This is a living document, with one section header corresponding to each date with a notable entry. It acts pretty much like my diary for the lab, and honestly, its more for me than it is for you, but if you find it interesting here it is.
I am starting fresh with this new document today, but I may occasionally back port some old entries from my old local diary to fill in some gaps & interesting anecdotes throughout the future.
07-21 - Tuesday
Today I want to focus mostly on robot arm stuff. The confocal situation I am not sure I can make too much more progress on until Shawn from Nikon can help us figure out an adequate camera. I do want to play with the python sdk I found yesterday, and I will do that probably tomorrow.
Goals for today
- 3D model and get print started for a well-plate holder replica.
- Install the robot arm control software on my laptop and start messing with it.
- Start writing some code / lab specific software to get it moving plates in a repeatable way.
Plate mover project updates
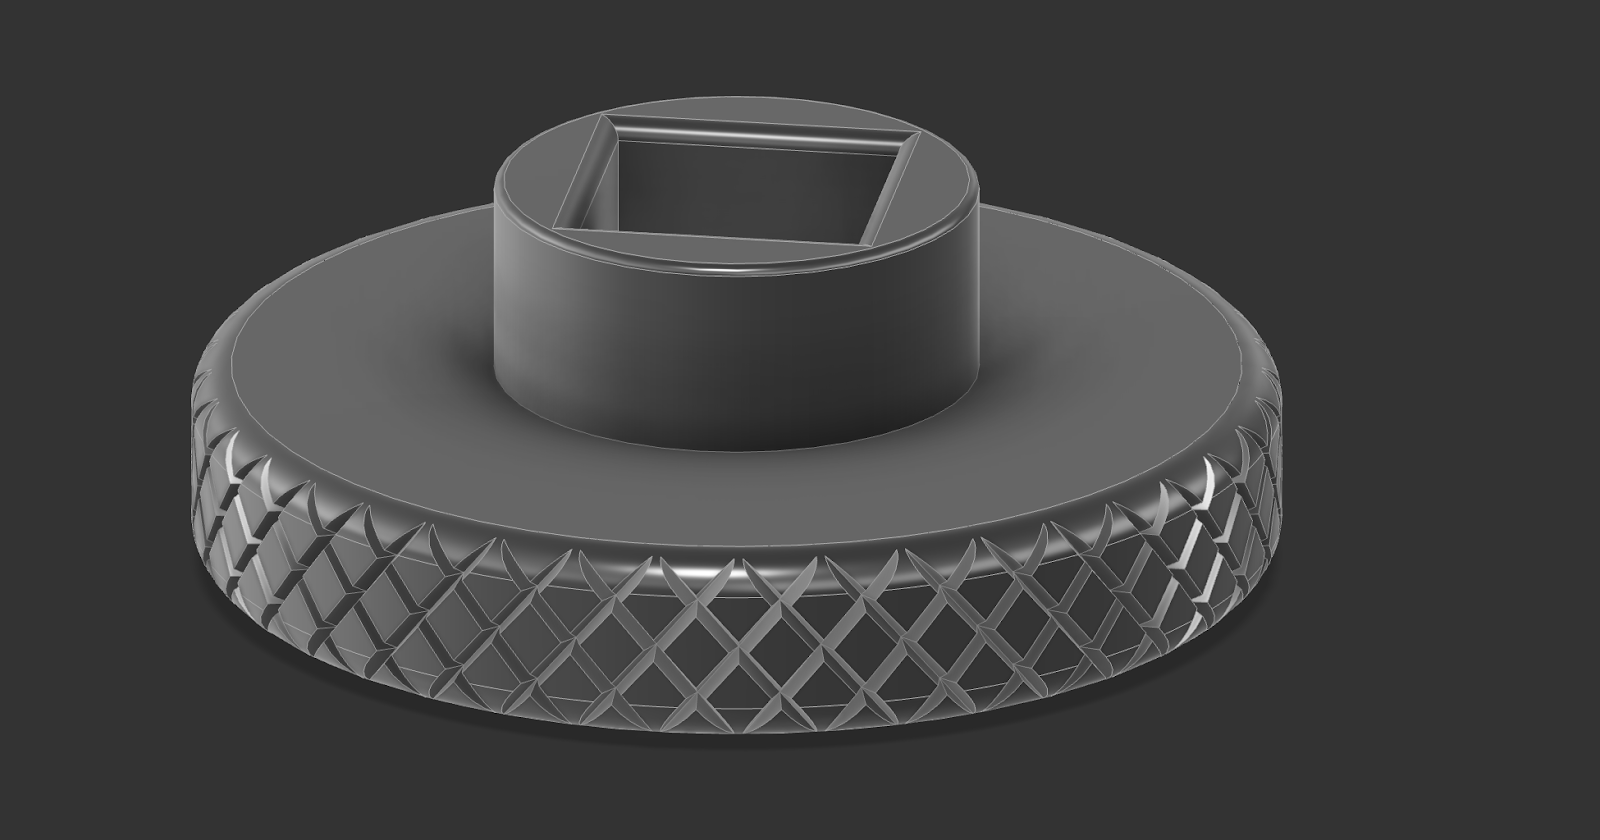
I started today by designing some plate holders that about perfectly mimic the dimensions of the Nikon 24 well plate adapter, to give us a similar target to work with.
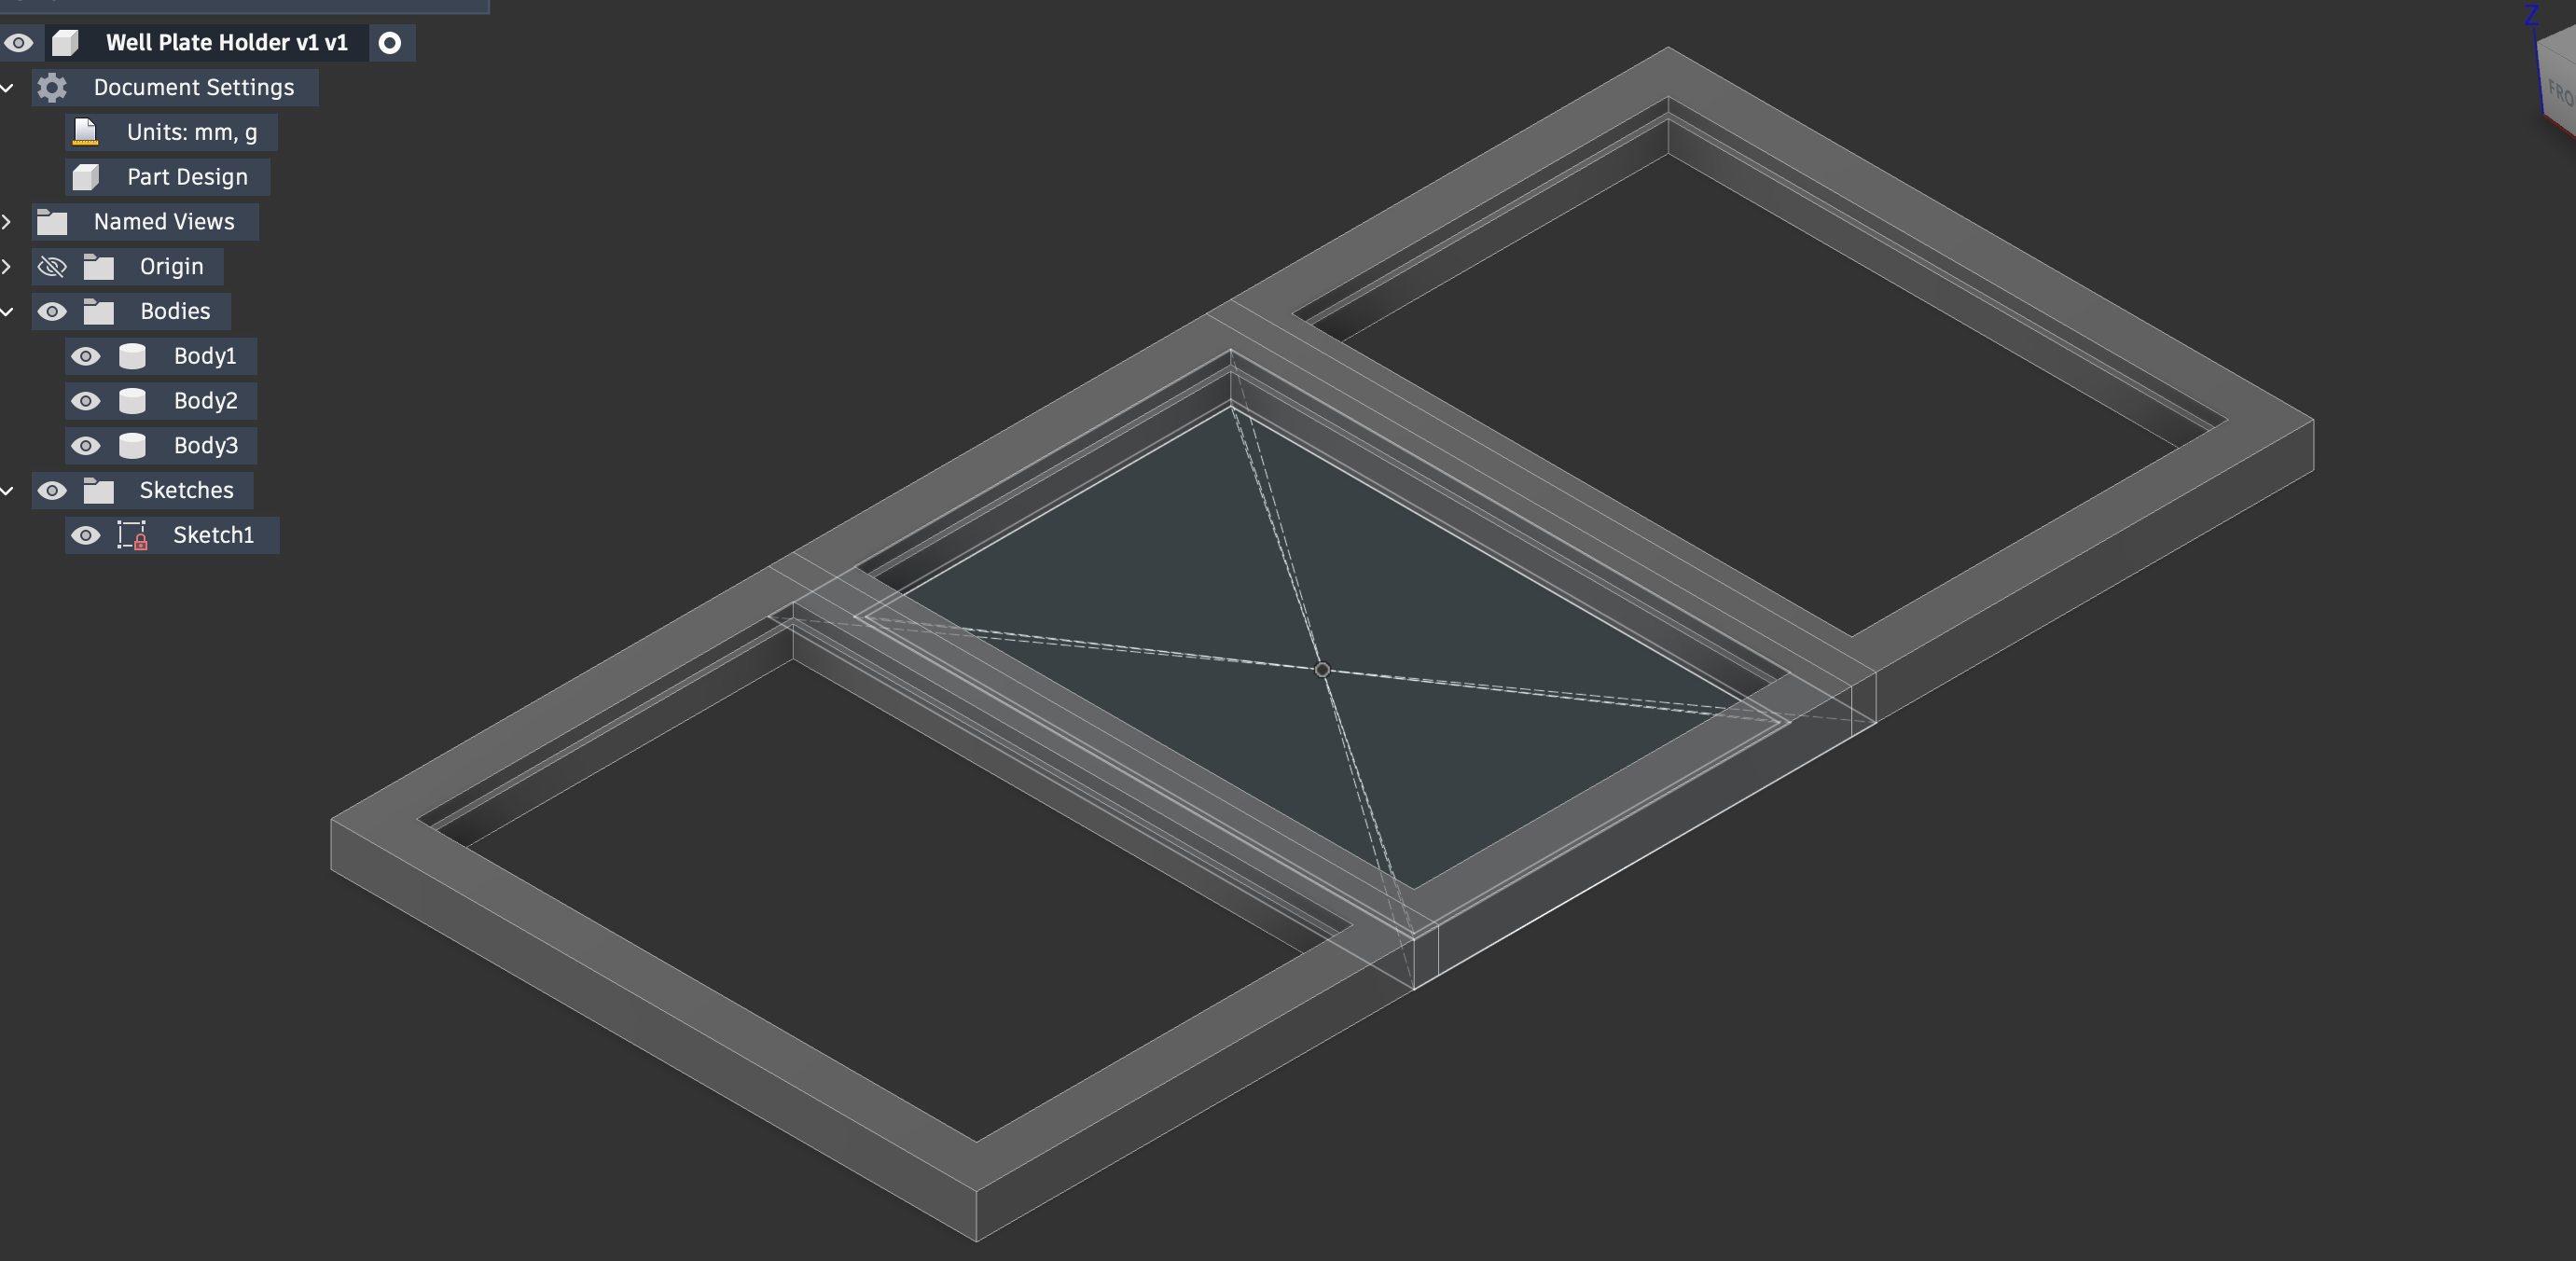
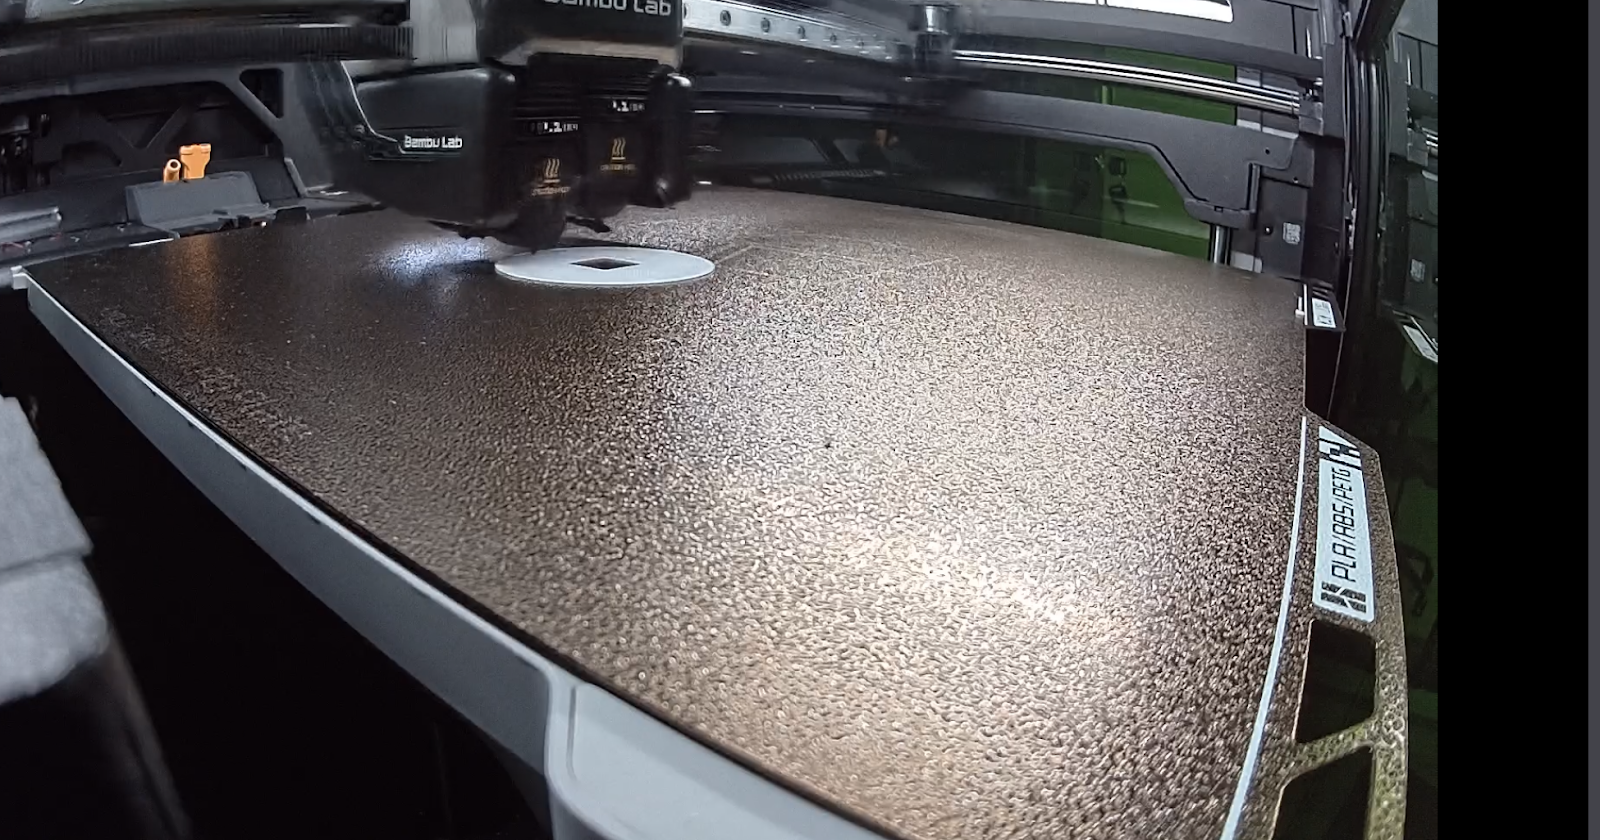
After test fitting one of these and making some modifications, I printed a couple designs that perfectly fit the plates. These are meant to mimic a future sample storage tray, and the Nikon stage. The goal here is to practice making complex moves with the robot arm before we move it next to the very expensive confocal.

I spent a while with this new test bench setup, attempting to make fine movements with the robot arm. After only making a few mistakes, I got it repeating a cycle of plate moving with sub-millimeter accuracy. Every once in a while it misplaces a plate, but I have an idea on how to fix that, the movement is just a little too complicated for the block based arm langauge I was using earlier. Tomorrow I am going to bring the program into python and continue to farther refine it. But in the mean time, check it!
The robot arm moving a well plate between two holders.
Biggest problem right now is upon plate drop, the vacuum head is still slightly engaged, so it drags it up a bit when it drops, which seems to mess with positioning. When I move this into python, im going to try some specialized moves with the vacuum head to try to do a little wiggle to ensure the plate is seated correctly, but that’s tomorrow’s problem.
TLDR for today
Here’s today’s updates in short form.
07-20 - Monday
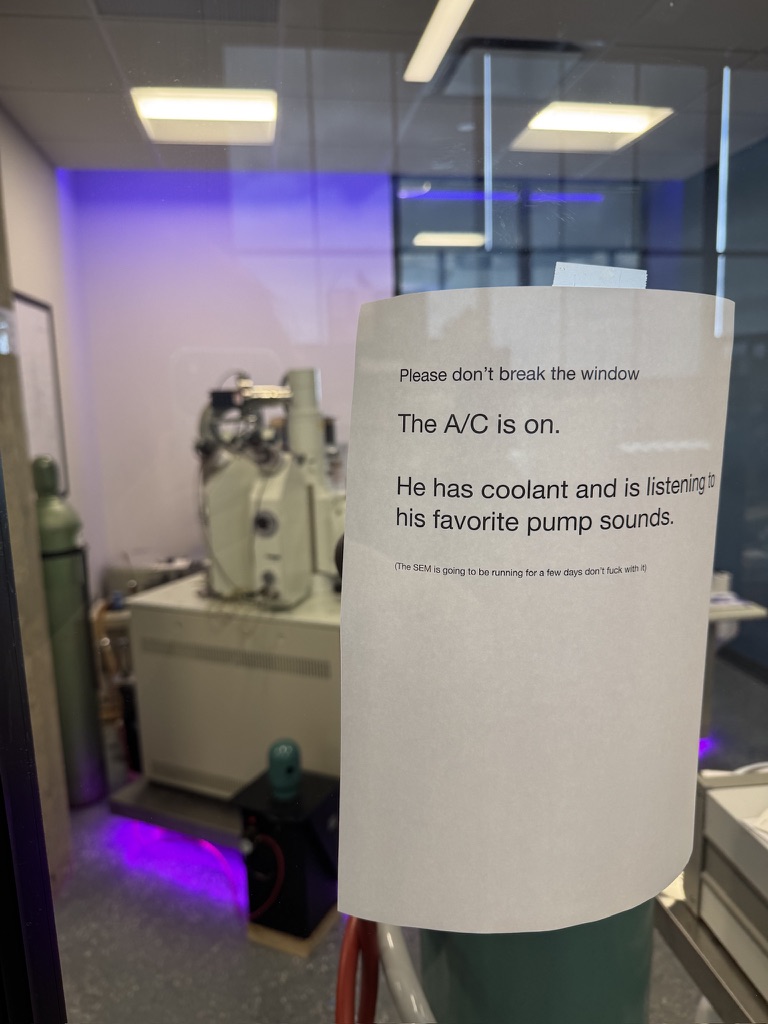
I am back at it again today, I was out for the latter half of last week due to some family stuff, and the first half of the week was just making a few final preparations for Adam to come by this week.
Unfortunately, Adam had some stuff come up with their shop, and needing to move to a new space, so they are not going to be able to make it out this month any more. They will likely be rescheduling for later in August. No matter, we have lots we can work on in the meantime, although it does suck to be out a SEM for the summer.
New goals for today
In light of the goals having shifted a bit in the last few days with the SEM delay, I am shifting my attention to a few other projects. My goals for today are:
- Work on the confocal automation and try to come up with a better way to automate well plate focusing and imaging. I specifically want to investigate:
- A weird power delivery issue one of our interns, Catherine, experienced this weekend.
- A faster and better way to find samples and focus on the sample wells.
- Troubleshoot some random crashes we were getting when trying to automate some of our procedures.
- Start to familiarize myself with the robot arms we have here, so I can start to build a better understanding of how to use them in some confocal sample. automation we want to do. Today I want to:
- Get familiar with the control methods for the arms and associated softwares.
- Look into vision capabilities / the ability to grab distinct objects.
- Maybe write some code to get an arm moving, we will see.
Confocal work
The confocal work was frustrating and buggy, as seems to unfortunately be the usual lately. Hoping Shawn from Nikon can help us troubleshoot some of these issues this week. You can hear more about whats wrong in the short at the end of today’s update, but mainly:
- Image stitching doesn’t work and corrupts or crashes every time we try to work with stitched images.
- The confocal software doesn’t really have computer vision built in, we can scan at 256x256 and get about 1fps refresh on our image but thats about the best we can do. I think a camera + computer vision would help us really hone in on root tips automatically. I envision a sort of loop where we:
- Scan at low res to identify root tips & see if they have moved since last session
- Build a coordinate point of one root tip in each well
- Image each root tip
- Repeat daily
I found quite a few resources that might help us in this effort:
- slietar/nikon - A python library that controls the scope via USB, bypassing Nikon’s software and SDK. Its a bit hacky, but NIS software can be so bulky, cumbersome, and un-automateable sometimes, that I like the idea of being able to control it directly. I will be messing with this tomorrow for sure.
- tlambert03/nd2 - Full featured ND2 file reader for python. This is great because it lets us programmatically review image metadata rather than having a human do it.
- Nikon AI Overview - Mostly dumping this here for future reference, but this is Nikon’s own AI powered sample navigation software. I am not 100% sure this will cover our needs but it will be good to mess with.
- Ti2 Wellplate Apps - This is a document that describes some automated wellplate imaging, they are using the camera and camera trigger port for these purposes.
Robot arm work
Ashwin and I spent a while messing with the robot arm today and made some great progress. We started by testing some manually trained programs and figuring out how to move the grabber arm and linear actuator. The robot software doesn’t let you control the linear actuator through the UI, but it does let you control the gripper. The gripper unfortunately wasn’t wide enough for a 24 well plate, but the vacuum gripper seems to work very well for these.

We think that after some tuning this should have high enough precision to move well plates on and off the confocal for automated imaging. Tomorrow we are going to 3D print some little well-plate sized holders, and try to write some programs to move the plates between those holders with sub mm accuracy. If we can do that, we will be golden.
TLDR for today
07-08 / 07-09 Wednesday / Thursday
Wednesday and Thursday were both more of the same cleaning. I didn’t get pictures of the final cleaning phases, because we were pedal to the metal, but we got:
- CLPP fixed apertures
- Upper liner fixed apertures
- Wehnelt cap
All good as new and ready to go back into the system. The Wehnelt cap itself took hours upon hours of polishing under a stereoscope to get the threads clean, shoutout to Jayden for tackling that.
Jayden and I spent a bit of time comparing our gun chamber manifolds to decide which one will go back into the machine.
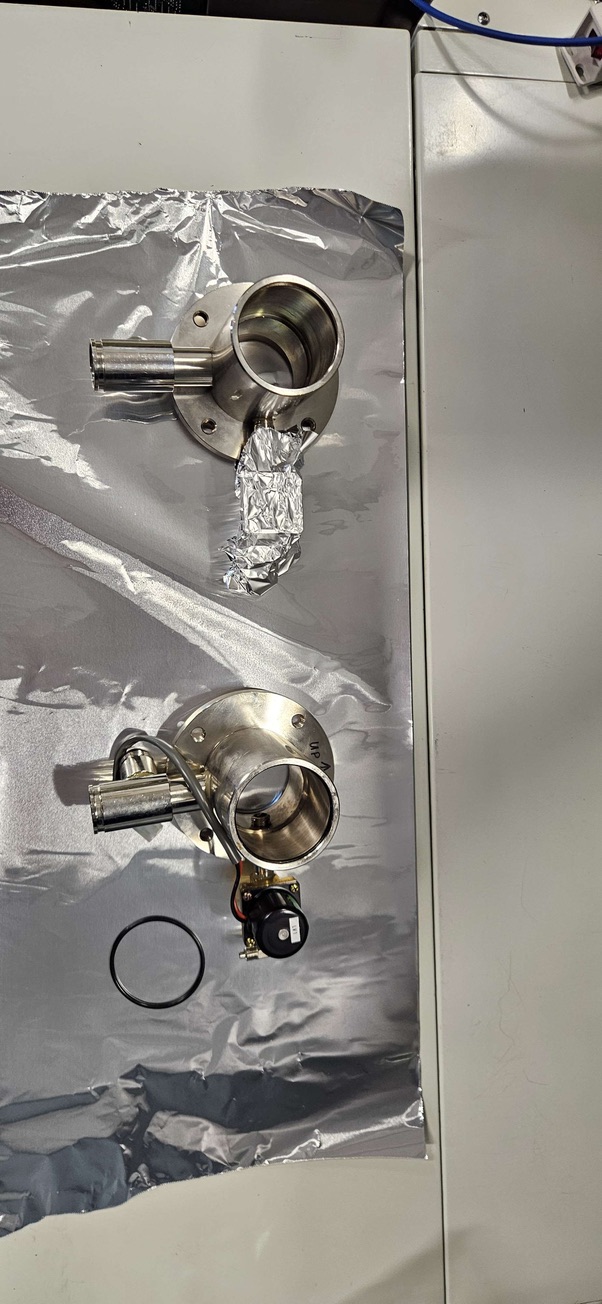
I think we are going to go ahead and clean the one that has more in-tact epoxy, with clean room wipes. We can see in these two comparison shots, that one of these seems to have much more of the original epoxy left than the other. Why is a mystery, but more epoxy is never a bad thing in high vacuum systems.
Tomorrow my goal is mainly to finish a bunch of boring admin expense stuff that you won’t see in this document.
07-07 Tuesday
Jayden and I have some big aqueous cleaning planned for today. The main piece we need to get cleaned is the gun chamber manifold, this is a large piece which connects to the gun, and has a few epoxied connections. It is going to be cleaned, and then re-epoxied. The full list of what we are going to attempt to tackle today, in-order is:
- Aqueous clean the gun chamber manifold and re-epoxy it
- Aqueous clean the chamber floor pieces
- Re-aqueous clean the upper liner tube apertures and anode
- Aqueous clean all Wehnelt components that have been removed so far
The Manifold
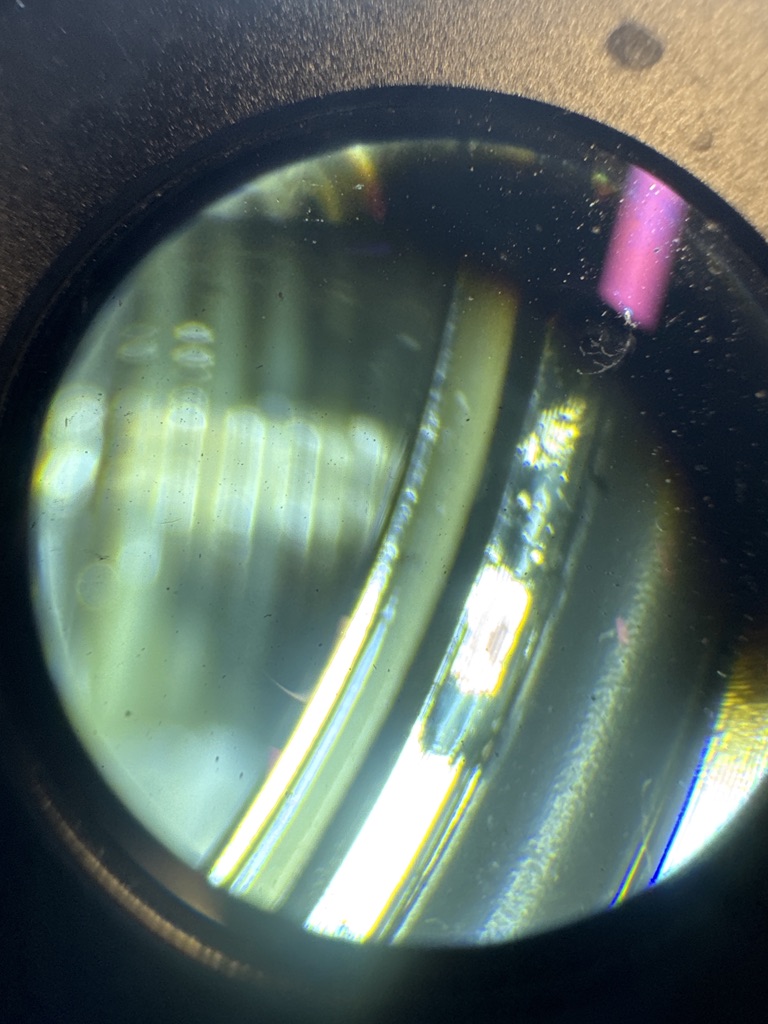
Jayden and I started off today by taking the solenoid off the valve seat of the gun chamber manifold. Pretty quickly we realized epoxying this thing after it comes out of the bath might be fairly difficult. Take a look at this part of the manifold:
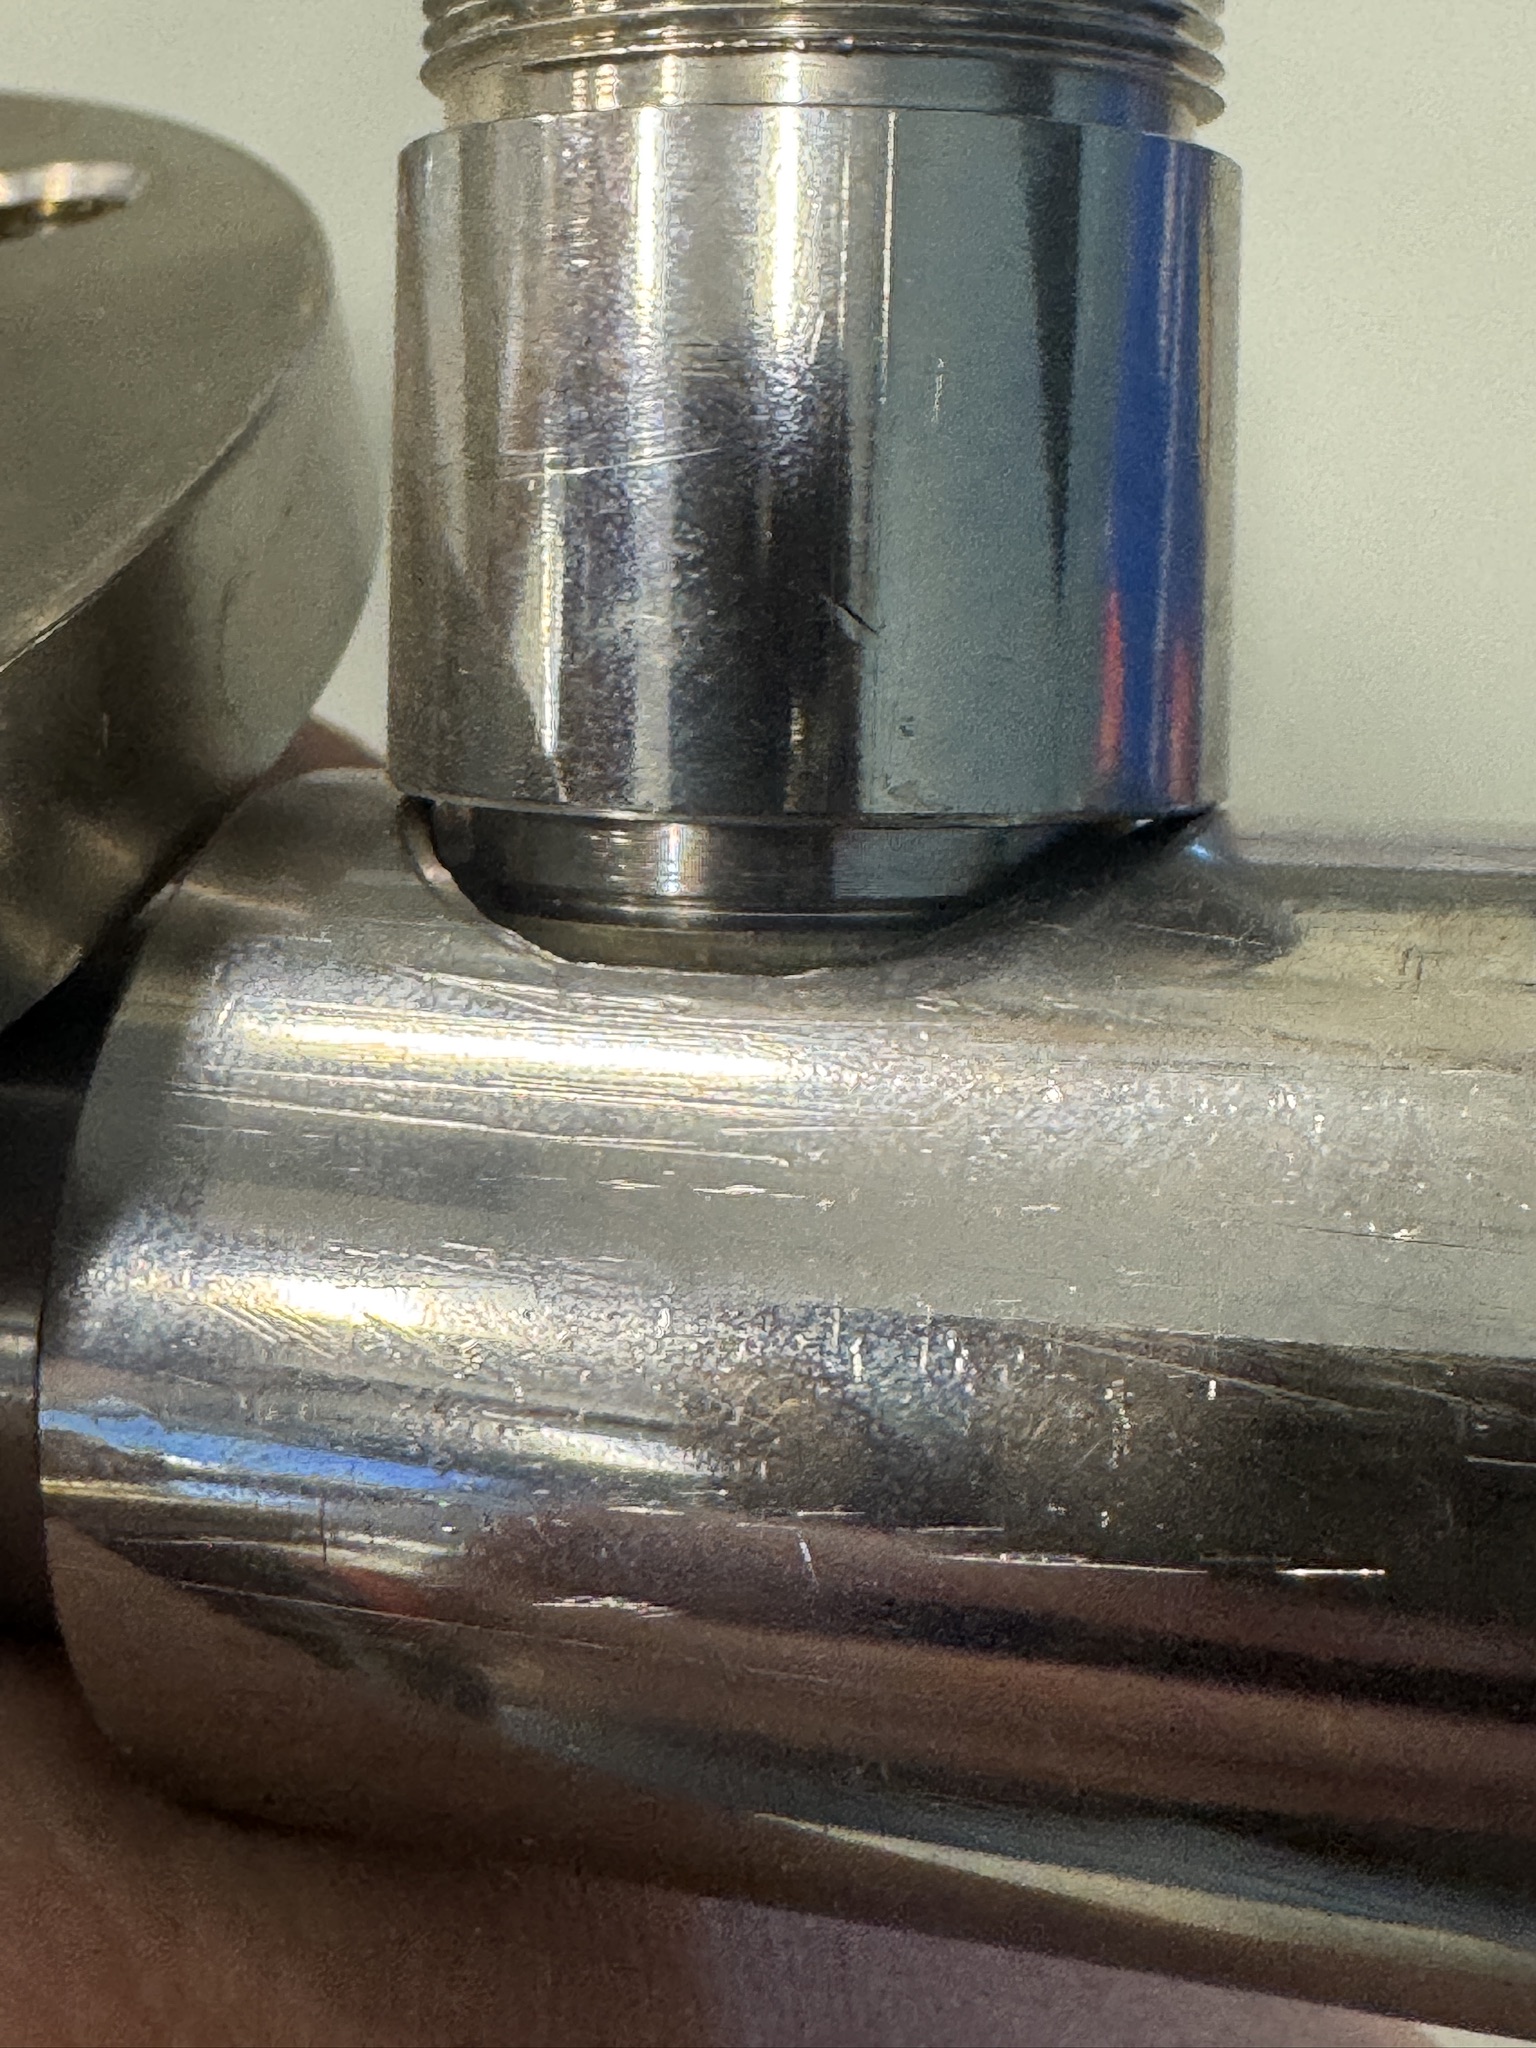
There is a big problem with this joint, first, we are using 5 minute epoxy, so anything we do we have to do quickly. Secondly, the base of the joint is obscured by the collar on the outer piece. I don’t figure there is a way to get a solid coat of epoxy down into that gap without just caking it everywhere, which I don’t necessarily want to try. I am getting with Adam for confirmation on that part.
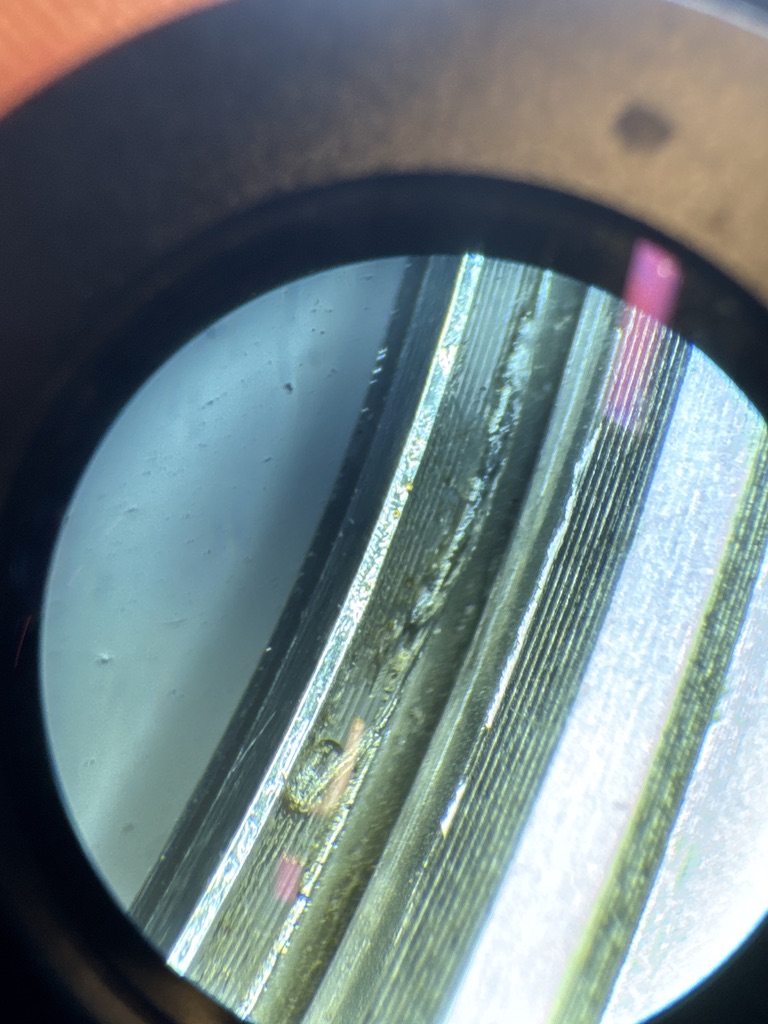
There is also an internal sleeve in this piece which you can sort of see from this view:
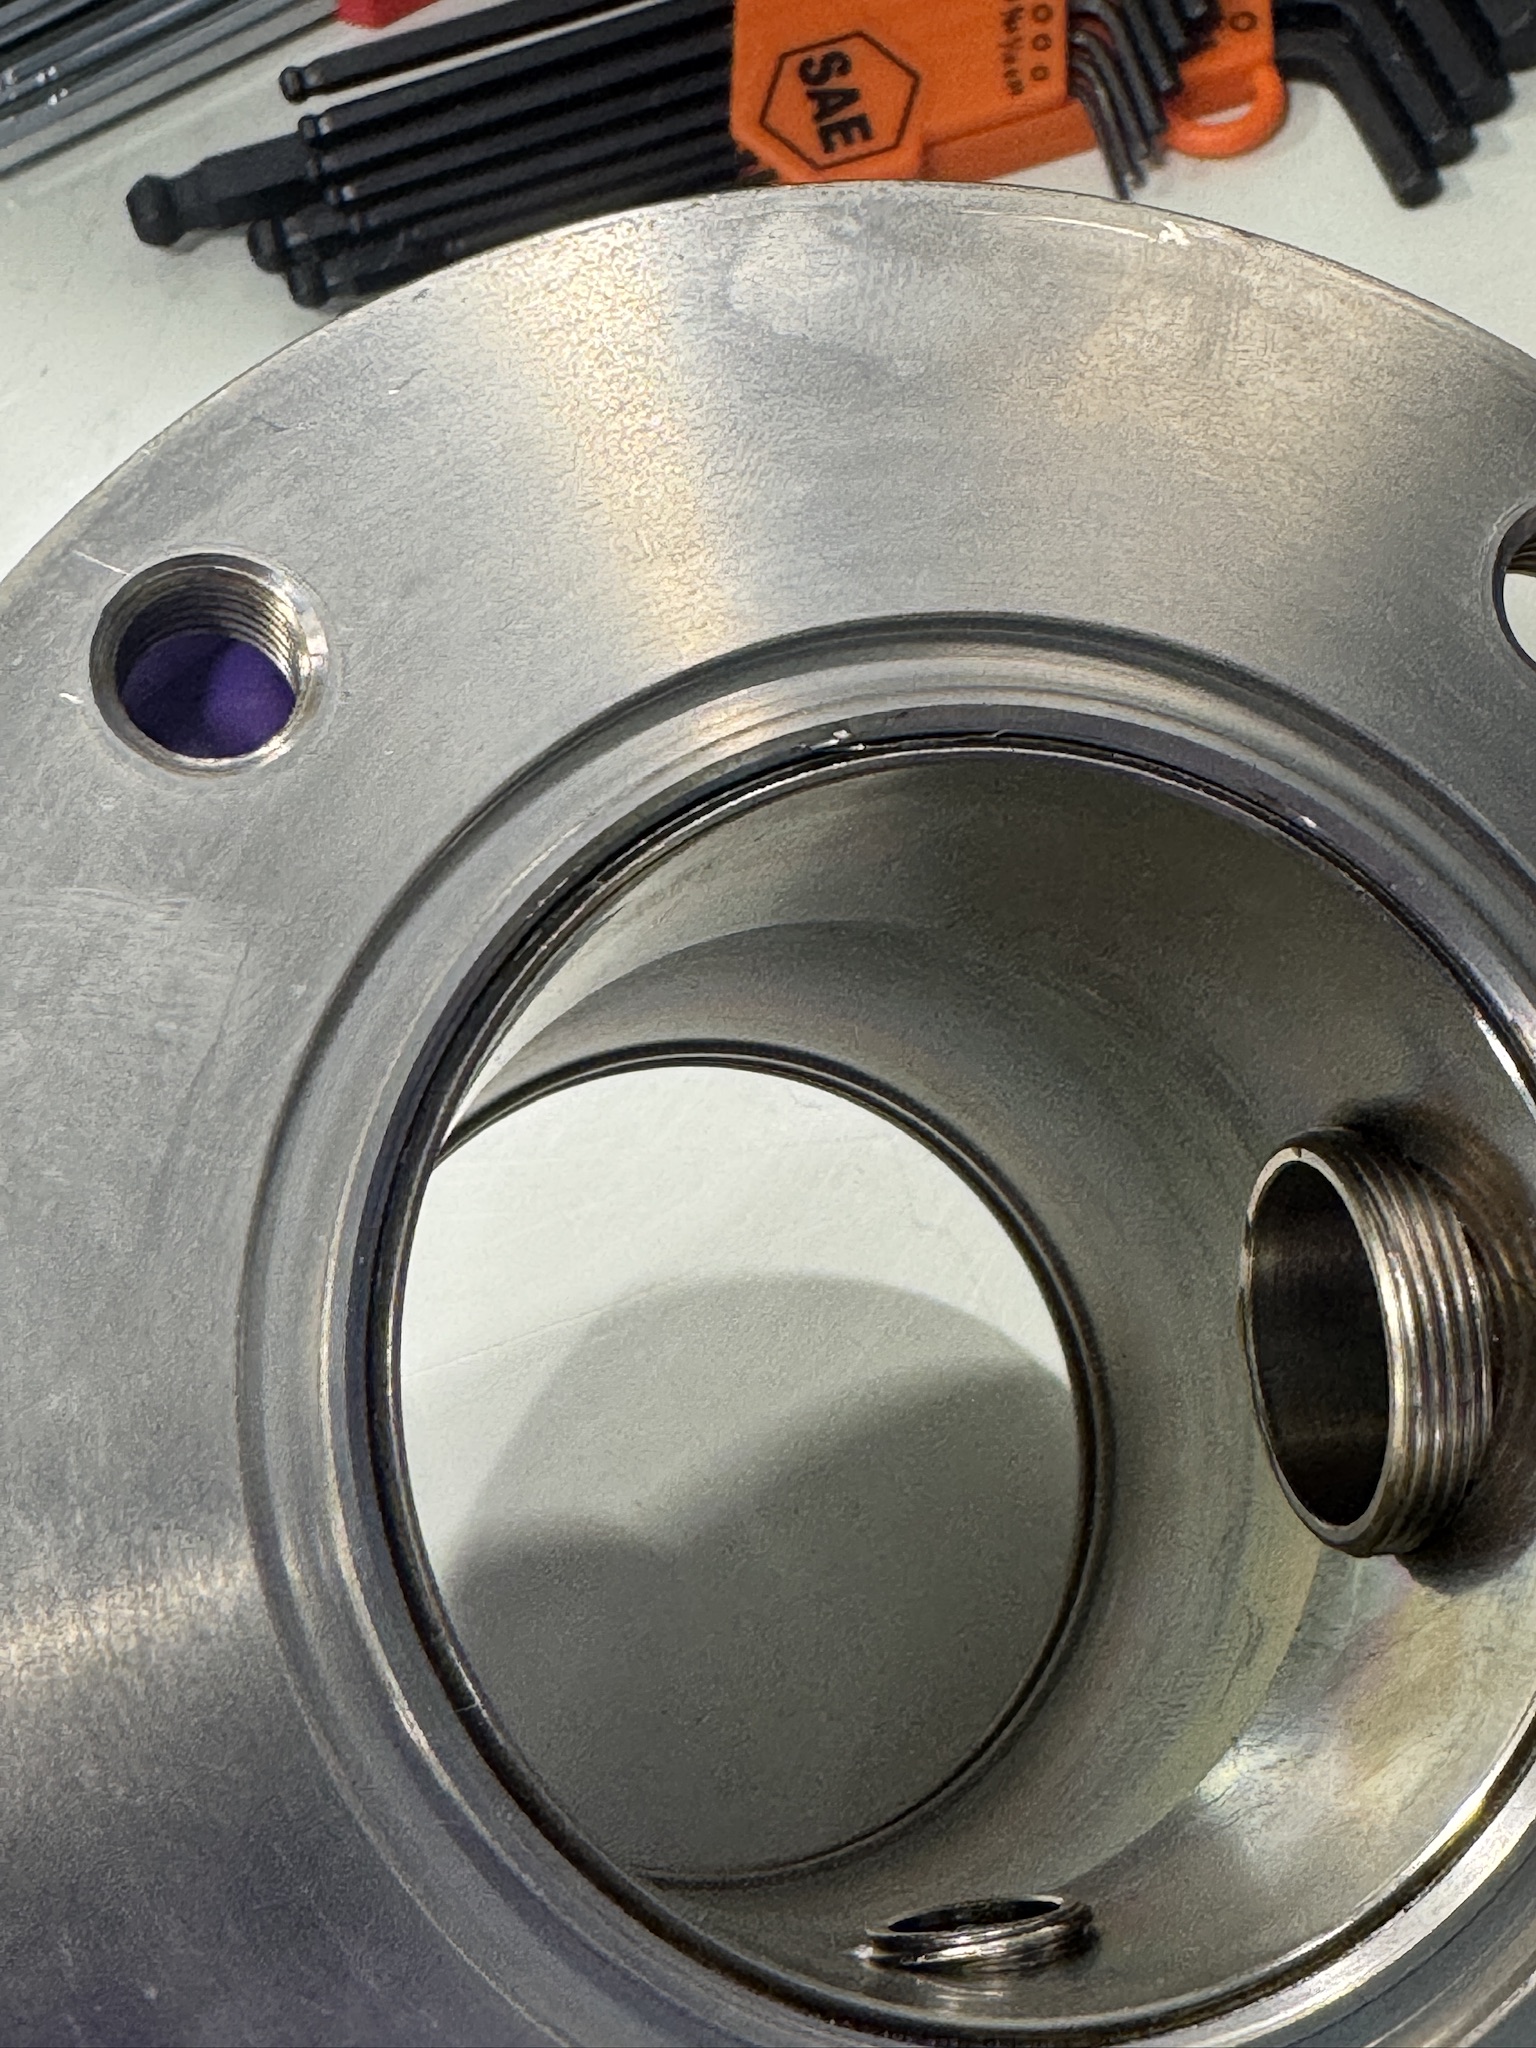
This collar/sleeve scares me, because I don’t know how it was inserted. It’s within the vacuum system so it didn’t need to be vacuum welded or anything, but that makes me think it was either pressure fit, or epoxied into the manifold. Read yesterday’s entry about trapped volumes if you want to know why this scares me. I am just not sure if we dunk that part in Mr. Clean, that we are getting the liquid back out of the space between the steel and the sleeve. I have also consulted with Adam on this, so I am going to wait for their reply to proceed with this piece.
Chamber Floor Pieces
This step went pretty quick and painlessly. The main grill had a rainbow sheen that came off pretty much instantly once it was ultrasonicating. These pieces were quick and easy to get cleaned, and they are sitting in the flow hood now:
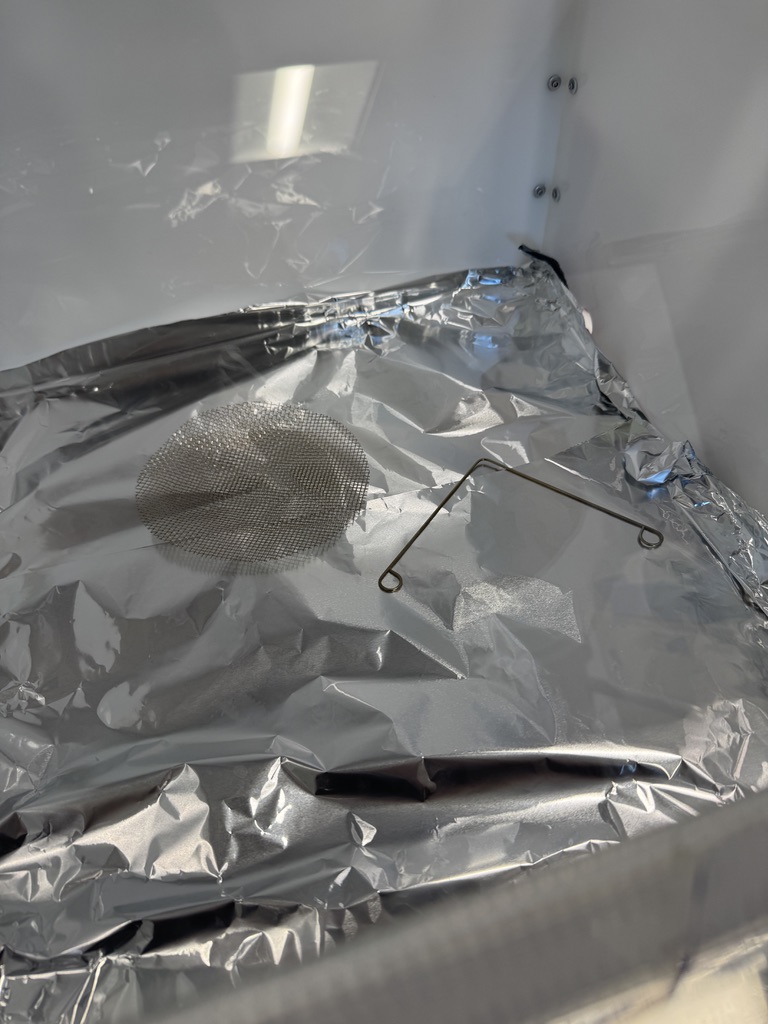
These are pretty much ready to go back into the machine after a quick dunk and rinse in Mr. Clean and DI.
Upper Liner Tube Apertures and Anode
I am actually going to upgrade this to re-cleaning all of the CLPP and Upper Liner apertures. We made some process mistakes the day we were doing these, and I just want to make sure we get them as clean as possible. So this list now includes cleaning:
- CLPP fixed apertures (2)
- CLPP aperture fixtures (2)
- Upper Liner Tube fixed apertures (2)
- Anode (1)
I was going to knock these all out today, but since we now have tomorrow as an extra work day, we are going to hit them then. The reason being the last time I cleaned these I was having a lot of difficulty holding onto small parts, and I don’t want to risk dropping any of these into the rinse bath. I have Large Kimtech gloves (rather than the XL we are using now) showing up in the mail today. If I didn’t have those gloves coming, I would have just dealt with it, but since we now have extra time, and better gloves coming, we are just going to do the sensible thing and wait until tomorrow.
Wehnelt Components
While these components are also very small and outside the realm of being easily handleable with oversized gloves, there are a few things we CAN clean.
- Screws for the Wehnelt holder
- Screws for the filament holder
- Wehnelt Spring
- Wehnelt Cap
These are fairly easy because they are either big enough to handle in gloves that are a bit large, or if they are small, none of them are optical, so components like the screws can all go in a bath together.
What we got done
Our new gloves ended up getting here, but unfortunately these have some big problems. They formed a soap with only DI water on my hands, which isn’t cool. XL Kimtechs it is… We will end up just having to deal with it and re-wash those parts with our big gloves. We got the Wehnelt cap cleaned, as well as a bunch of screws and bearings from the Wehnelt itself, but we didn’t get to anything else.
Our goal for Wednesday is to get the:
- CLPP fixed apertures (2)
- CLPP aperture fixtures (2)
- Upper Liner Fixed Apertures (2)
- Anode (1)
All re-cleaned, I am probably also going to tackle the Wehnelt while we are at it just because we were having trouble getting some crud out of the threads.
07-06 - Monday
Today Jayden and I started the day by making some new water to wash out parts tomorrow. We are planning on having a huge aqueous clean day tomorrow to knock out a few final big pieces before Adam gets back.
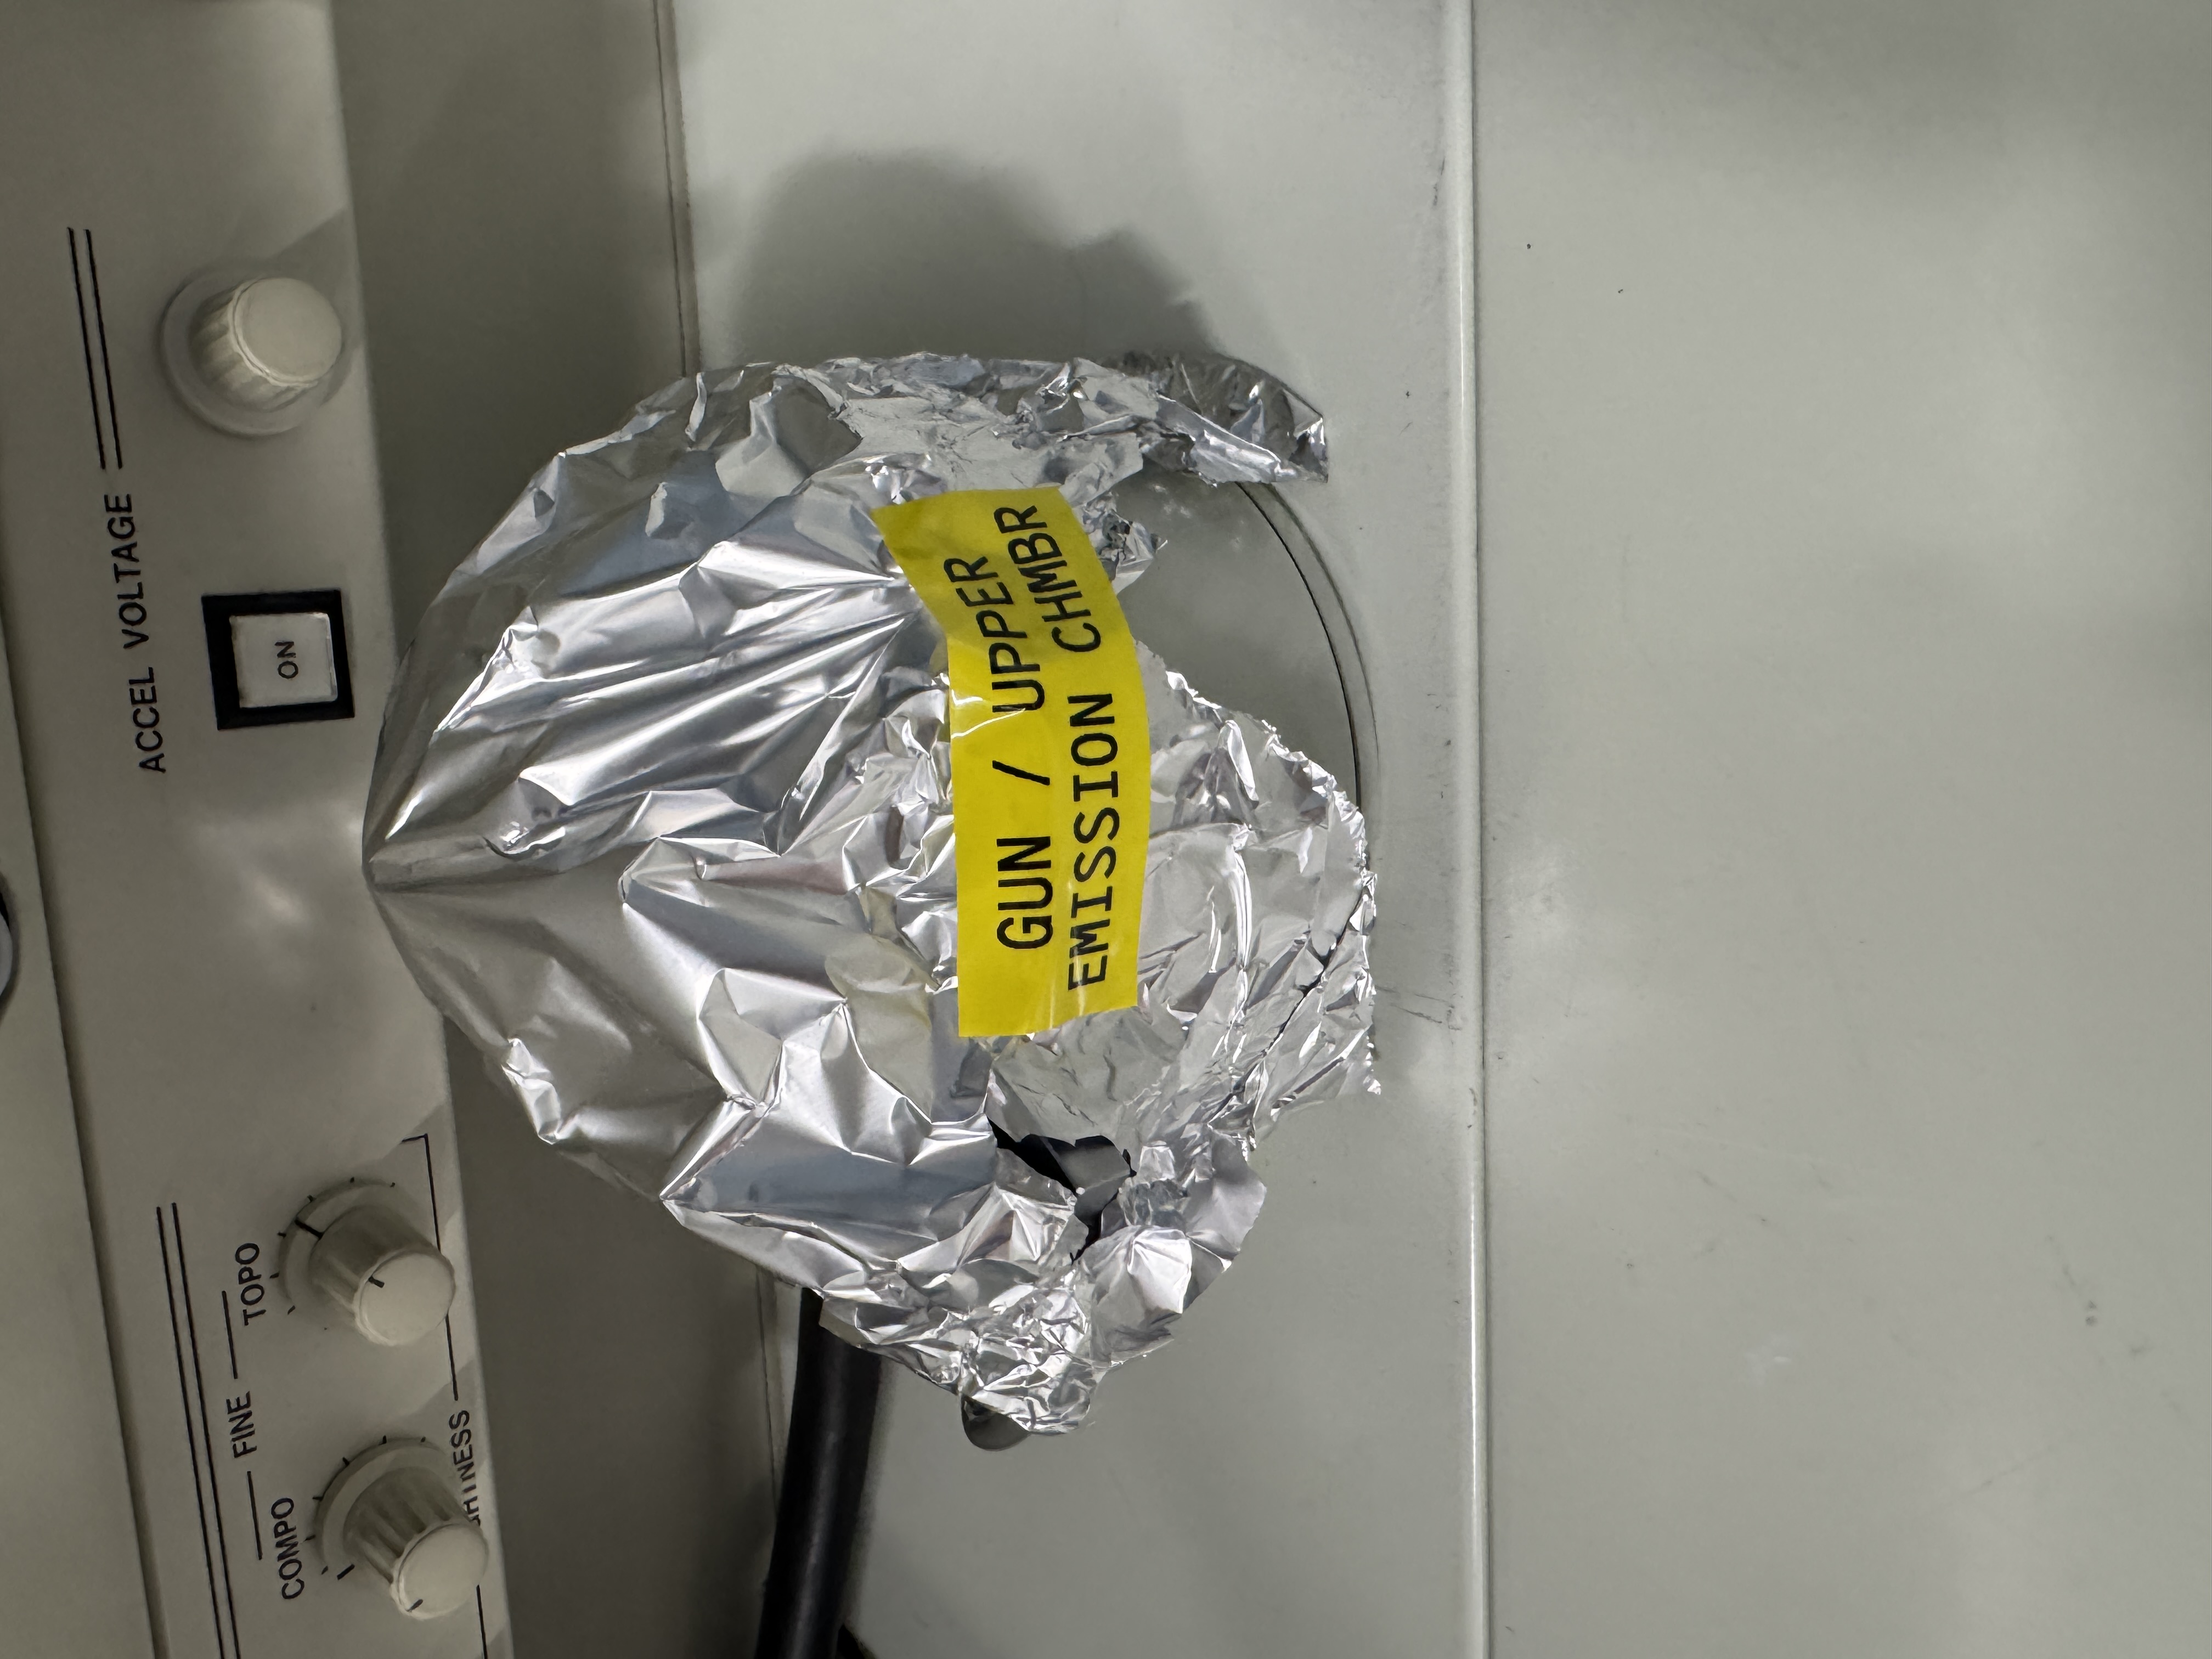
I have to tend to some admin stuff today, but we will be at least taking apart the electron gun to get it ready for cleaning.
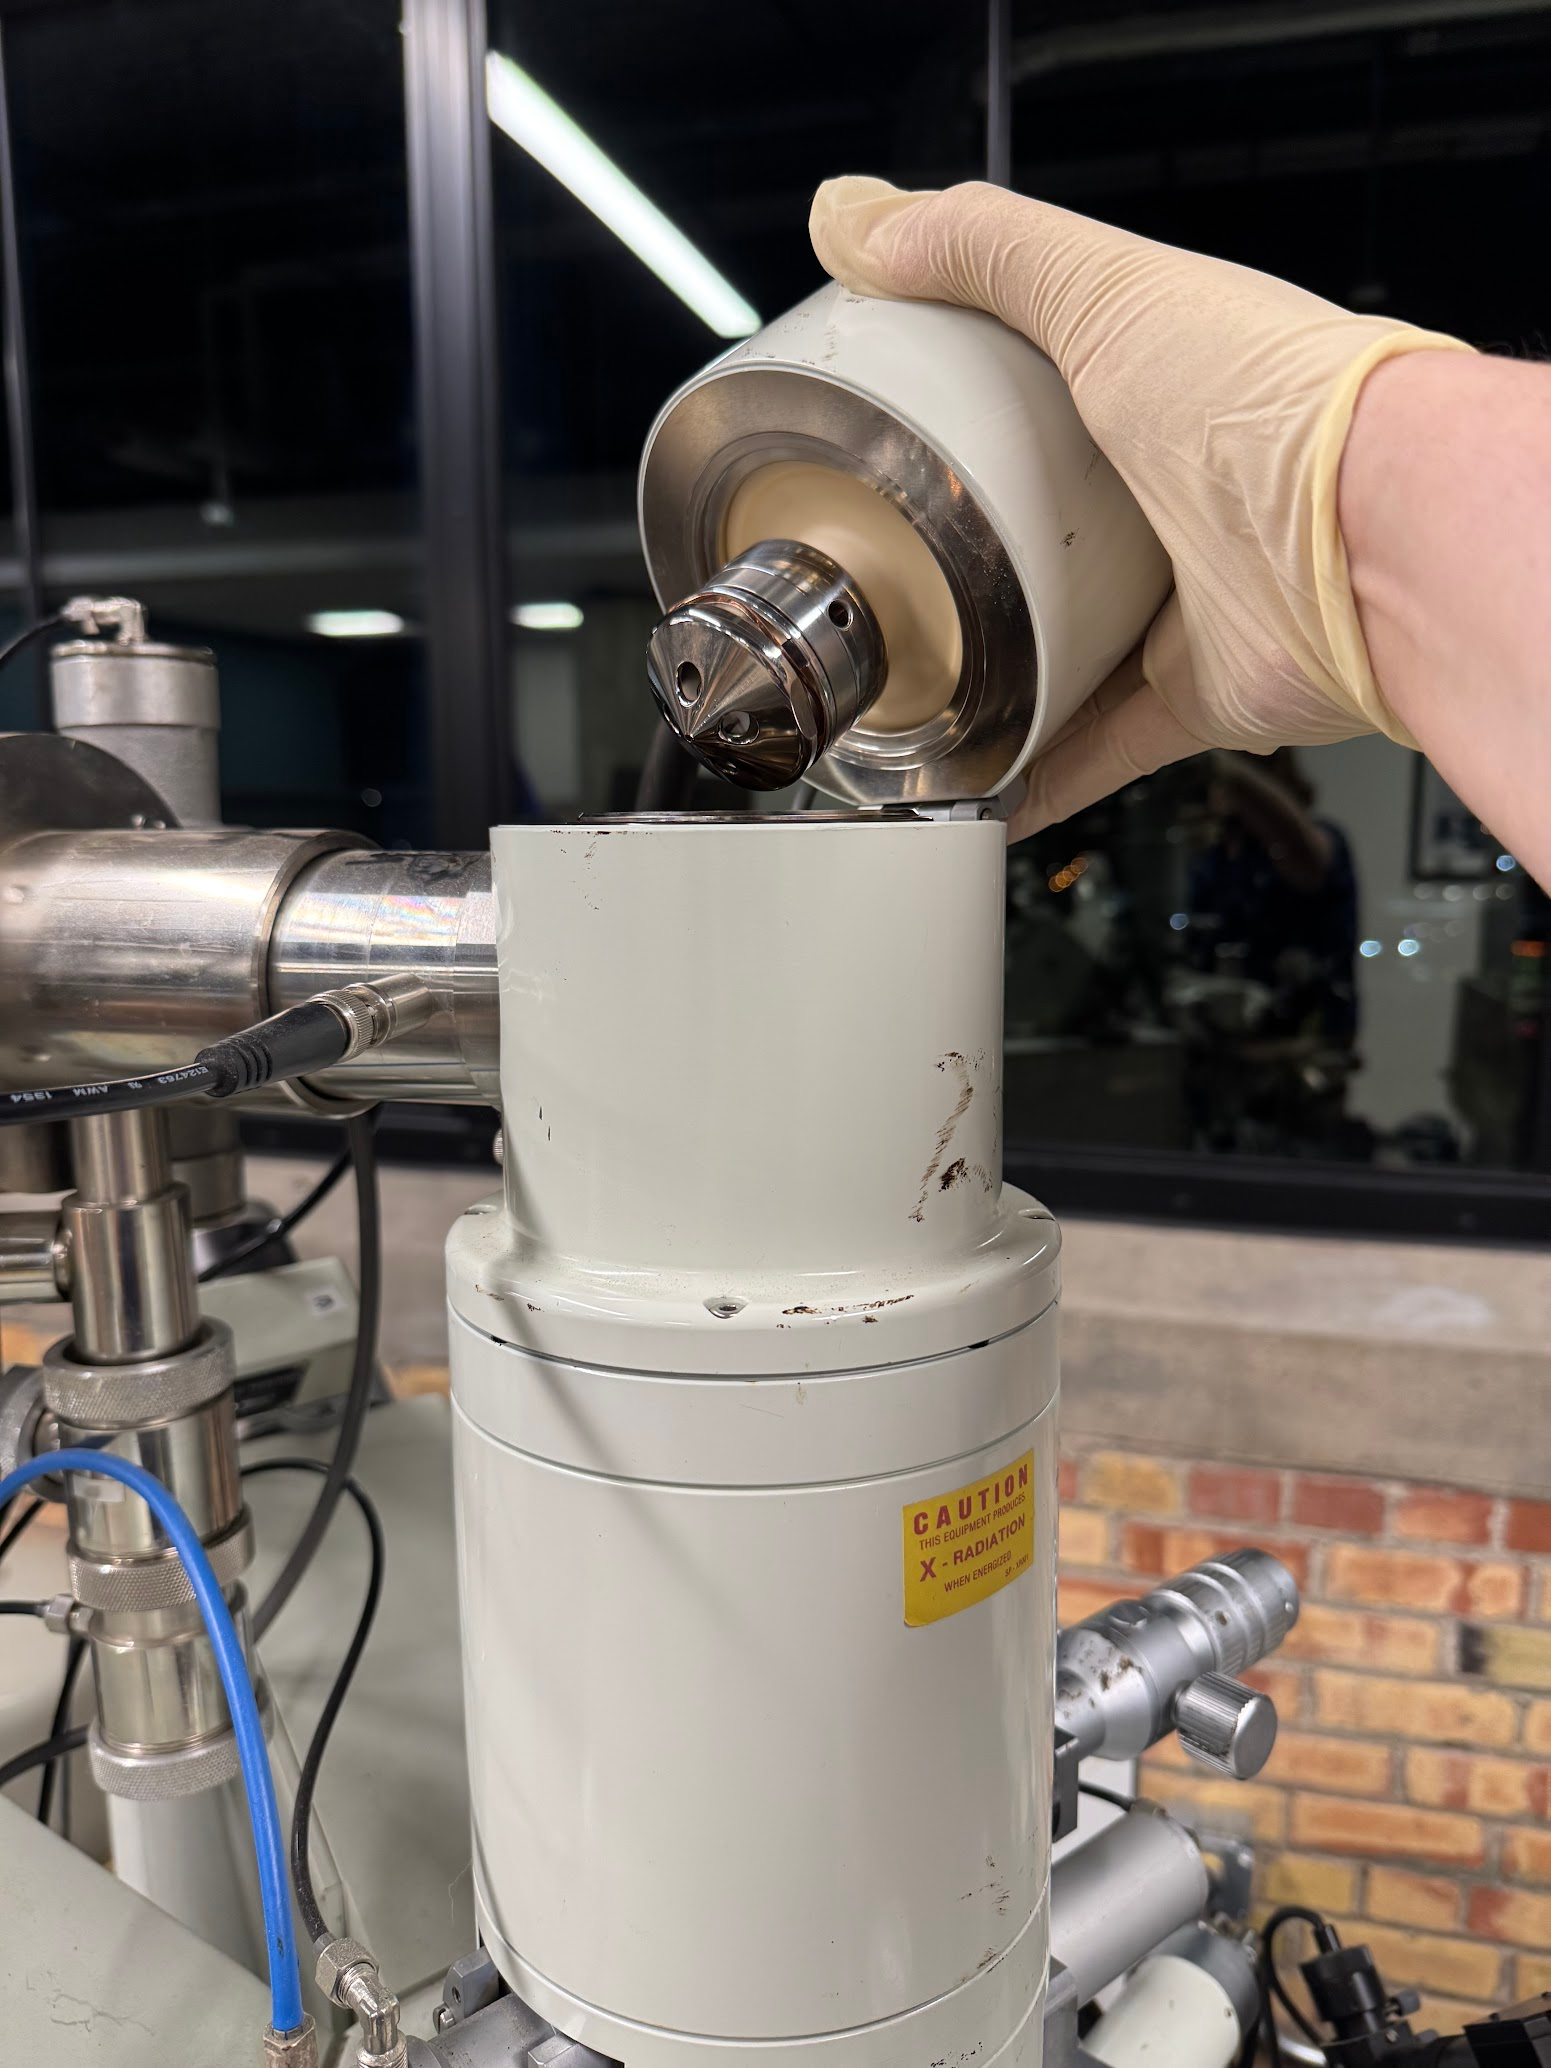
Electron Gun Disassembly
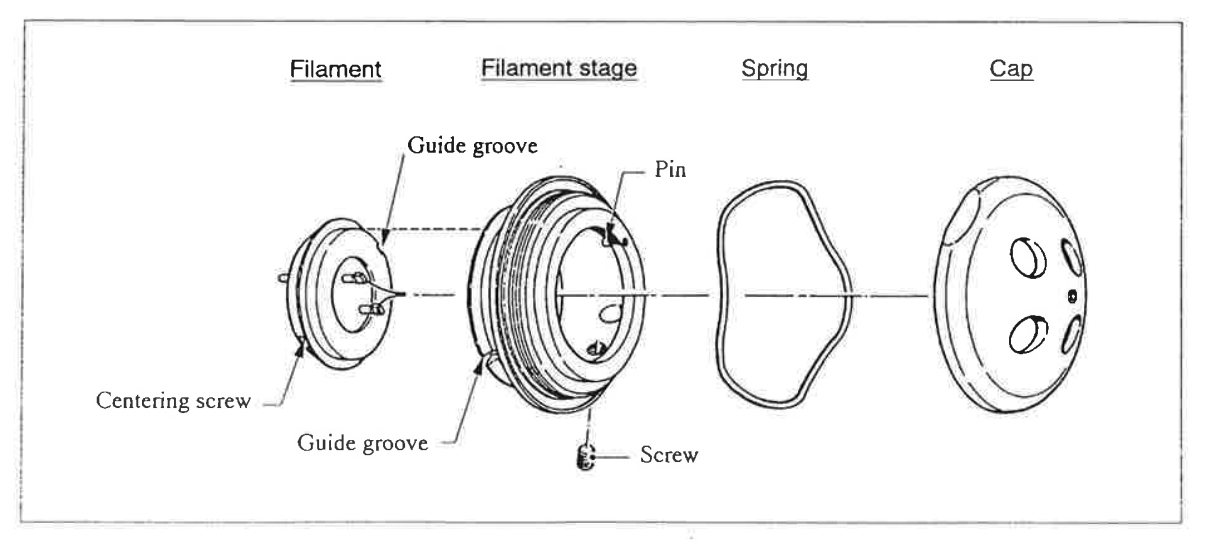
To start with disassembly, we need to pull the Wehnelt unit out of the gun. There is technically a special tool that you are supposed to use to pull this as shown here in the service manual:
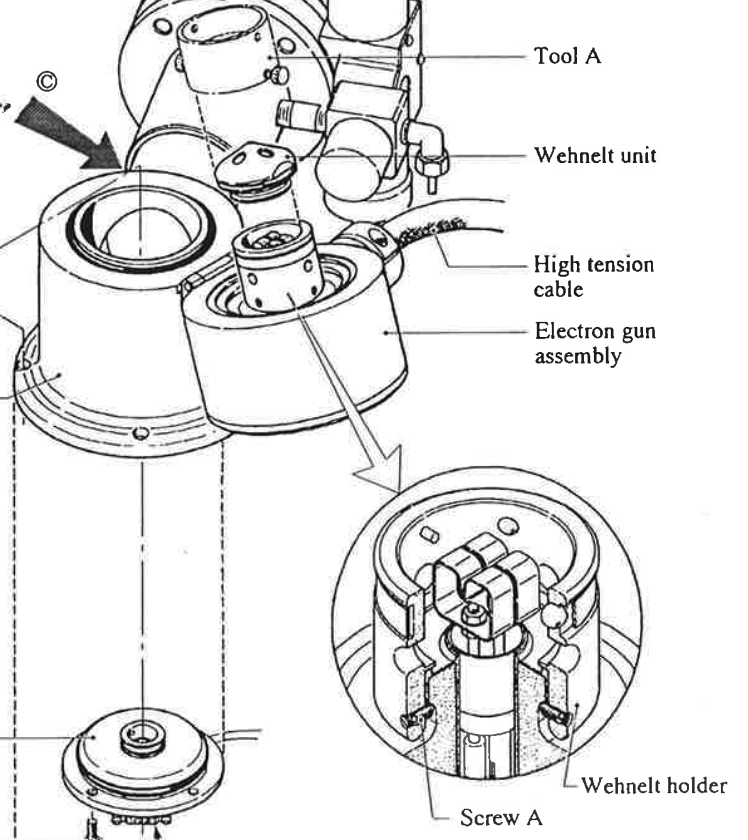
The problem is, we don’t have this tool. We have every other custom tool we need, anode puller, column alignment tools, etc. but are lacking this tool. Luckily, if there is ONE tool we want to be lacking, its this one, as you can pretty much just use your fingers.
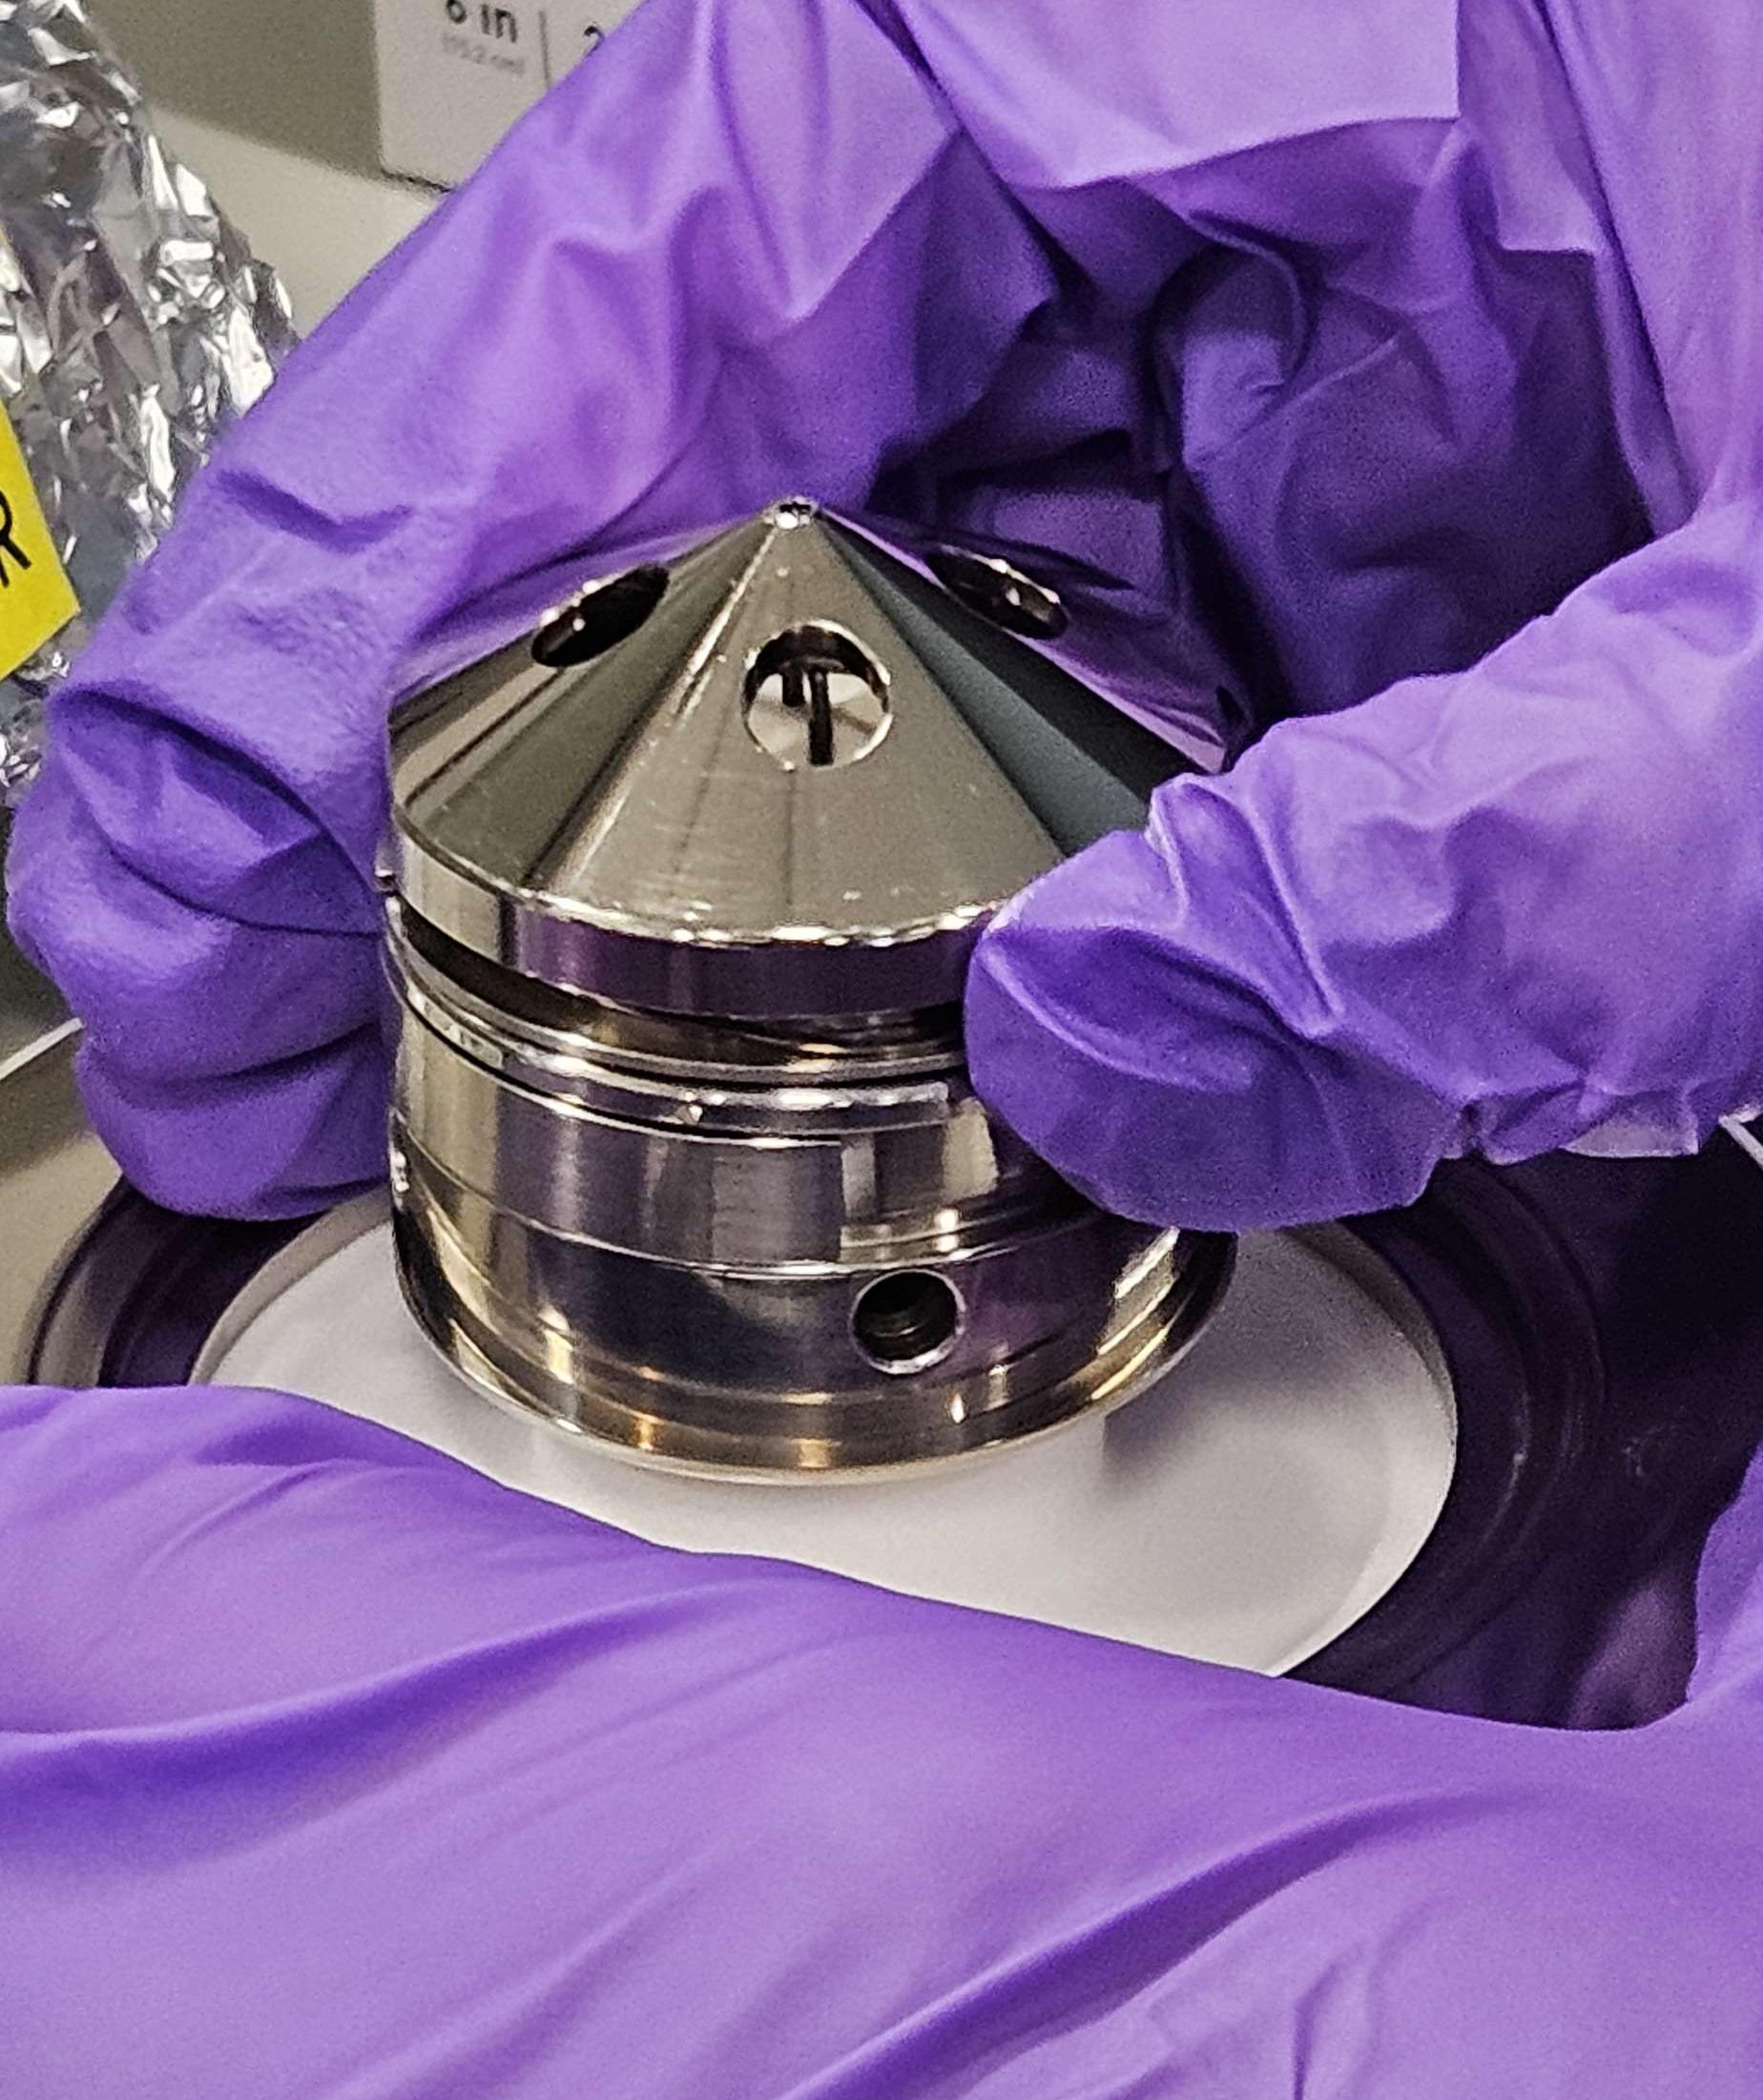

The first thing we do is unscrew the cap from the rest of the Wehnelt unit, along with its spring.
The spring and the cap are immediately ready for cleaning, the cap will need polished, the spring will not. To get the filament out of the filament holder, we need to unscrew a few set screws. There is one small gotcha on this part that can trip you up if you aren’t careful, and that is that ONE of these set screws is shorter than the other two. Its the one that is nearest the slot for the alignment pin, pictured here:
The inner filament itself just lifts out from the bottom after these screws are loosened/removed. Our filament gets boxed back up with our other good filaments for later use. We will be putting a brand new filament in this thing after our restoration work, so this one will get parked until we need it. Its probably got enough contaminants on it that its not worth the cleaning time, and will probably not get put back into service. But its always good to keep the filament bases, as you can make new filaments from thin tungsten wire and a filament base, so its good to have a few spares.

After this we are left with a small tub of components that are nearly ready to clean:
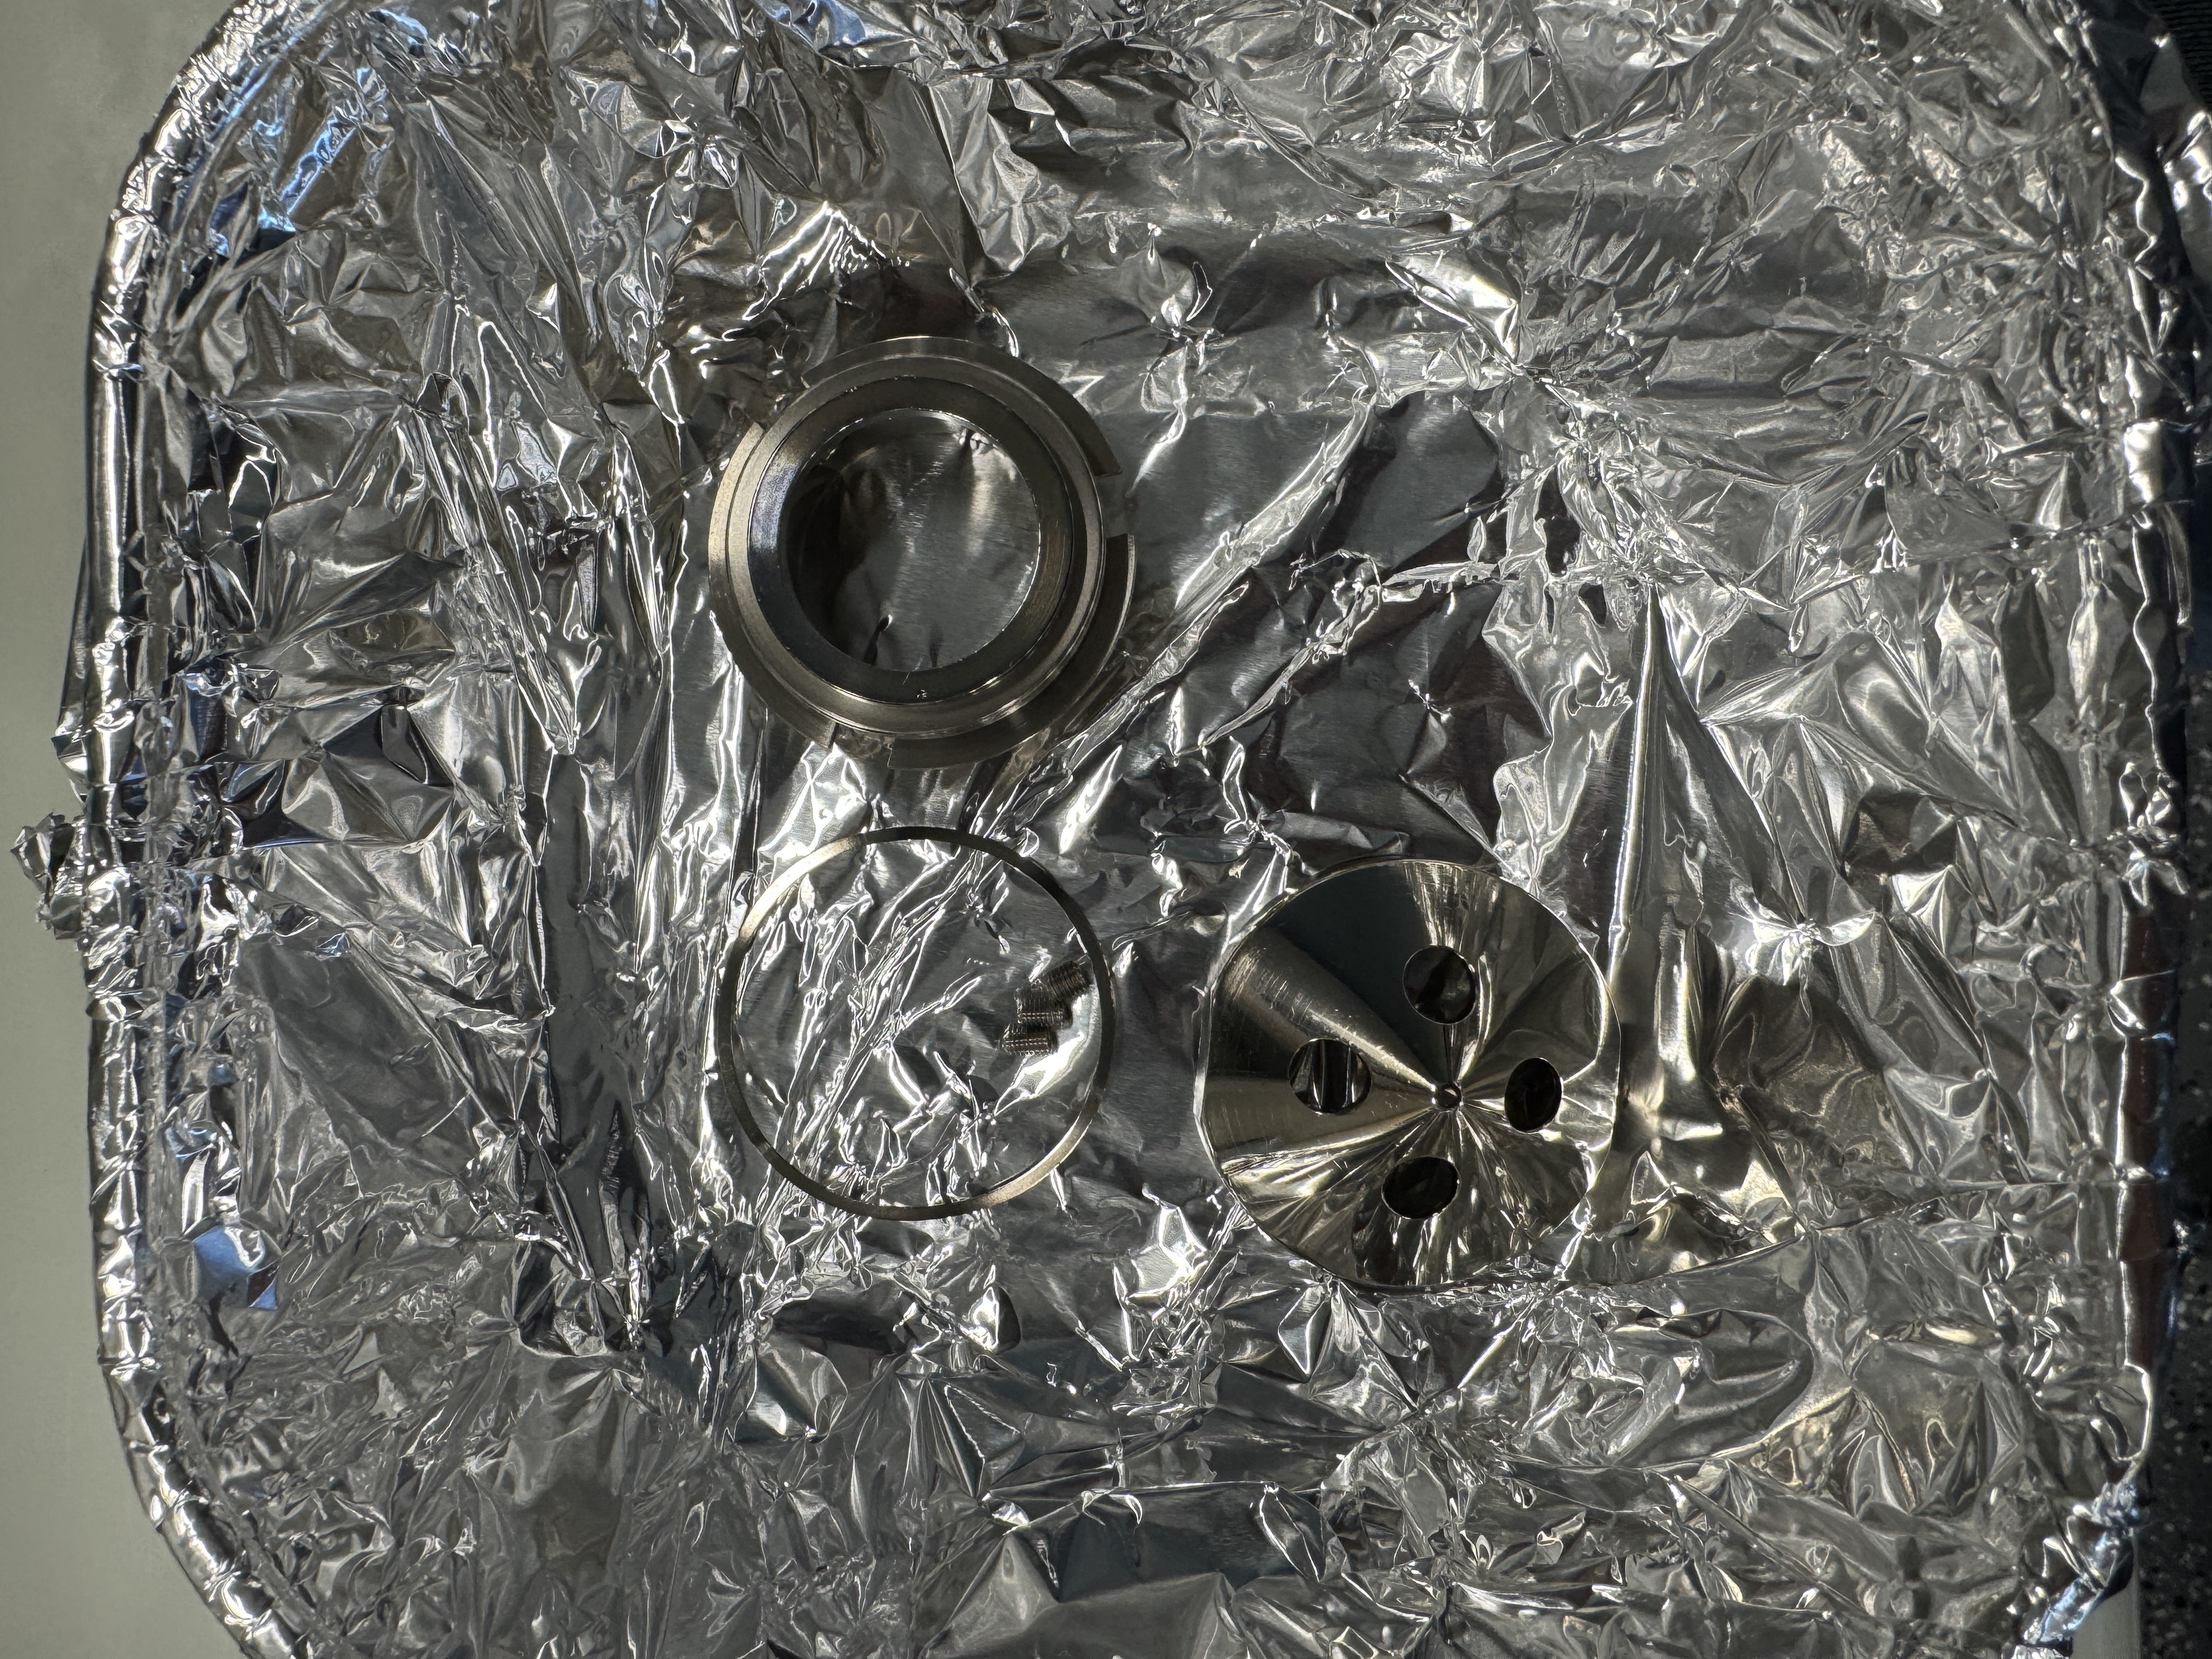
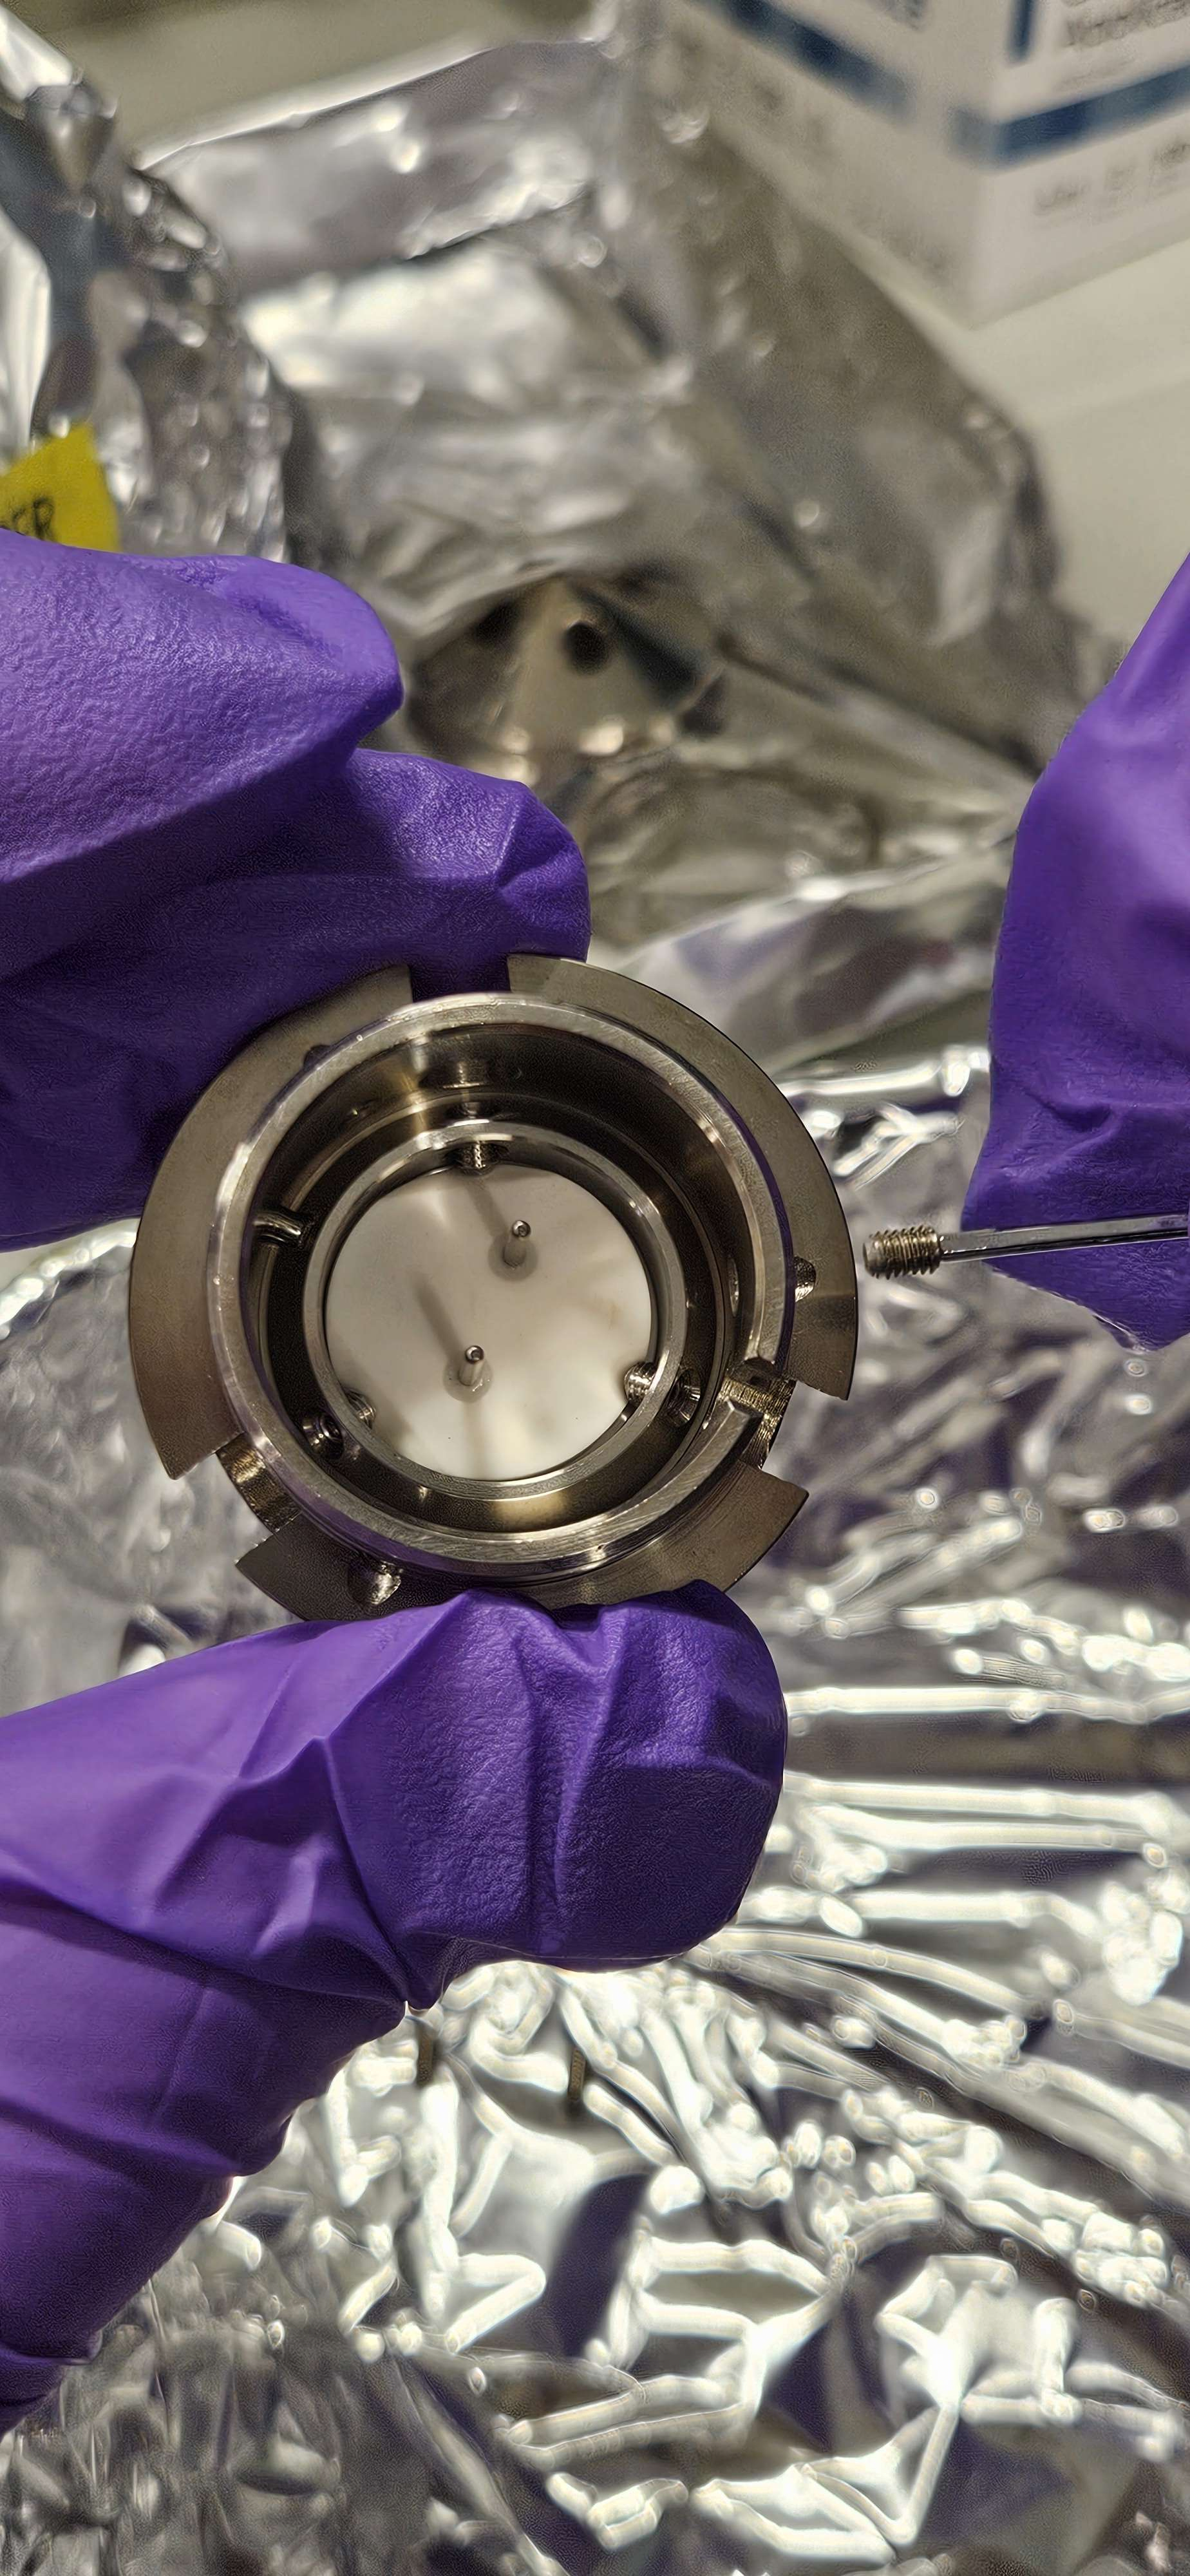
I say nearly ready to clean because our filament holder has a fun problem, and that is this pin:

Pins like this in vacuum system cleaning work are the devil. You know why? Because of the magic of ✨trapped volumes✨. A trapped volume is anything like this, a pin shoved into a hole, a small opening on an otherwise hollow piece of steel, anything that water can easily get into, but cannot easily get back out of. Pins like this complicate cleaning immensely. Adam said he has some tricks for getting this pin out, so we are going to wait to clean this piece until later this week when we can try to actually get this pin out. So for now we will clean every other part of the Wehnelt.
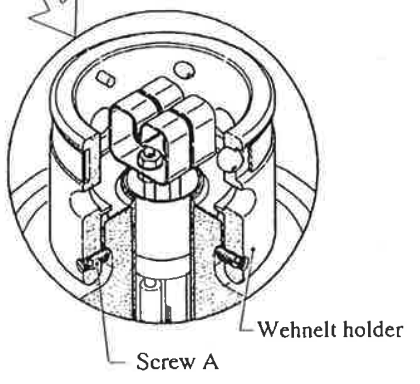
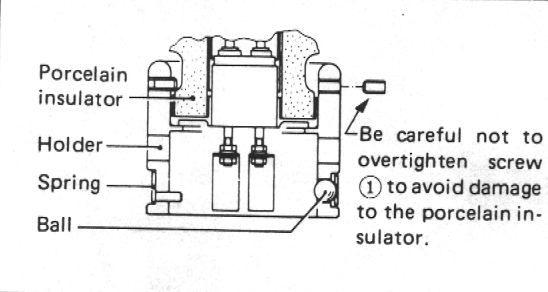
Now that we have the Wehnelt ready, it was time to attack the holder. Our holder tripped me up a bit, every manual and service doc I have access to shows this configuration:
Upon getting a closer look, I realized ours is completely missing the set screws, and is about half the height compared to the diagrams.
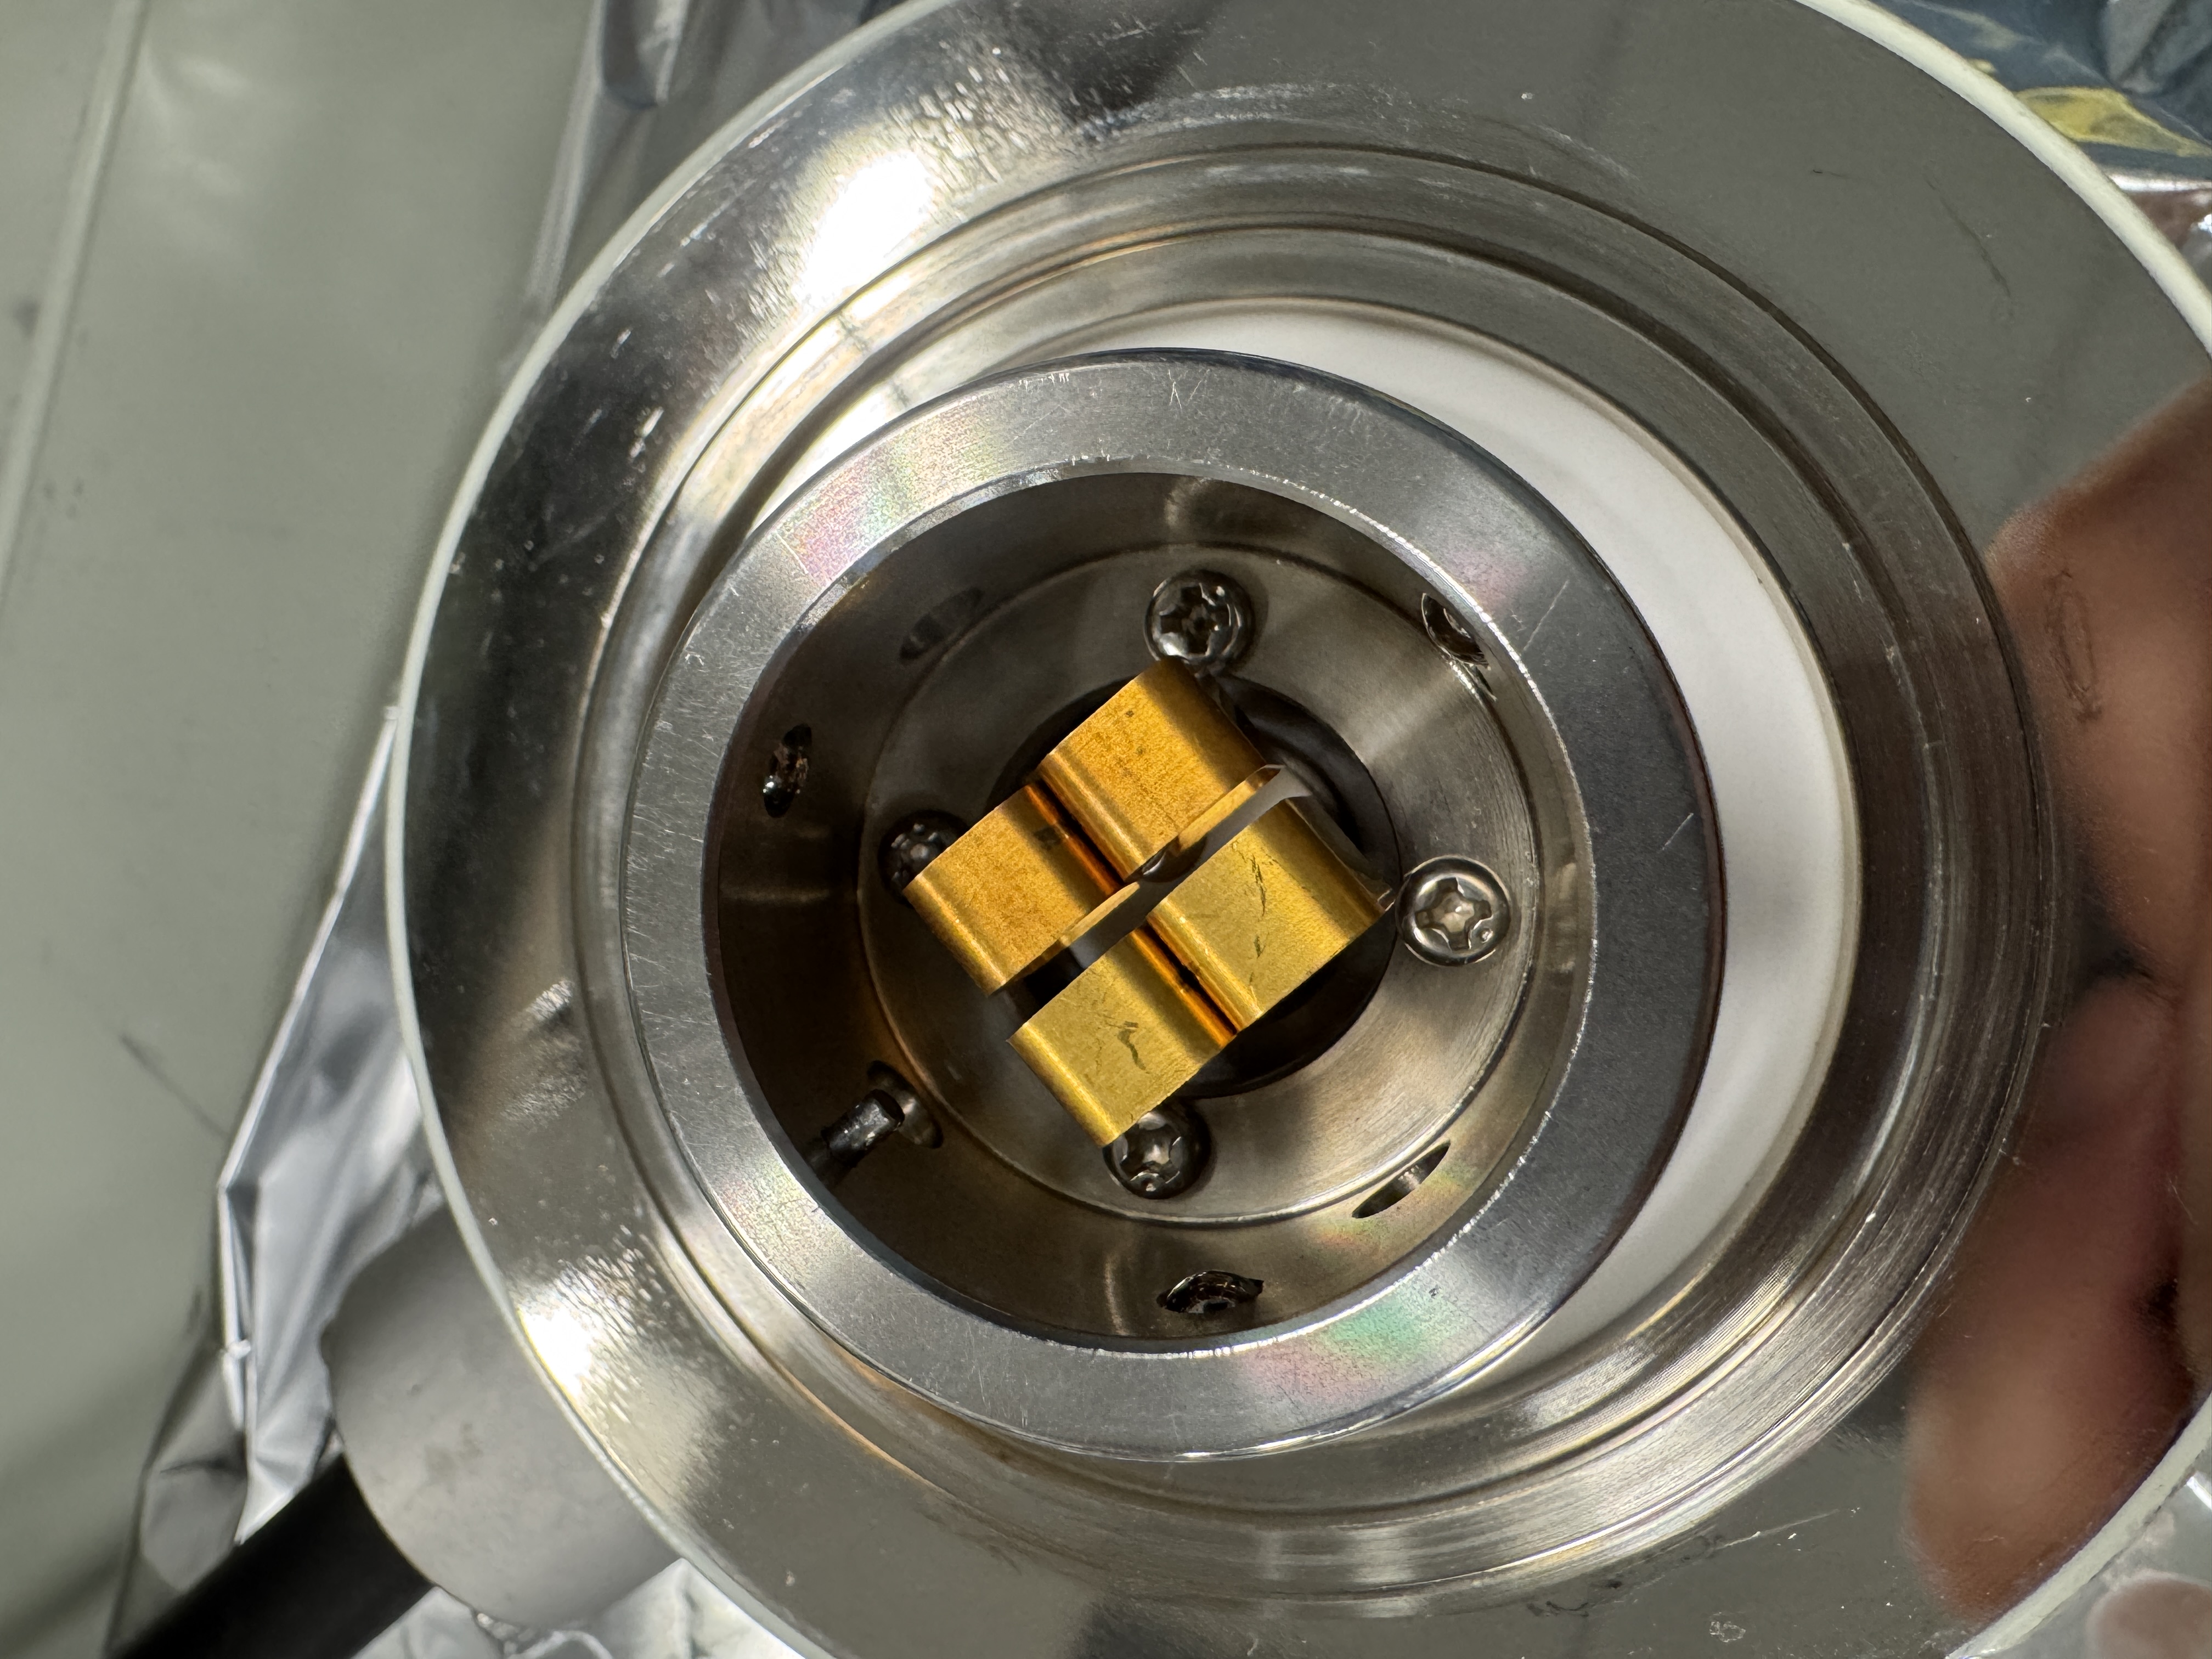
After consulting with Adam, I learned that this is just a later revision. Instead of risking cracking the porcelain insulator, this design is a bit more robust, and honestly easier to remove. I took off the holder itself after removing the 4 phillips heads:

After removing this, I was able to pull the ball bearings by sliding the split ring around until each bearing popped out. This piece unfortunately also needs to wait for Adam, because we need to remove this slip ring, which must be done very carefully, so I would prefer to wait, and even if we didn’t have this problem, we have ANOTHER pin on this piece, which is going to need removed anyways.
When Adam gets back, we will get these pins pulled, and get the split ring removed. We will have a small aqueous cleaning session when they are back but it shouldn’t be long.
Tomorrow the goal is a big cleaning session with Jayden of everything that we can clean.
07-03 - Friday
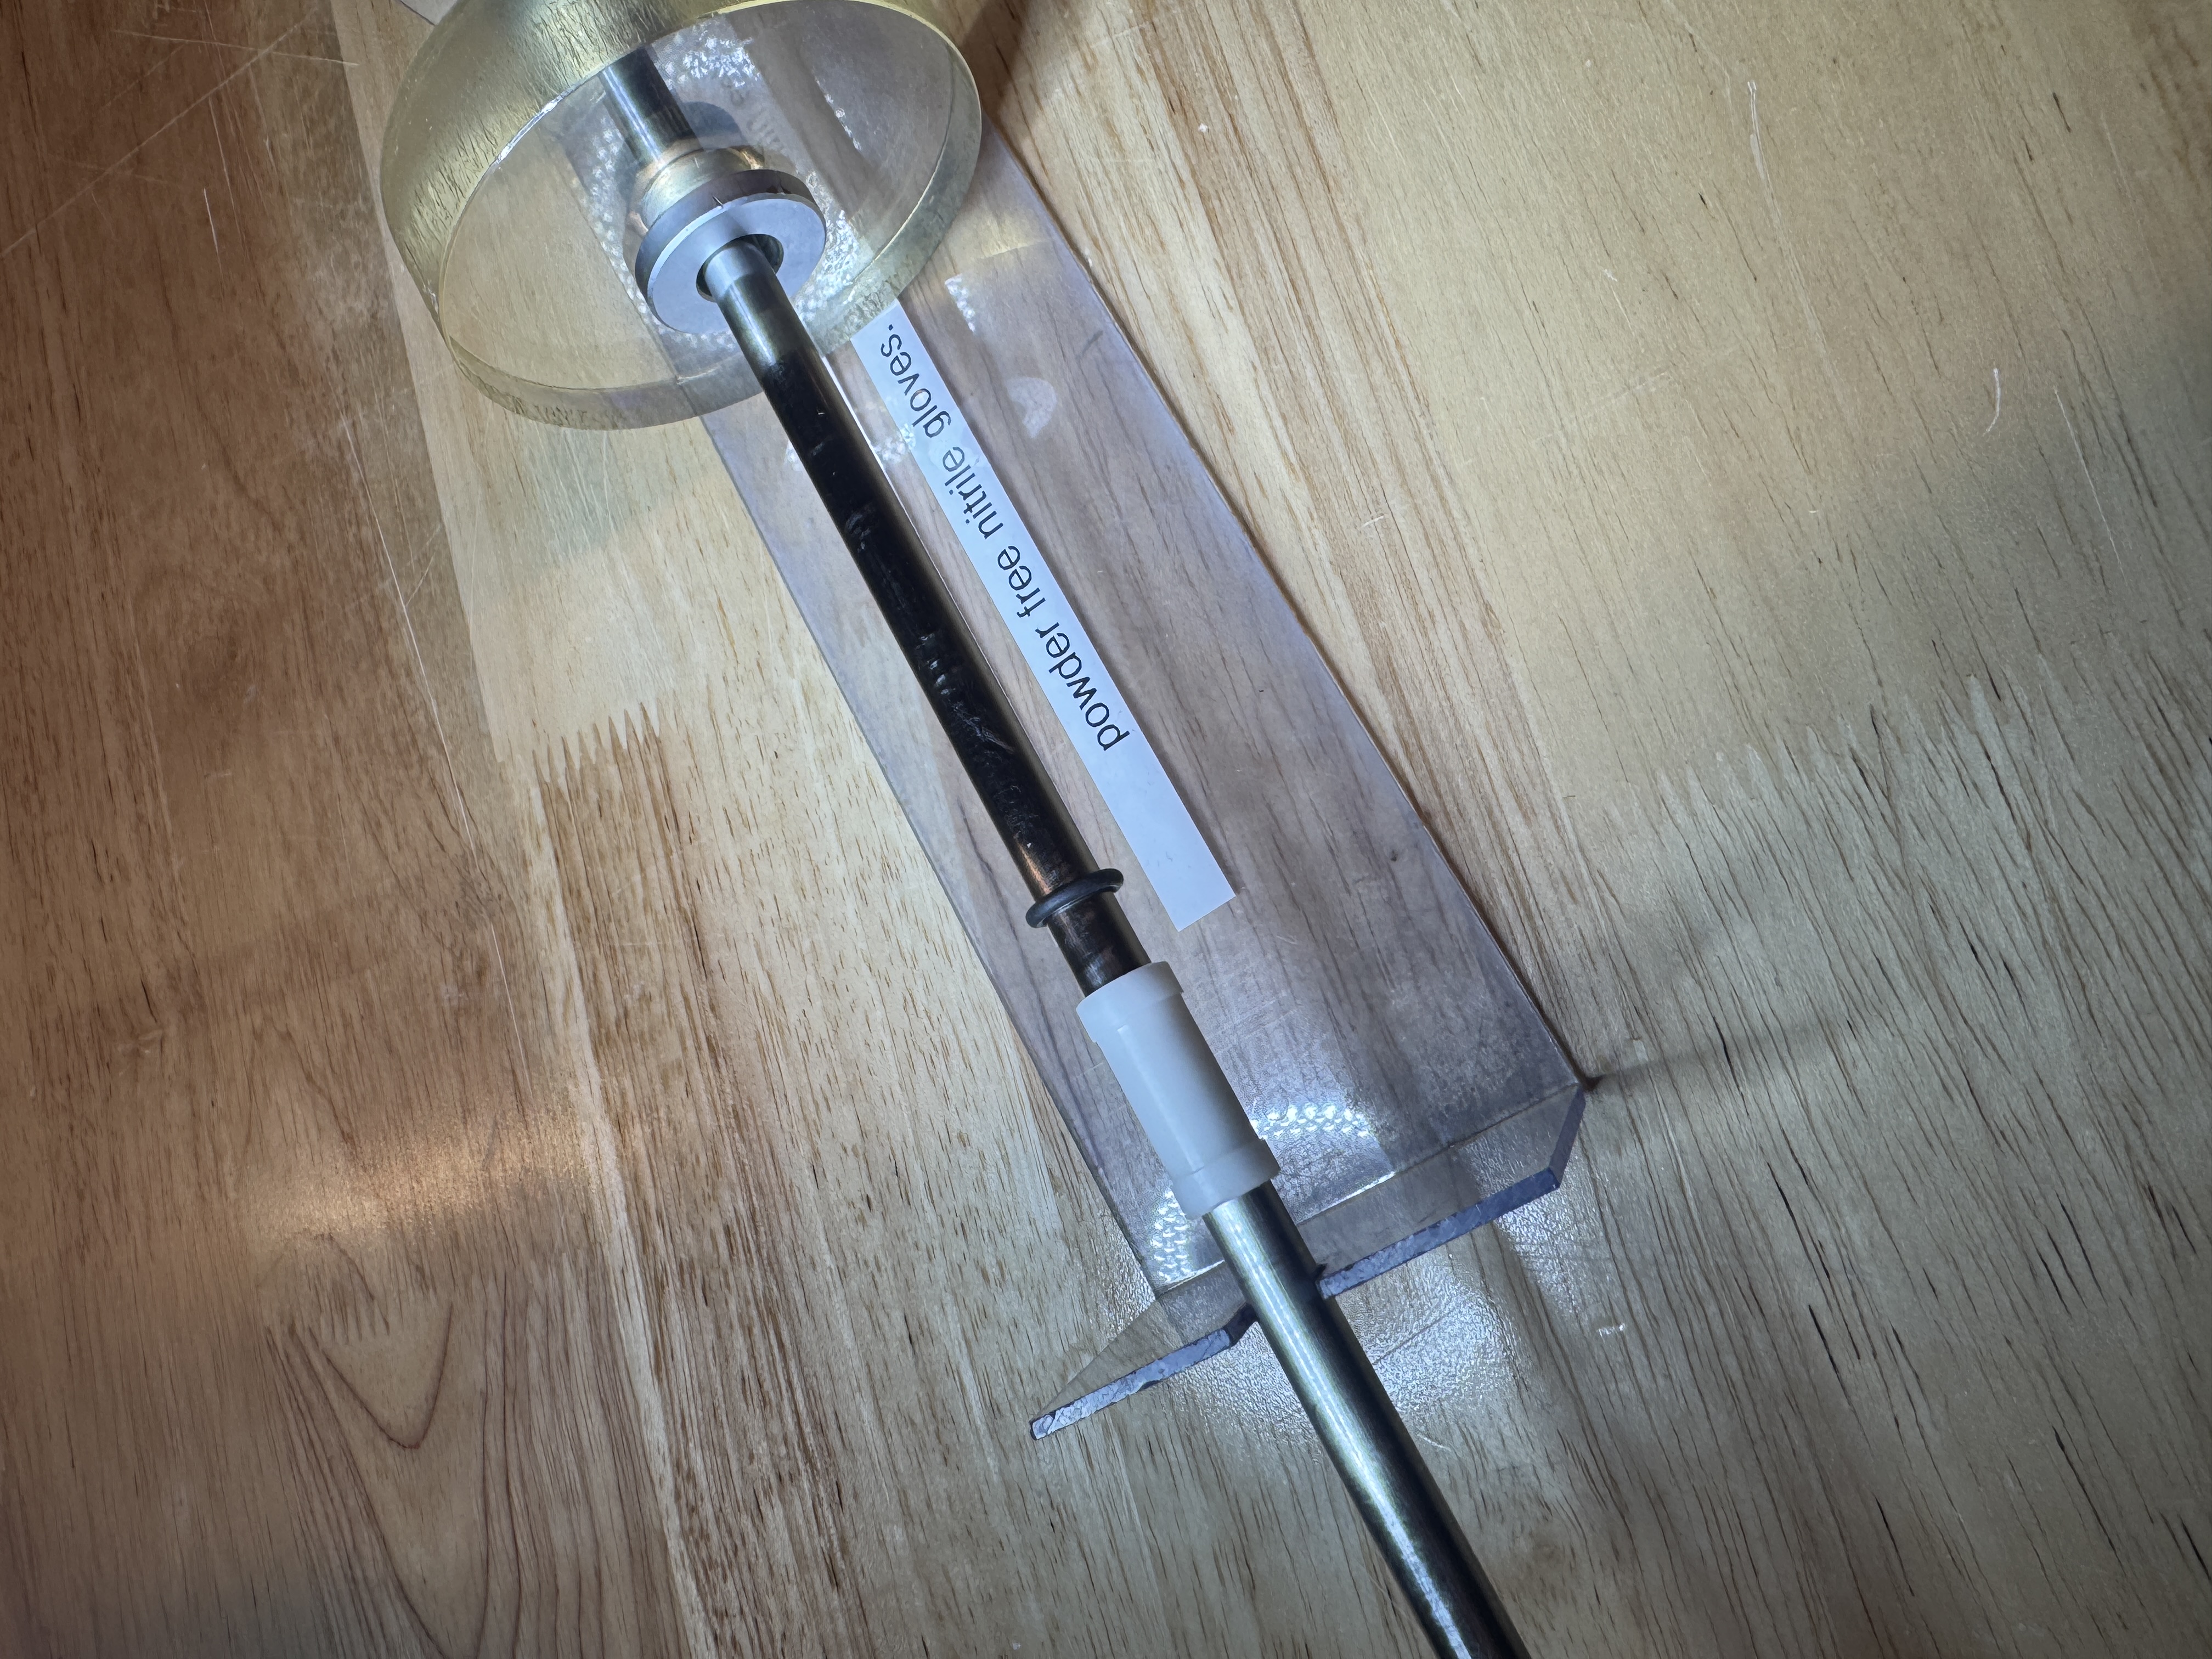
OK so my goals for today were:
- Test our 5 min epoxy on the specimen exchange rod, get that fixed
- Re-solder the SED
- Aqueous clean the upper liner tube apertures and anode again (I am worried about potential contamination on these)
- Aqueous clean the chamber o-rings and chamber floor
- Disassemble the gun and aqueous clean the smaller components
- Clean the gun chamber manifold and re-epoxy it
- Rebuild the small butterfly valve (I might wait for Adam on this one idk)
What a great list, after double checking with Adam on a few things, a few items on this list we are going to hold off on.
Holding off on:
- 5 min epoxy on the specimen exchange rod, this is a bit more sensitive than I originally thought, this small plastic piece has to be at the exact right depth in order to seal properly, better to wait for the expert on this one.
- Re-solder the SED, going to wait on this one too, I am decent at soldering, but this is a very sensitive component, and again, better to wait for the expert on this one.
Still needed before Tuesday
- Re-aqueous clean the upper liner tube apertures and anode
- Disassemble the gun and aqueous clean the smaller components
- Wipe down the insulator and mounted components of the gun (need to wait until Monday or Tuesday for the wiping because the opened wipes have a shelf life, and we need them fresh when Adam gets here next week).
- Wipe down the chamber o-rings and door o-ring (I was originally planning on aqueous cleaning these, but they are way too big for my ultrasonic. I have some cleanroom wipes I will use to vigorously wipe these down instead, but also waiting until Monday on this).
- Aqueous clean the gun chamber manifold and re-epoxy it
- Rebuild the small butterfly valve
I don’t have the time today with it being a holiday to get any aqueous cleaning done, I think what I am going to do tonight is tear down the gun and get it ready for cleaning.
At the very least, prepare myself for this task.
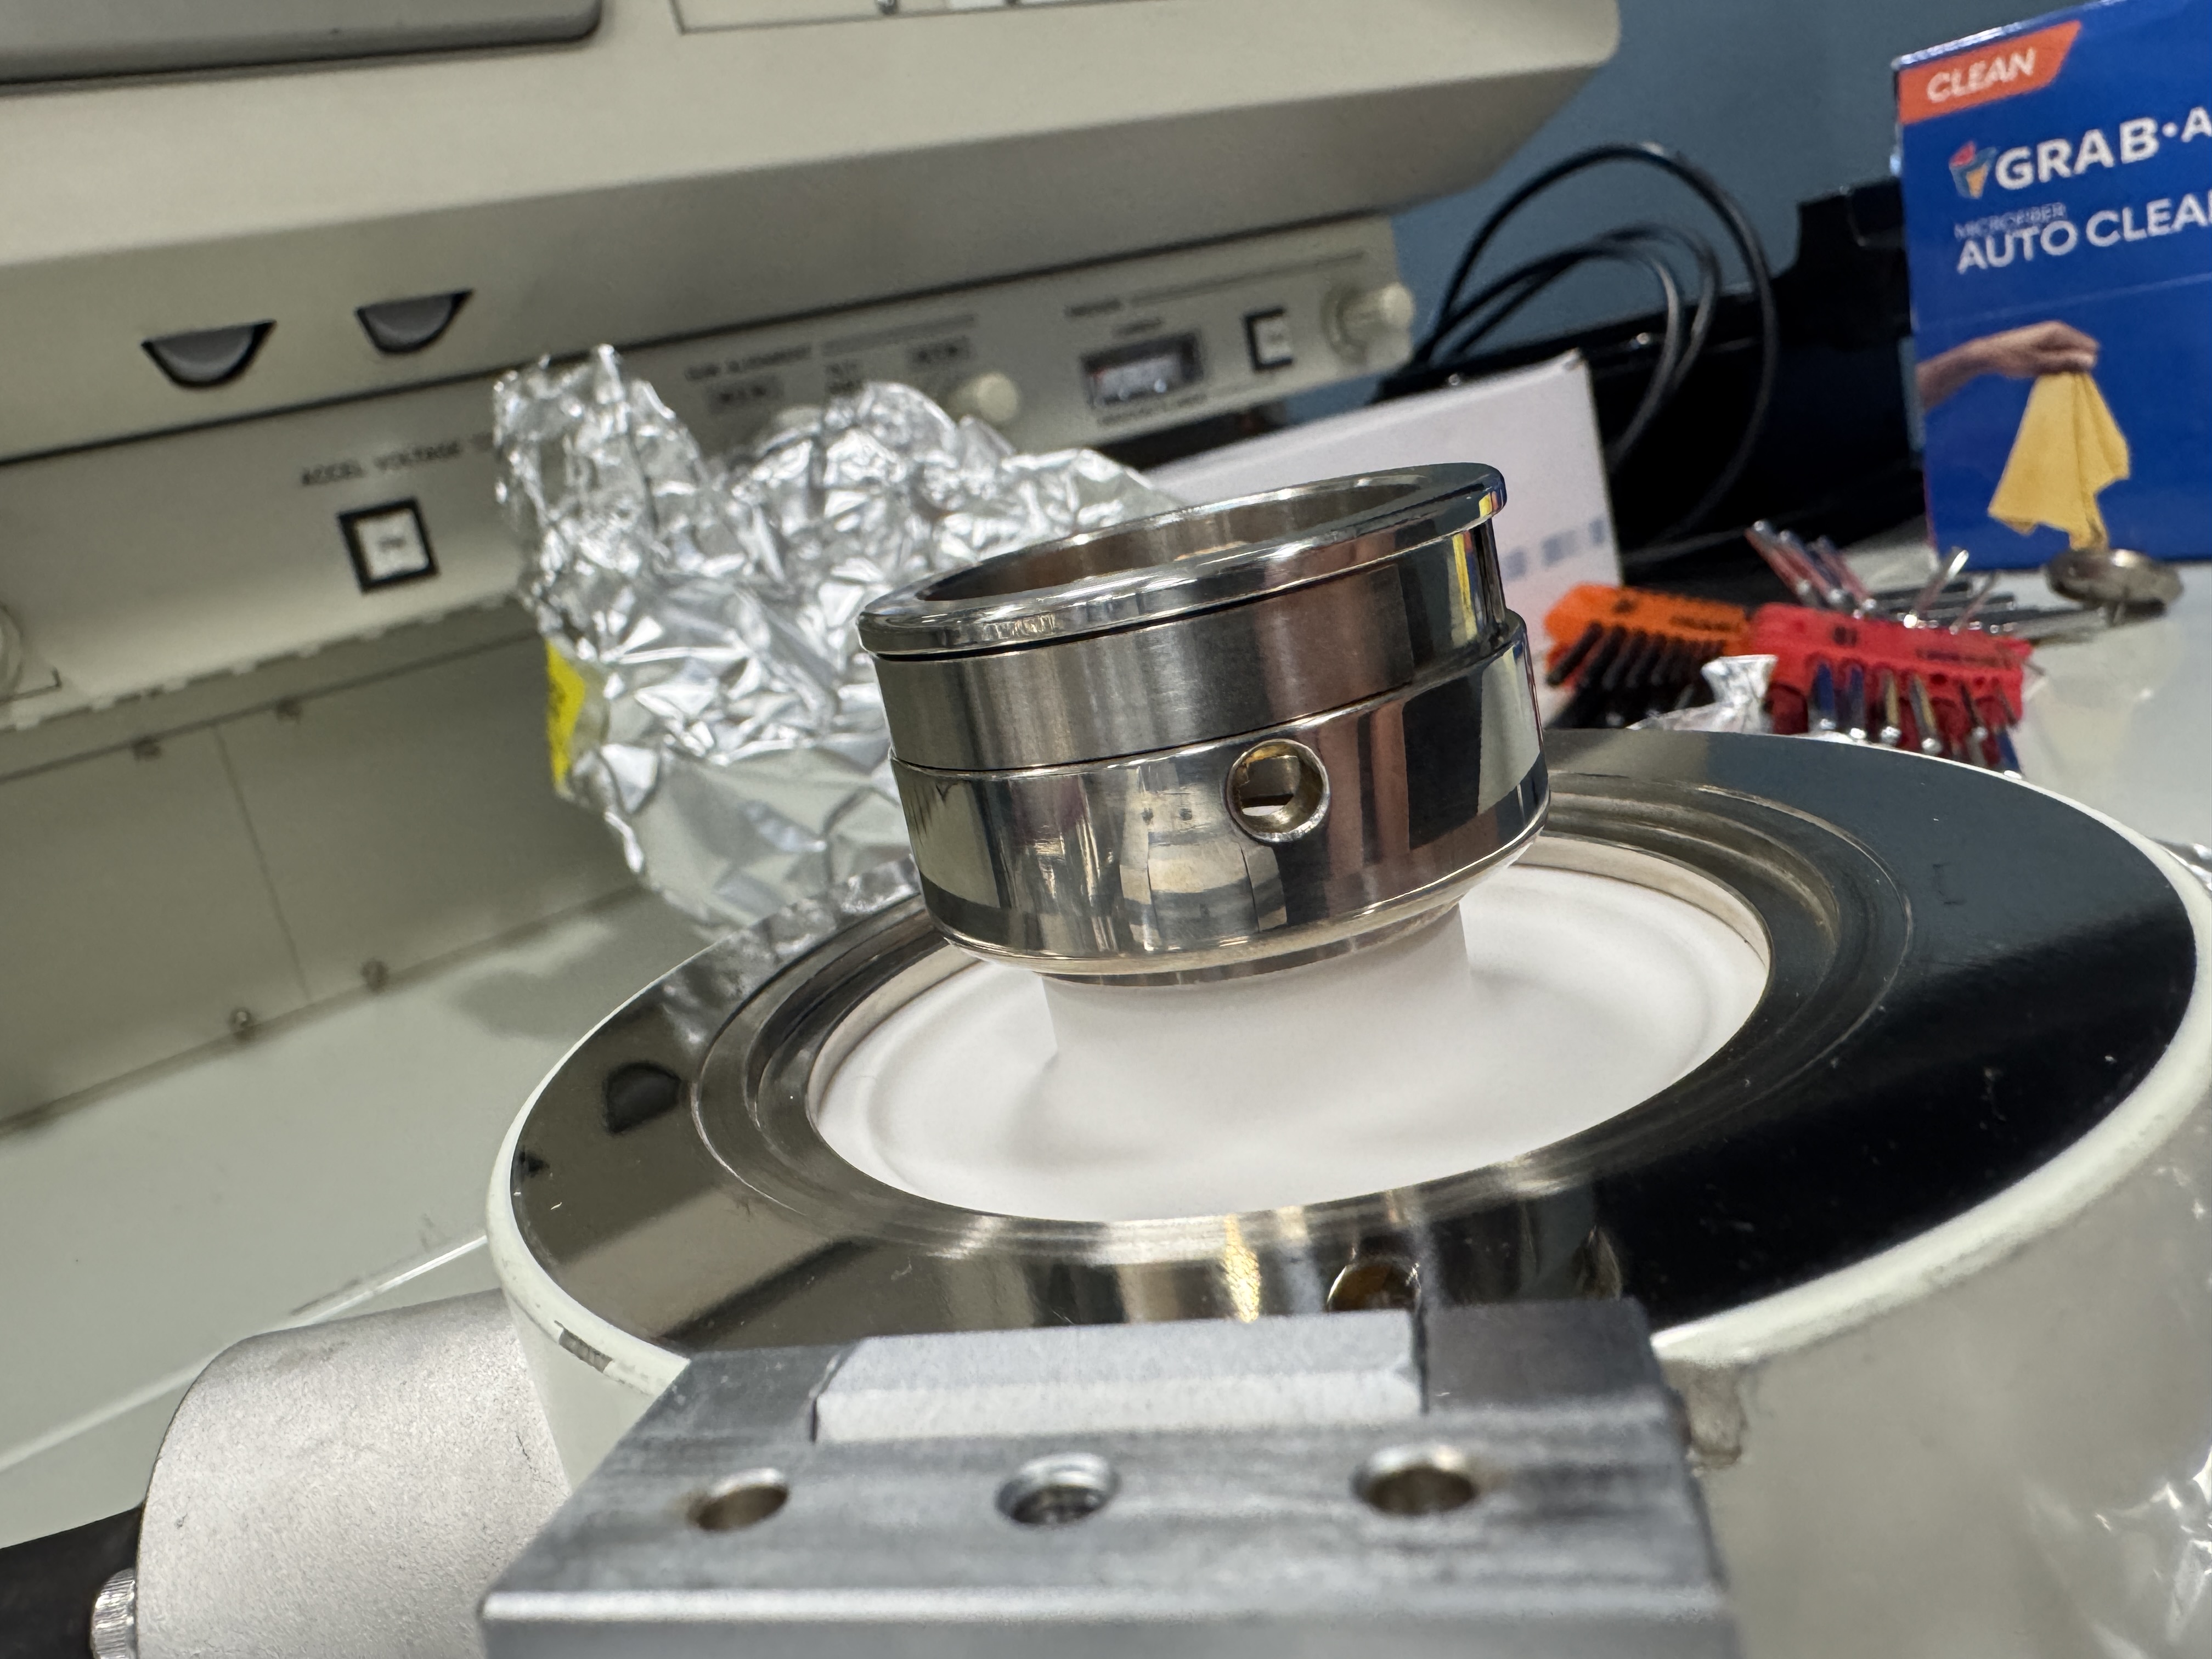
The Electron Gun
The electron gun looks pretty simple, but contains quite a few sub components that we need to remove from the porcelain insulator and ultrasonicate.
The whole gun swivels up and off the top of the machine during normal operation. Right now, our column is in a few hundred pieces, so its just sitting on our workbench:
Luckily this will make disassembling it for maintenance a little bit easier. It comes apart into a few distinct parts:
We have first the Wehnelt unit itself, which has a few sub-components of its own:
We need to clean all of these sub-components, minus the actual filament, this is relatively new, and clean, we don’t want to damage it by cleaning it.
Then we have the Wehnelt holder, which clamps around the Wehnelt and holds it in place within the gun.
The holder has its own sub-assemblies that also need taken apart. Firstly, we need to disassembly the spring assembly that holds the actual Wehnelt into place. This spring assembly consists of ball bearings that help hold the Wehnelt, and a spring to tension them. The assembly itslef is held onto the porcelain insulator with some small screws. It should be fairly trivial to get this part apart, but we need to take extra care and caution not to let any of the bearings drop out of place or fall anywhere during this process. I do have one spare of this part but, not something I really want to pull out of storage just because I drop a bearing.
Once all this is apart, we need to ultrasonicate every single metal part in Mr. Clean. We also aren’t out of the polishing woods yet, as we need to polish the Wehnelt itself. It took me a while to prepare for this job, I am likely going to strip this down on Sunday, and do a BIG aqueous session on Sunday and Monday.
07-02 - Thursday
Today I am back after a good sleep, I am going to try to clean the PCD pieces and aperture pieces before I call it a day today. I probably will not get to any of the larger parts or the SED soldering, going to try to focus on those tomorrow, which will probably be a very long day 😮💨
Aqueous Cleaning part one million
I got the last 4 aperture and PCD pieces cleaned just now, and they are safely stored awaiting re-assembly. Now I just have to clean the gun chamber manifold, some pieces of the gun itself (which I first need to disassemble) and the big chamber O-rings. That should about do it for aqueous cleaning. After that just a few housekeeping things to do like re-soldering the SED, and rebuilding the butterfly valve, and we should be back on track for Adam’s return.
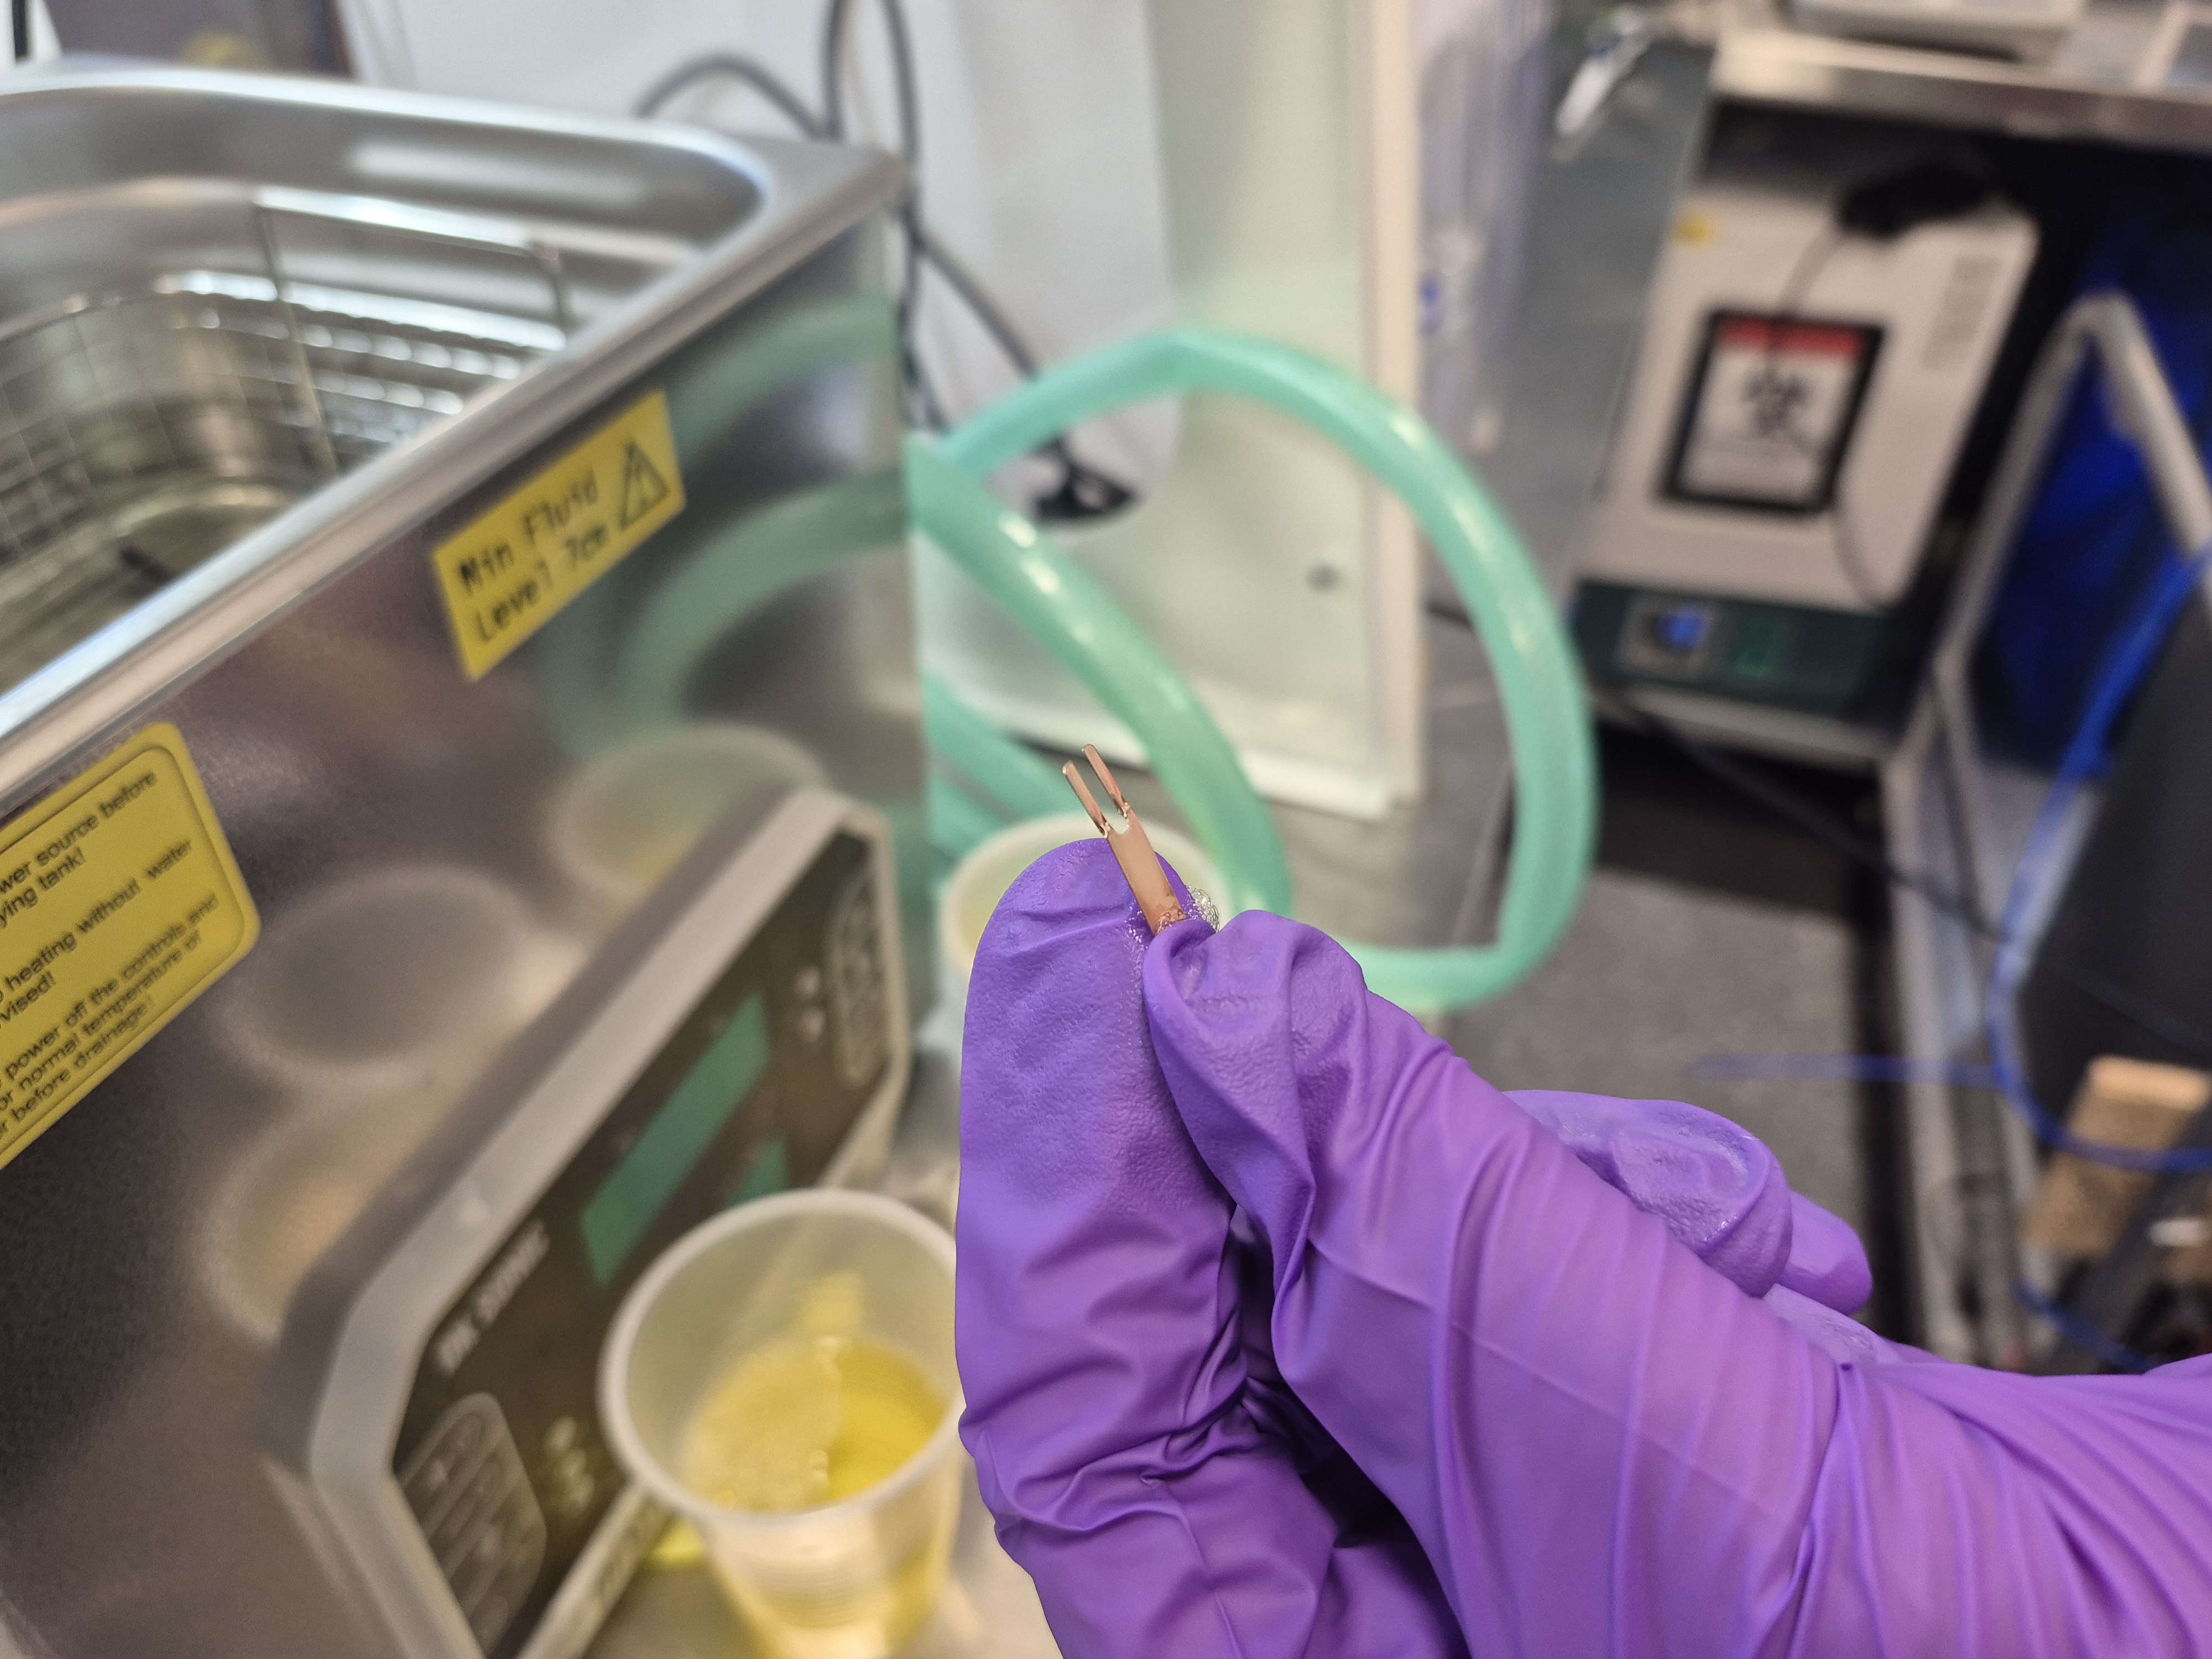
Rough Process
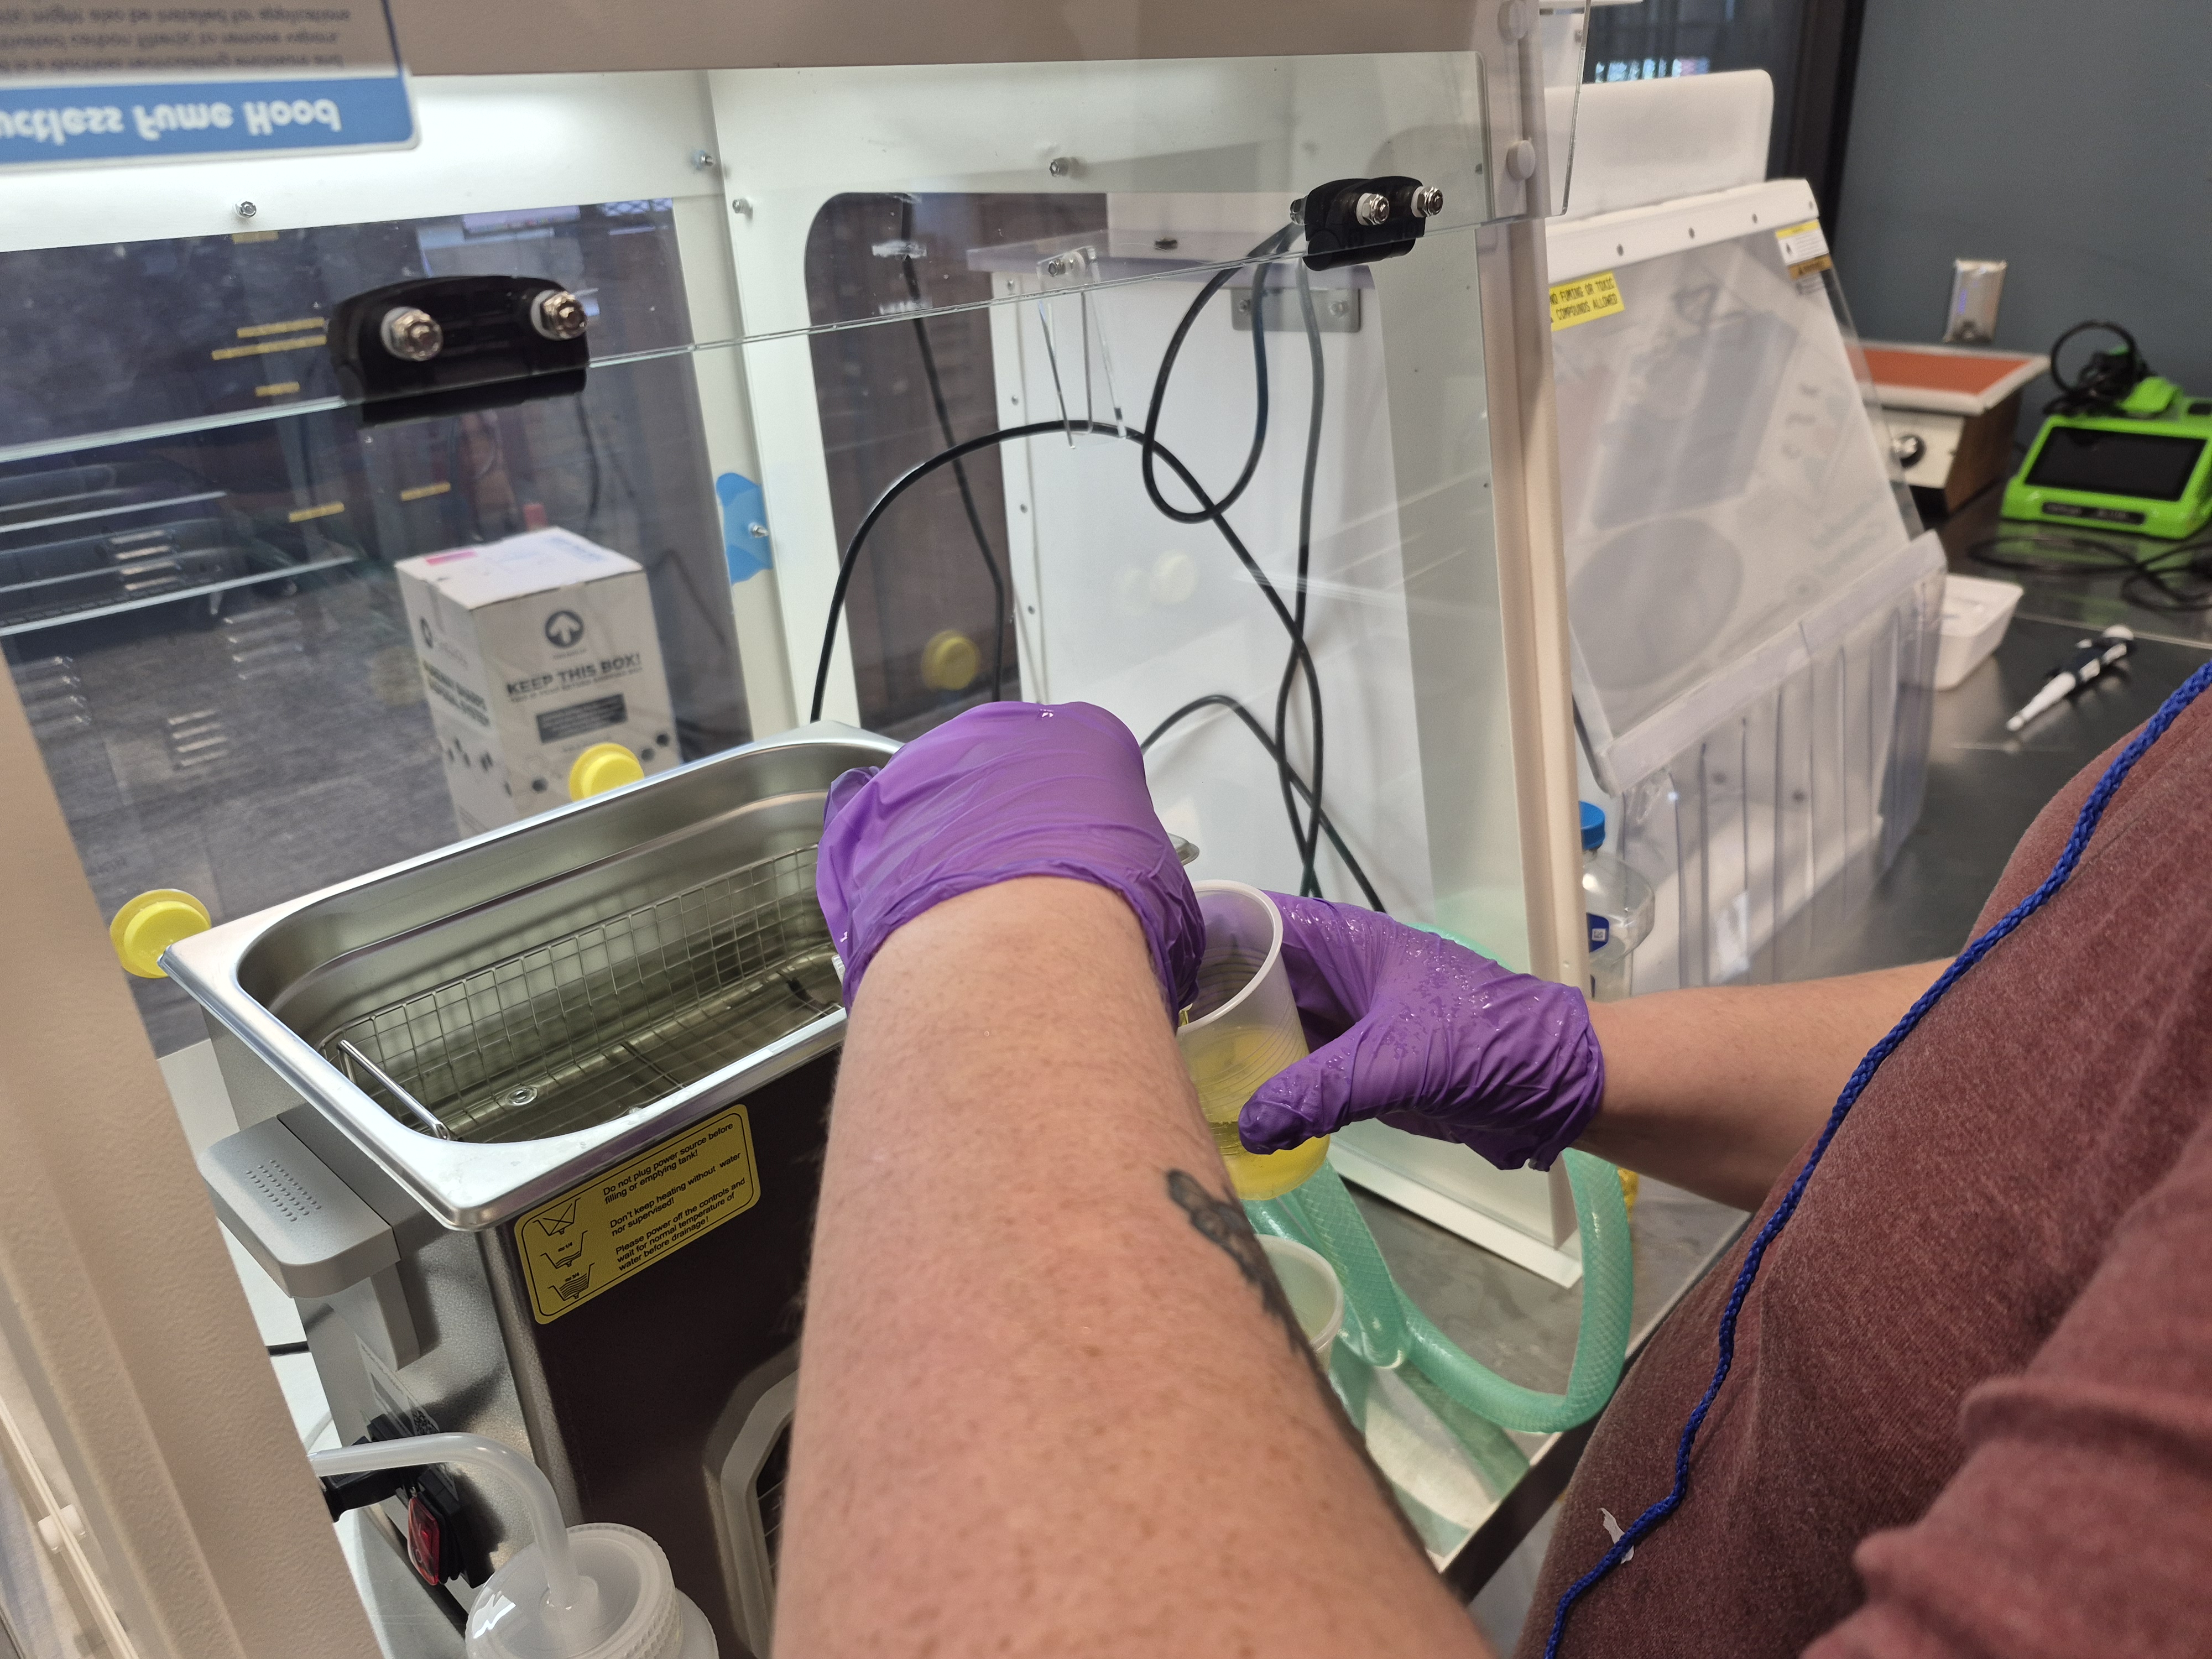
I’ve explained this before in this doc, but now I have a couple pictures that I can actually show to give some context.
After polishing all of these parts, they get a quick spray with windex, and then go into an ultrasonic bath with Mr. Clean. We do these sensitive elements inside plastic cups within the ultrasonic bath to prevent metal-on-metal contact, which can seriously deform and damage optics in an ultrasonic environment. (See this video by my friend Spirit if you’re curious as to why this is a thing: Does ultrasonic cleaning damage ball bearings? Electron microscope investigation!)
We then fish the parts out of the ultrasonic, trying to get as little residual Mr. Clean on our gloves as possible (as a heavy load of Mr. Clean on the gloves can almost entirely prevent you getting your part rinsed)
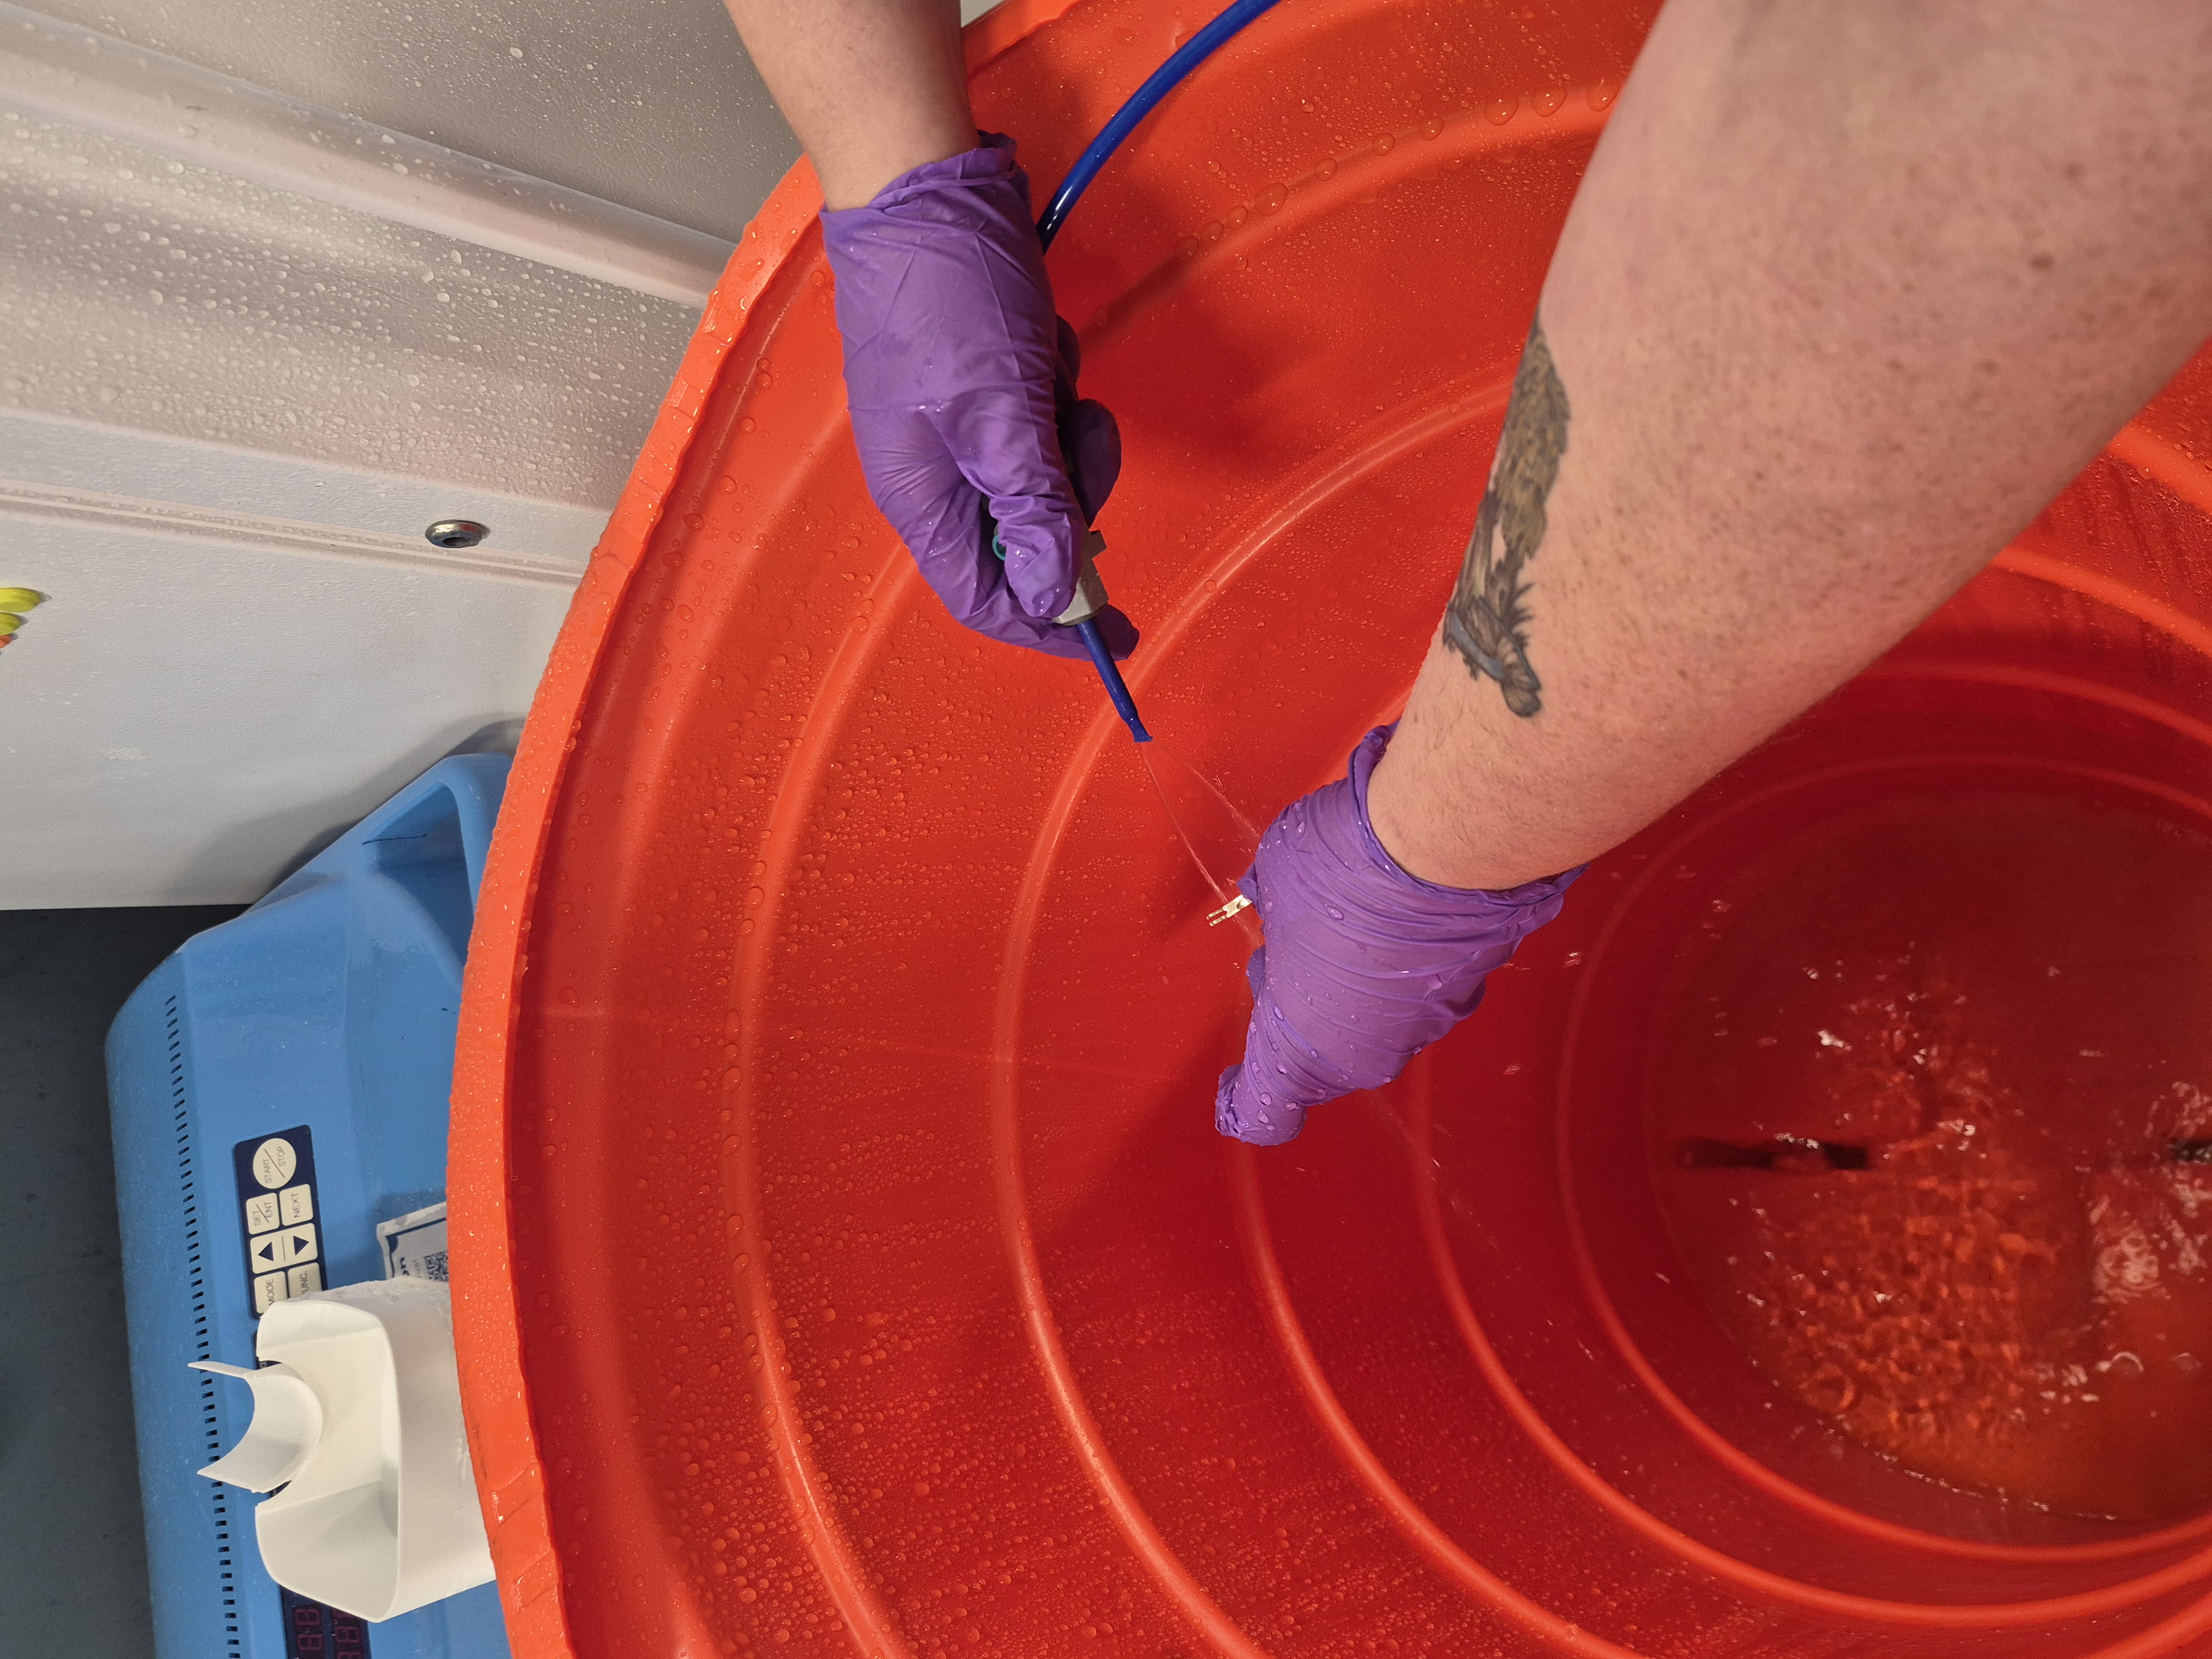
After this, its time to give the part a thorough DI rinse. Its hard to describe just how much water is needed to rinse these parts. And its not just any water, this is lab-grade DI water. We had to build a DI water system within our lab just to make rinsing with this much DI water economical.
When you are trying to remove ALL of the Mr. Clean from a part, you need to rinse it with literally gallons of water in most cases. This is because the Mr. Clean is a surfactant, and its really good at sticking to the surface of the parts. You don’t want Mr. Clean left on your parts for a couple reasons, the main one being you don’t want those residues evaporating into your high vacuum system. The other reason being that leaving this residue on the metal for a long time would cause some corrosion, which is also not ideal if you can believe it. We also have to carefully transfer the part to clean fingers, rinse our dirty fingers, and transfer the part to clean fingers again. We repeat this a few times throughout the rinse to ensure all trace residues are gone from the glove and the part. We are really rinsing the glove almost as much as we rinse our part.
So to successfully rinse a part you don’t just need a standard gallon jug of DI water, you need a system that can provide a continuous high flow of DI water for a long period of time. We can make about 50-100 gallons of DI water here in the span of a day, depending on how many parts we are rinsing. We went through about 20 gallons just today, to clean these 4 small parts, and that isn’t even close to the amount of water we have used during other phases of this rebuild.
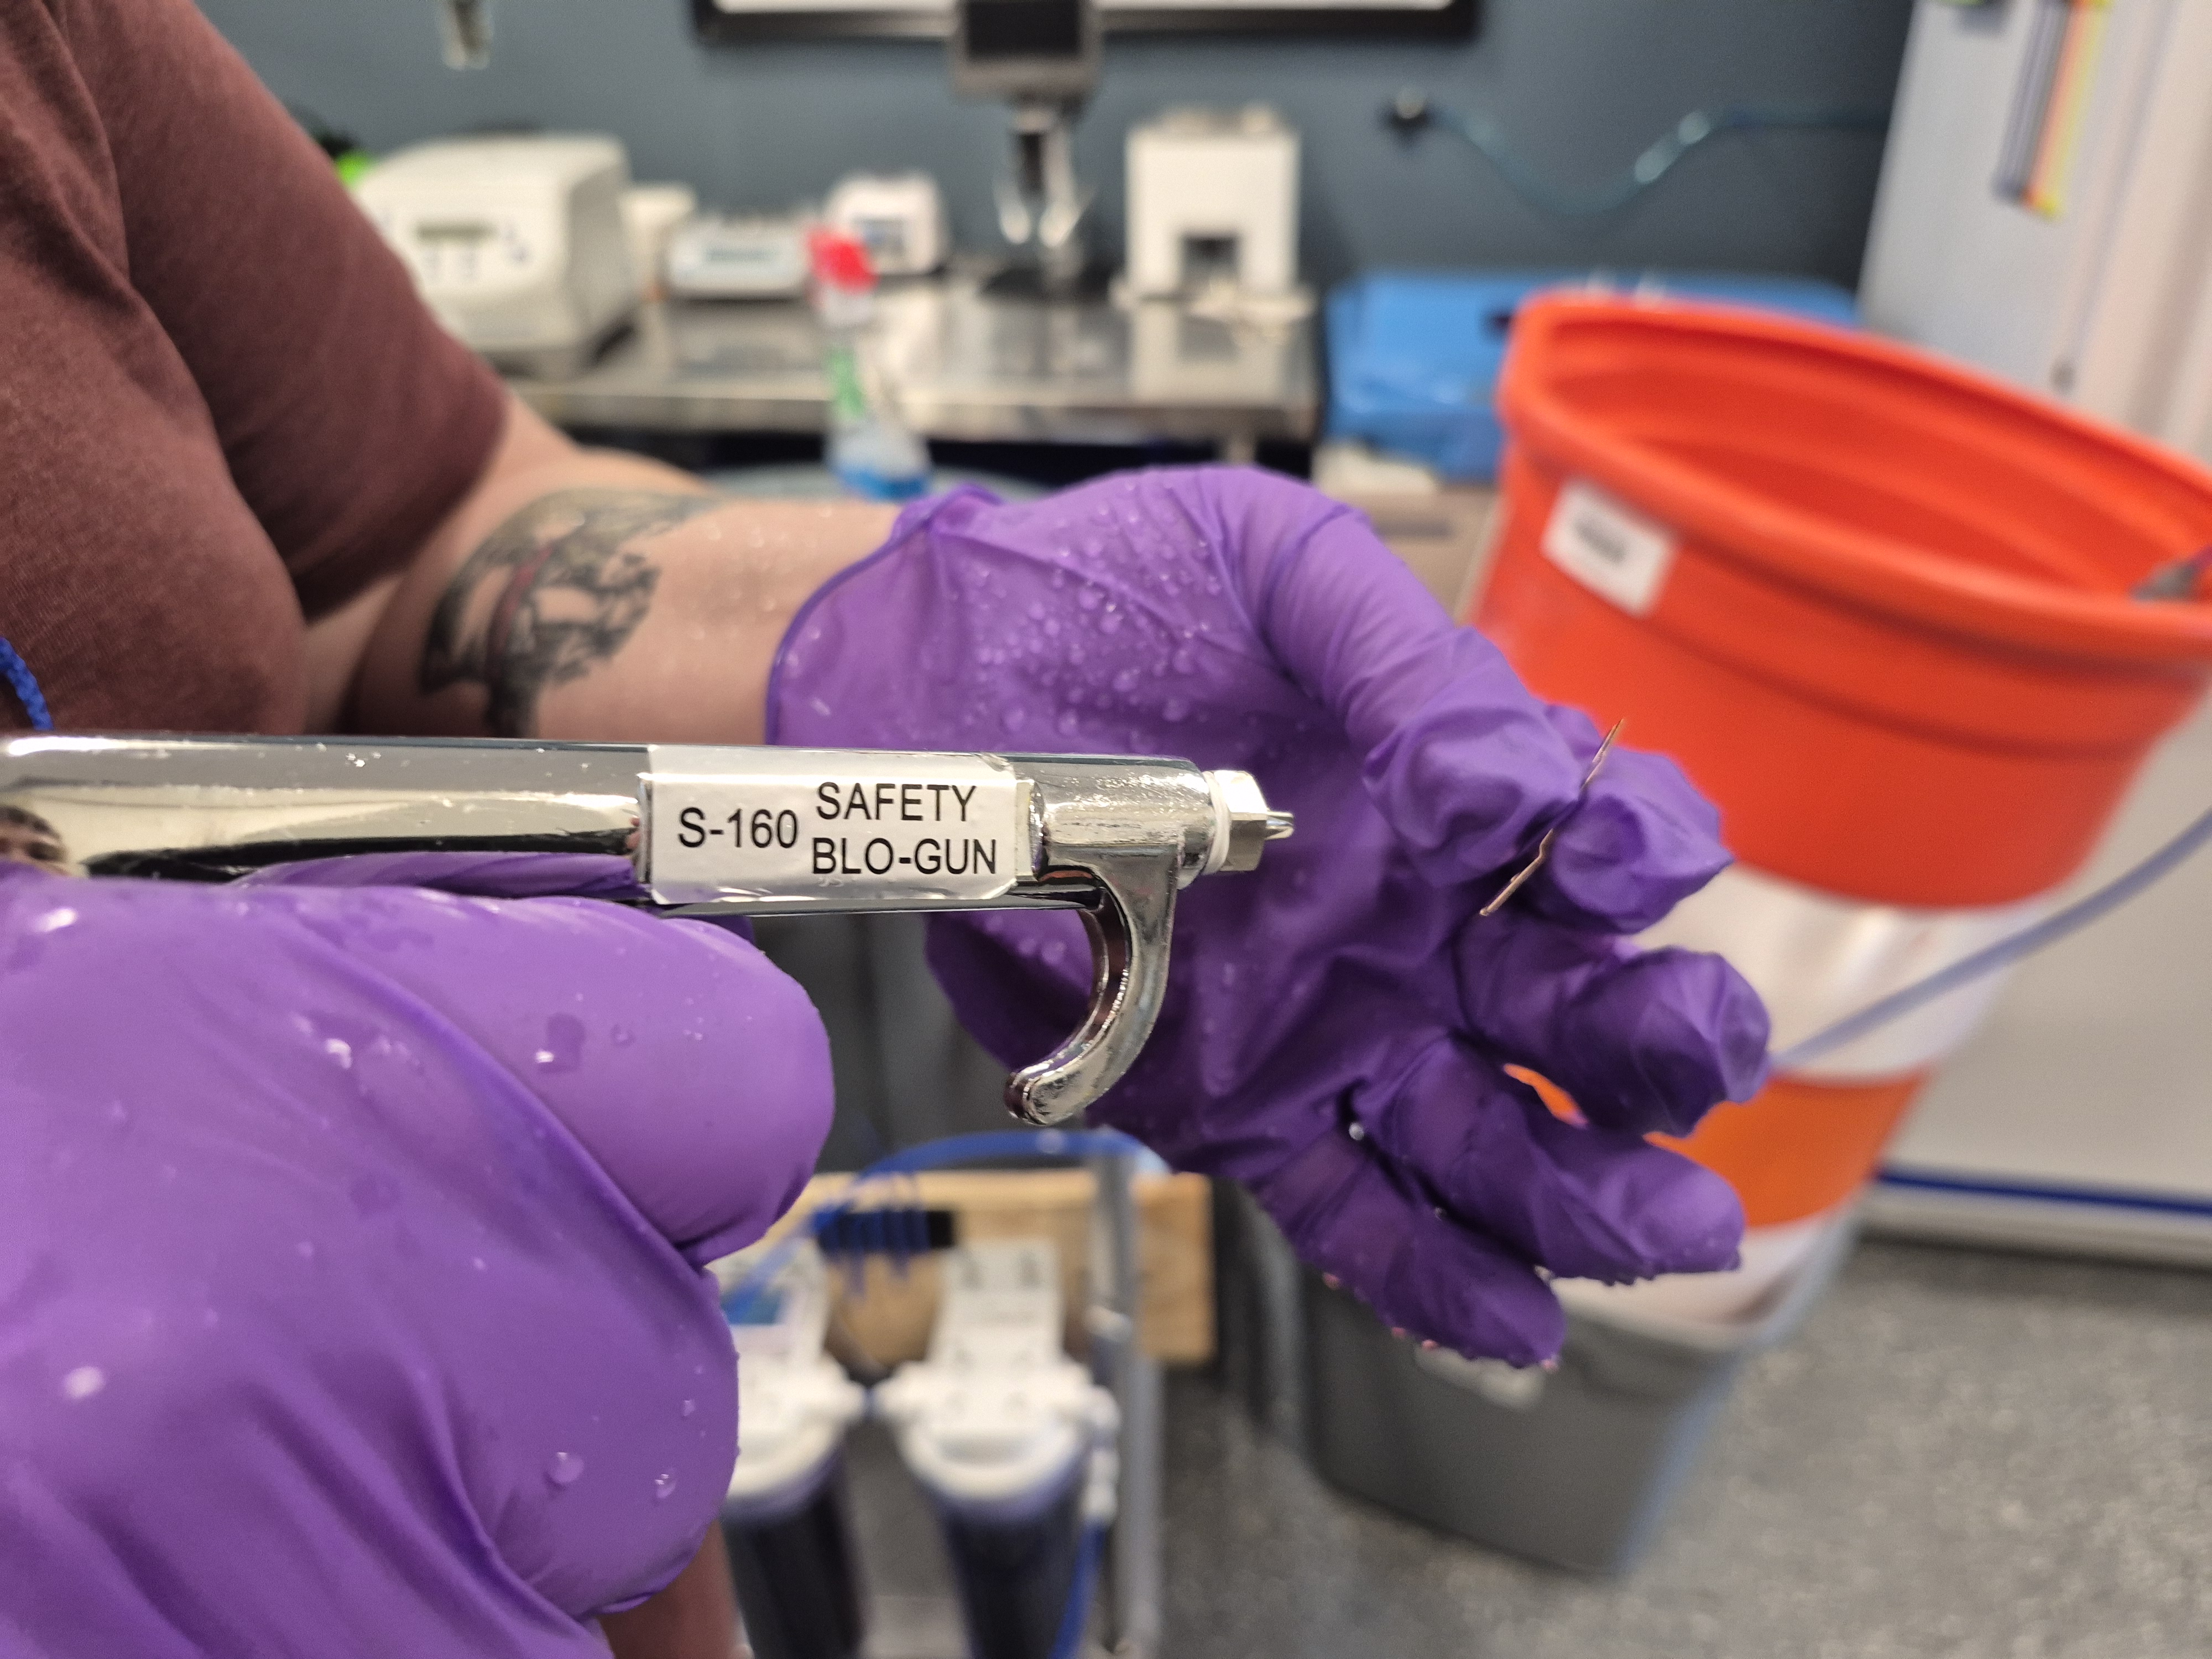
After the part has been thoroughly rinsed, we give it a comprehensive blow-off with Clean Dry Air (This air is supplied by an oil free compressor from harbor freight, I will at some point have a guide on putting one of these together for lab use). The goal with this isn’t to dry that part off, its to blow the part off. We work in a raking patten, choosing one direction to blow and sticking to it, to sort of “push” all of the water off of the part. We again are paying as much attention to the glove as we are to the part, because water on the glove can easily be blown back onto the part. We work in a pattern of rough drying the part, rough drying the glove, drying the part a bit more, drying the glove a bit more, etc. until we are confident our part is dry, and that there is no trapped moisture between where our glove is touching the part.
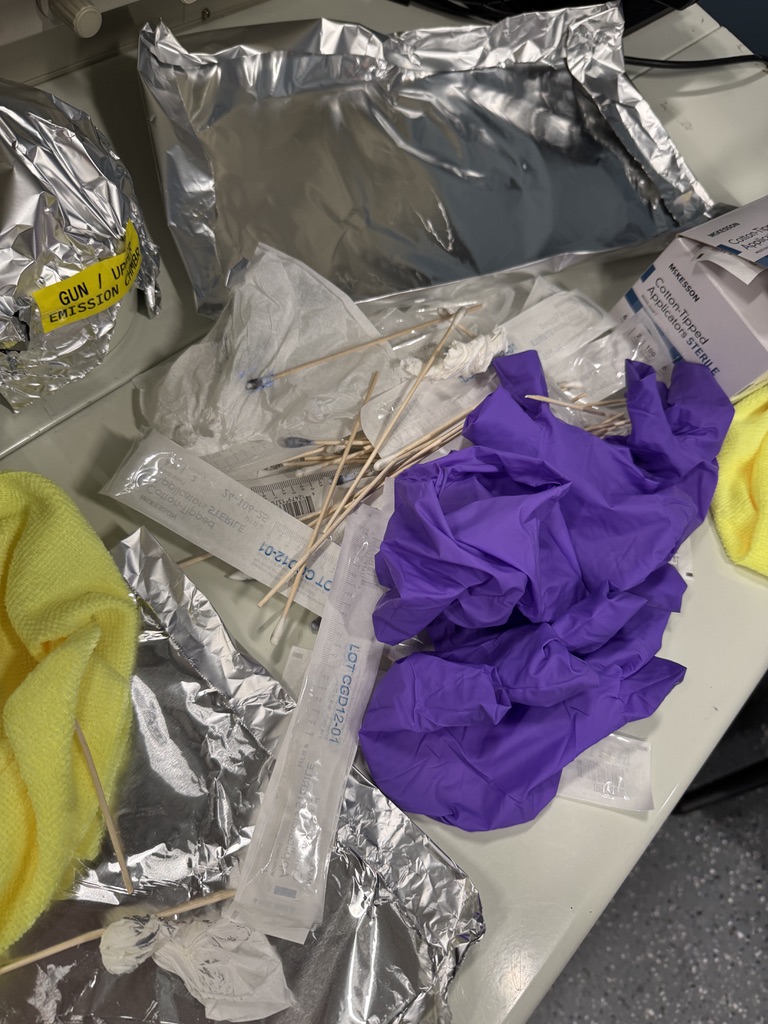
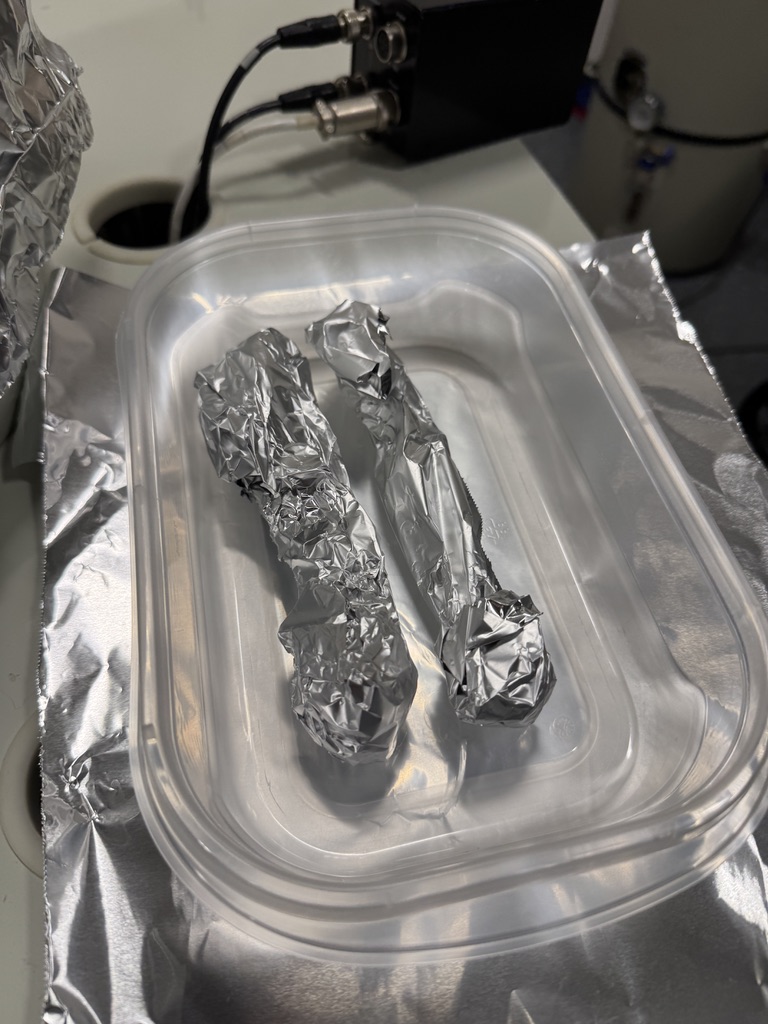
After this, we set our completed dried part into a clean laminar flow hood lined with ultra-clean foil. Once we clean all of our parts for the session, we box them up into containers also lined with ultra-clean foil, and seal them up for re-assembly.
That’s it! Not too bad right? 😉
It only took me about 4 hours to get 4 parts cleaned today, which is a bit better than yesterday. Those liner tubes suckkkkk to clean.
Tomorrow’s Goals:
- Test our 5 min epoxy on the specimen exchange rod, get that fixed
- Re-solder the SED
- Aqueous clean the upper liner tube apertures and anode again (I am worried about potential contamination on these)
- Aqueous clean the chamber o-rings and chamber floor
- Disassemble the gun and aqueous clean the smaller components
- Clean the gun chamber manifold and re-epoxy it
- Rebuild the small butterfly valve (I might wait for Adam on this one idk)
Wow, writing that out, it looks like tomorrow is going to be a pretty long day. Its likely I will be completing some of this on Sunday. Until I figure that out, sayonara 🫡
07-01 - Wednesday
More SEM Work
Today I am working more in the off hours on some of the outstanding SEM tasks. I hope to finish cleaning all the small parts for the column tonight, and then hopefully get the SED re-soldered. I also have a couple large parts that need aqueous cleaned and ultra-sonic’d and then subsequently epoxied, which I think I will try to accomplish tomorrow, as Thursday there is usually a bit less traffic in the lab. After that, just a few small tasks including a butterfly valve rebuild, and we will be back on track for Adam’s return, which is likely going to be on Monday the 6th.
Aqueous cleaning
Did more cleaning tonight, I sadly only got through the liner tubes, because they each took over an hour to get polished, not even counting the rest of the cleaning process. This is mainly because one of the liner tubes contained some threads on the ID, which are not amazingly easy to clean polish out of.
I went through quite a few cotton swabs, to say the least:
After literally 5 hours of cleaning, I finally called it a night, going to have to get to the rest of the optical parts and the SED tomorrow and this weekend. I forgot to take more pics during the process because I was locked in, but our liner tube for the Objective Lens, and our upper liner tube, are both clean now.
This process requires a lot of prep and takes up a lot of the lab, it makes working very difficult because during the summer our lab is incredibly busy with all of our interns completing projects. I am going to try to get the rest of this cleaning done before the weekend so I can enjoy the 4th, but at this point its looking like I might be pulling some weekend hours to get it finished. We will see.
06-30 - Tuesday
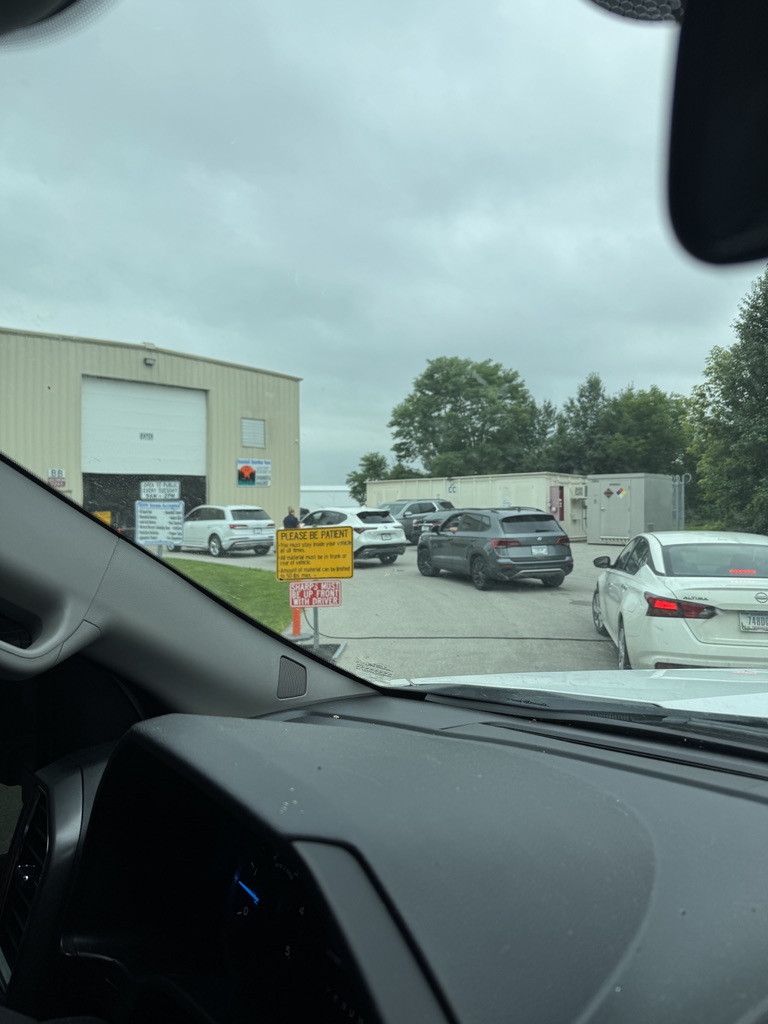
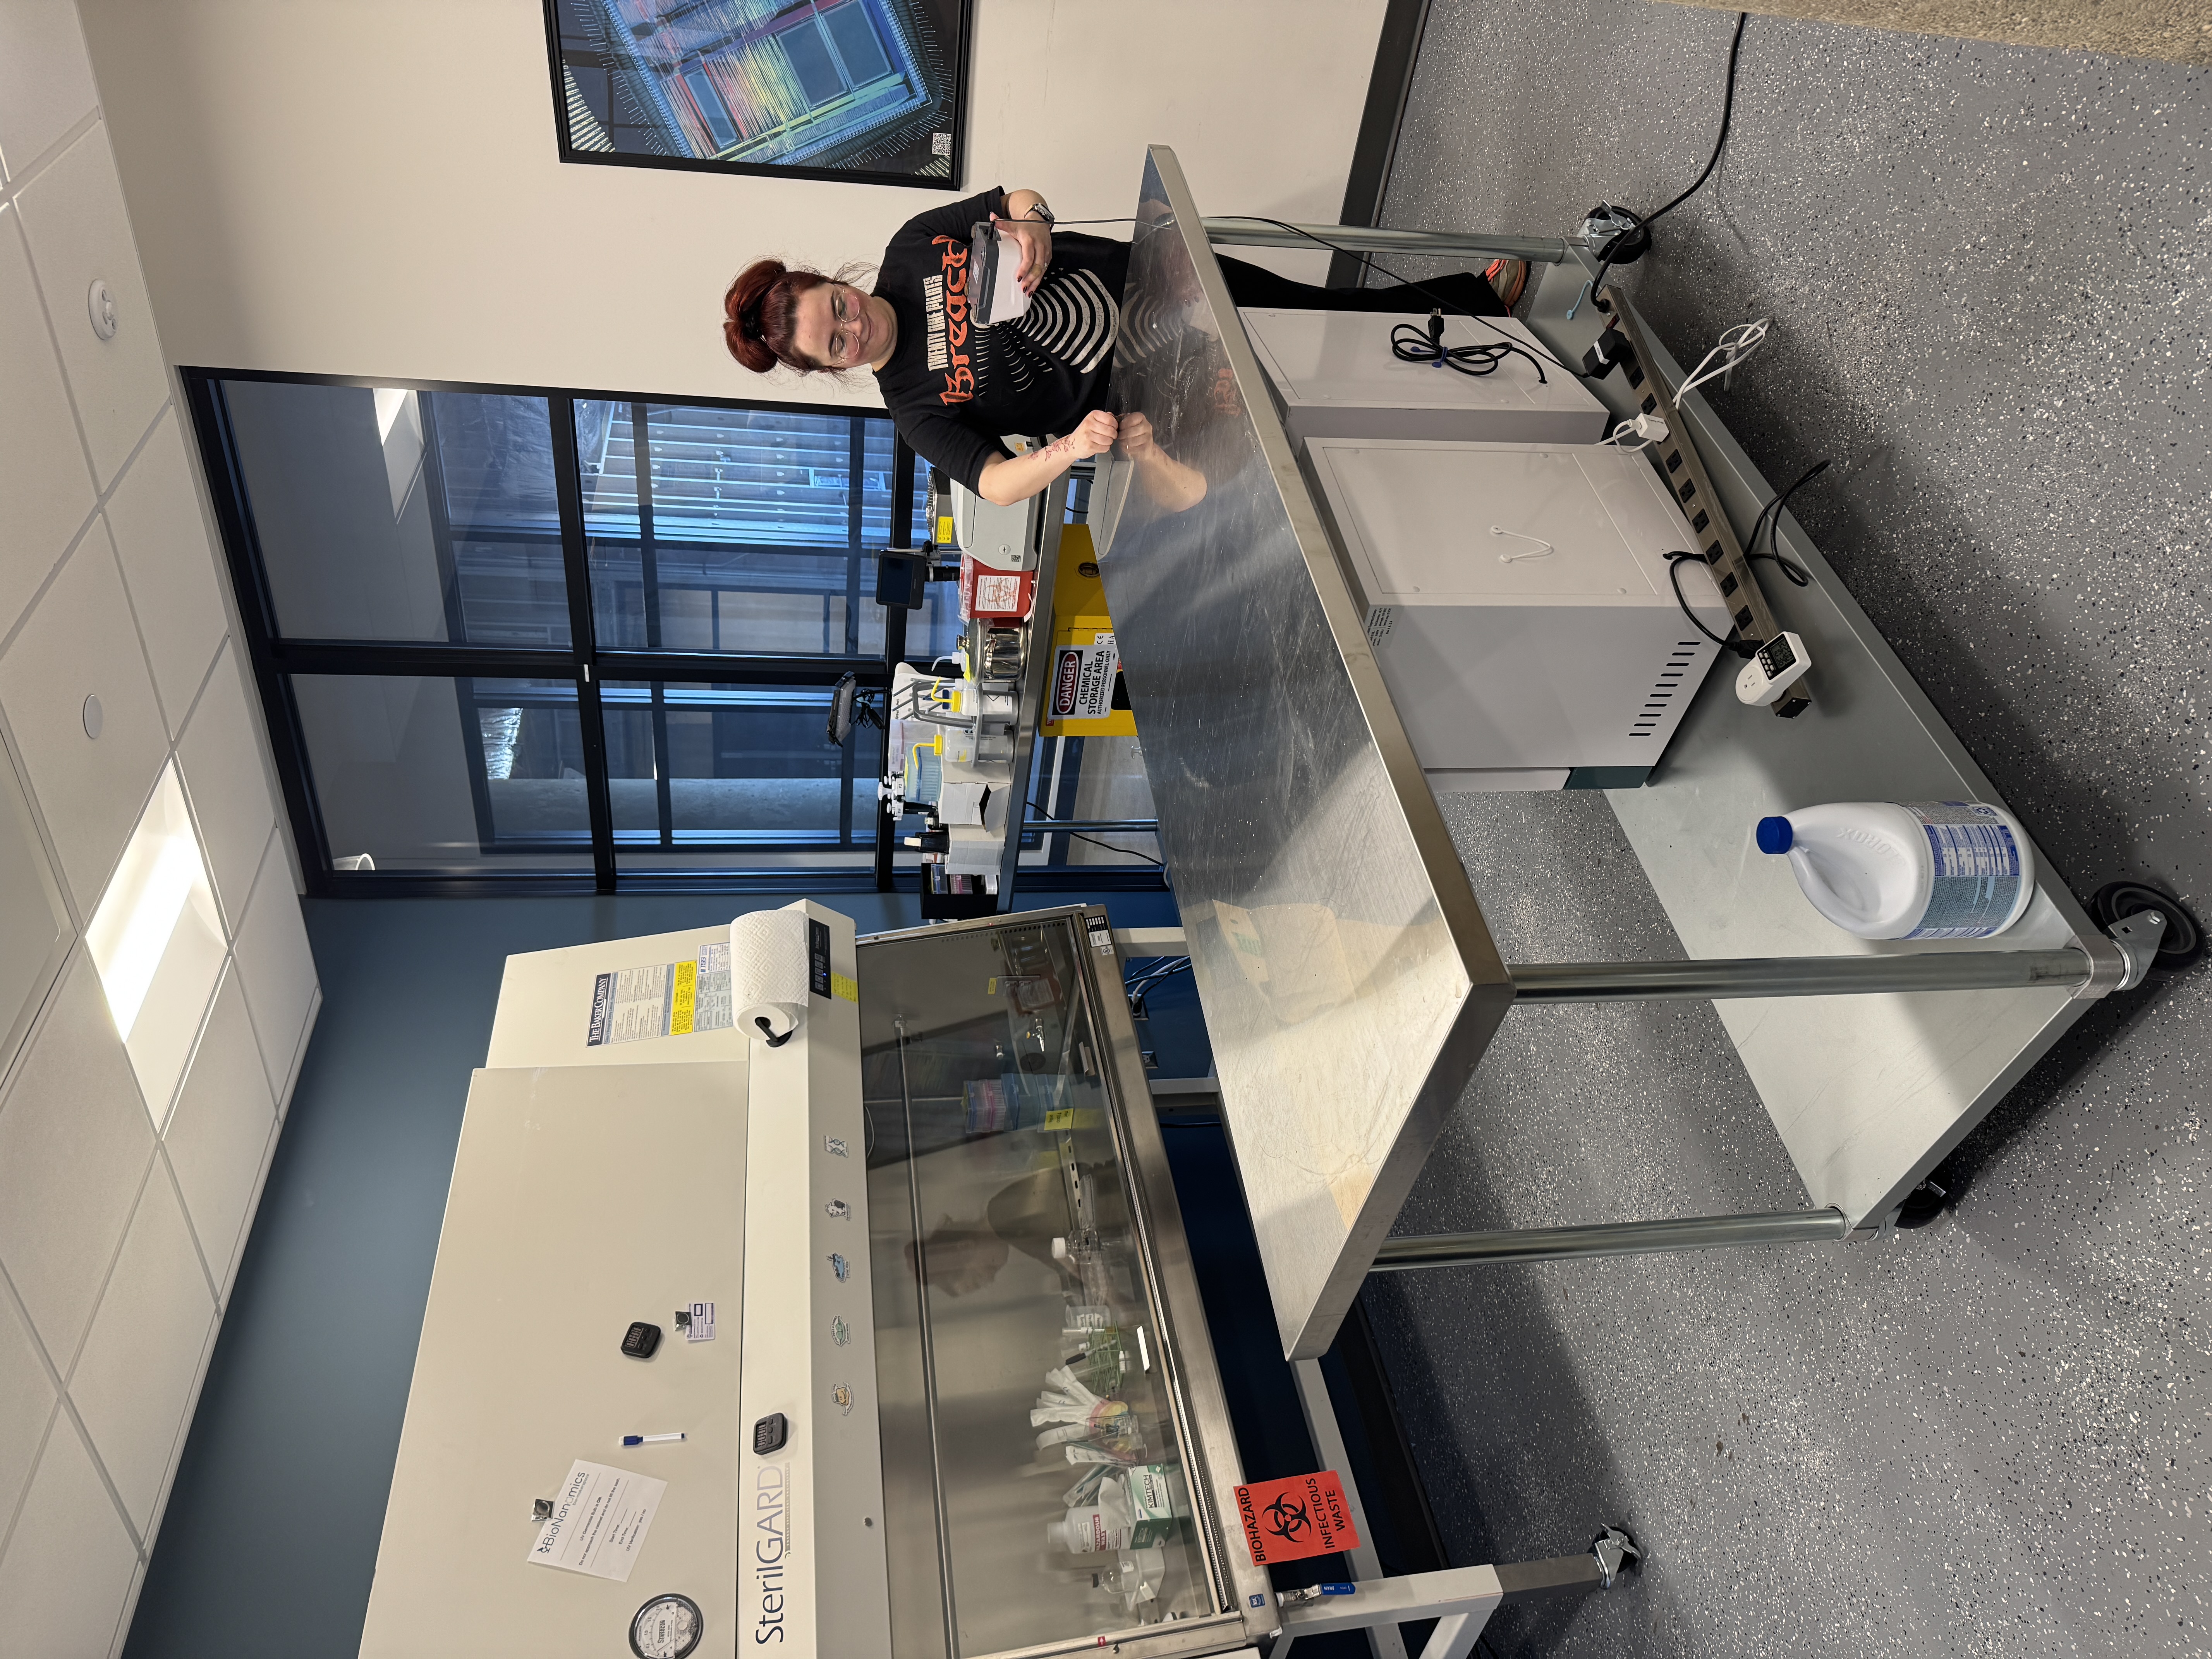
Yesterday I spent mainly on admin stuff, ordering, getting some returns setup for some defective products we received, etc. The plan for today was to continue organizing our space to be a bit more functional, and start making more DI water so I can do some small parts cleaning later tonight. First though, I had to make a run to Allen County Hazardous Waste to drop off some stuff from some systems we recently decommissioned for SEM work.
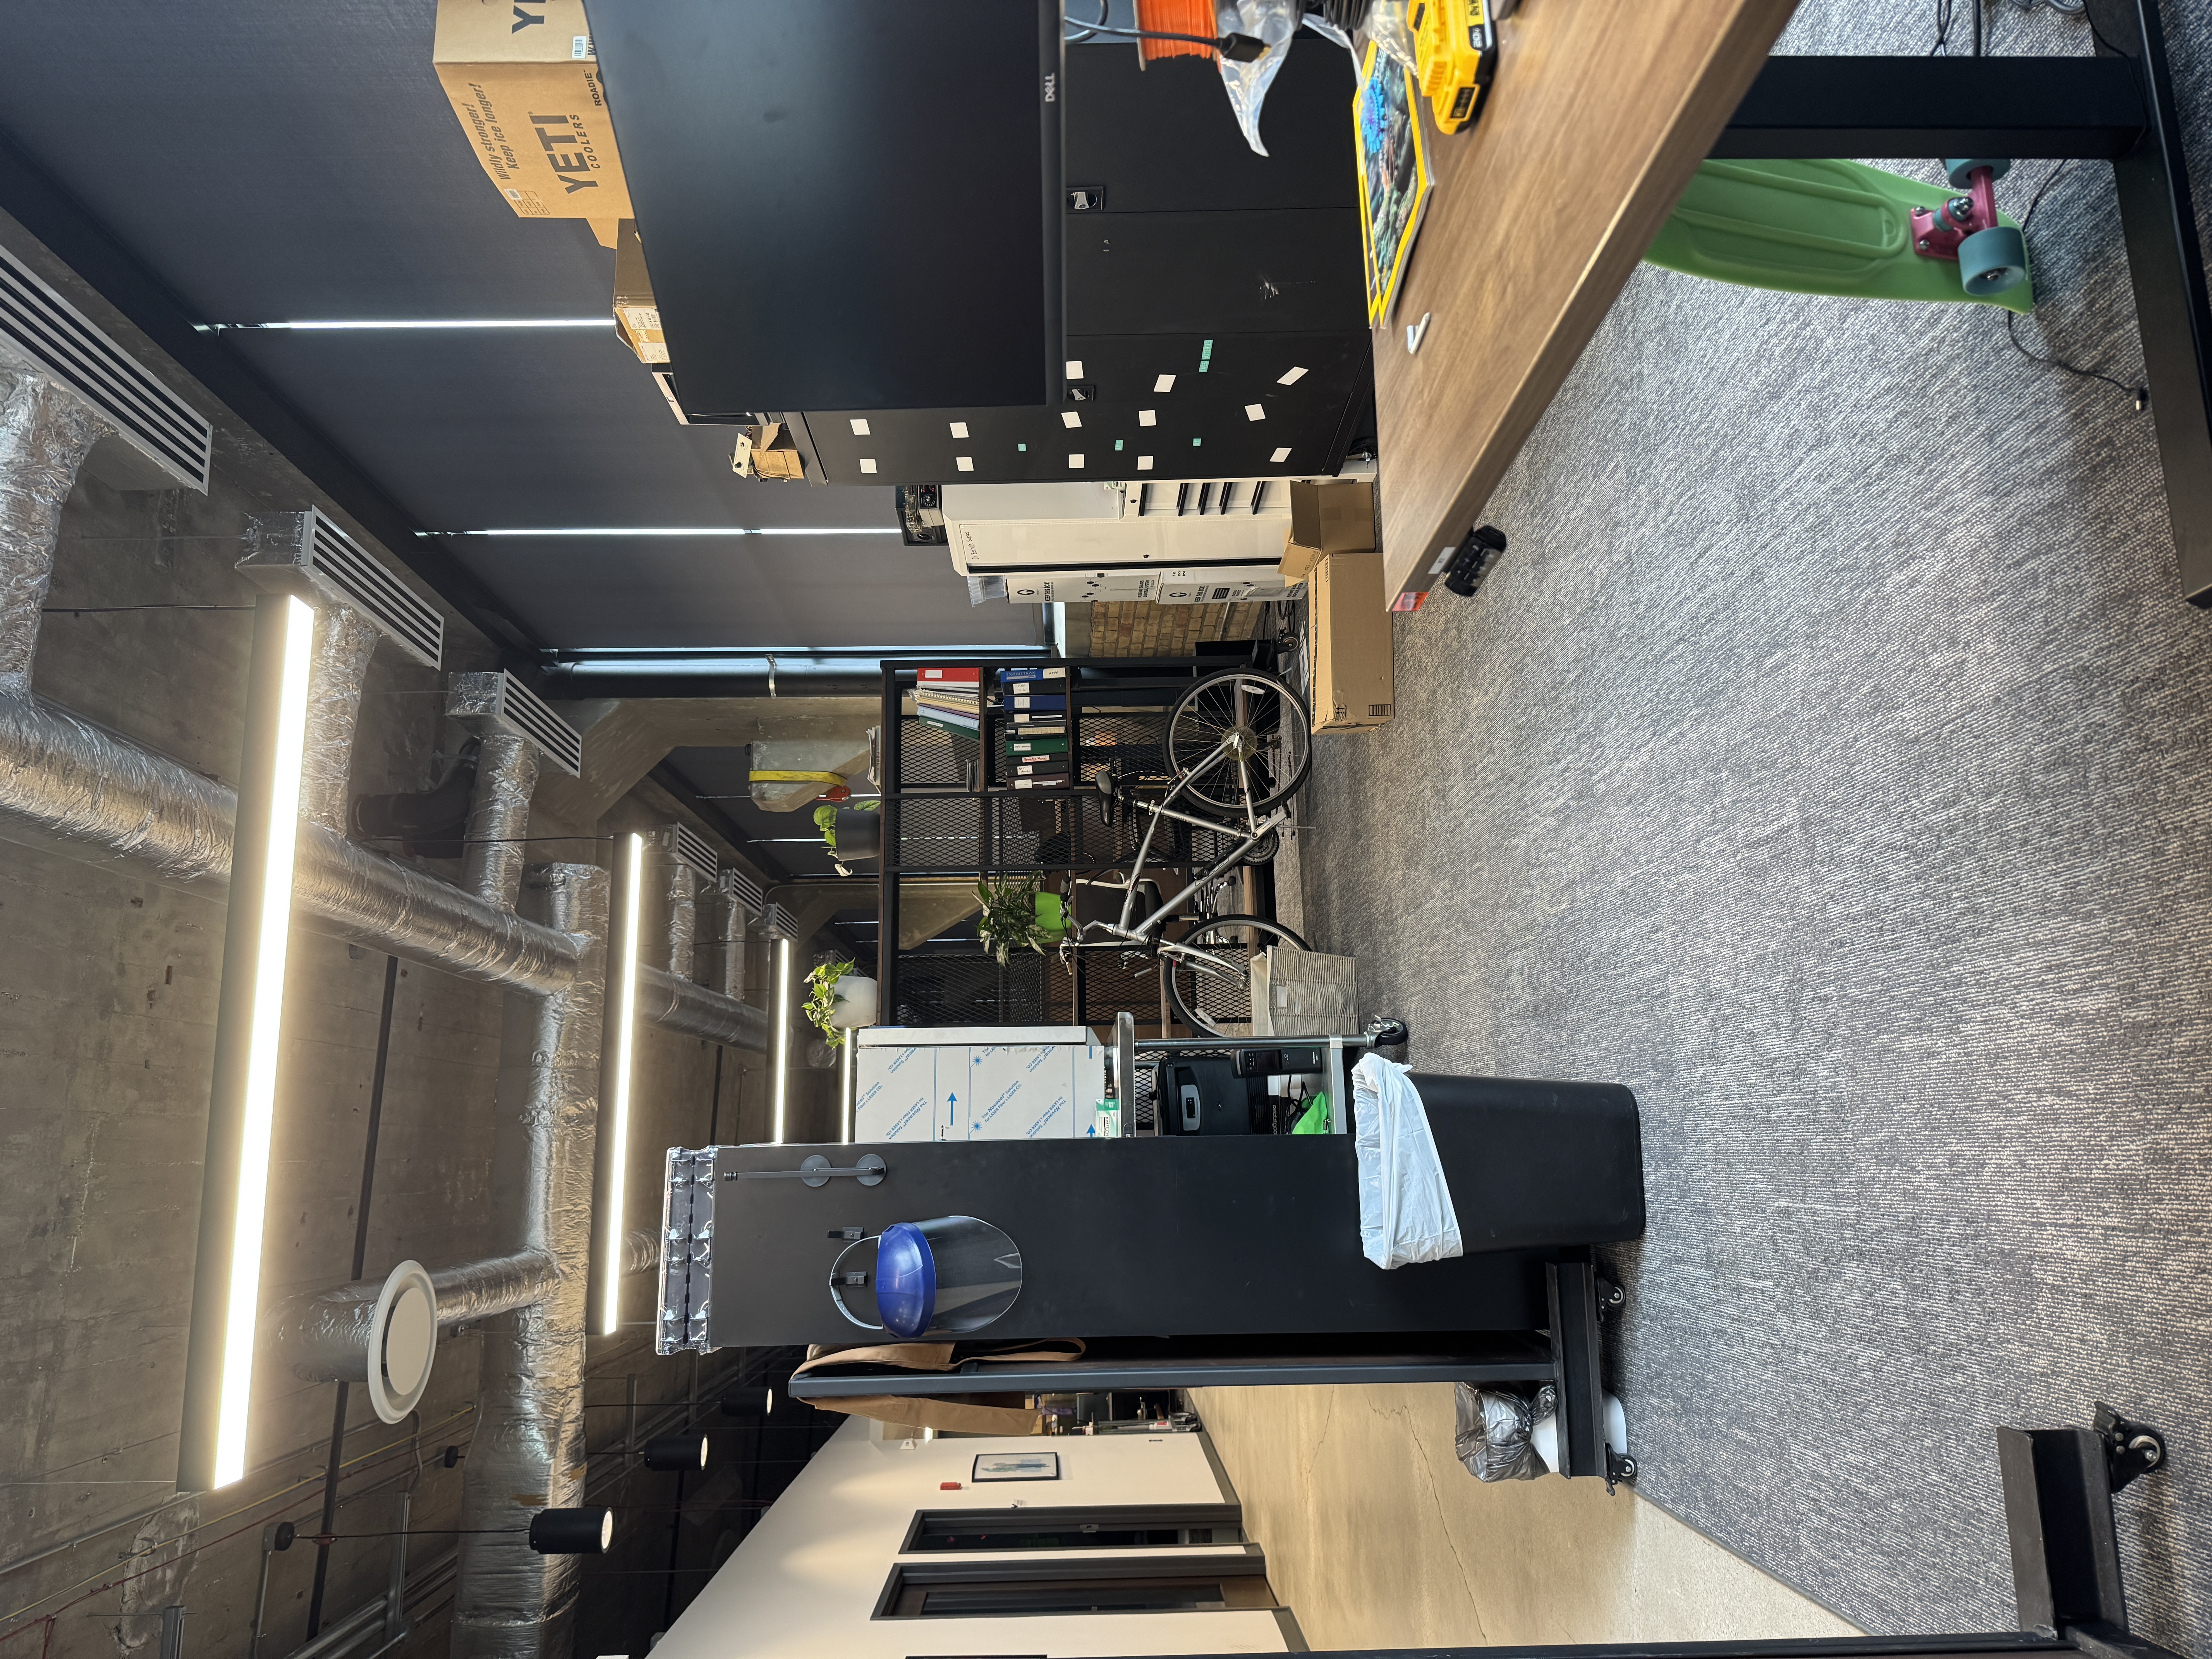
After making the run, I spent a long time finalizing our lab organization a bit. Desks have been moved, new working spaces have been created, etc.
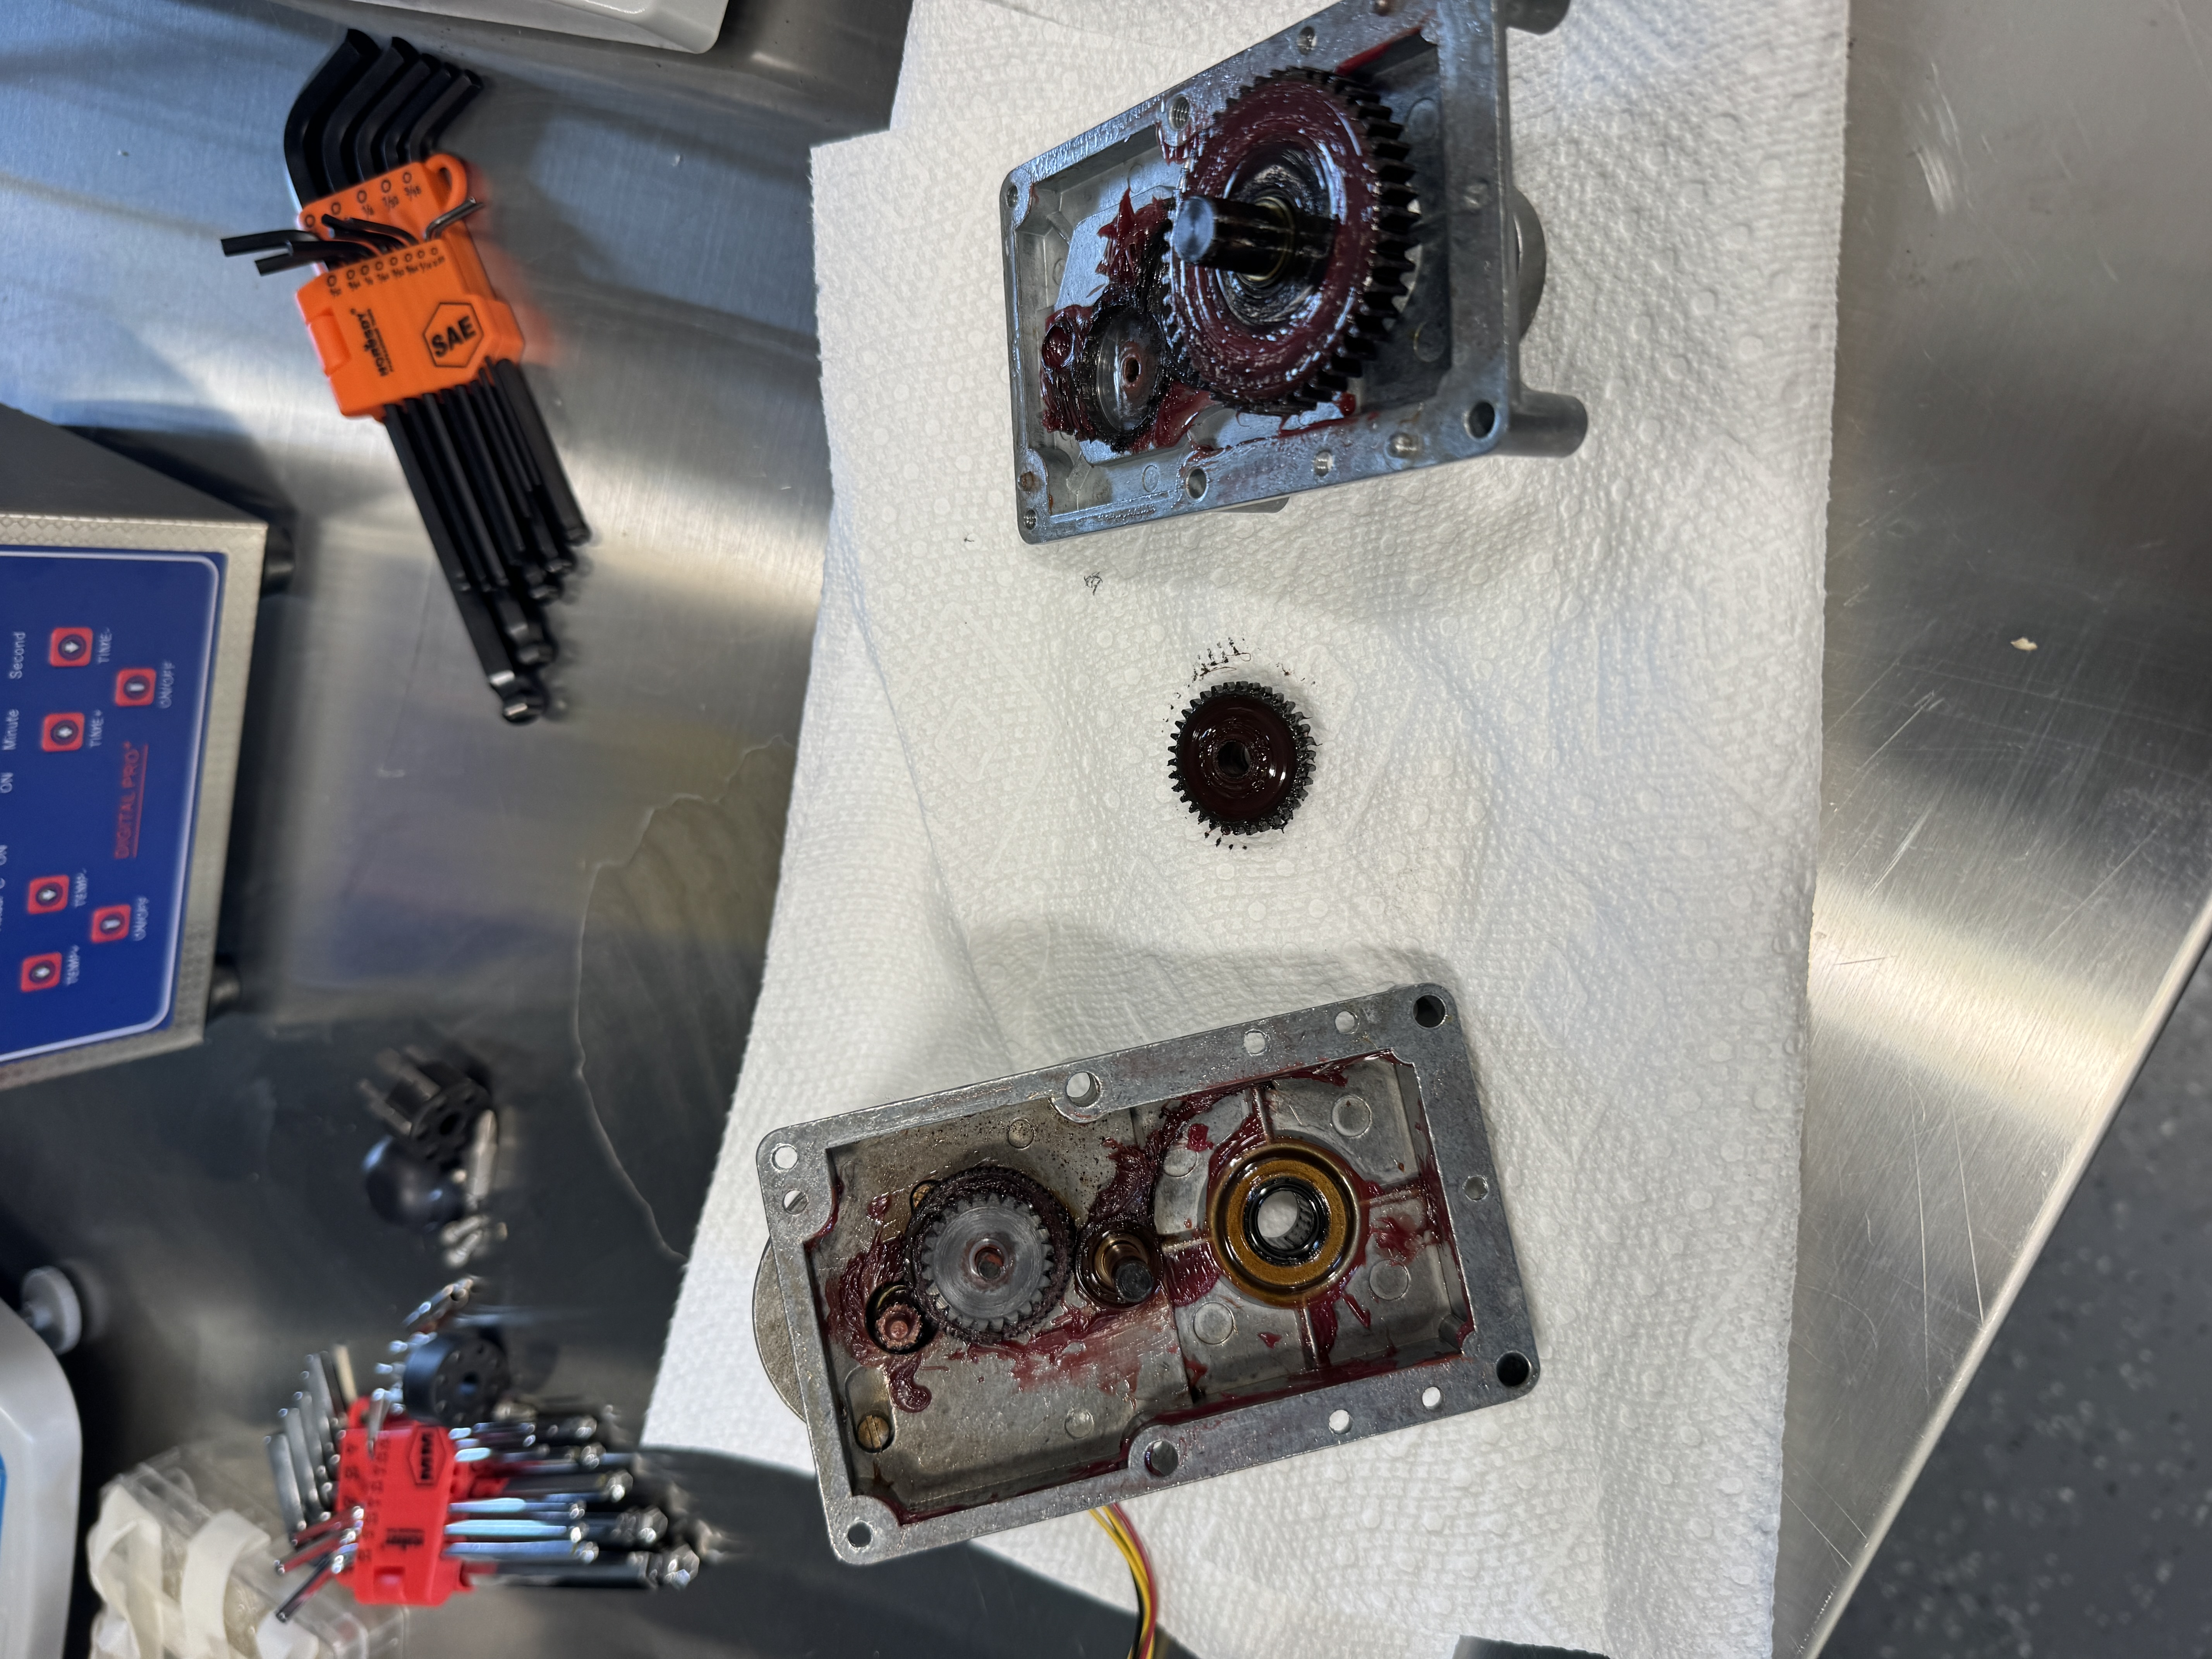
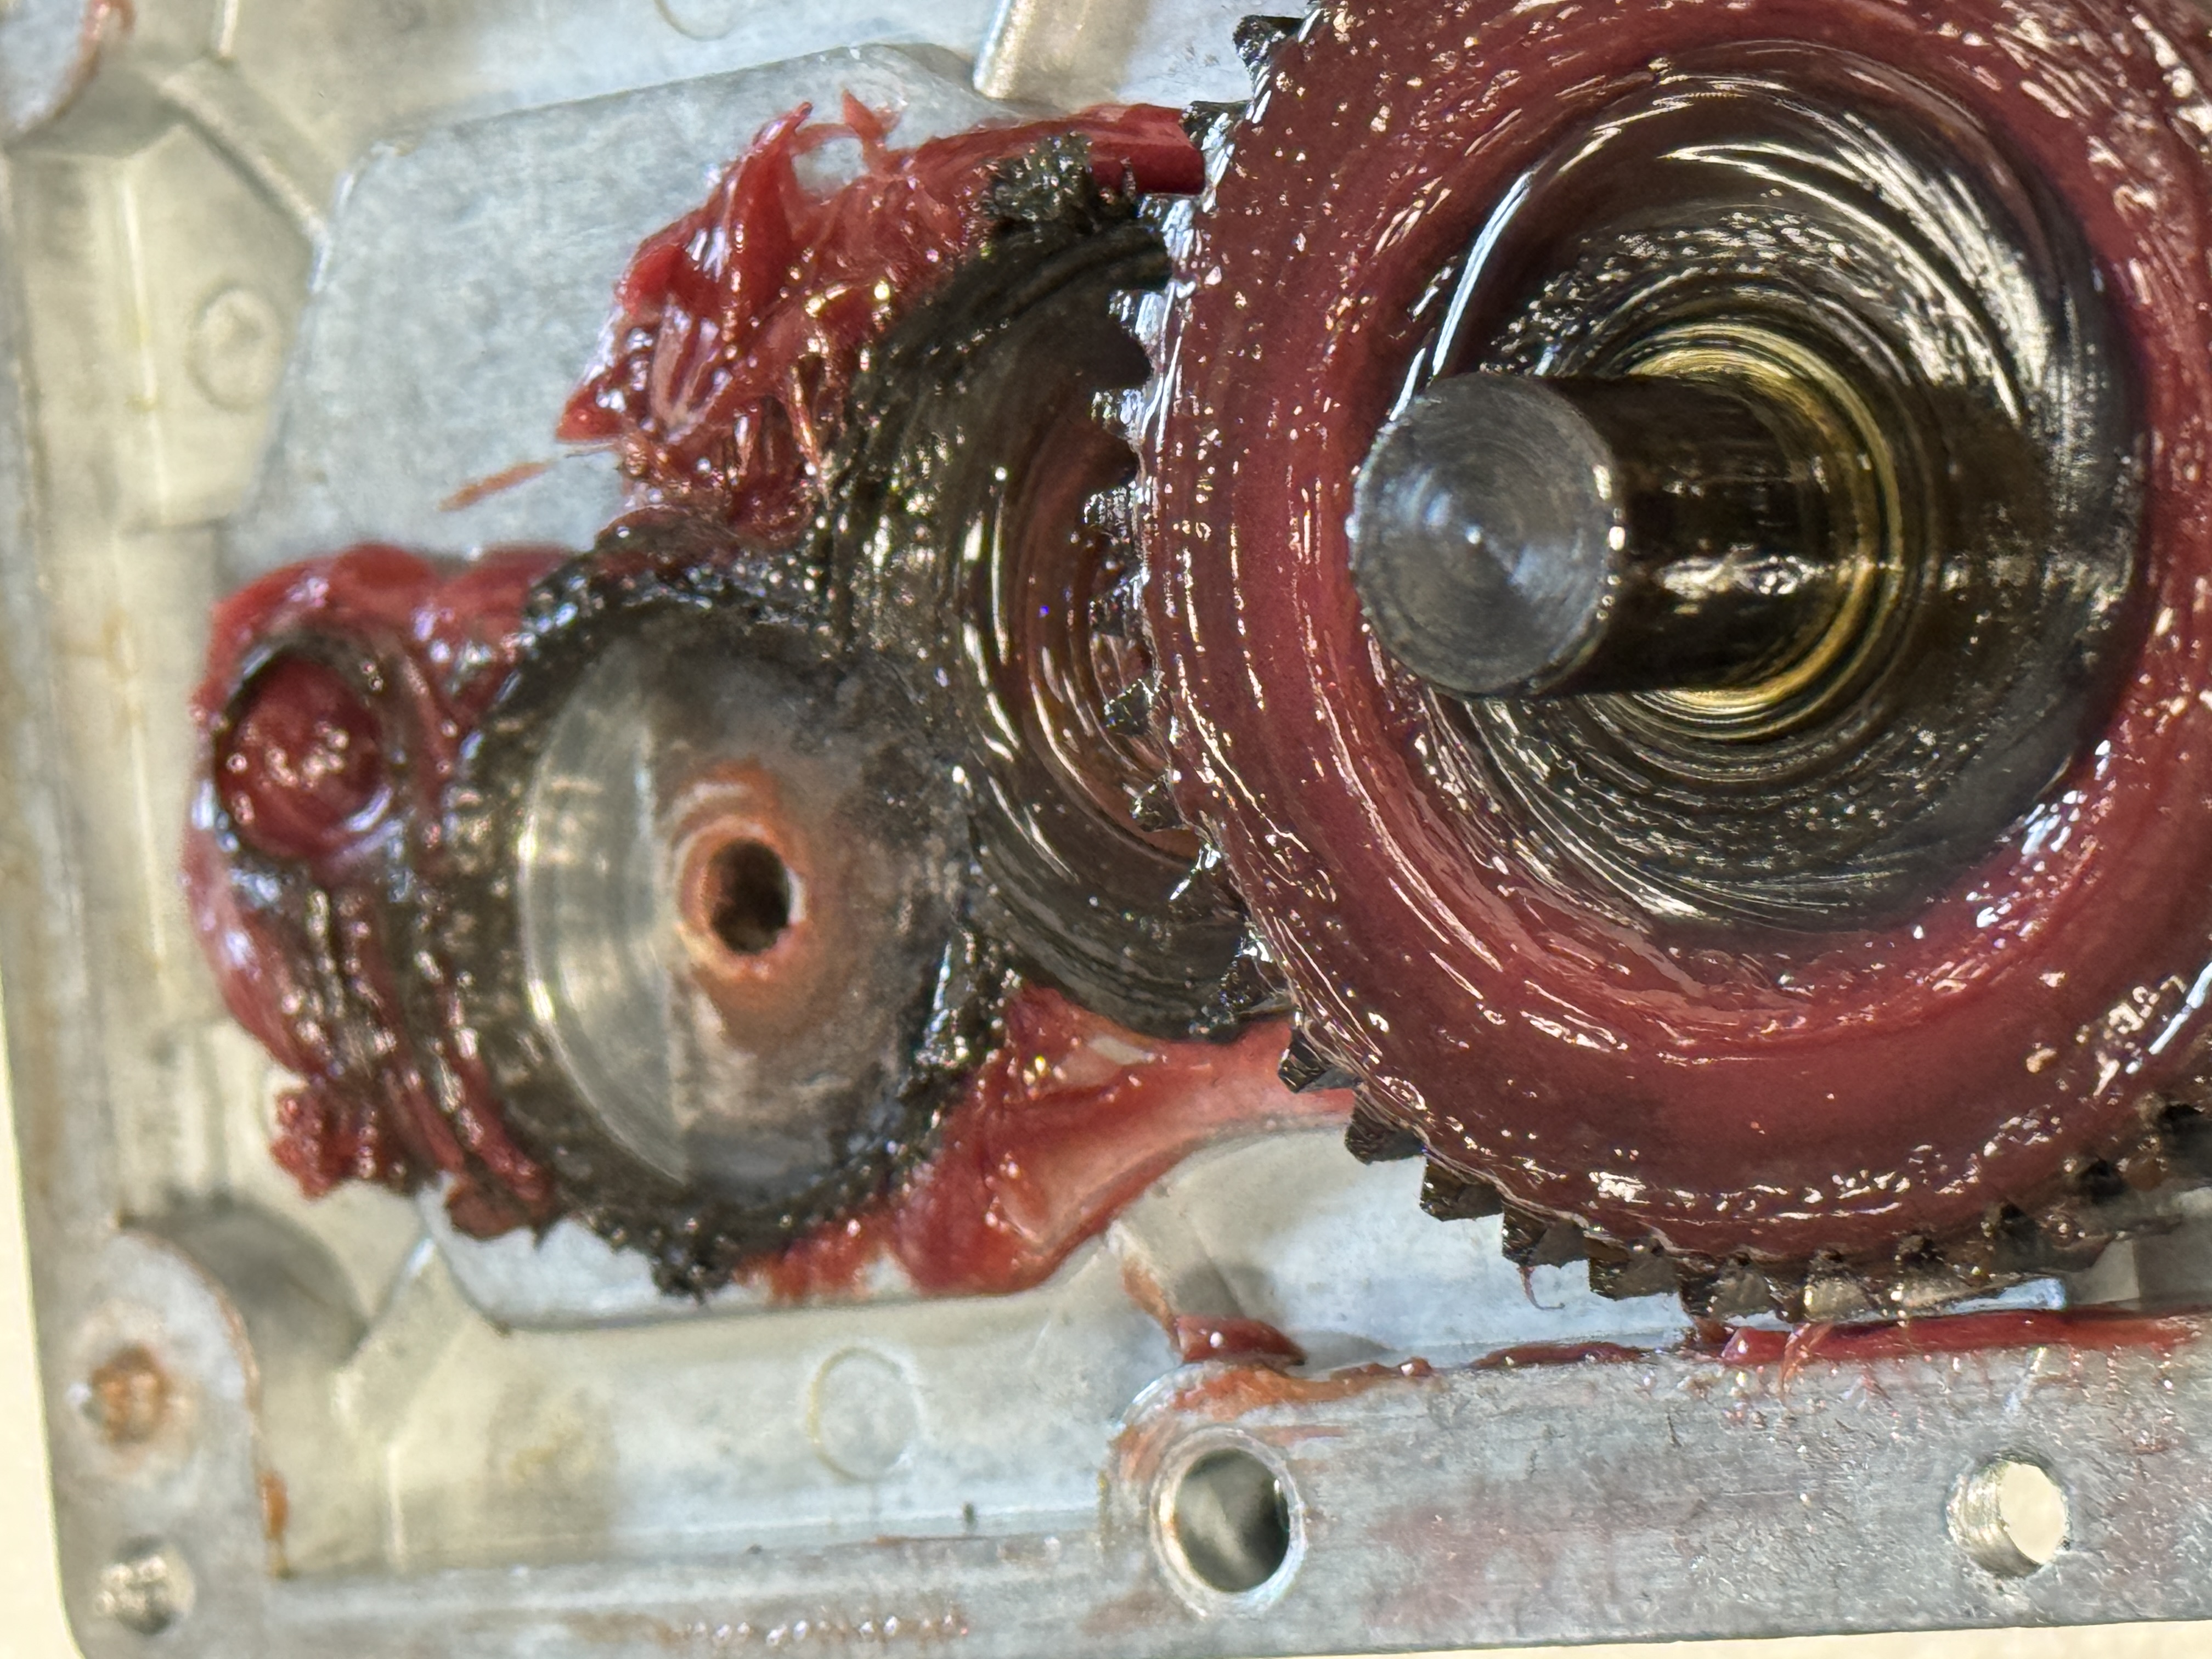
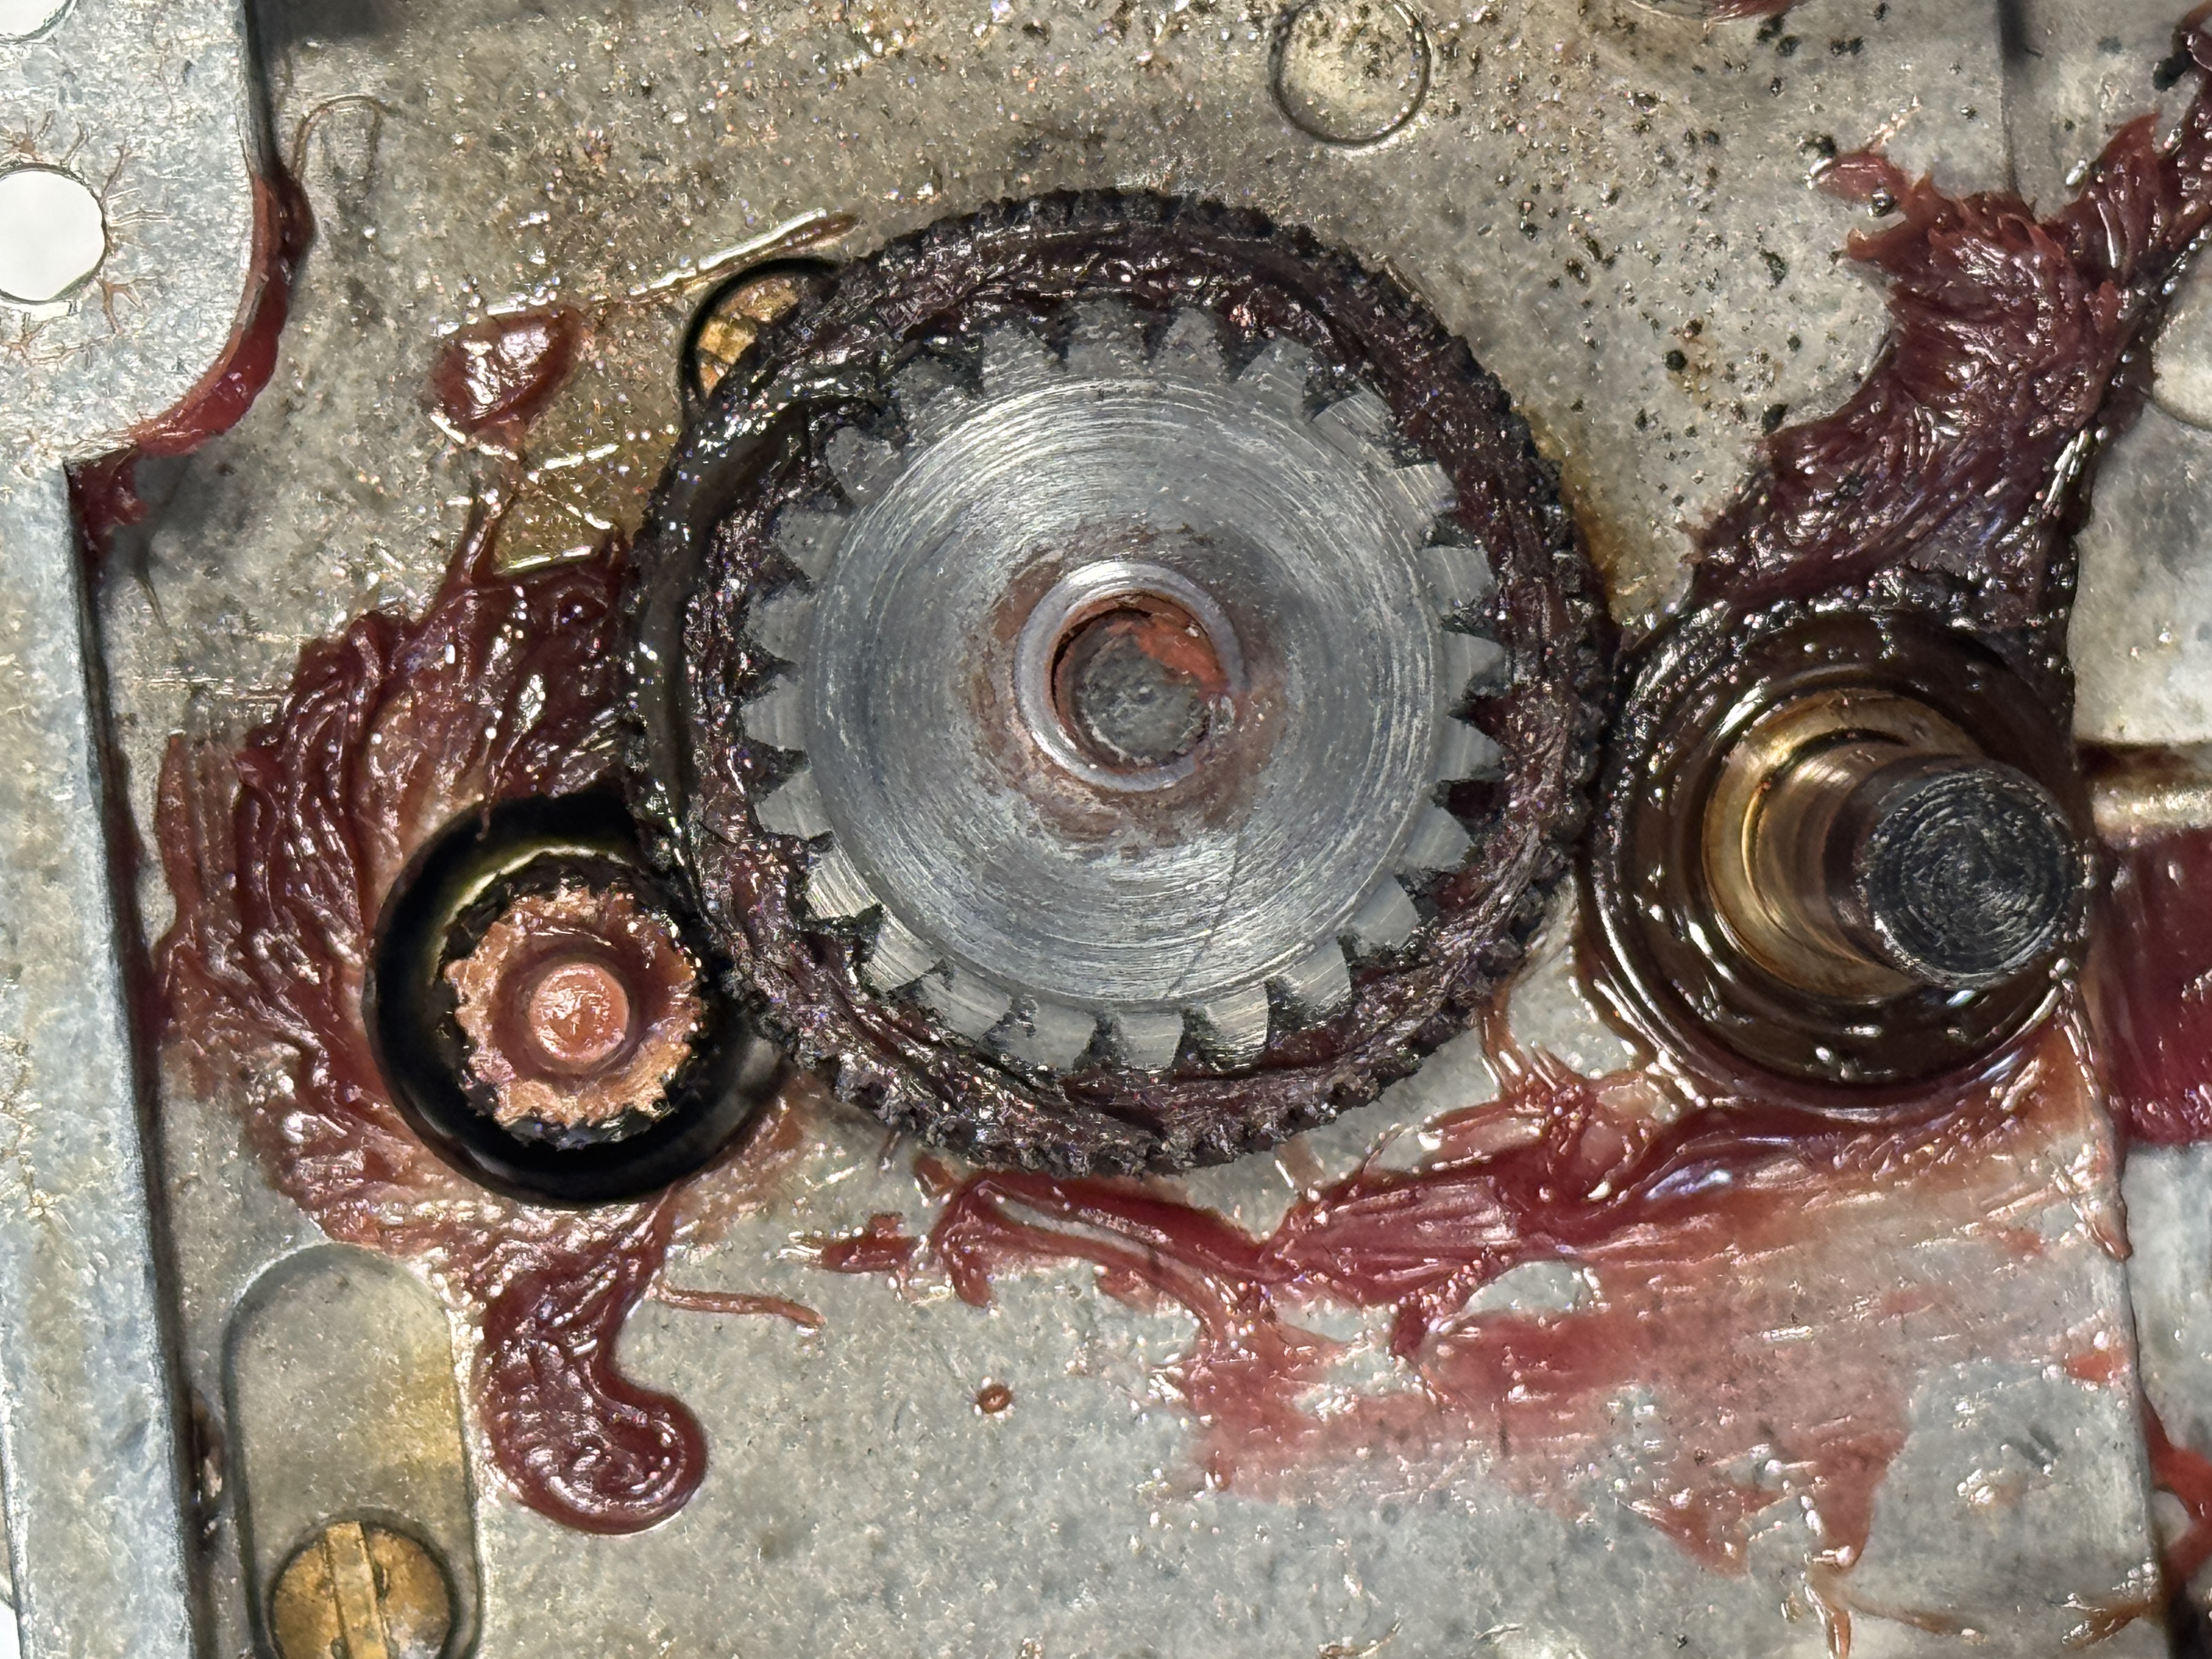
I decided that the inaugural use of this new workbench would be to take a look at our centrifuge, which started immediately shutting down upon boot yesterday.
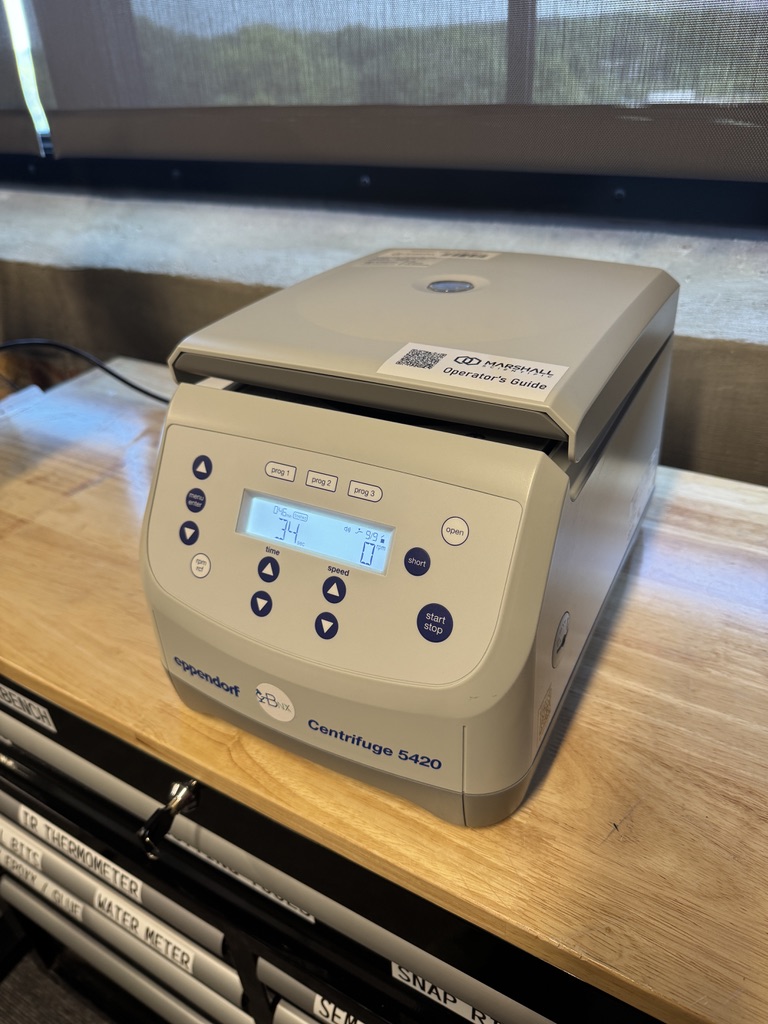
I spent a good hour digging into the manuals, trying to find a service manual. Our centrifuge was powering on briefly, but then just saying “Off” and shutting back off. I fixed this by doing absolutely nothing, after about 30 min of flipping it on and off and trying to find some error message, it just started working again. Bri and I sent an email to Marshall Scientific to see if our unit is still under warranty and if they can perform some servicing on this. Don’t get me wrong, I love repairing lab equipment, but I don’t want to tear into this thing if the resellers warranty is still active.
06-25 - Thursday
Lab Org Day
We have some aqueous cleaning to do still, probably a day or two worth, but I am taking a break to tackle more of the general organization. This project blew our organization up a bit, and its at the point where we really need to get it back in order.
Jayden and I spent a while today organizing the SEM spares back into a pallet so we can get them back into storage:
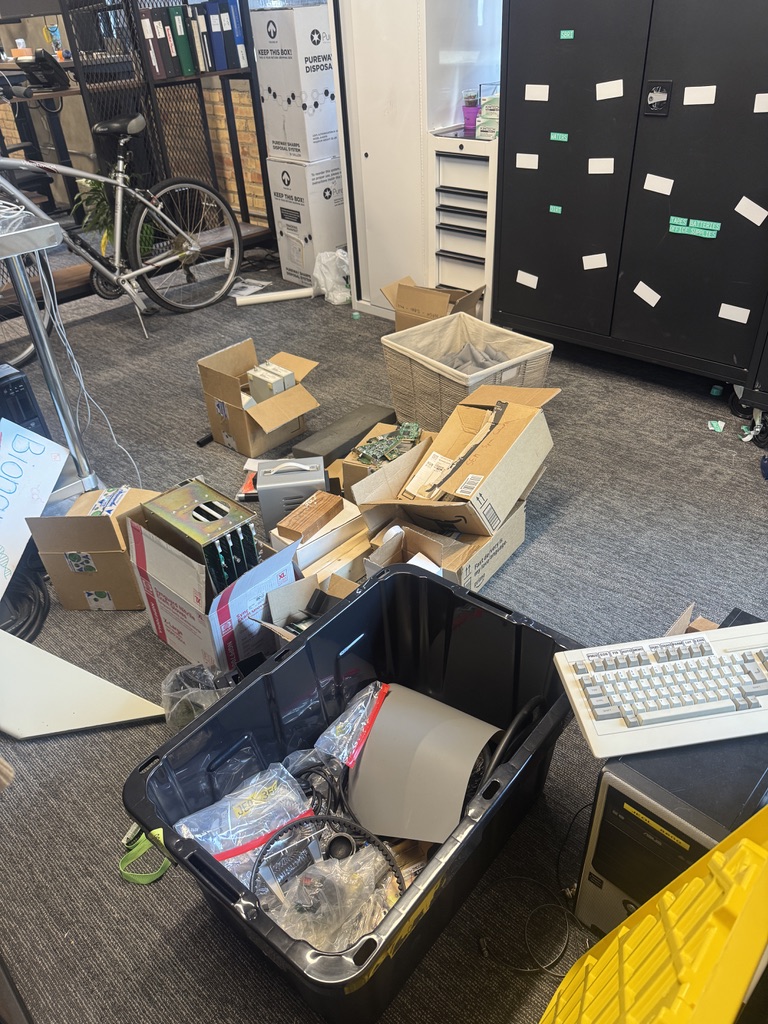
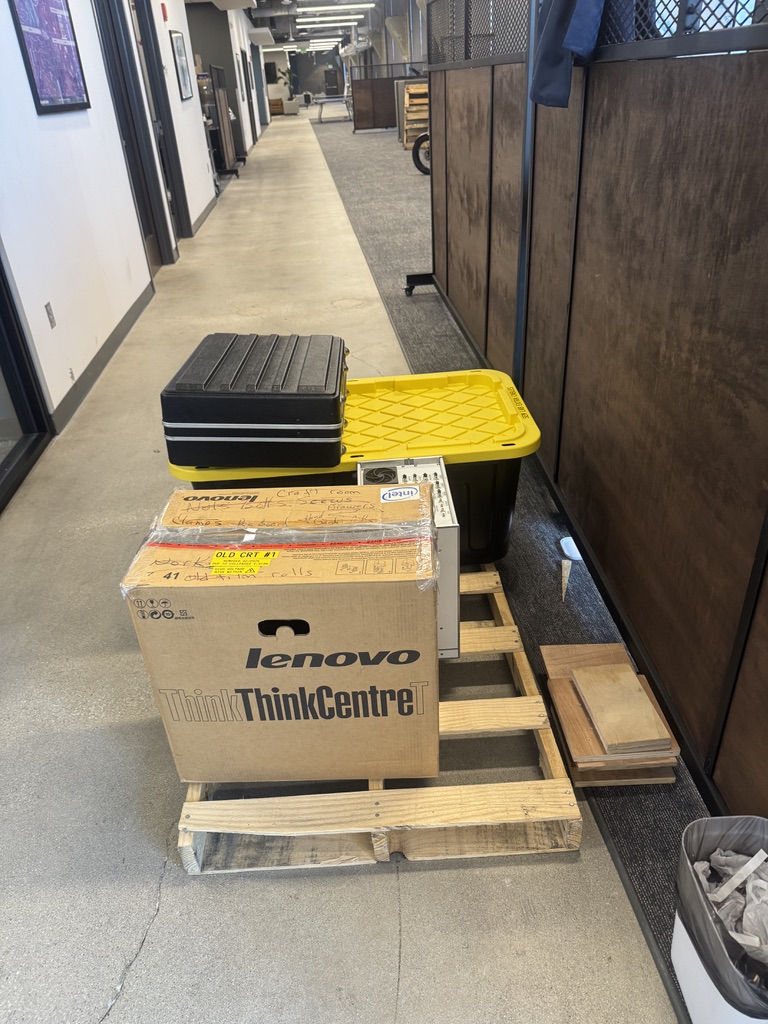
We opened up pretty much every spare part box we had while doing the SEM work, and I have a good handle now on what we will / won’t need for Phase 2, so its time to get all of the stuff we aren’t going to need back into long-term storage.
Sorting and cleaning everything was a nice little break from aqueous cleaning, and also was pretty needed as the lab had blown up quite signifiantly with junk and spare parts.
We also made some more DI water for use in more aqueous cleaning this weekend. I am probably not going to have much of an update tomorrow because its going to be mainly spent doing more of the same, I need to come here during off-hours a few times next week to do more cleaning.
06-24 - Wednesday
Ok, I have been bad at keeping up on daily notes, but really getting back to it starting today. I have been working on this long-form post still about the SEM rebuild, that is coming soon still. But its time to start giving some general updates here again too!
More Optics Cleaning
Last night Jayden & I spent 5 or so hours cleaning about 5 pieces of the optics stack for the SEM. This is some work Adam & I didn’t have time to finish while they were out helping, but that needs done before they get back to finish up. We cleaned the annode, the upper liner tube fixed apertures, and the CLPP fixed apertures and fixtures that hold them in.
I sadly and regretfully didn’t take pictures, but the process for cleaning these optics goes something like this:
- Metal polish - we use some cotton swabs to go over every surface and crack of all of these pieces with metal polish. We use UniPol metal polish, commonly used in the medical industry for joint replacements and things of the like. The important thing is a polish that is abrasive enough to cut through deposited contaminants, but not so abrasive that it will damage the surface of the optics. Once we have applied a nice layer of polish, we use a clean swap to remove it until no polish or contaminants are coming back on the cotton. Keeping the surface of these opitcs very smooth, and also in their original shape, is critical to the performance of the SEM. Damaging the surface curvature of these optics can mean game over for getting a good beam in the future.
- Windex quick rinse - after the metal polish, we give these pieces a quick rinse with Windex to get any more polish residues off, and then without letting the parts dry off at all, we give them a quick DI rinse and plop them straight into a plastic cup full of Mr. Clean (lemon). It is incredibly important to not let Windex dry on these parts. We don’t want the ammonia in the Windex to have time to react with the metal.
- Ultrasonic in Mr. Clean - these cups then go to the ultrasonic bath for about 10 minutes. The bath is preheated to 50C and we give the liquid in the cups some time to come up to this temperature before we start the ultrasonic process. We are using plastic cups to prevent metal-on-metal contact, which can quickly destroy optics in an ultrasonic bath. The Mr. Clean is a great solution because of some NaOH analogues in it that help to break down contaminants. Mr. Clean, if you are reading this, please make us a scentless Mr. Clean for lab use, the lemon scent is a bit much for this process.
- DI Rinse - after the ultrasonic, we give these parts an extensive rinse with DI water to get all of the Mr. Clean off. We built an on-demand DI water sprayer system specifically for this purpose. It requires thoroughly rinsing each one of these parts with at least a gallon or two of water to ensure all Mr. Clean is gone.
- CDA Blowoff - finally, after our DI rinse, without letting these parts dry, we give them a thorough blow-off with Clean Dry Air to get rid of all of the water on our part and the glove.
- Into laminar flow hood - finally, we take these parts into our laminar flow hood, and let them sit while we finish up the rest of the parts. At the end of all parts cleaning, we wrap these in a container lined with clean foil, and seal them up for re-assembly.
If theres any question as to why it took so long to clean all 650 other parts of this microscope, maybe you now understand. This is a very time consuming process, and it is critical to the performance of the SEM that we do it right.
Tomorrow Jayden and I may aqueous clean more, we may focus more on lab organization, there are a few things to do before Adam comes back which should be somewhat soon. I am mainly just getting prepared.
06-04 - Tuesday
Its been almost a month since my last tempo update. It isn’t because I haven’t been working, its mostly because I’ve been working so hard that I haven’t had time to sit down and write until this last week. I am working on a long-form post describing that work right now, but it will be probably the end of the week before you see it. It will be linked here.
Catching up
So whats happened in the last few weeks? Uhhh… a lot? What was supposed to be a 5-7 day tune up on the SEM turned into a 3 week rebuild from hell after we discovered major oil contamination issues while tearing the column down. We didn’t even really touch the SEM until day 5 of our “SEM work” either, because after running some tests, we found the electromagnetic noise from our chiller (which was also inadequate for cooling our system) to be too much for it to exist within 20 feet of the column. This facilitated a reworking of our entire plumbing setup, which was not a quick and easy task. Our ultrasonic cleaner also kicked the bucket within the first couple hours of cleaning parts, and our entire parts cleaning setup was not nearly at the caliper it needed to be at to clean literally an entire scanning electron microscope. This caused us to have to build our own RO/DI water system to spray HUNDREDS of gallons on parts for rinsing, a new sink and setup for washing these contaminated parts, etc. And we haven’t even gotten to the brunt of what was wrong with the system yet.
Needless to say the system looks like this right now:

You might see here a pile of parts, what I see here is many hours of scrubbing, sonicating, and drying, tons of pieces of this instrument. This table represents nearly 60 hours of work just accounting for the cleaning.
So, the good news is, every one of the pieces wrapped in tinfoil has been vigorously decontaminated and cleaned. The bad news is, our SEM tech Adam, who graciously donated a lot of extra time to us, finally had to leave us for a couple weeks. We will be resuming work in probably 2-3 weeks on this project and finally re-assembling everything. In the mean time, I have a lot of other parts of the lab I need to get in order, and a lot to clean up from this project.
Thats mostly what I have been doing today so far, catching up. I got a nice new eye-wash installed in the lab, did some organization, some returns, some orders, etc. I have a stack of about 60 receipts to enter from the last 3 weeks sitting behind me, and a lot of random stuff that I have been neglecting the last few weeks since this project got so insane. I am going to try to continue to make regular updates as I work and not get out of the habit again, but hey, at least you’re getting a nice long-form post about all that soon.
05-04 - Monday
Acquiring supplies
Today my primary and only goal was to source a water chiller off facebook for some extra firepower for our cooling setup. I managed to get in touch with a guy up in Sturgis last night who had a Vevor CW-5200, a decent industrial chiller, a short drive away. I made a deal to come pick it up this morning.
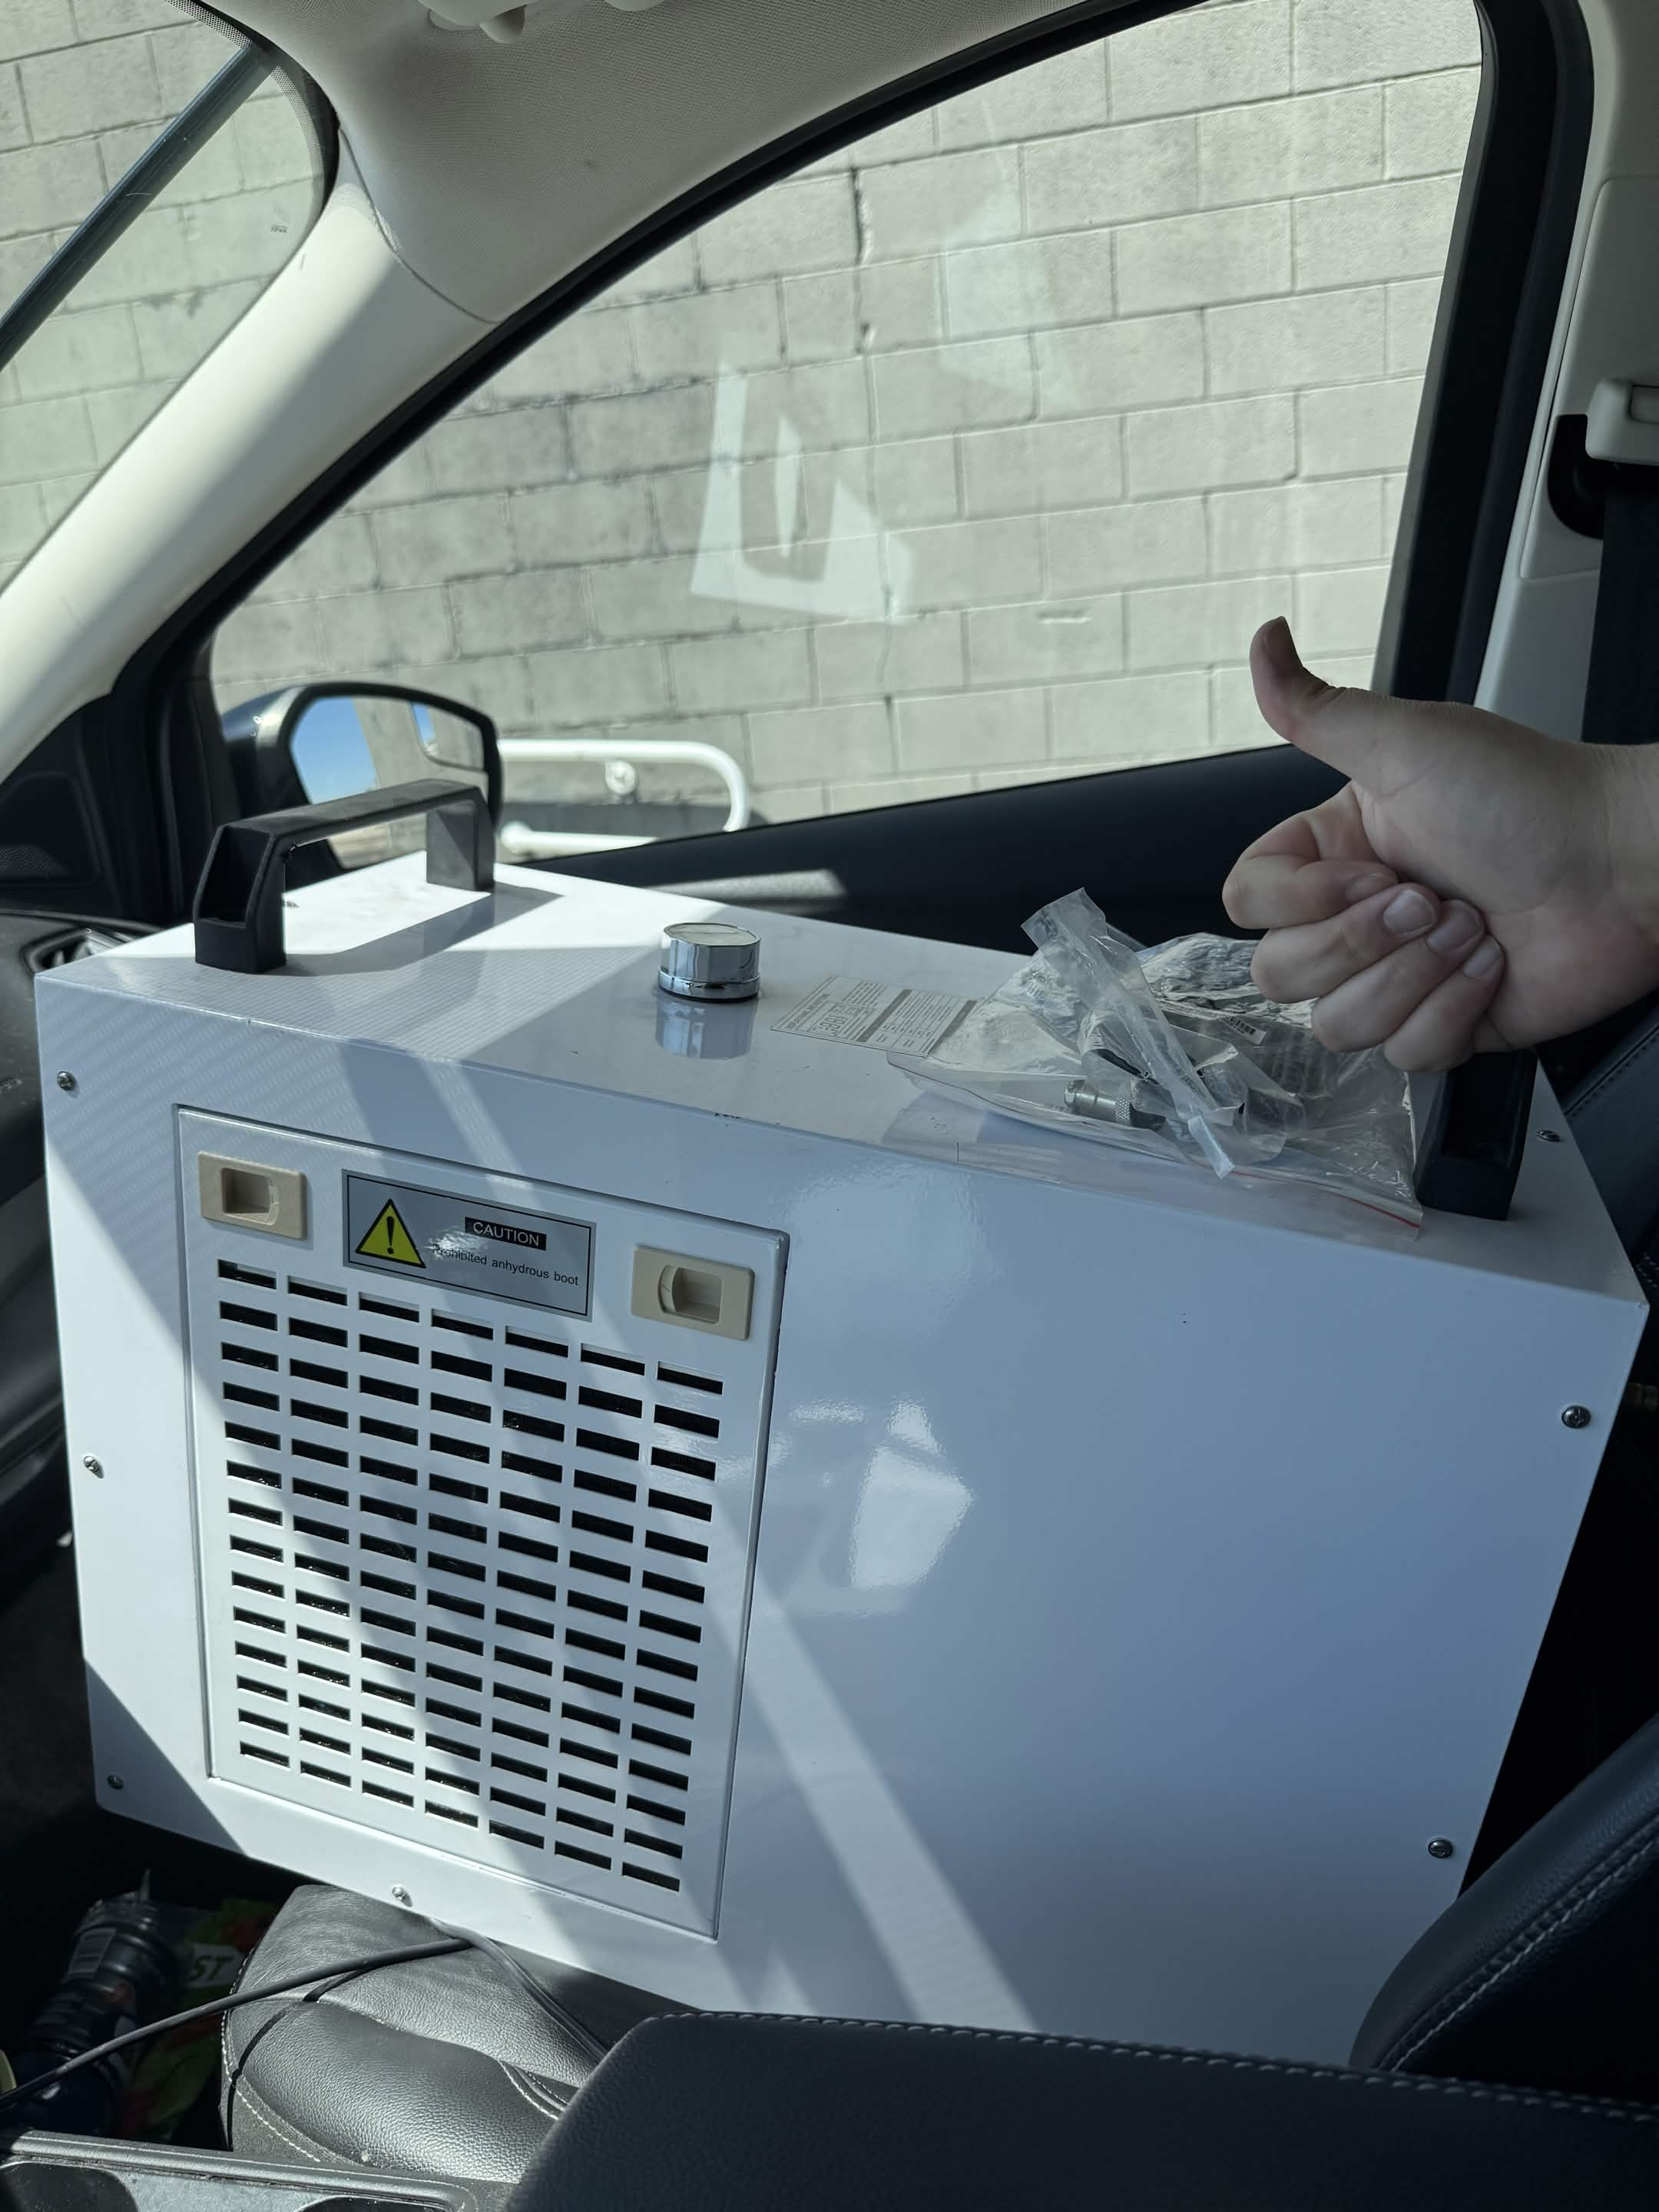
After grabbing that, I had to also stock up on some helium.
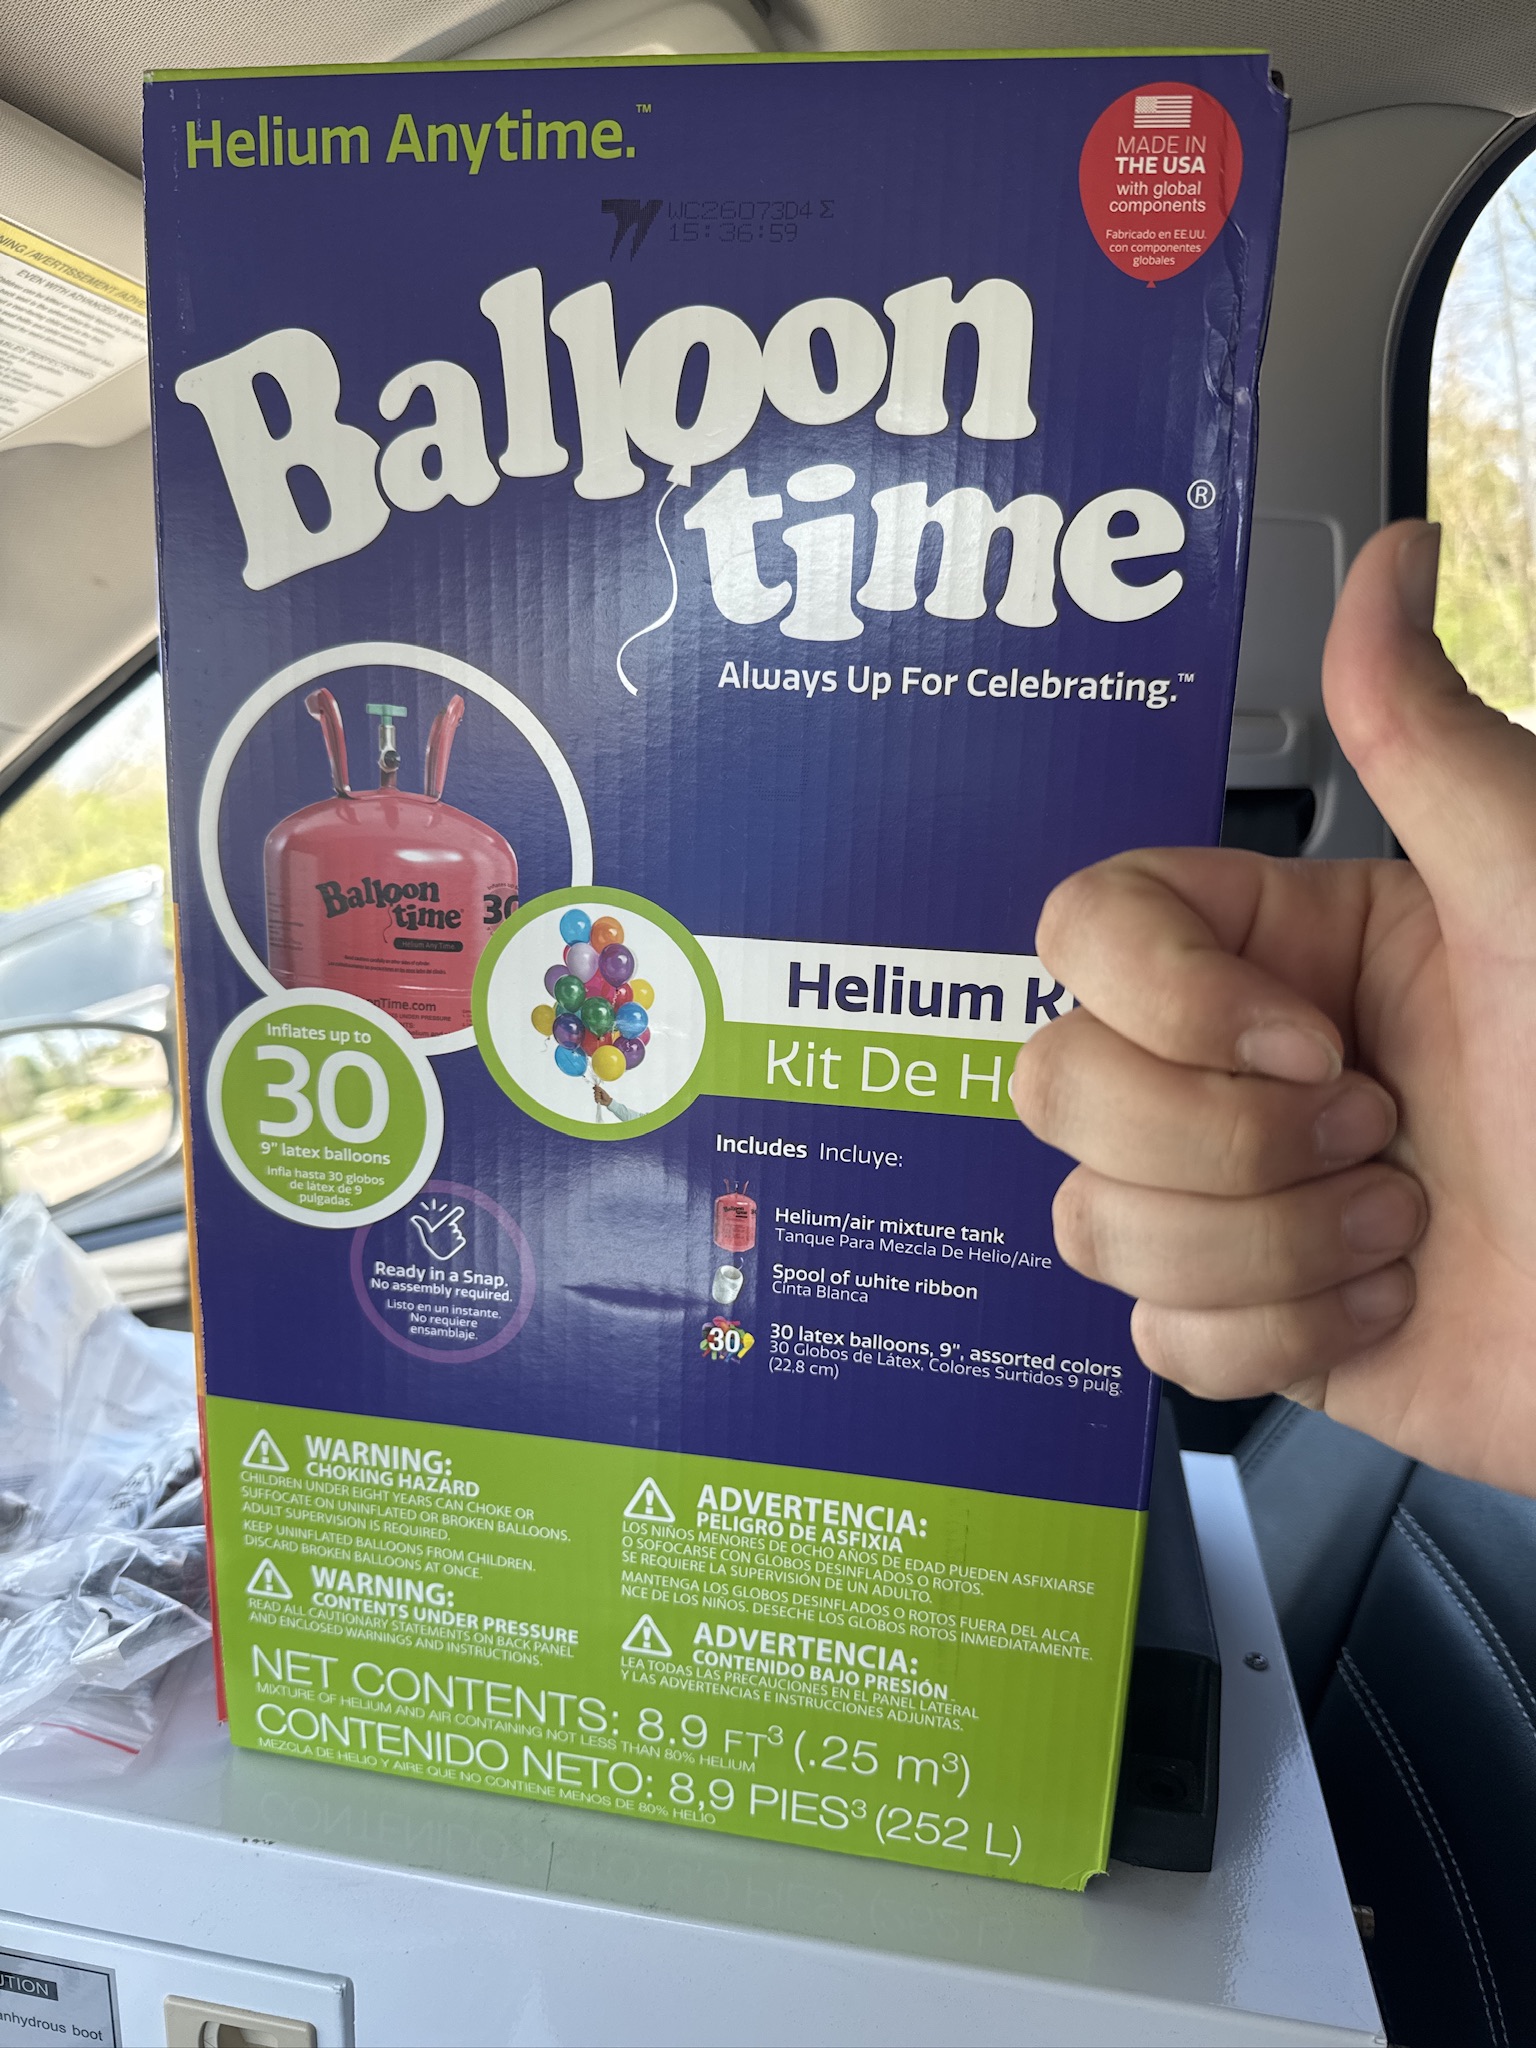
The helium is also to aid our leak checking efforts, since its atoms are so light, it gets sucked into vacuum systems more easily than almost anything else. The idea behind helium leak checking is we attach a device that is extremely sensitive to helium atoms, usually a mass spec tuned just for helium, to the part of the system you want to check. You then spray helium around possible areas of concern, and if any gets through, you’ve found your leak.
Adam is bringing one out later this week, it will be fun to get our system airtight again!
05-03 - Sunday
Today I finally managed to get the leak rate check done. I started by stripping the panels off the main microscope body and taking initial measurements.
Vacuum Leak Rate Check Procedure for JSM-6400
Just for fun, here is the procedure I am using to perform this leak rate check.
Step 1: Pump down and take initial measurements
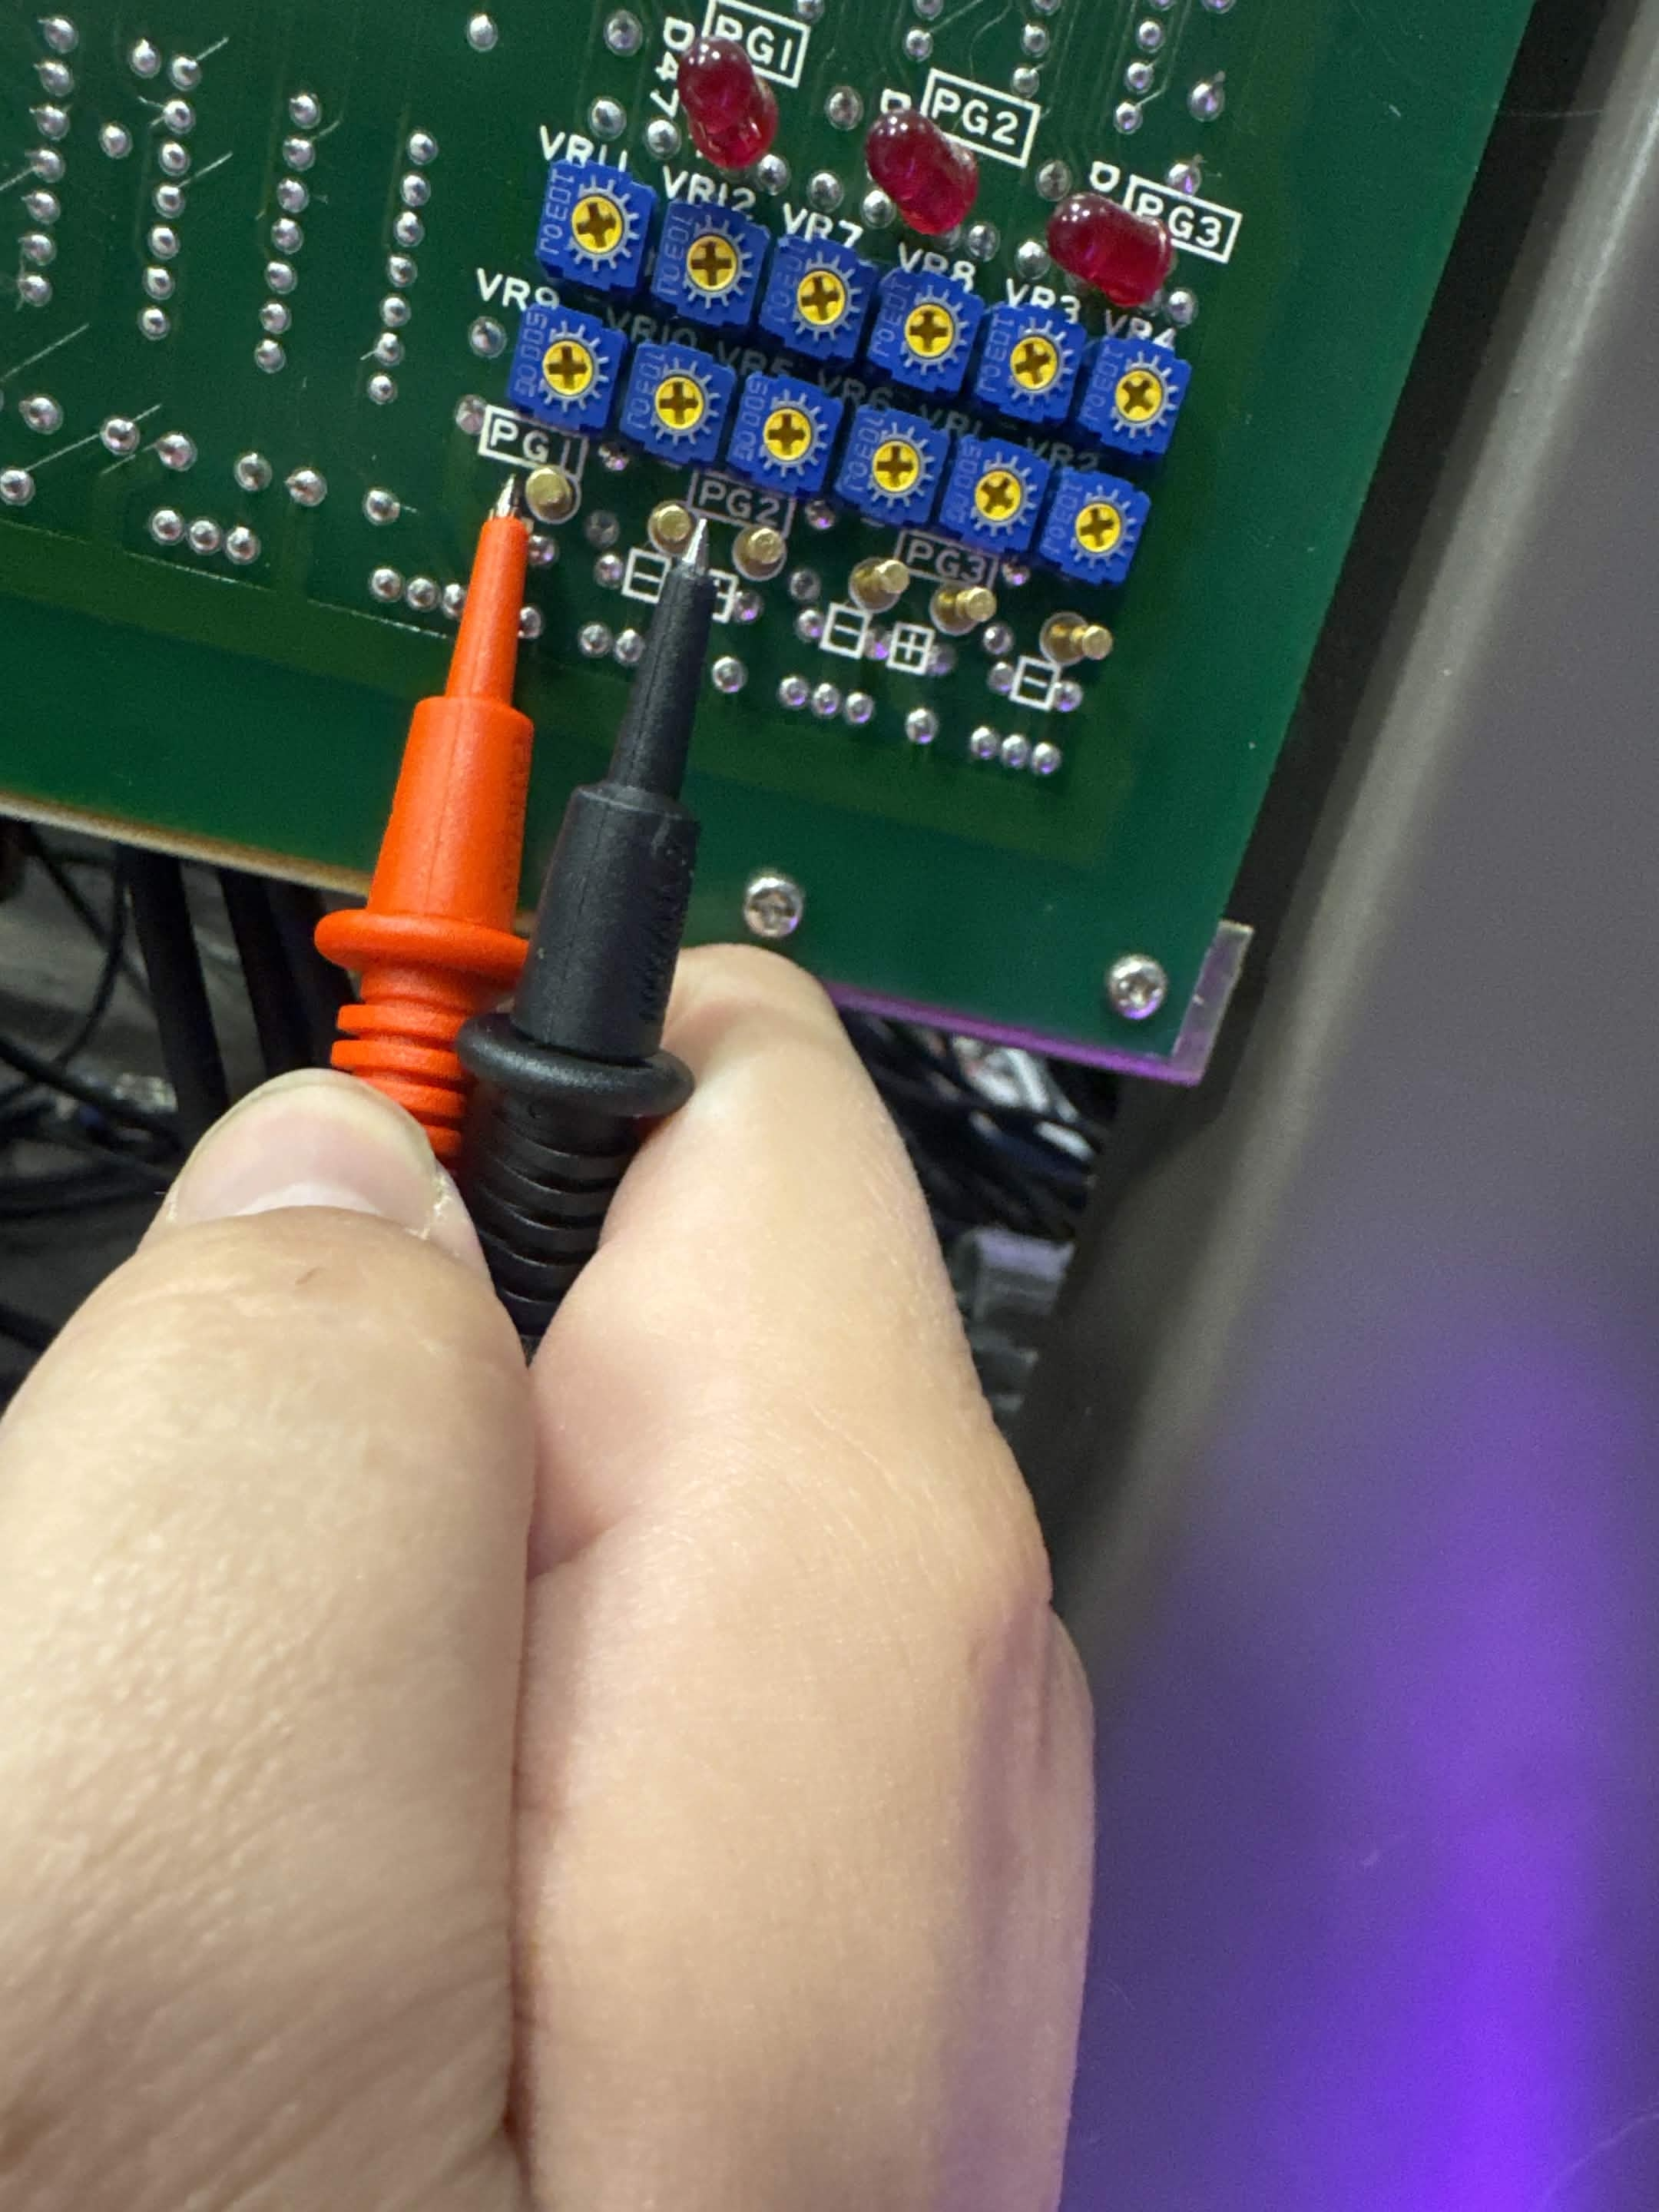
The very first thing we need to do is leave the SEM running and pumping down in auto vacuum mode for a few days. At this point in the week, it has been on for a week already, so that is done. Once that is done, we need to take some initial measurements on our PG 1, 2, and 3 test points.
Initial Values
| Gauge | Initial Value (μA) |
|---|---|
| PG1 — Chamber | -1.0 |
| PG2 — Gun Chamber | -0.5 |
| PG3 — Buffer Tank | 0.2 |
Our initial values for the PG test points were all between -1μA and 0.2μA, which is odd. It seems like the last person who calibrated this system did so incorrectly, as the set points for these gauges should not be 0.
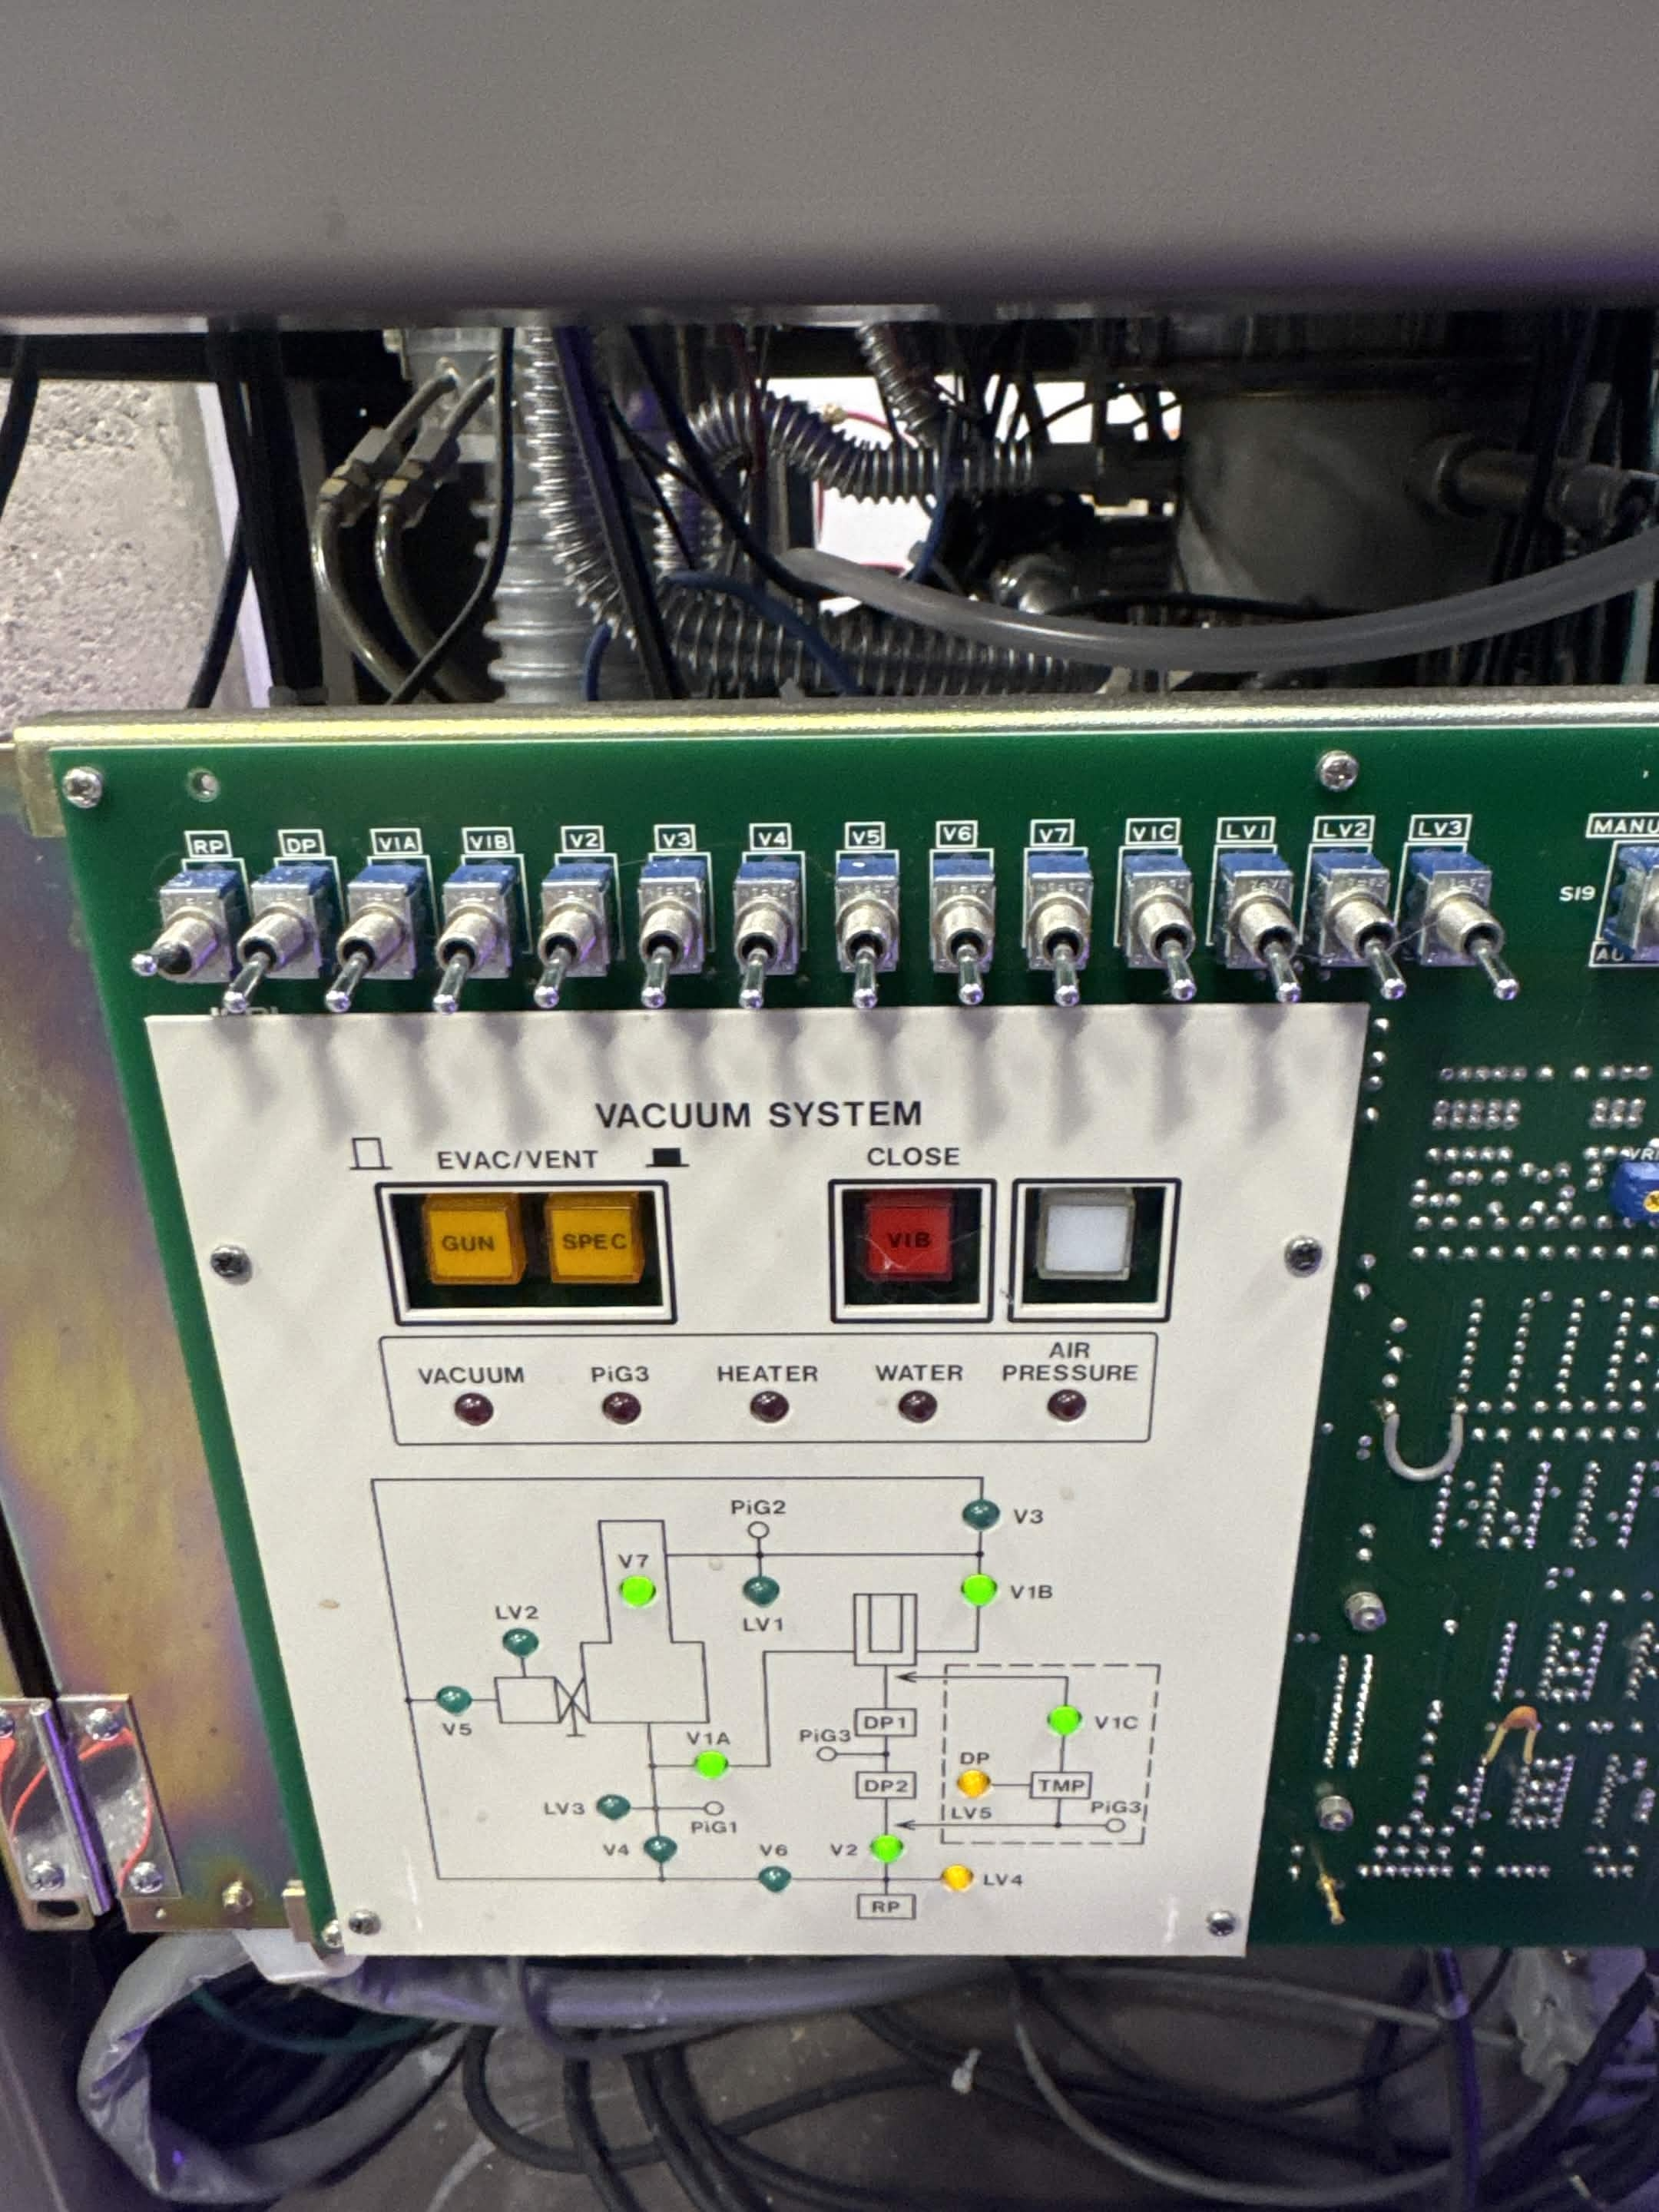
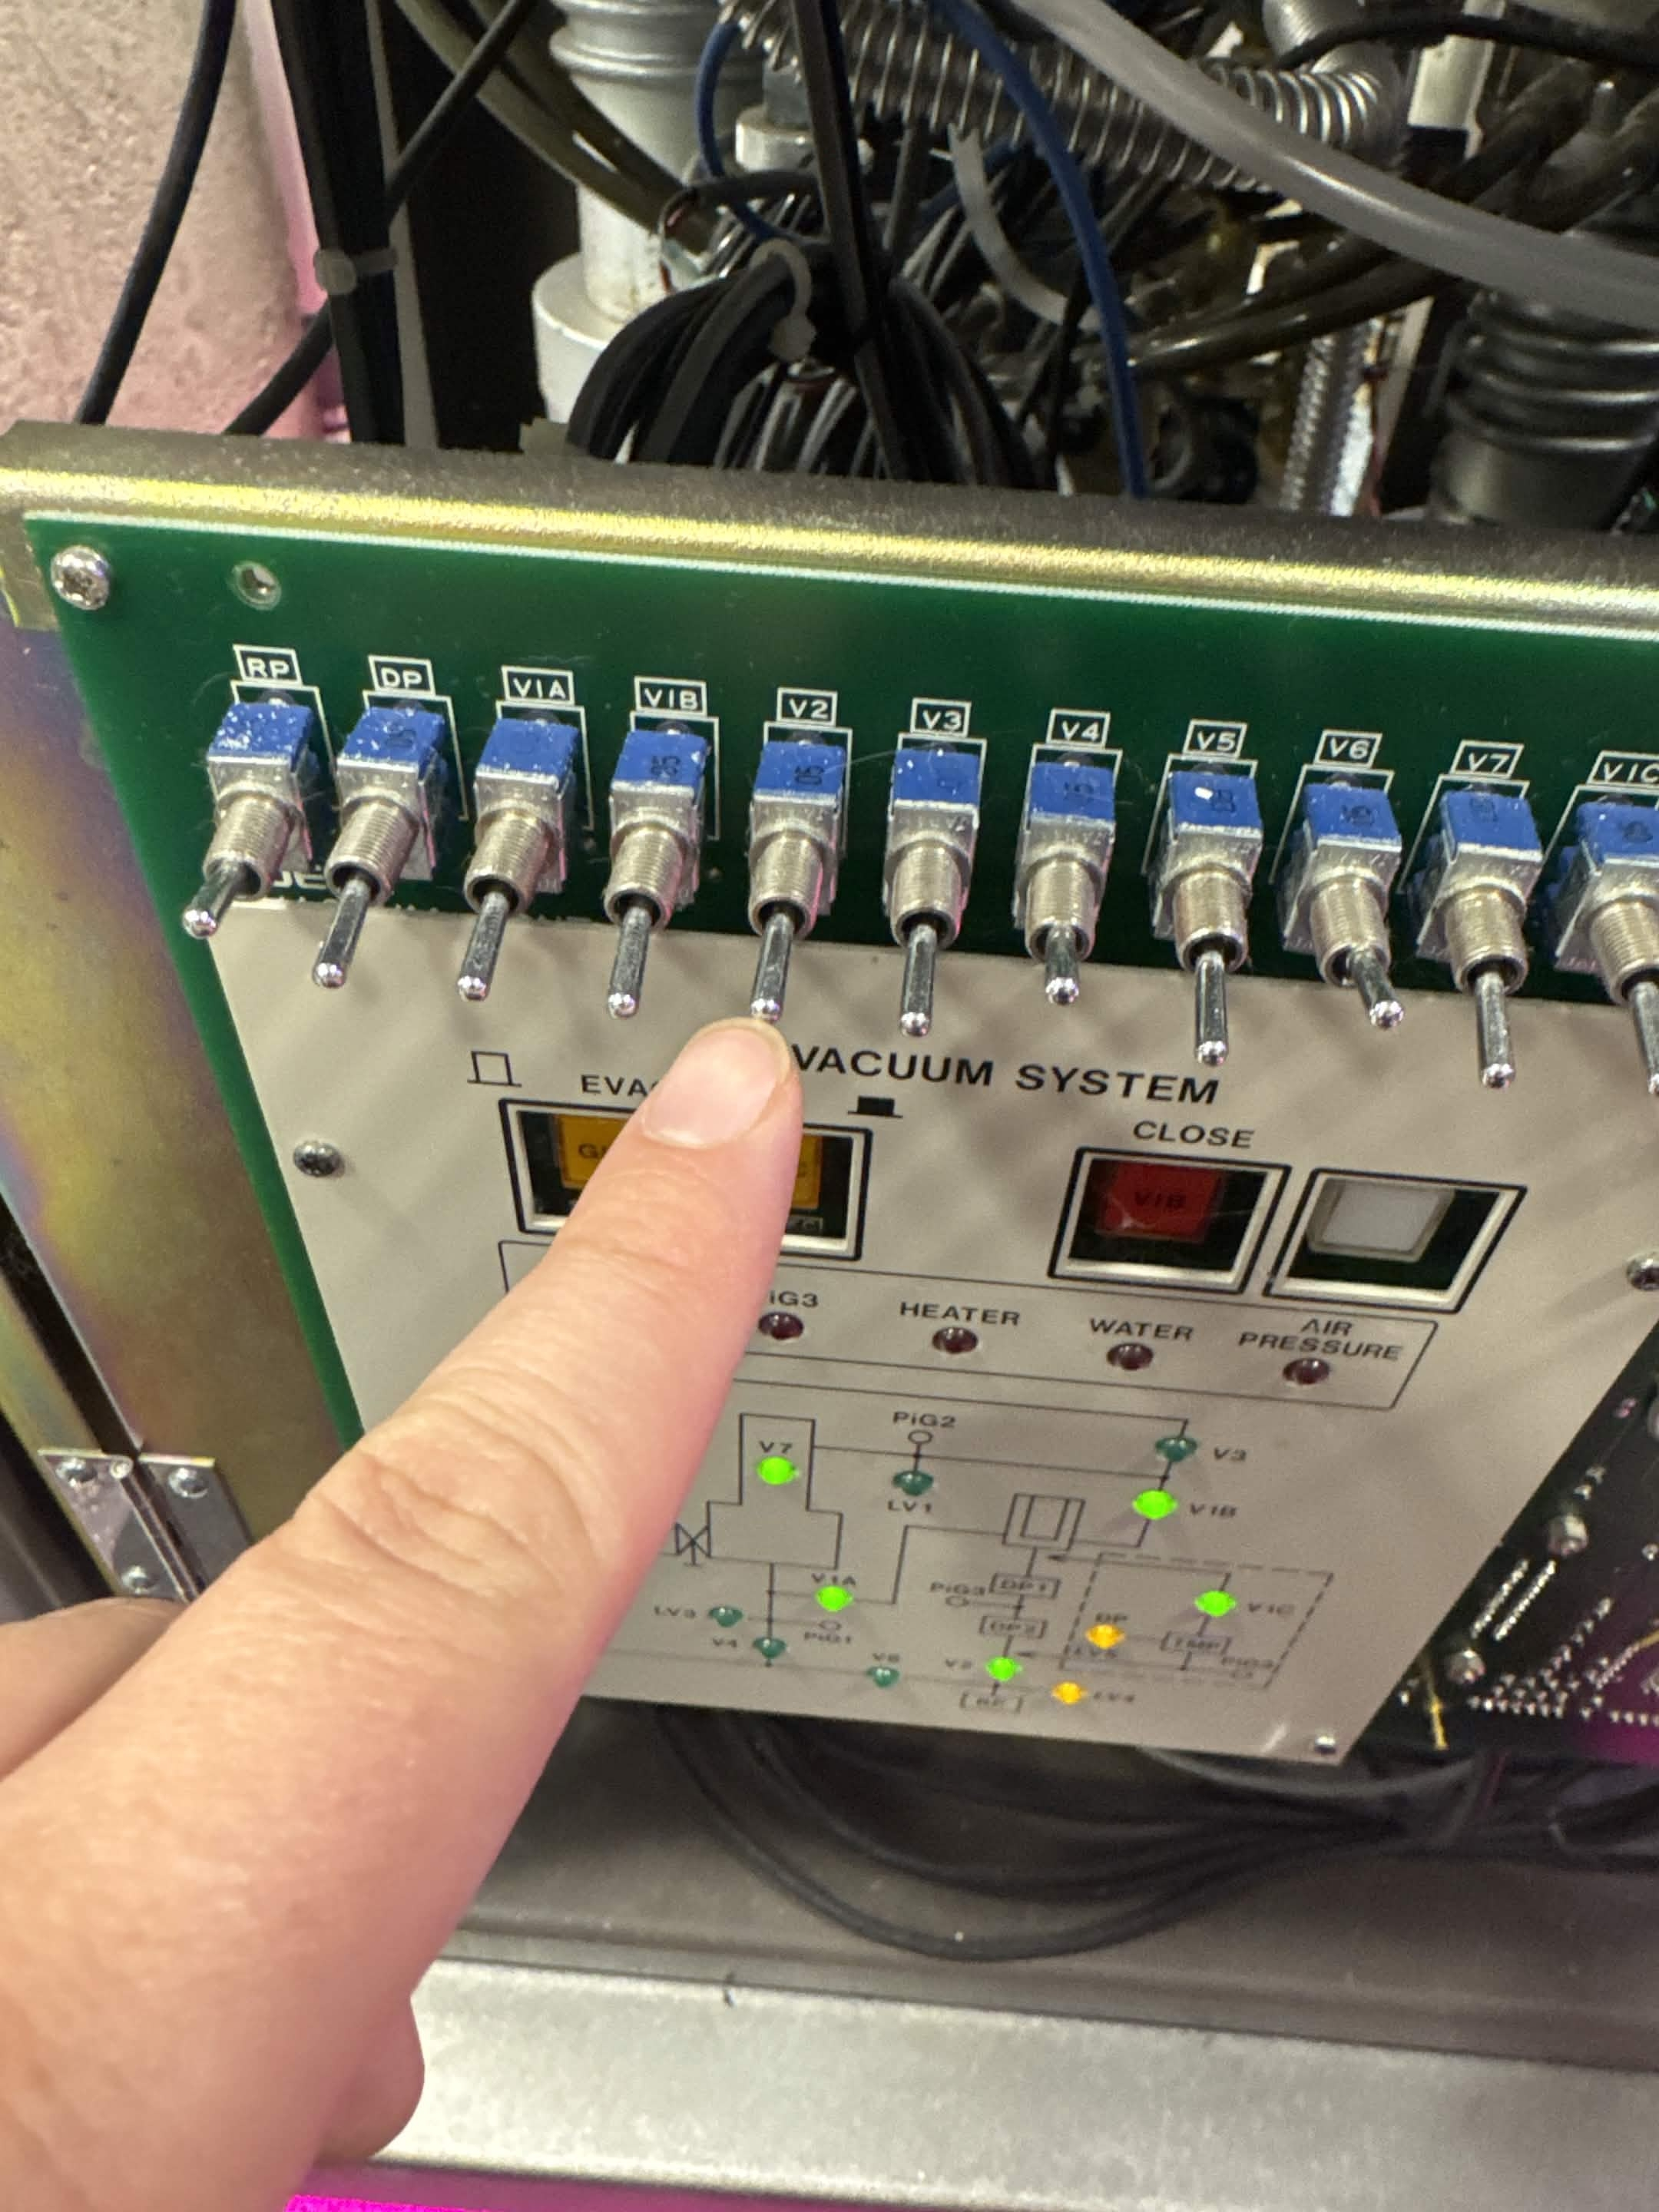
Step 2: Stage switches for correct valving
Next we need to set the switches on the front panel of the SEM manually to close all of the valves. To do this we first ensure our AUTO/MANUAL switch is still set to AUTO, and then flip every switch to its down/off position except for the RP and DP switches, to keep our rotary pump and diffusion pumps running.
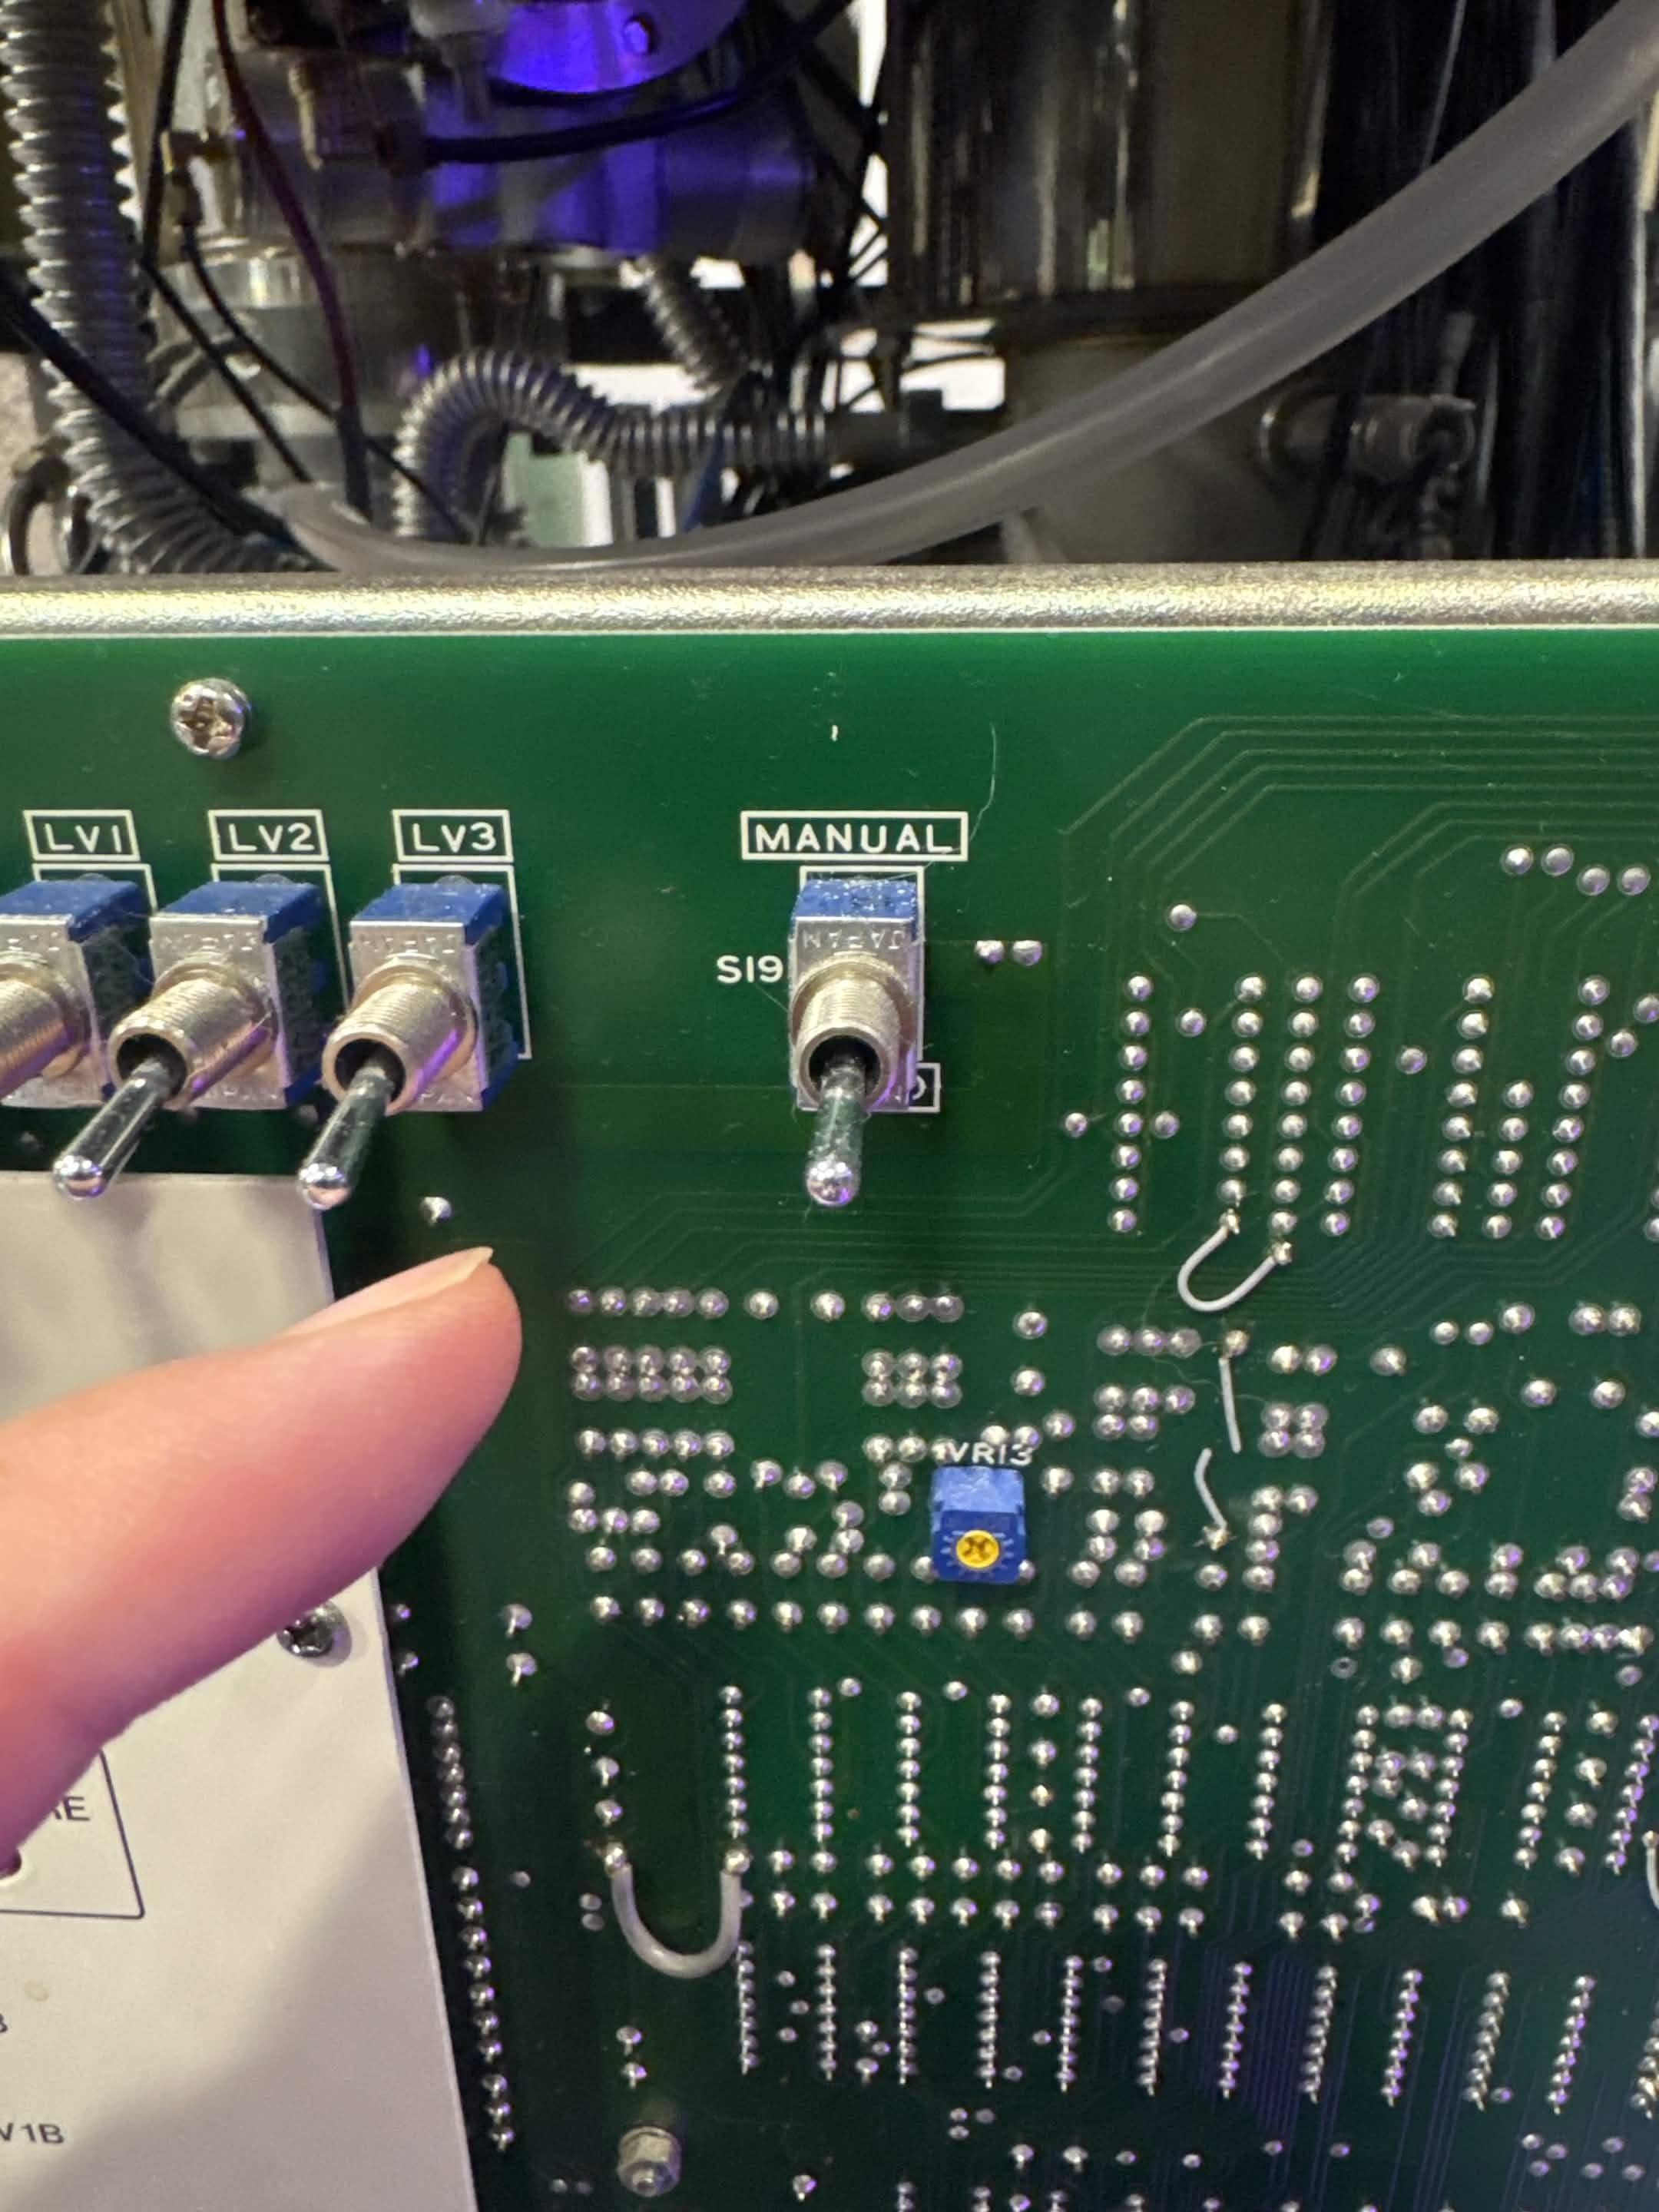
Step 3: Flip to manual and measure values
I would re-show the picture but its probably the last picture you looked at, we are now going to flip the AUTO/MANUAL switch to MANUAL.
Once we flip to manual we QUICKLY check our PG3 test point and look for a sudden increase, if we were to see a sudden increase, we would want to open V2 to re-up the backing pressure on the diffusion pumps.
Bearing all this in mind, we flip the system to MANUAL. This produces quite a lot of noise, from all of the valves closing at once and the system quickly flashes an air pressure warning before it goes away, but otherwise, everything is quiet.
I quickly measure PG3 first, and notice that somehow it has actually decreased… ok? That is either a really good sign or really bad sign. Down from 0.2μA to 0.1μA. Regardless, it doesn’t show a sudden rise, so I leave V2 closed for now.
I take a quick round of measurements at 15 seconds after confirming PG3 is ok, and then start repeating this process every 60 seconds to start to gather data.
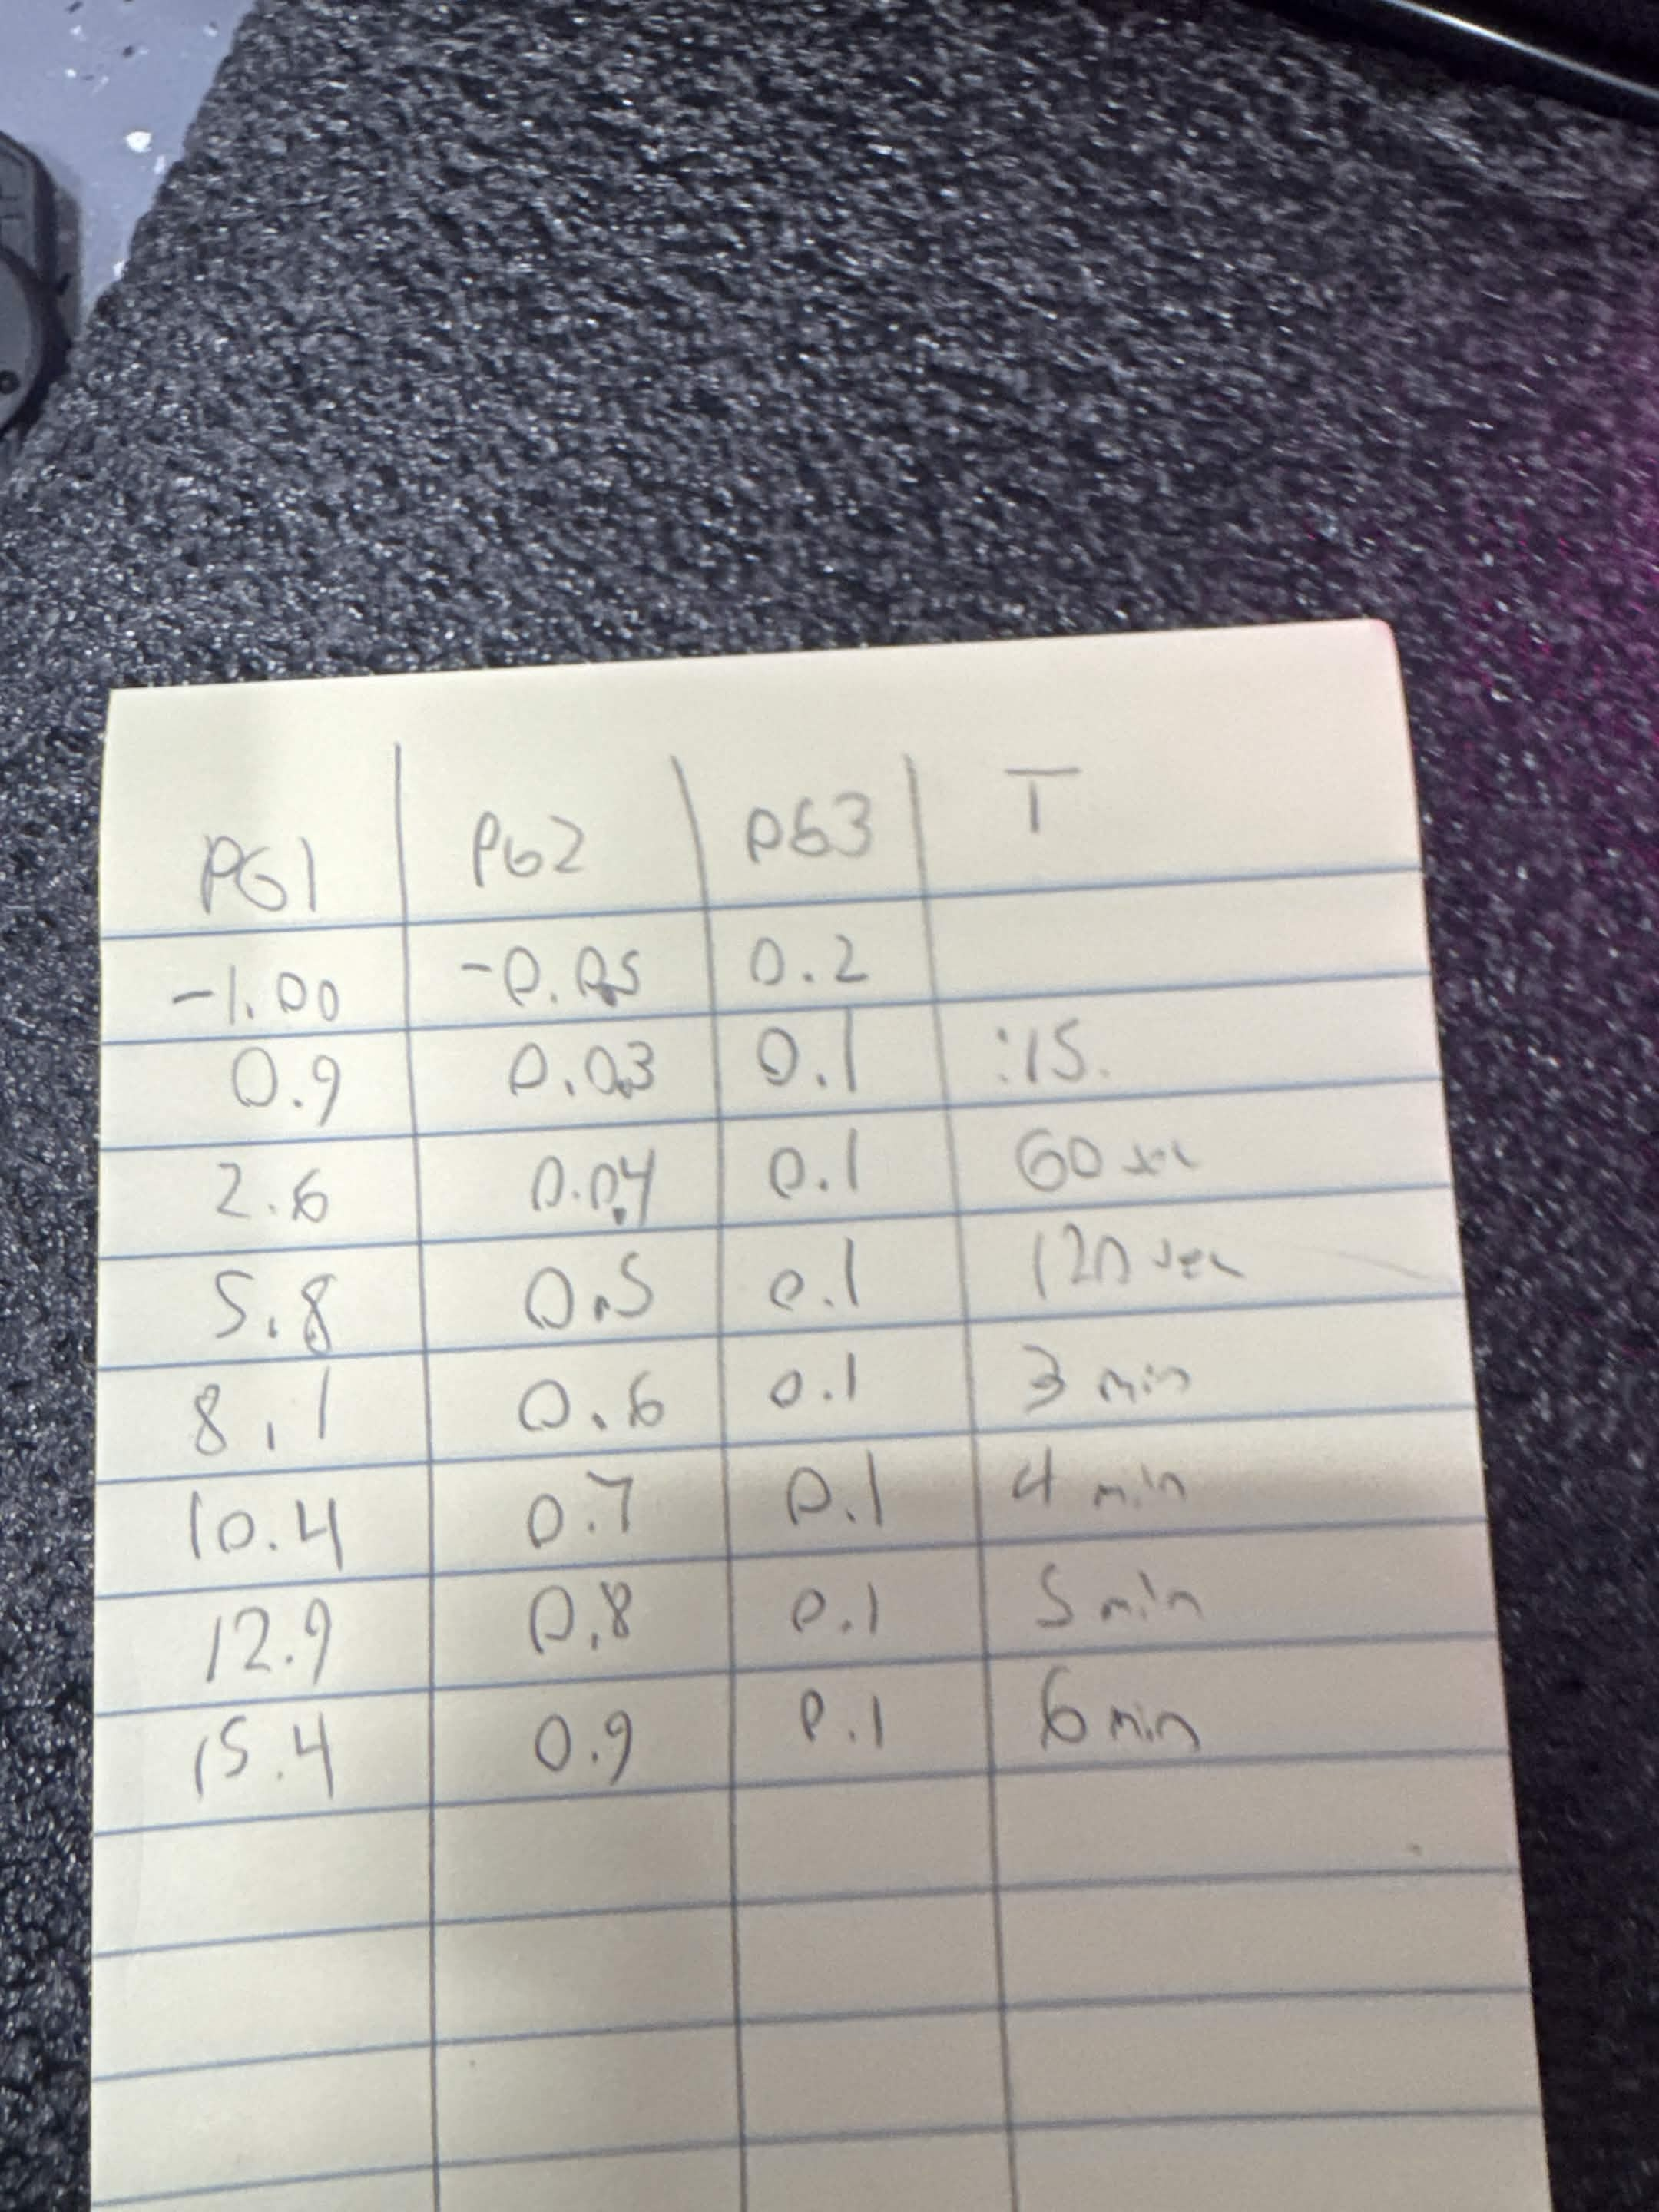
At this point we are seeing a big leak in the chamber at the very minimum. The gun chamber also shows a leak, but definitely a slower one, and the buffer tank / PG3 is still just kinda… sitting there suspiciously?
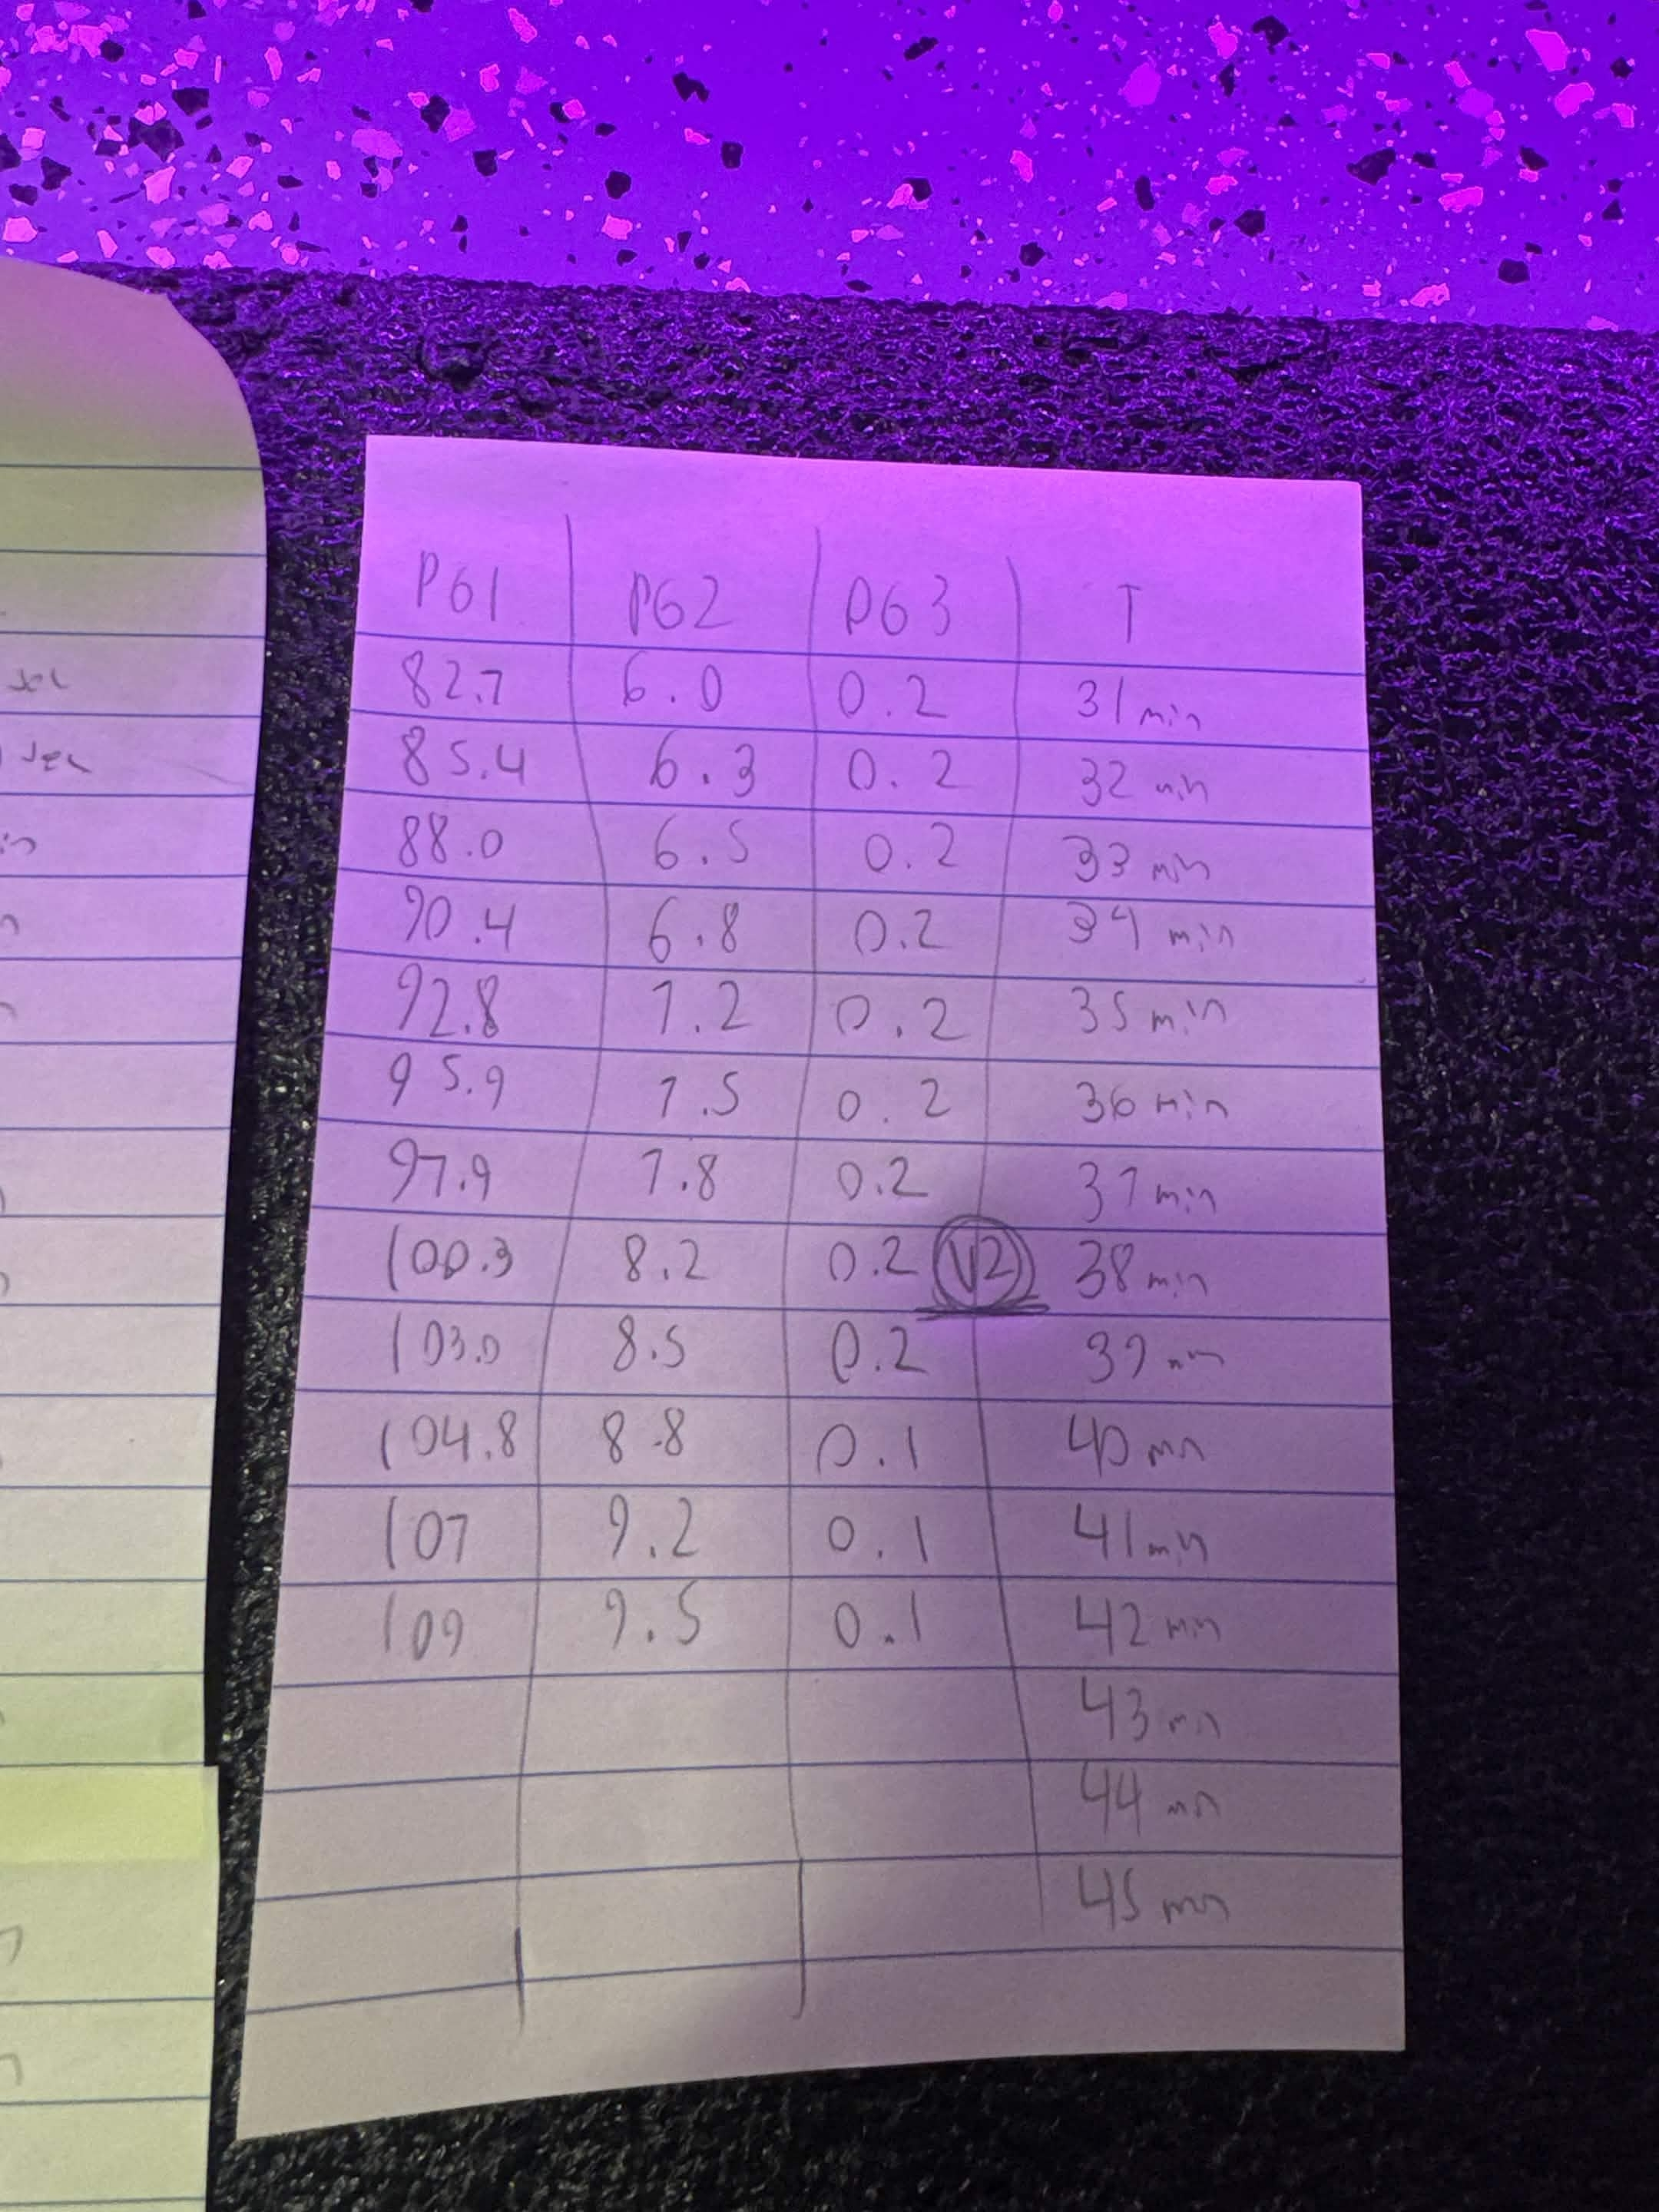
I continue to collect data for the next 45 minutes. At the 22 minute mark we actually see PG3 jump up from 0.1μA to 0.2μA. All of the other test points have changed far more. I start deliberating with some members of the SEM discord, and Adam and I decide it might be a good idea to open V2, just in case. We expect to see the value come back down if the meter is working in any regard, but to see this little degree of change over this large of an amount of time is concerning. It either means the vacuum is actually really good, or something is really wrong down in the buffer tank.
After 38 min I open V2 to pull backing pressure back onto the buffer tank and diff pumps, and sure enough, one minute later, the value climbed back down to 0.1μA.
So we know PG3 is either fine or completely toasted, what about the other two? Well, lets take a look at a graph here:
We can see pretty clearly that we have a bigggg leak on PG1, our chamber. Its such a massive leak in fact, that it severely skews the scaling of the other two test points. Lets flip this graph’s y axis to a log scale so we can make better sense of the smaller values:
Ok this makes it pretty clear to see whats going on with all 3 PG test points over the course of the 45 min run. We have identified our Chamber has what could basically be described as a gaping hole in it in vacuum terms, our gun chamber is not winning any awards, and our buffer tank has either a goddamn perfect vacuum or some weird stuff going on. This gives us a lot of background data and lets us know where to start focusing when Adam gets here later this week. Its likely at this leak rate that the big issue with the chamber door is probably a fiber across an O-ring. When Adam has their helium leak detector out here later this week, it will be easier to figure out whats going on.
Other
Tonight my only other goal is to source an extra water chiller for the lab in the next day. I am going to hit facebook marketplace and get back to you guys with an update tomorrow.
05-01 - Friday
Lighter day today, I am leaving a bit early since I am planning on working an ungodly amount of hours next week with Adam on the SEM. Today I have mostly been cleaning up and organizing the lab / continuing to get ready for Tuesday. If Adam gets back to me with the leak check procedure Ill do that today otherwise Ill leave that for tomorrow evening or something.
One of our interns and I also spent some of this afternoon organizing some cables to get our SEM inventory completed ahead of Adam’s arrival next week.
04-30 - Thursday
I was going to start today by performing the manual leak check on the SEM, but I still haven’t been able to confirm the valving order with the experts on this machine yet. I am thinking about re-starting this pump down on Saturday and just making this order of business #1 when Adam gets out here. But we will see, I sent some messages and if I don’t hear back today I’ll likely just postpone this process until next week.
General
I spent a lot of this morning trying to track down the power supplies for some PTZ Optics cameras we have, considering trying to use these for our live-streaming next week. No luck on that but I am going to order some replacements that should be here Tuesday.
I had a call with Adam McCombs earlier today and they gave me some good advice on leak checking, I am still waiting on them to confirm some stuff around valving, but we confirmed all the details for their visit out next week, and we should be in for quite a treat. It will be really fun to document this process, and I am excited to update all of you lots on that next week.
Most of my day today was spent just trying to figure out logistics for next week, and I also spent some time with Esteban and Bri today getting Esteban introduced to the lab for his new phylogenetic research.
04-29 - Wednesday
SEM Updates
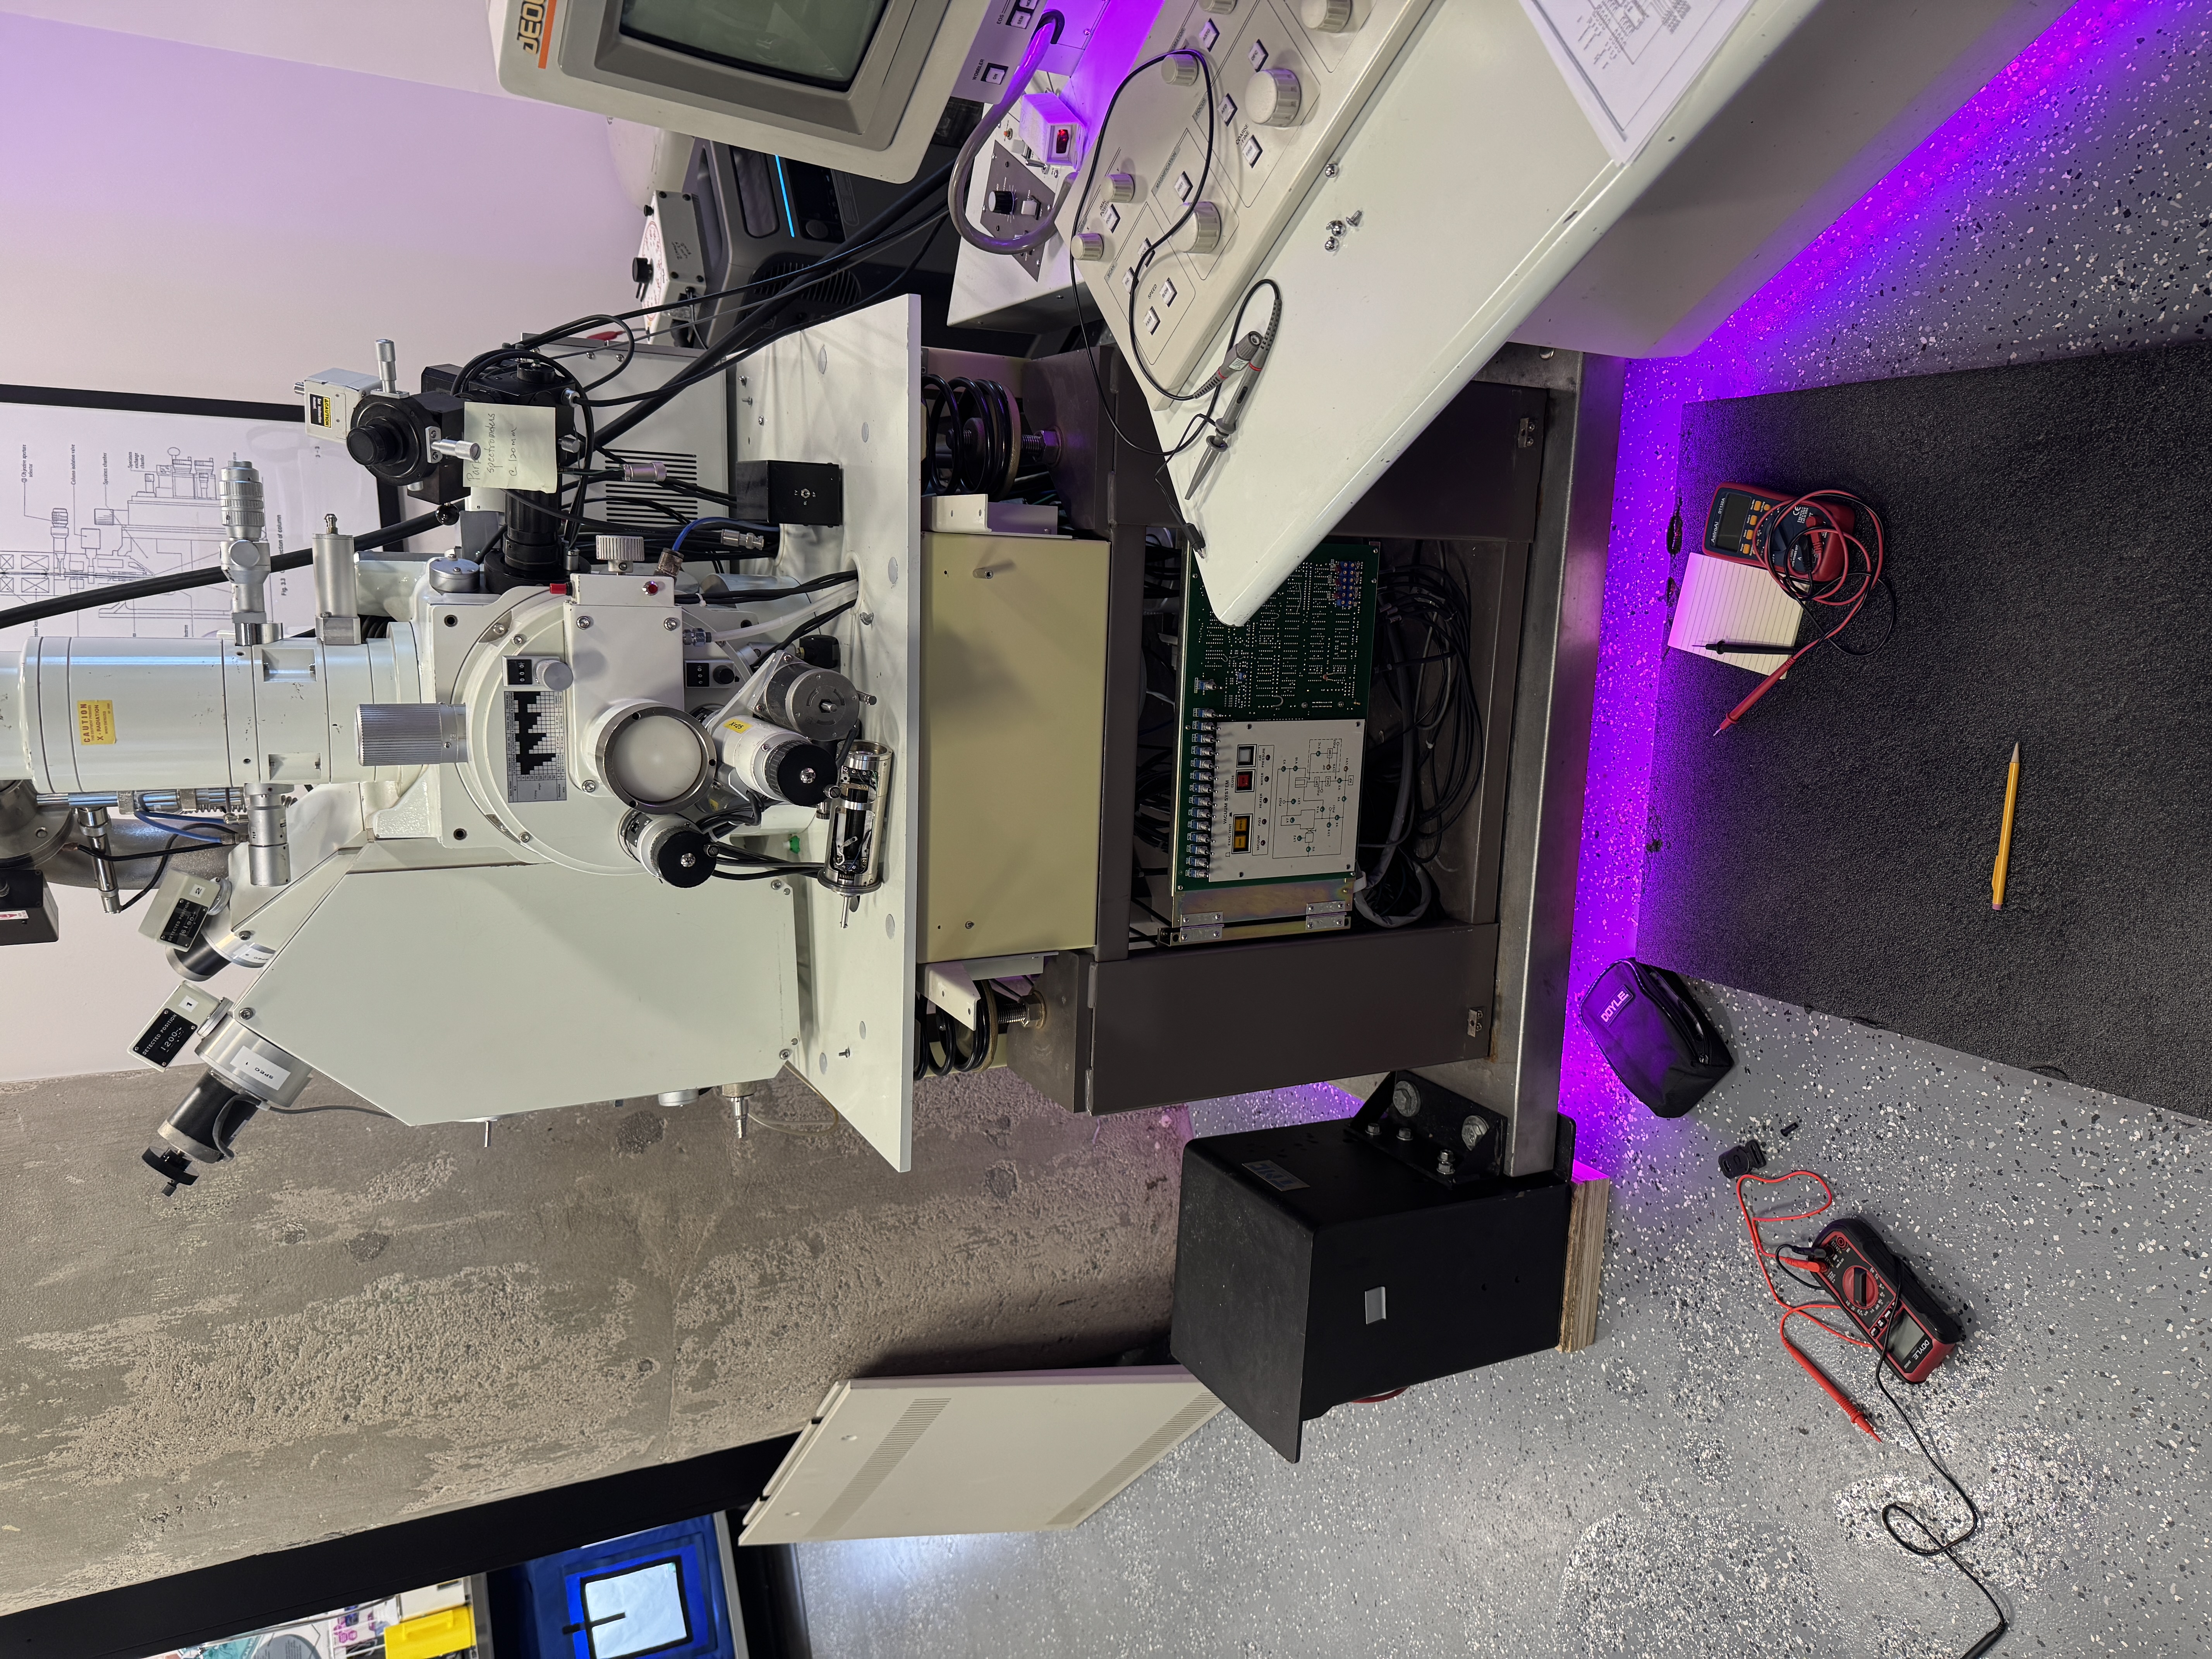
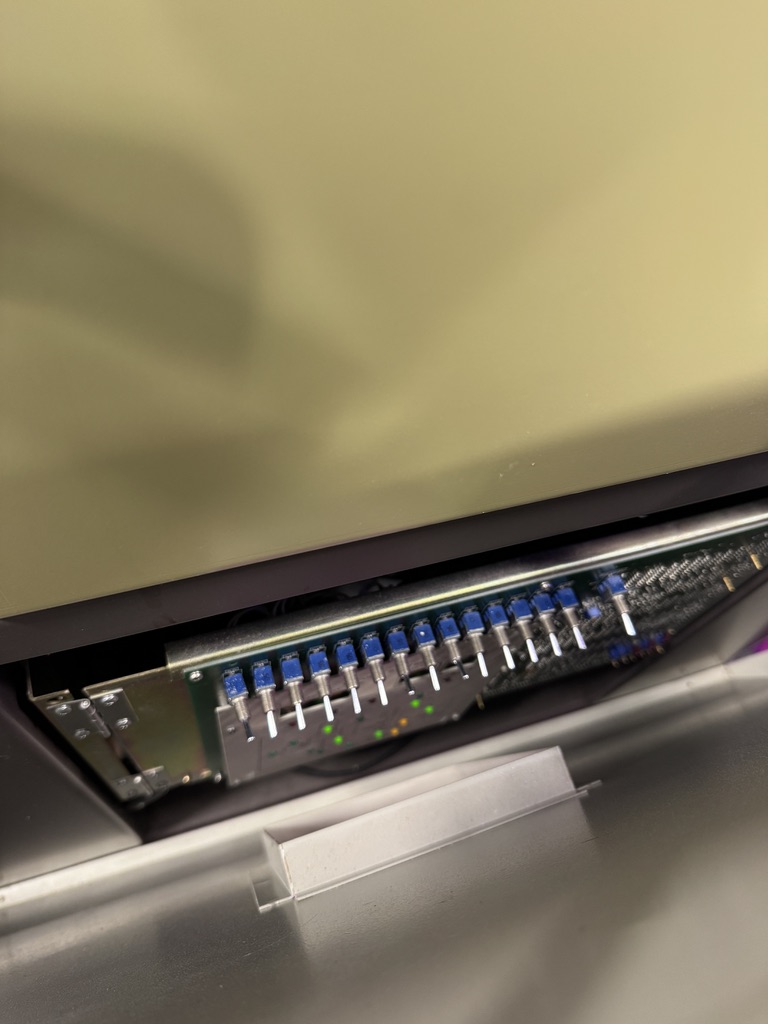
I started today with a tool run to Harbor Freight. I needed a new ųA meter for testing the PiG 1, 2, and 3 test points on the SEM’s vacuum board. The SEM has been running for a couple days because we are going to run a leak checking procedure tomorrow to get a good idea of where the vac system is at before Adam gets here next week:
After getting back form Harbor Freight, I did a quick probe of the test points to see where we were at. The main PiG 1 test point was bouncing between 0-1.4 ųA which I am guessing means that gauge is at the lower end of its range in being able to detect a vacuum, so that vacuum is probably pretty good right now. Tomorrow we will manually shut a few valves and measure the rate at which that value climbs across a couple of those points, and that will give us a leak rate.
I forgot to take pictures until i was putting the last screws back in, but here is a peak into the vacuum test panel:
Sputter Coater Updates
Our Global O-Ring & Seal order got here today, and our amazon order got here a couple days ago, so we now have all, or at least nearly all of the vacuum hardware that we will need to get the sputter coater back to a full vacuum.
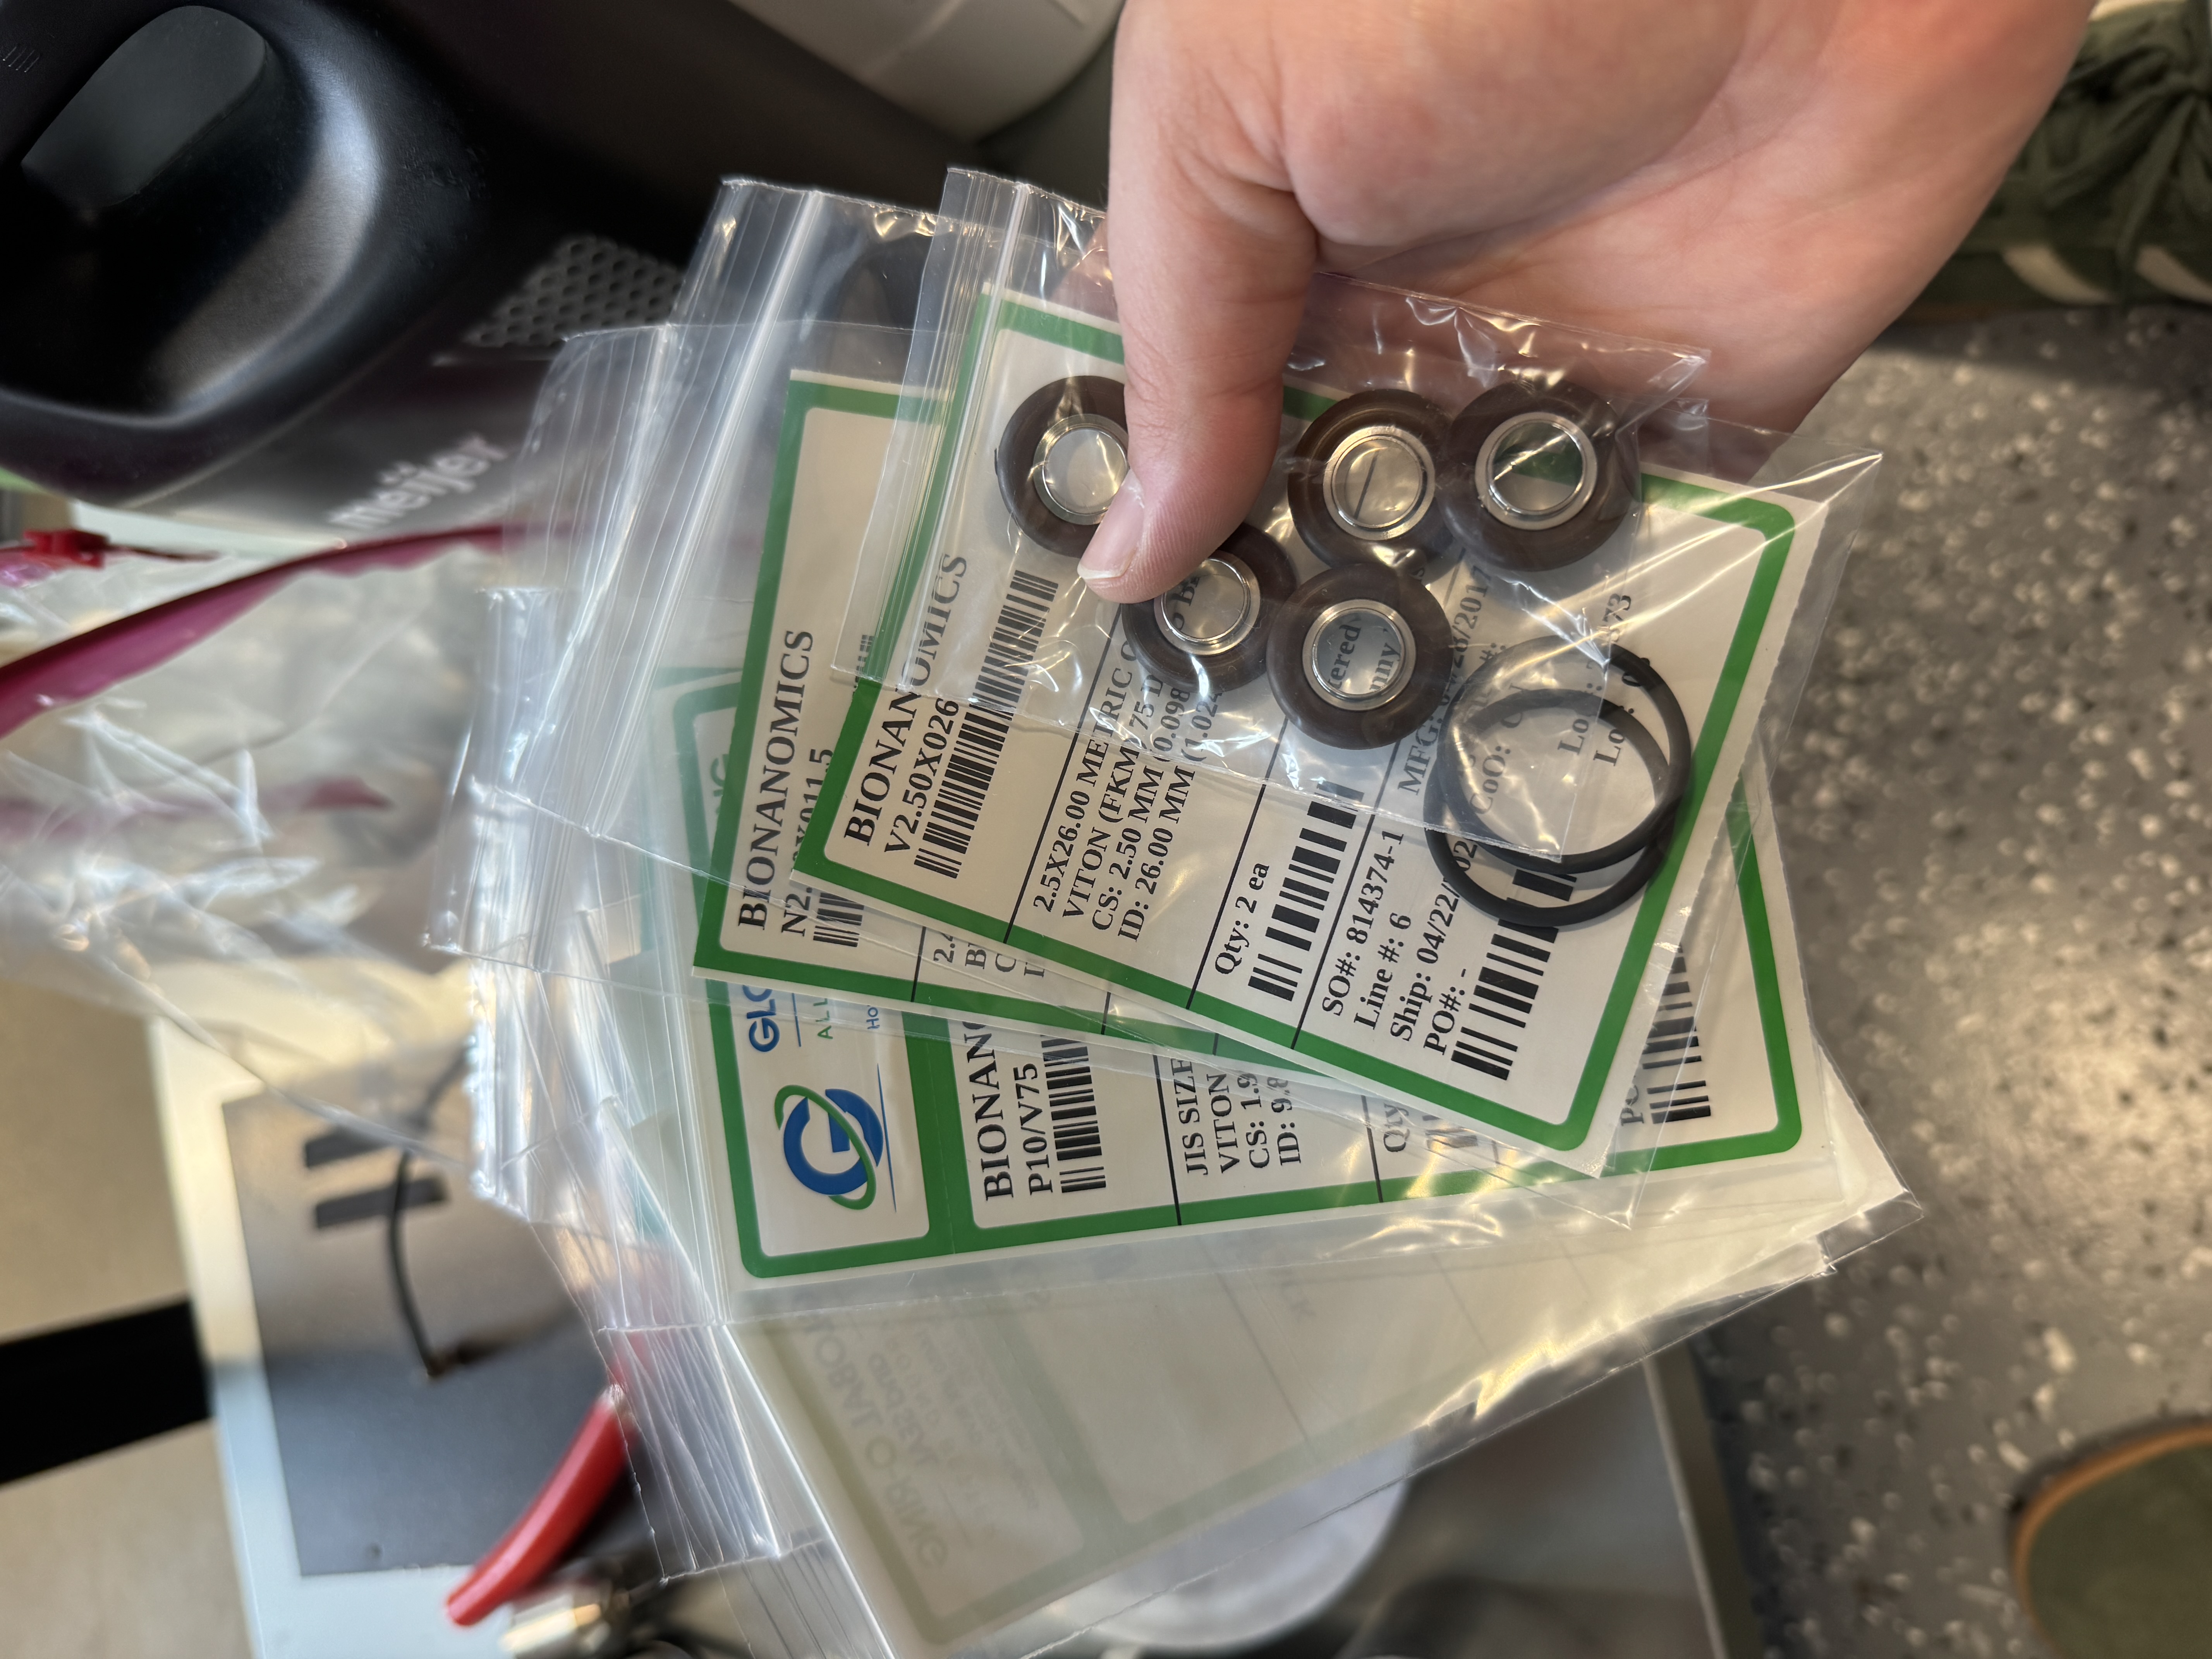
I will update the sputter coater log when I actually test fit these, but for today I was just taking inventory of what we received.
04-28 - Tuesday
First update in a bit here, I was out last week for some personal stuff and was out sick yesterday. Happy to finally be back.
First exciting update for the day is that we finally got Adam McCombs scheduled to come out and help us fix our SEM up next week. So the 4th-9th-ish will be full of many exciting SEM updates getting that system ready to use for our interns this summer.
Secondly, I had a great chat with my buddy Esteban this morning, who is going to start doing an OpenIDI research project on some potentially new trilliums.
Today I am mostly just getting caught up from a few days of being out. I am taking inventory on some of the SEM issues, and trying to build a plan to get the sputter coater and all parts of the SEM workflow fully operational before June.
I also made some quick code fixes to this blog, namely with how sidebar scrolling works when sidebar content gets long.
04-22 - Wednesday
Today my work has once again mostly been on the sputter coater, I spent the day sourcing and ordering replacement o-rings, trying a few different cleaning methodologies, and planning some future parts of the project. You can read about all that here: Sputter Coater Repair Log.
04-21 - Tuesday
Today I am doing some more work on the sputter coater, see the sputter coater repair log post for more info on that: Sputter Coater Repair Log. A lot of what I have been working on today is in that doc, and today’s tempo is probably going to be a bit lighter due to that and an appt I need to make this afternoon.
I am taking part of the afternoon here to work through re-reading this paper, to fill in some gaps in my understanding with some of our current gall research. I read it months ago, but it again has been months and I need a good refresher.
I also spent some time today fixing more bugs on this blog codebase & getting some behavior with anchor links and some css resolved that my agent was having a hard time with.
04-20 - Monday
Today we can finally re-organize the lab! Now that the BSC is up on wheels it should be easy to get all the equipment moved to where it needs to go.
Lab Organization Update
Bri and I spent a couple hours re-organizing everything this morning:
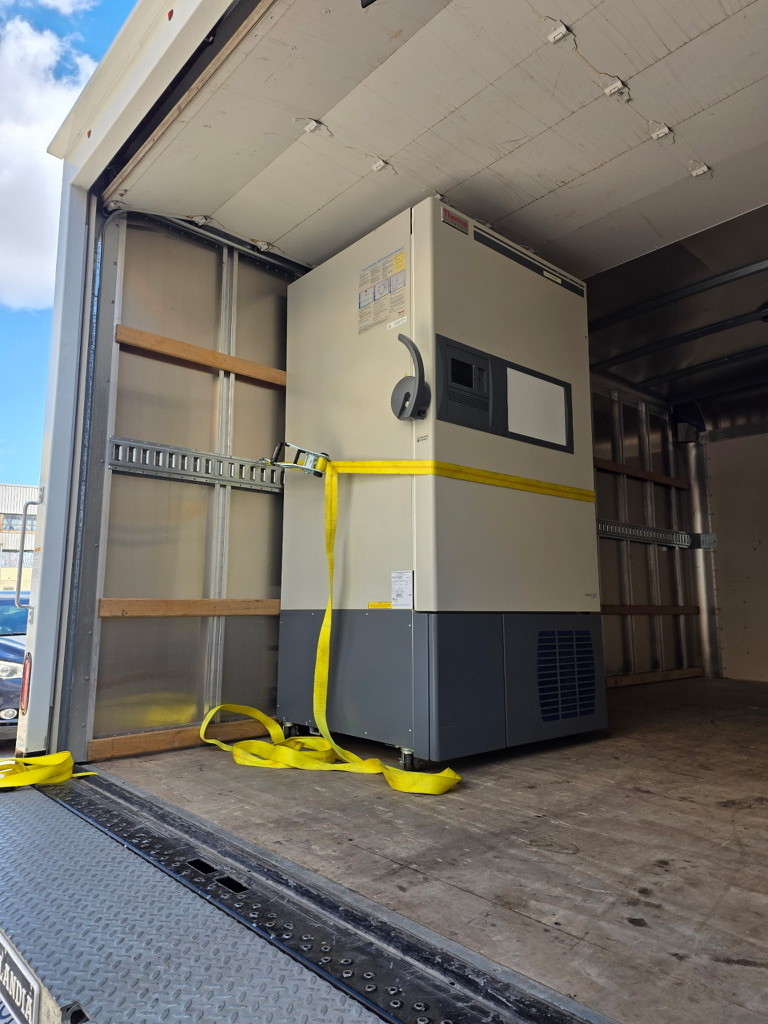
After a few hours we have it in a really good spot:
This is great, because it lets us have both of our freezers as well as the autoclave all contained within the wetlab now, which is a huge gamechanger for our workflows.
Having this -86C up all the time also enables us to do a lot more work with sensitive peptides / DNA. I am going to email Adam Kranz this afternoon and tell him we are likely ready to recieve the peptides.
Since we had to move some of our art around, I opted to quickly replace it with some posters that are more relevant to our research:

Gall research
Speaking of our research, I also reached out to one of our research partners; Adam Kranz, today, and told him we are ready to start Phase 1 of the Arabidopsis trials in earnest. We will hopefully hop on a call soon and figure out what next steps look like.
I’ve also spent quite a while reading around on “The Levin Lab” today, and going through some course materials there, just to further my own knowledge. Learning is fun 😉. Speaking of learning, I have a biology textbook that just got delivered to my house, so I am going to sign off for the day and dig into that. See y’all tomorrow!
04-17 - Friday
No update yesterday because it was mostly an amp lab day. Yesterday evening / this morning though I made some progress on the Echinocereus OpenIDI project.
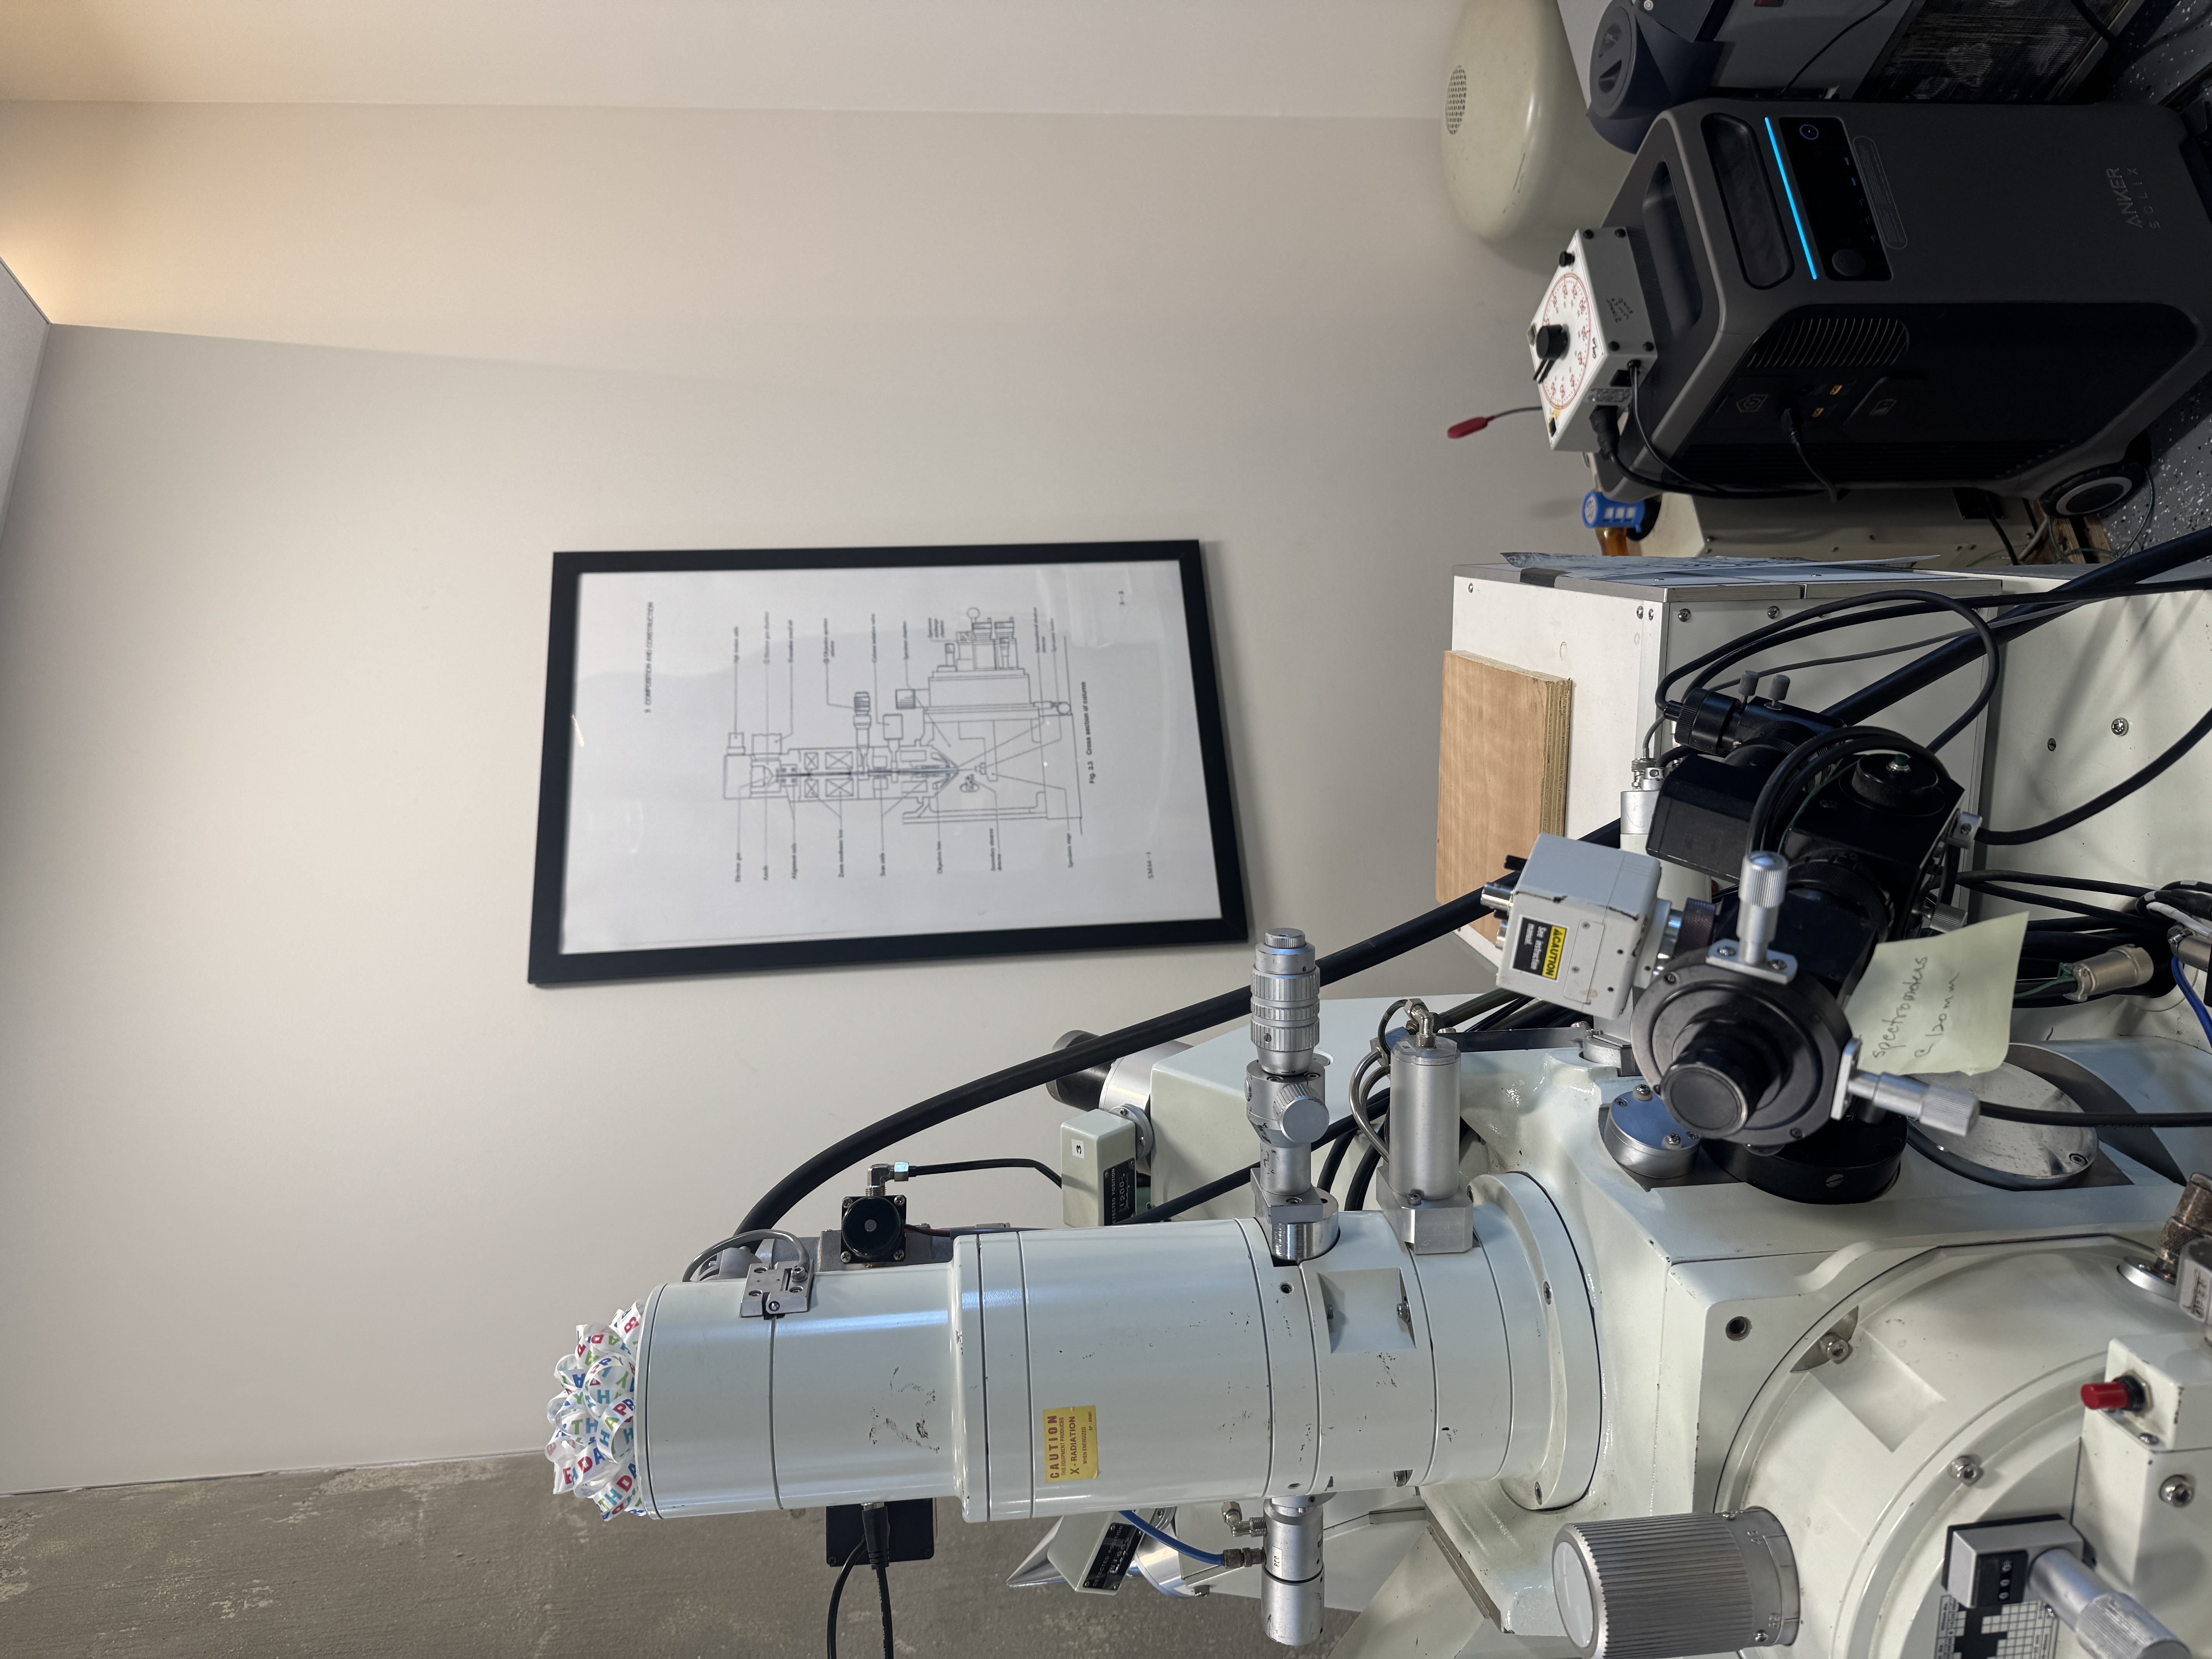
Echinocereus Spine Imaging
Today I managed to get some imaging done of the first specimen that I prepped using St. Francis’ sputter coater last month. This specimen is Echinocereus relictus or Relict Hedgehog Cactus. This imaging is part of a larger study to characterize members of the genus based off of the morphology of these tiny spines. We got a few good images this time:
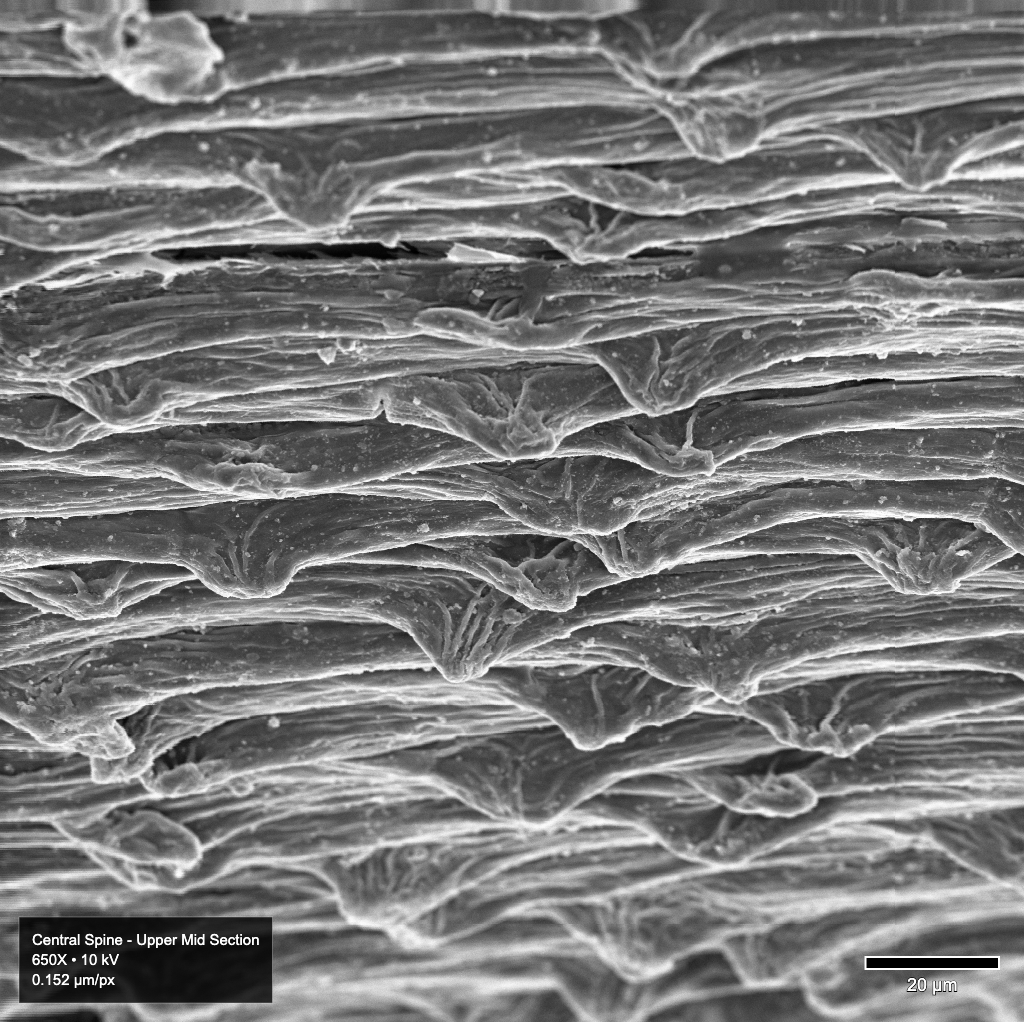
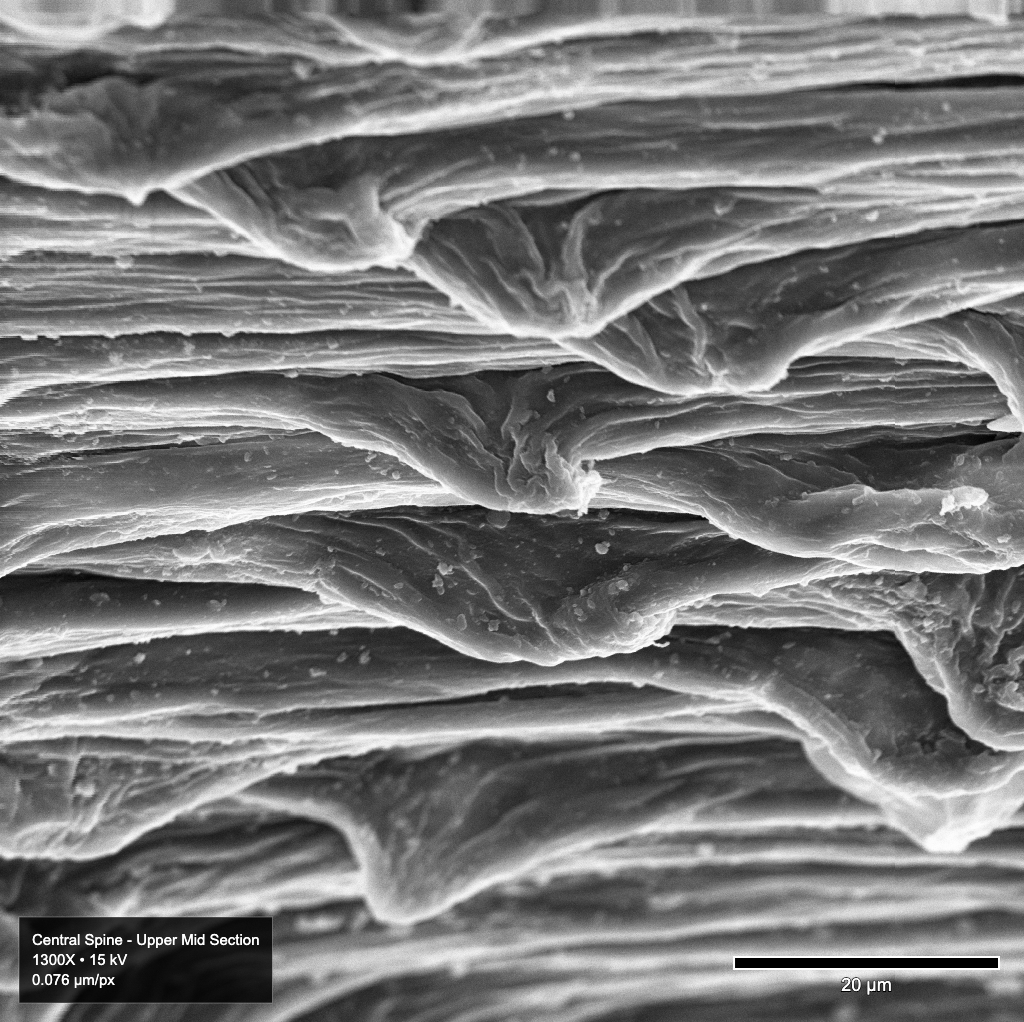

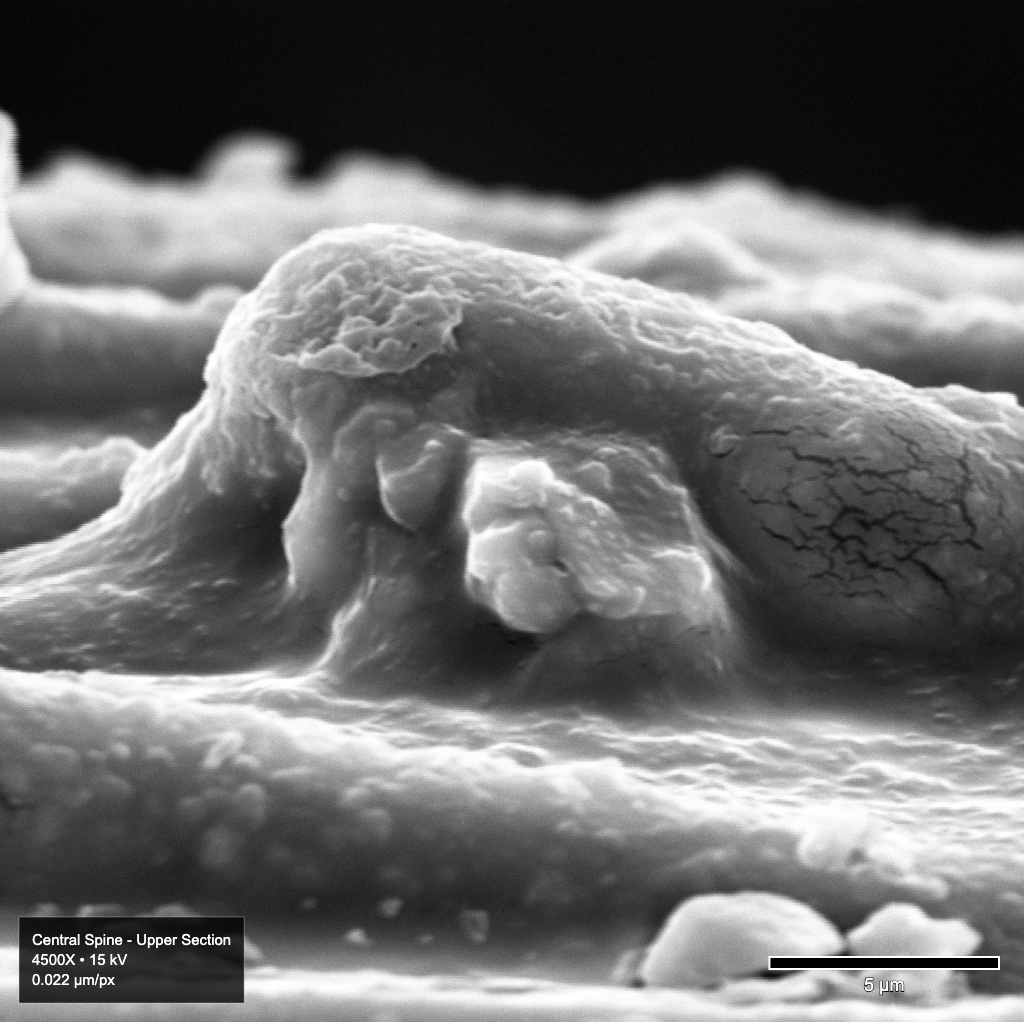
These turned out pretty well. I am still getting some flagging on some of these, but once I get these electrical issues troubleshooted properly, I think that will all go away. Plus, its at such a small scale it doesn’t impede the research we are doing for this study. To any interested readers, full uncompressed images are viewable in our SEM image viewer tool on OpenIDI. Simply scroll to the bottom of the page for this specimen to explore the full detail images and zoom to your heart’s content.
My main images with the SEM at this point are the flagging like we see in these images. I am going to attempt to measure electric fields in the room next time we are running and see if I can pin down the source of the electrical noise. Fixing this will enable higher resolution scanning and more consistent results.
BSC
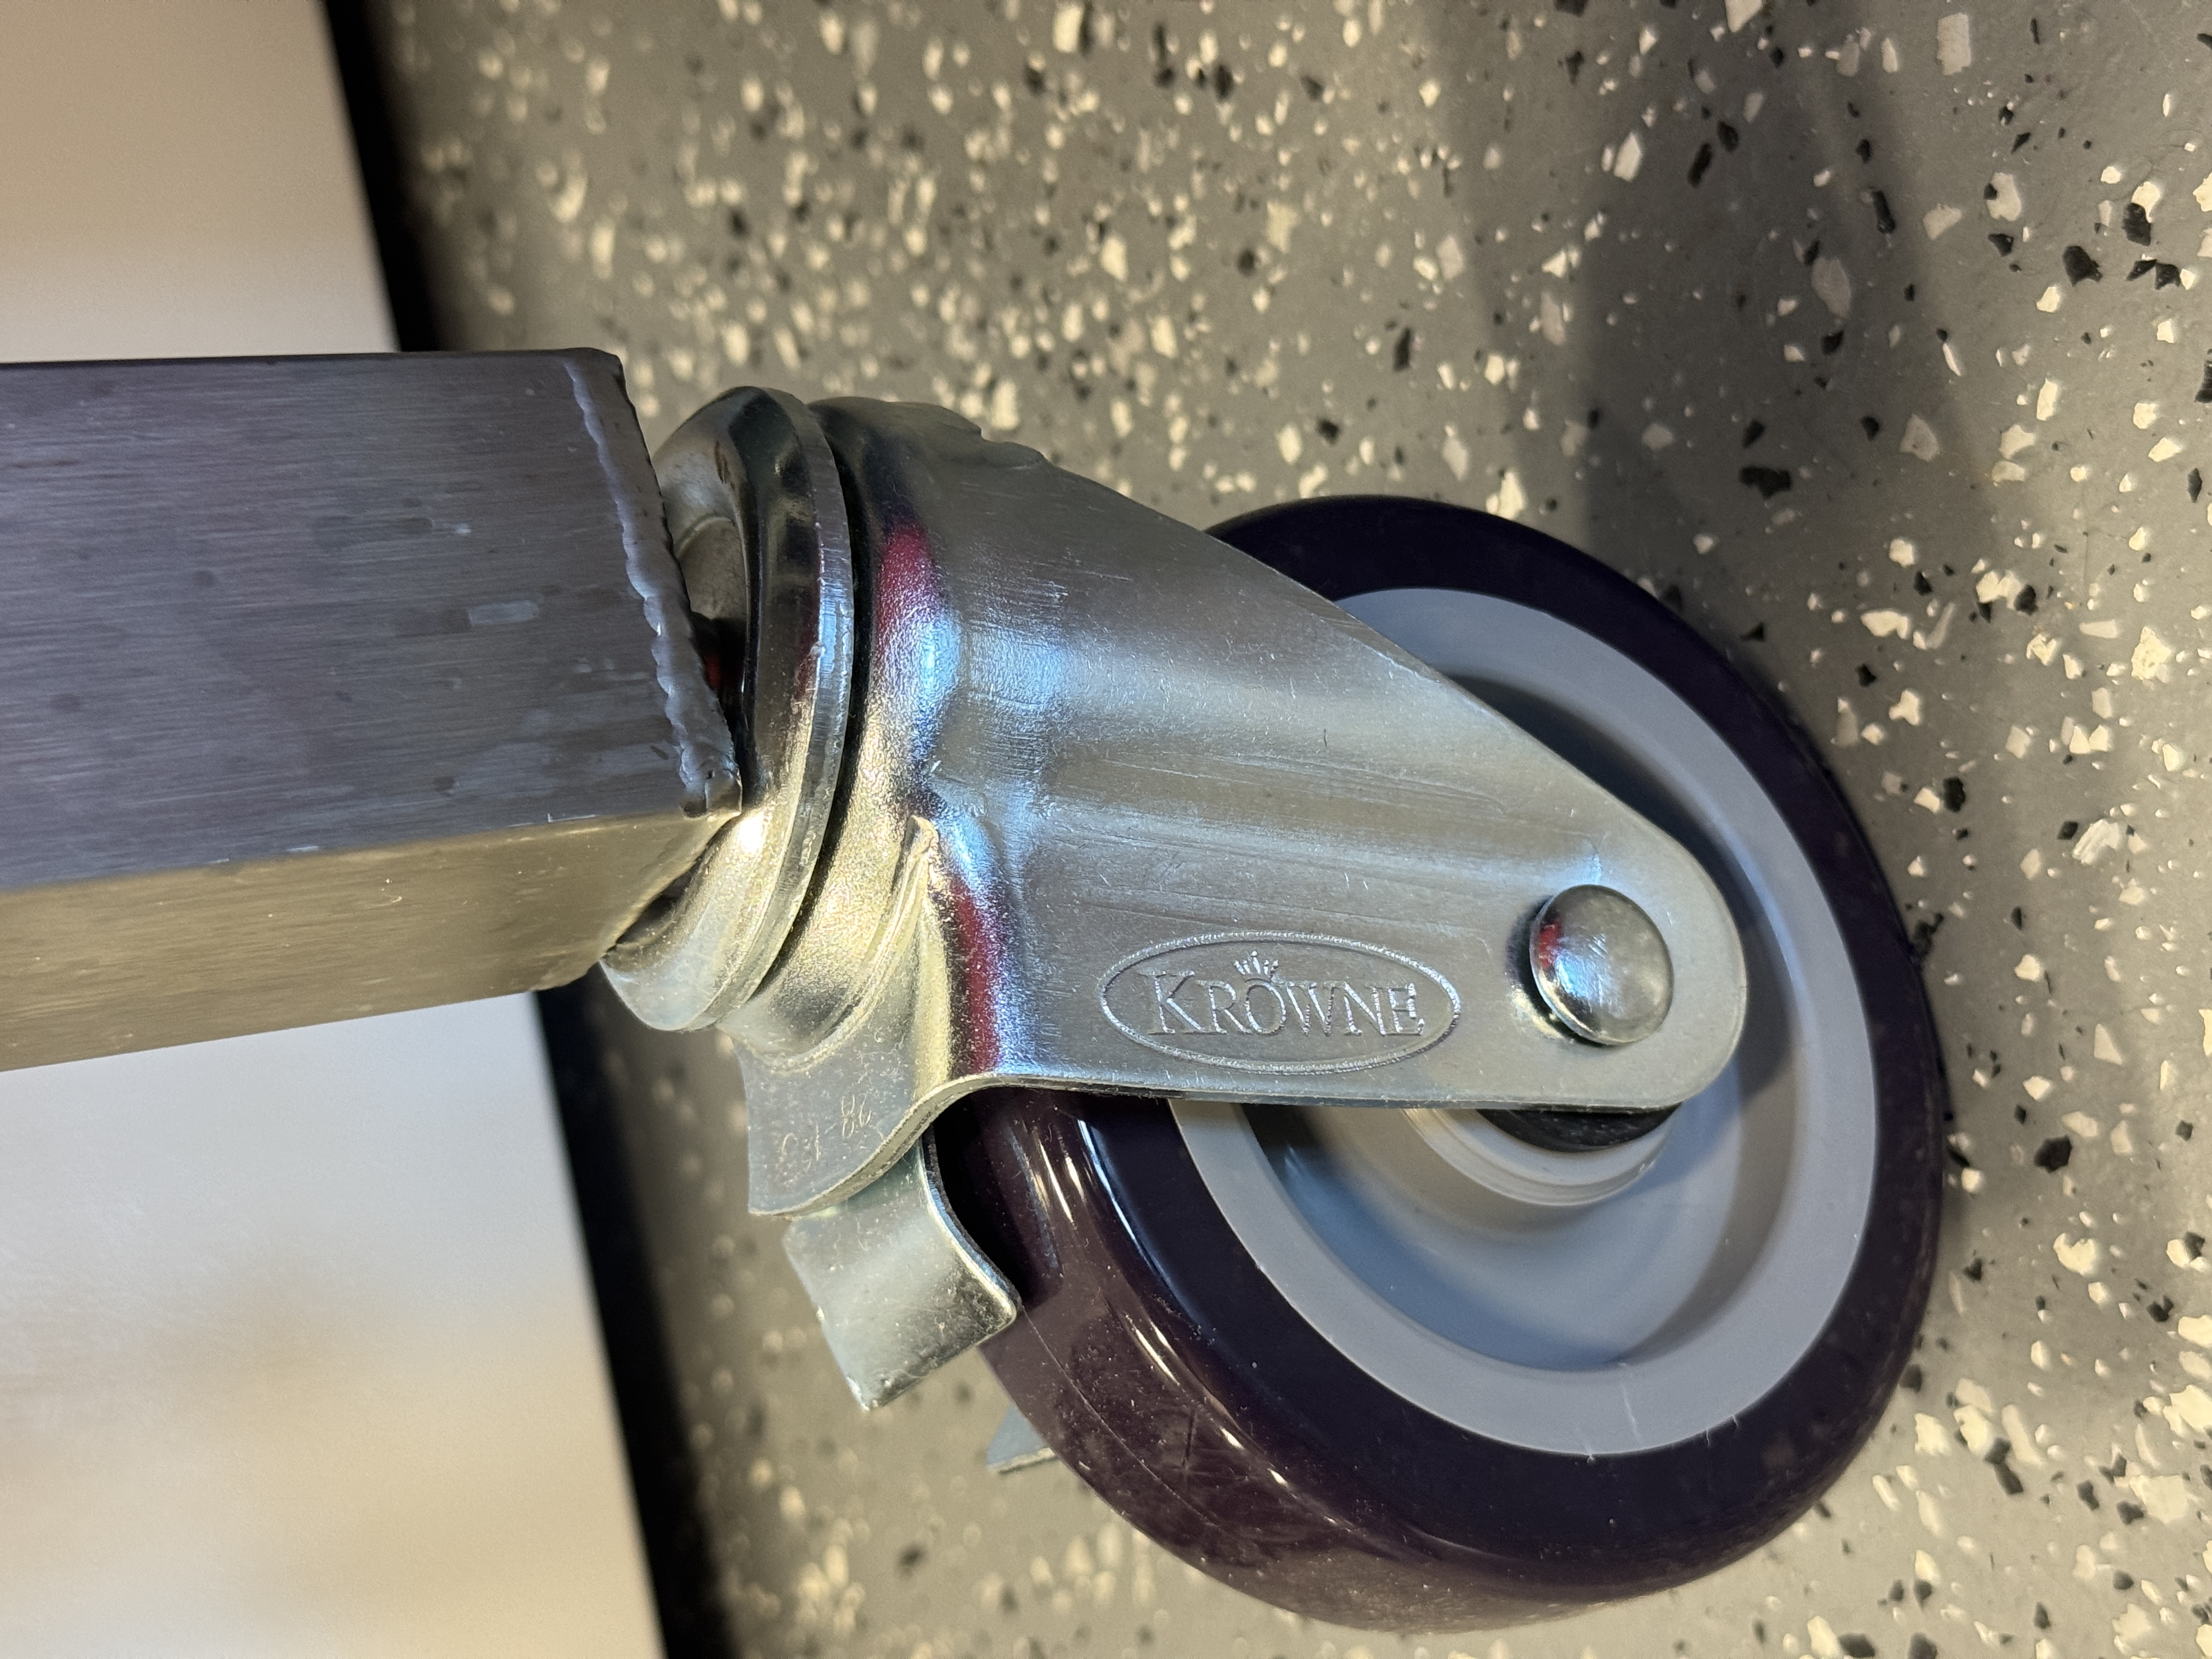
In what is hopefully my final update on the BSC, we FINALLY got it up on its new casters today, and I am happy to report it wheels around happily without complaint.
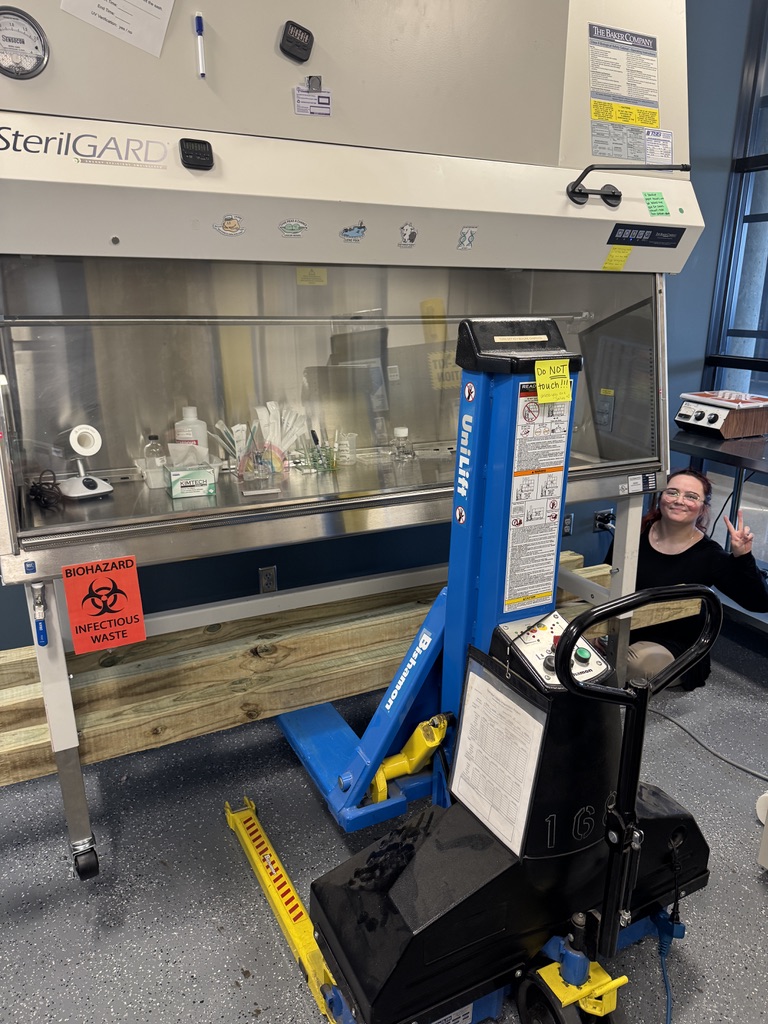
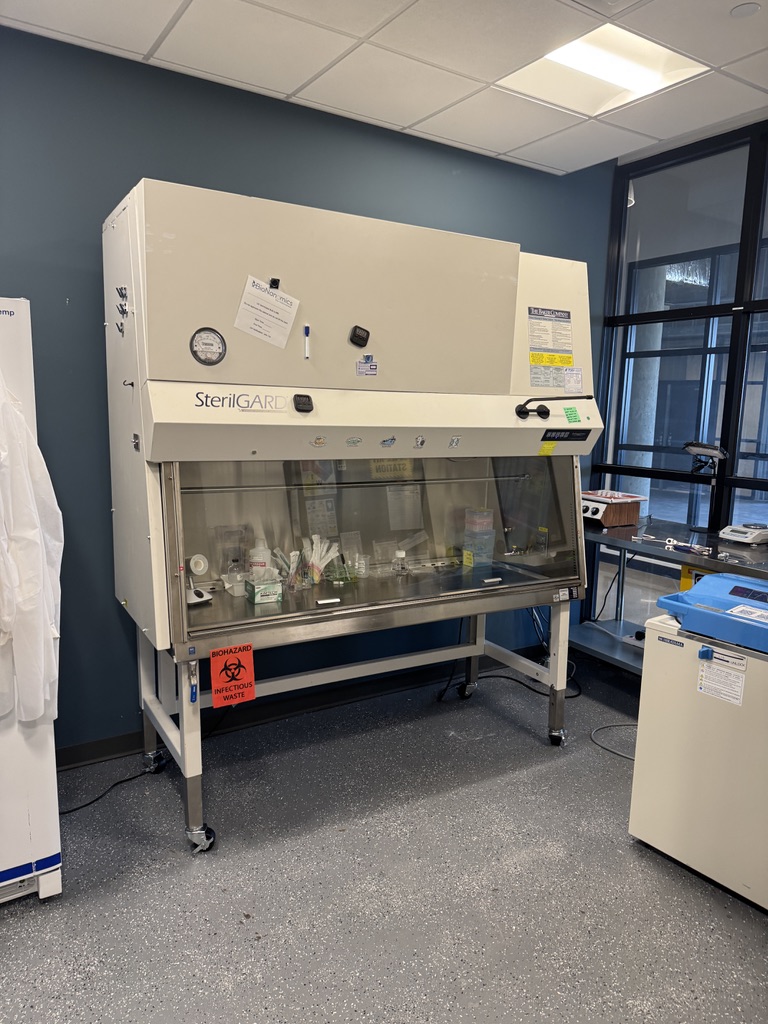
With this back down and fully moveable with just one human arm, we are poised to be able to re-organize the lab pretty easily on Monday!
Other
I also did a bunch of code cleanup on the raw SEM Image viewer this morning, now as an admin I can re-label / correct meta that was labeled incorrectly on the SEM computer. I used it already to help me fix these new images with the correct labels.
04-15 - Wednesday
I got in today after some appts and checked on the time-lapse I started yesterday. The focus held up a lot better this time, and this gives me a lot more hope for managing these longer time-lapses. We did end up having a lot of extra microbial growth visible on the slide this time, we are still getting blooms of bacteria and mold after 48ish hours. This is a slight problem, but one I think we will be able to alleviate through better sterilization of our soils and better sterile conditions when prepping slides. I am also considering adding some sort of anti-microbial agent to the vitamin solution we add to the slides.
Its pretty interesting seeing the ‘flow’ of the microbes crashing into this root tip wave after wave. You can see the image darken about 1/4 through the time-lapse, this is because I turned down the gain on the transmitted light detector because I noticed the microbes were sort of stealing the show. I don’t think this time-lapse holds a ton of scientific value in terms of what it teaches us for our study, but its a good baseline to try to beat for keeping the sample microbe free and clearly imaging.
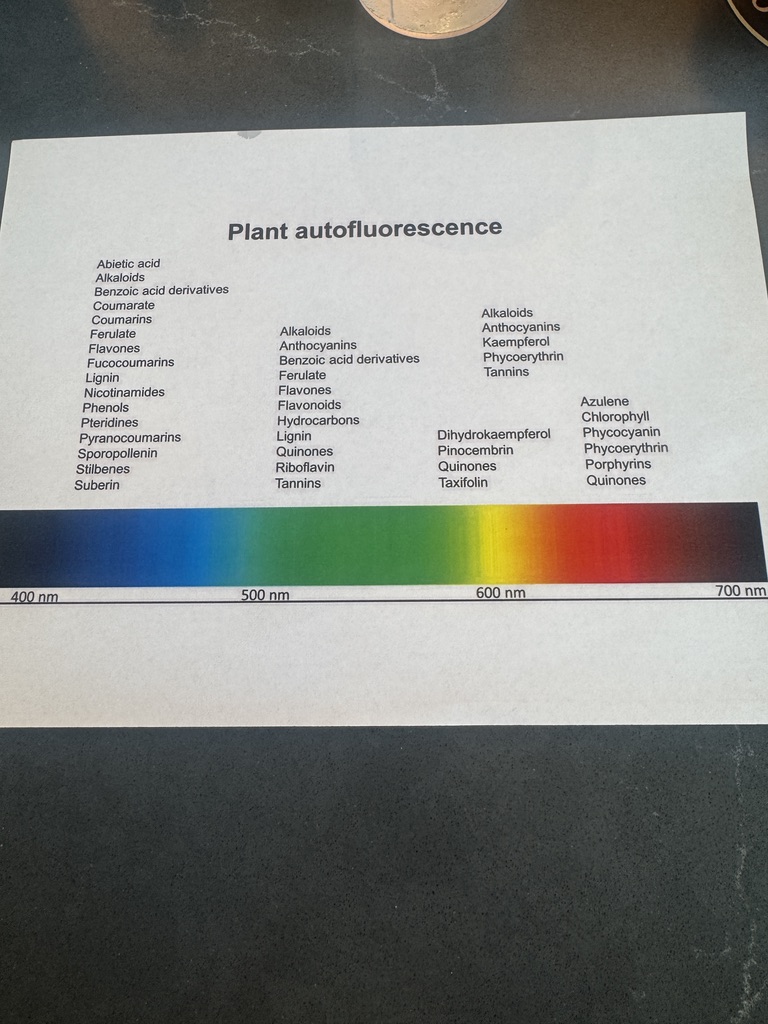
I am going to get another one started first thing in the morning, and I have some cool new ideas for this one including using PFS from the start, and I also want to dig a bit into the confocal’s spectral analysis tools to see if we can’t get a better idea of what is fluorescing in our samples.
04-14 - Tuesday
Today and tomorrow I have some doctors appts, so updates will be a little sparse.
Arabidopsis Update
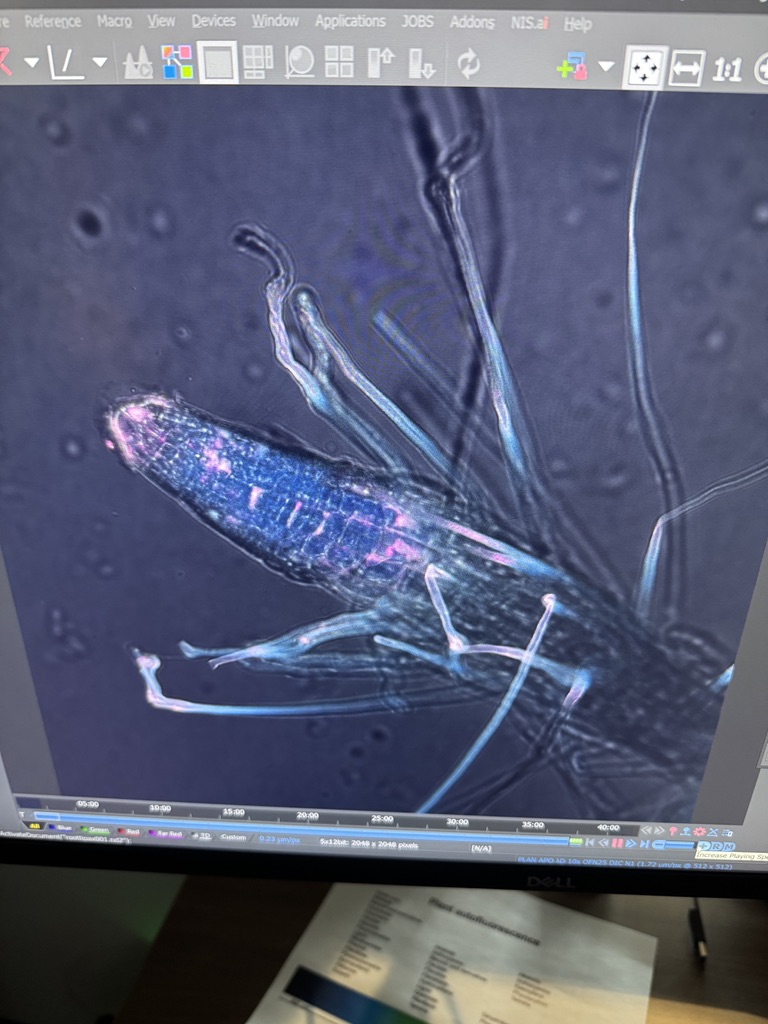
The time-lapse we started yesterday actually looks great, though, the root pulled out of focus about halfway through:
I got another timelapse started today with the same sample, I used the scope’s PFS (Perfect Focus System) to keep the focus plane in line with our subject this time, so we will see how that all turns out tomorrow.
I also spent a while looking into some plant autofluorescence and trying to build some hypotheses about what we are seeing in our samples.
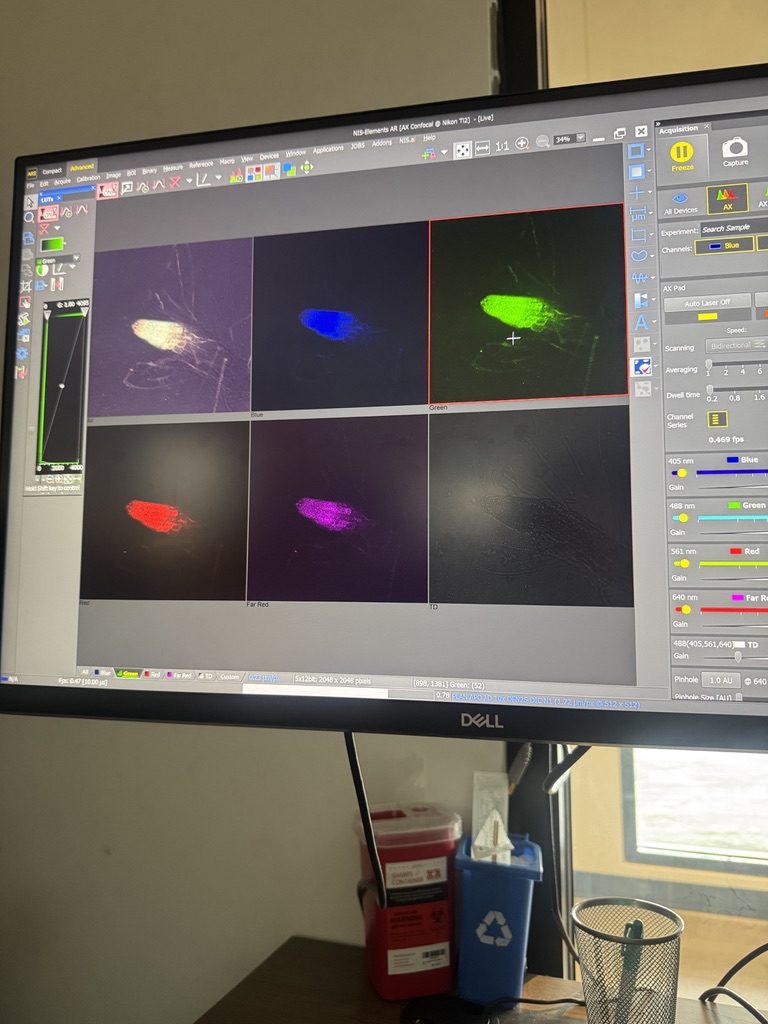
I am going to let this timelapse cook and check it after my appts today and tomorrow!
04-13 - Monday
Got rolling this week by attempting to re-organize the lab again and get the BSC situated finally. We borrrowed a lift from DoItBest and were able to get the BSC lifted up, take off the broken casters, and set it back down.
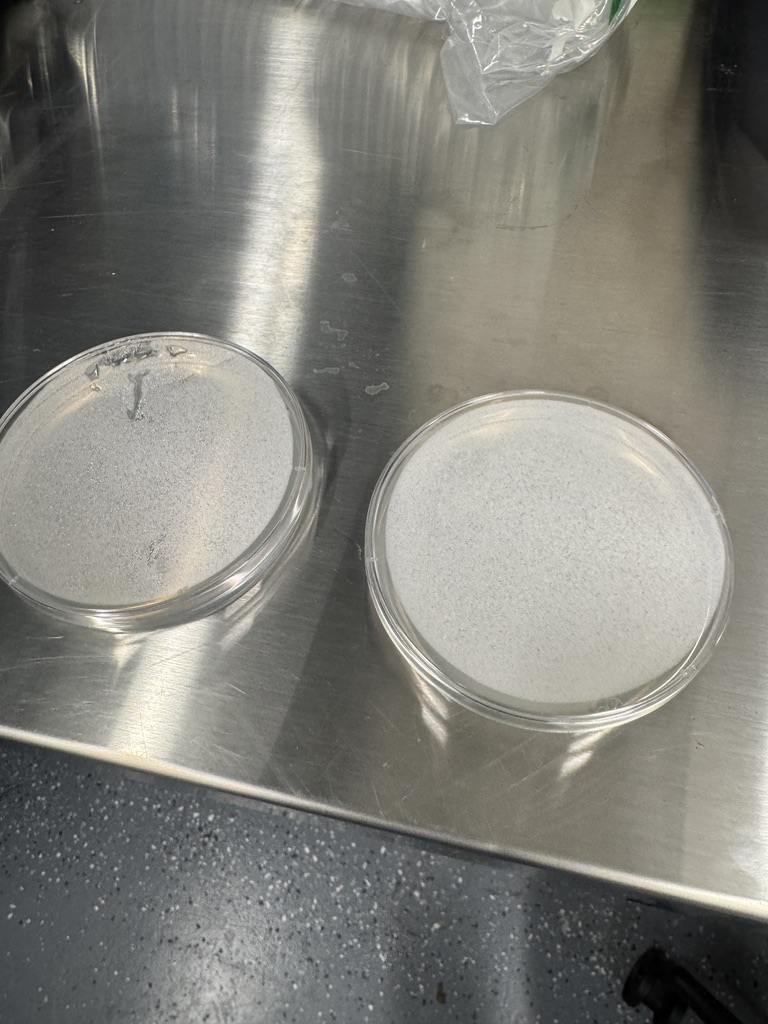
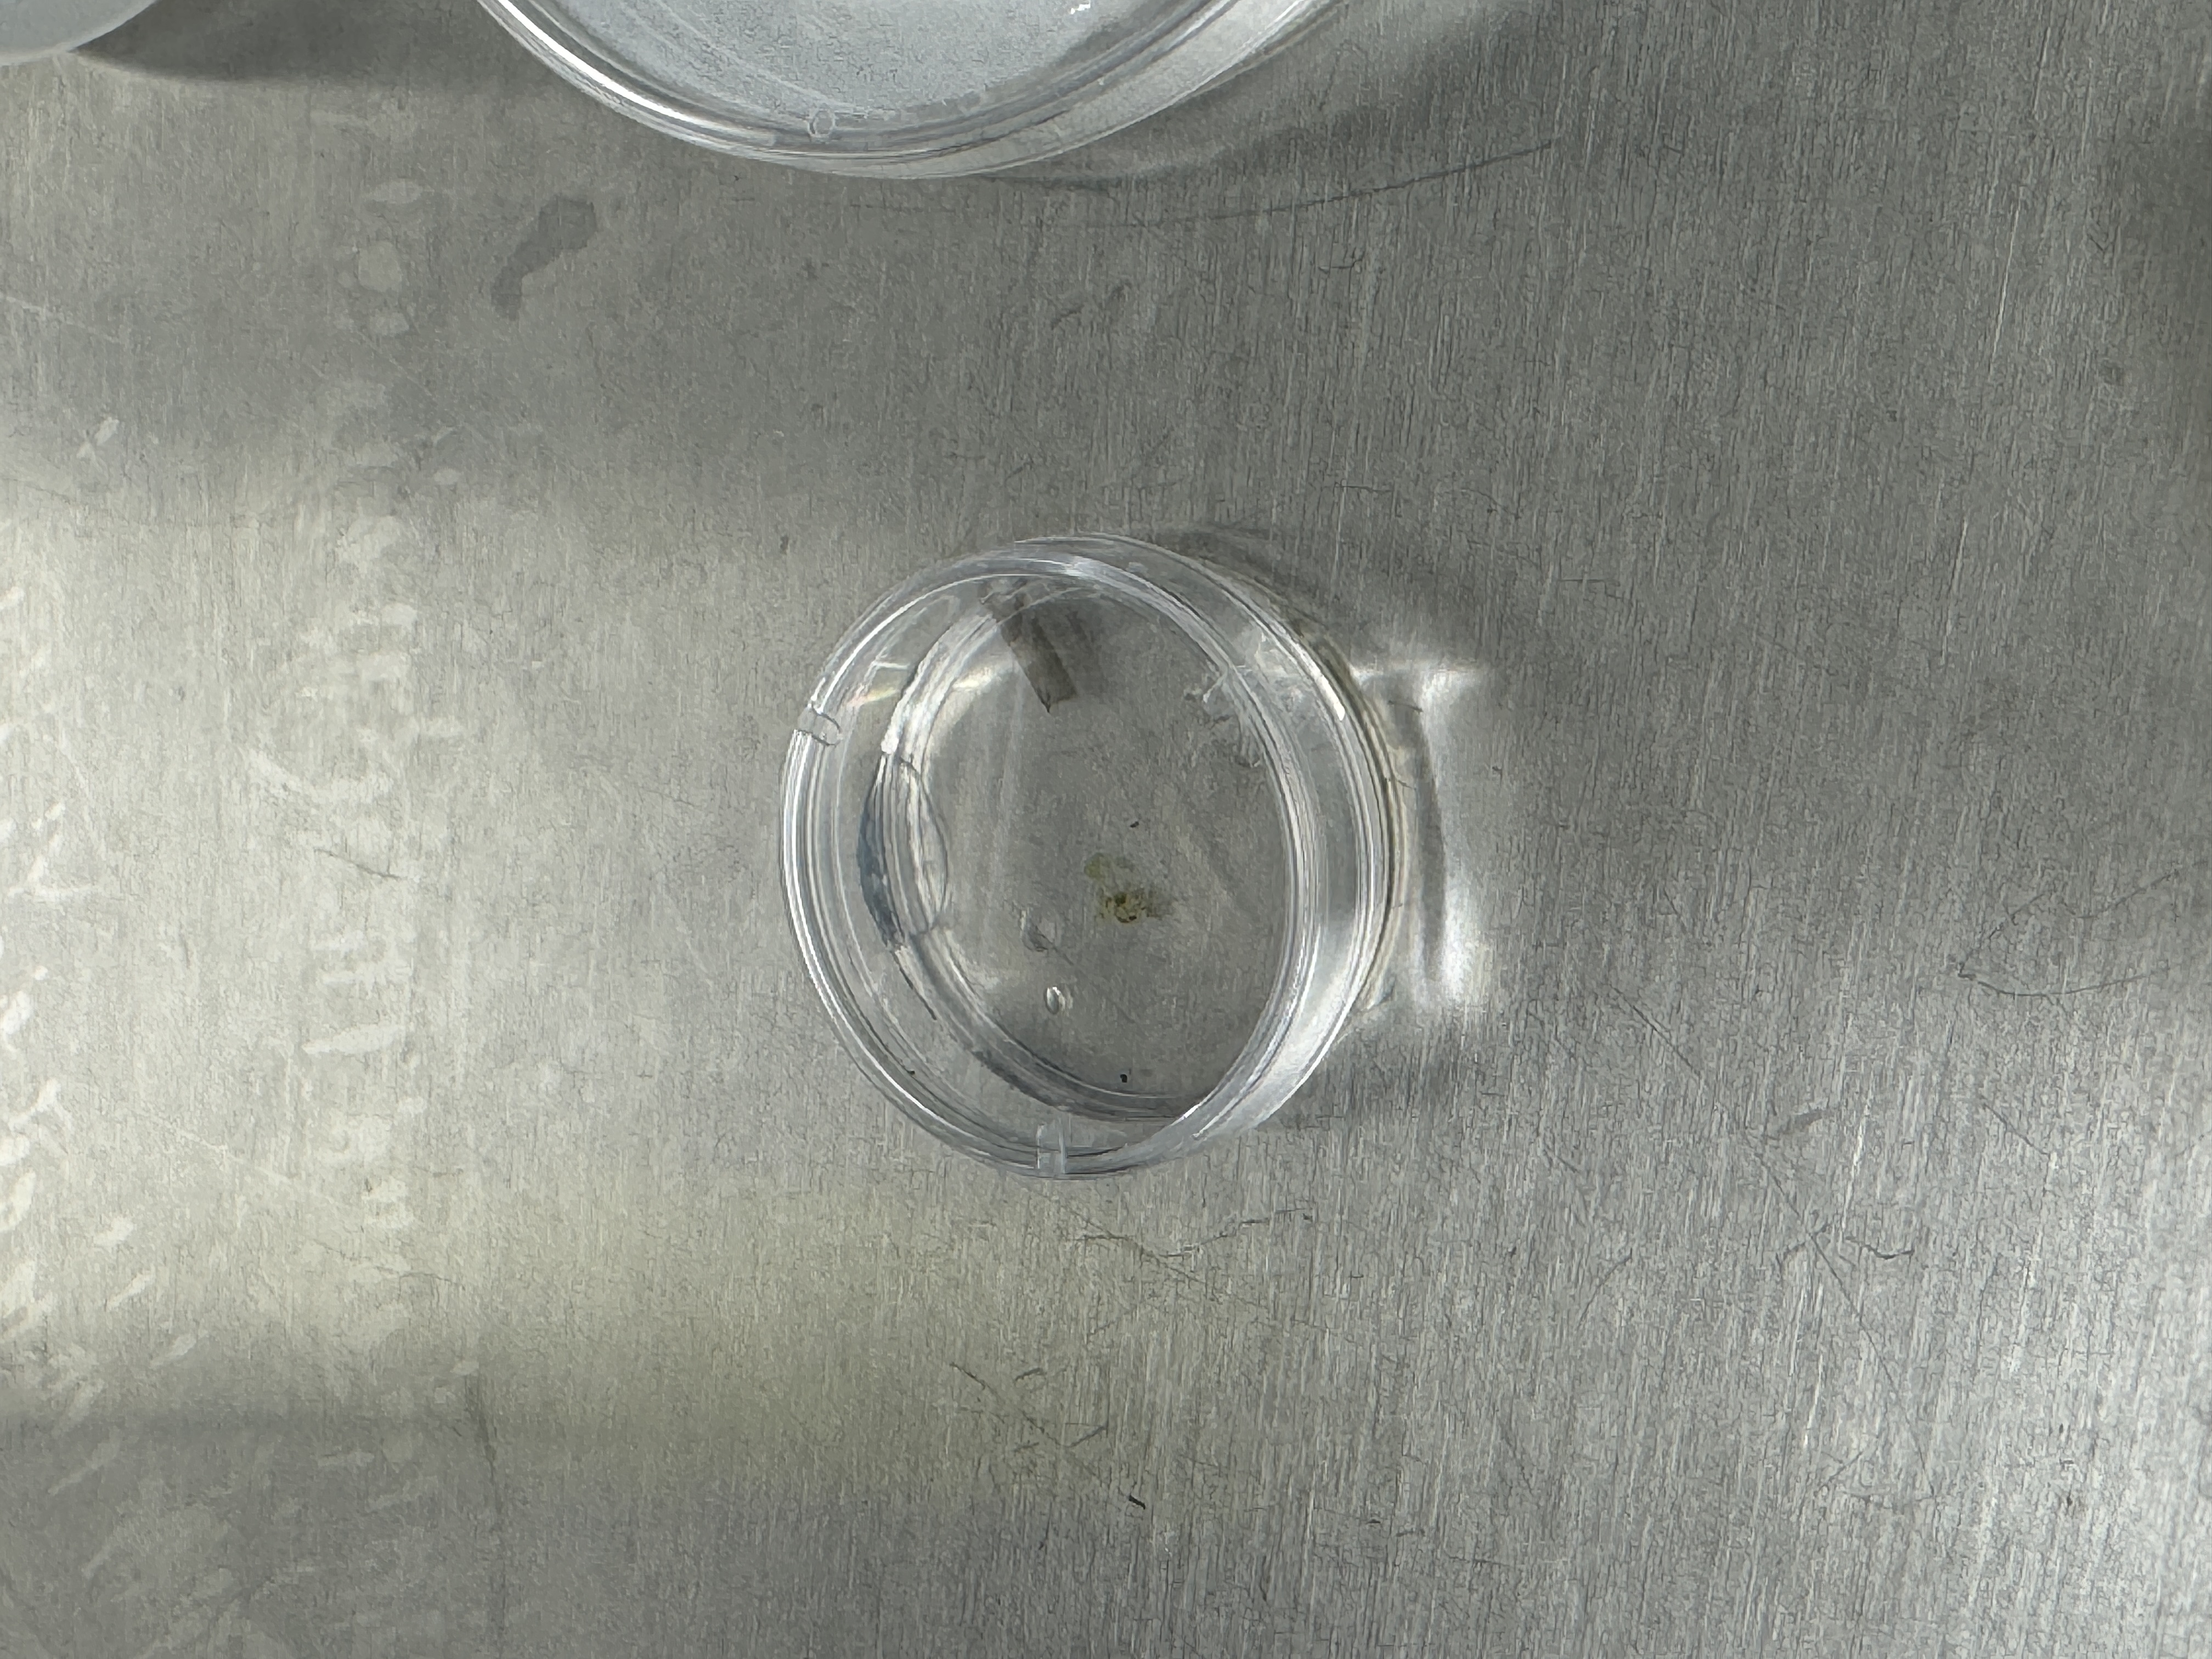
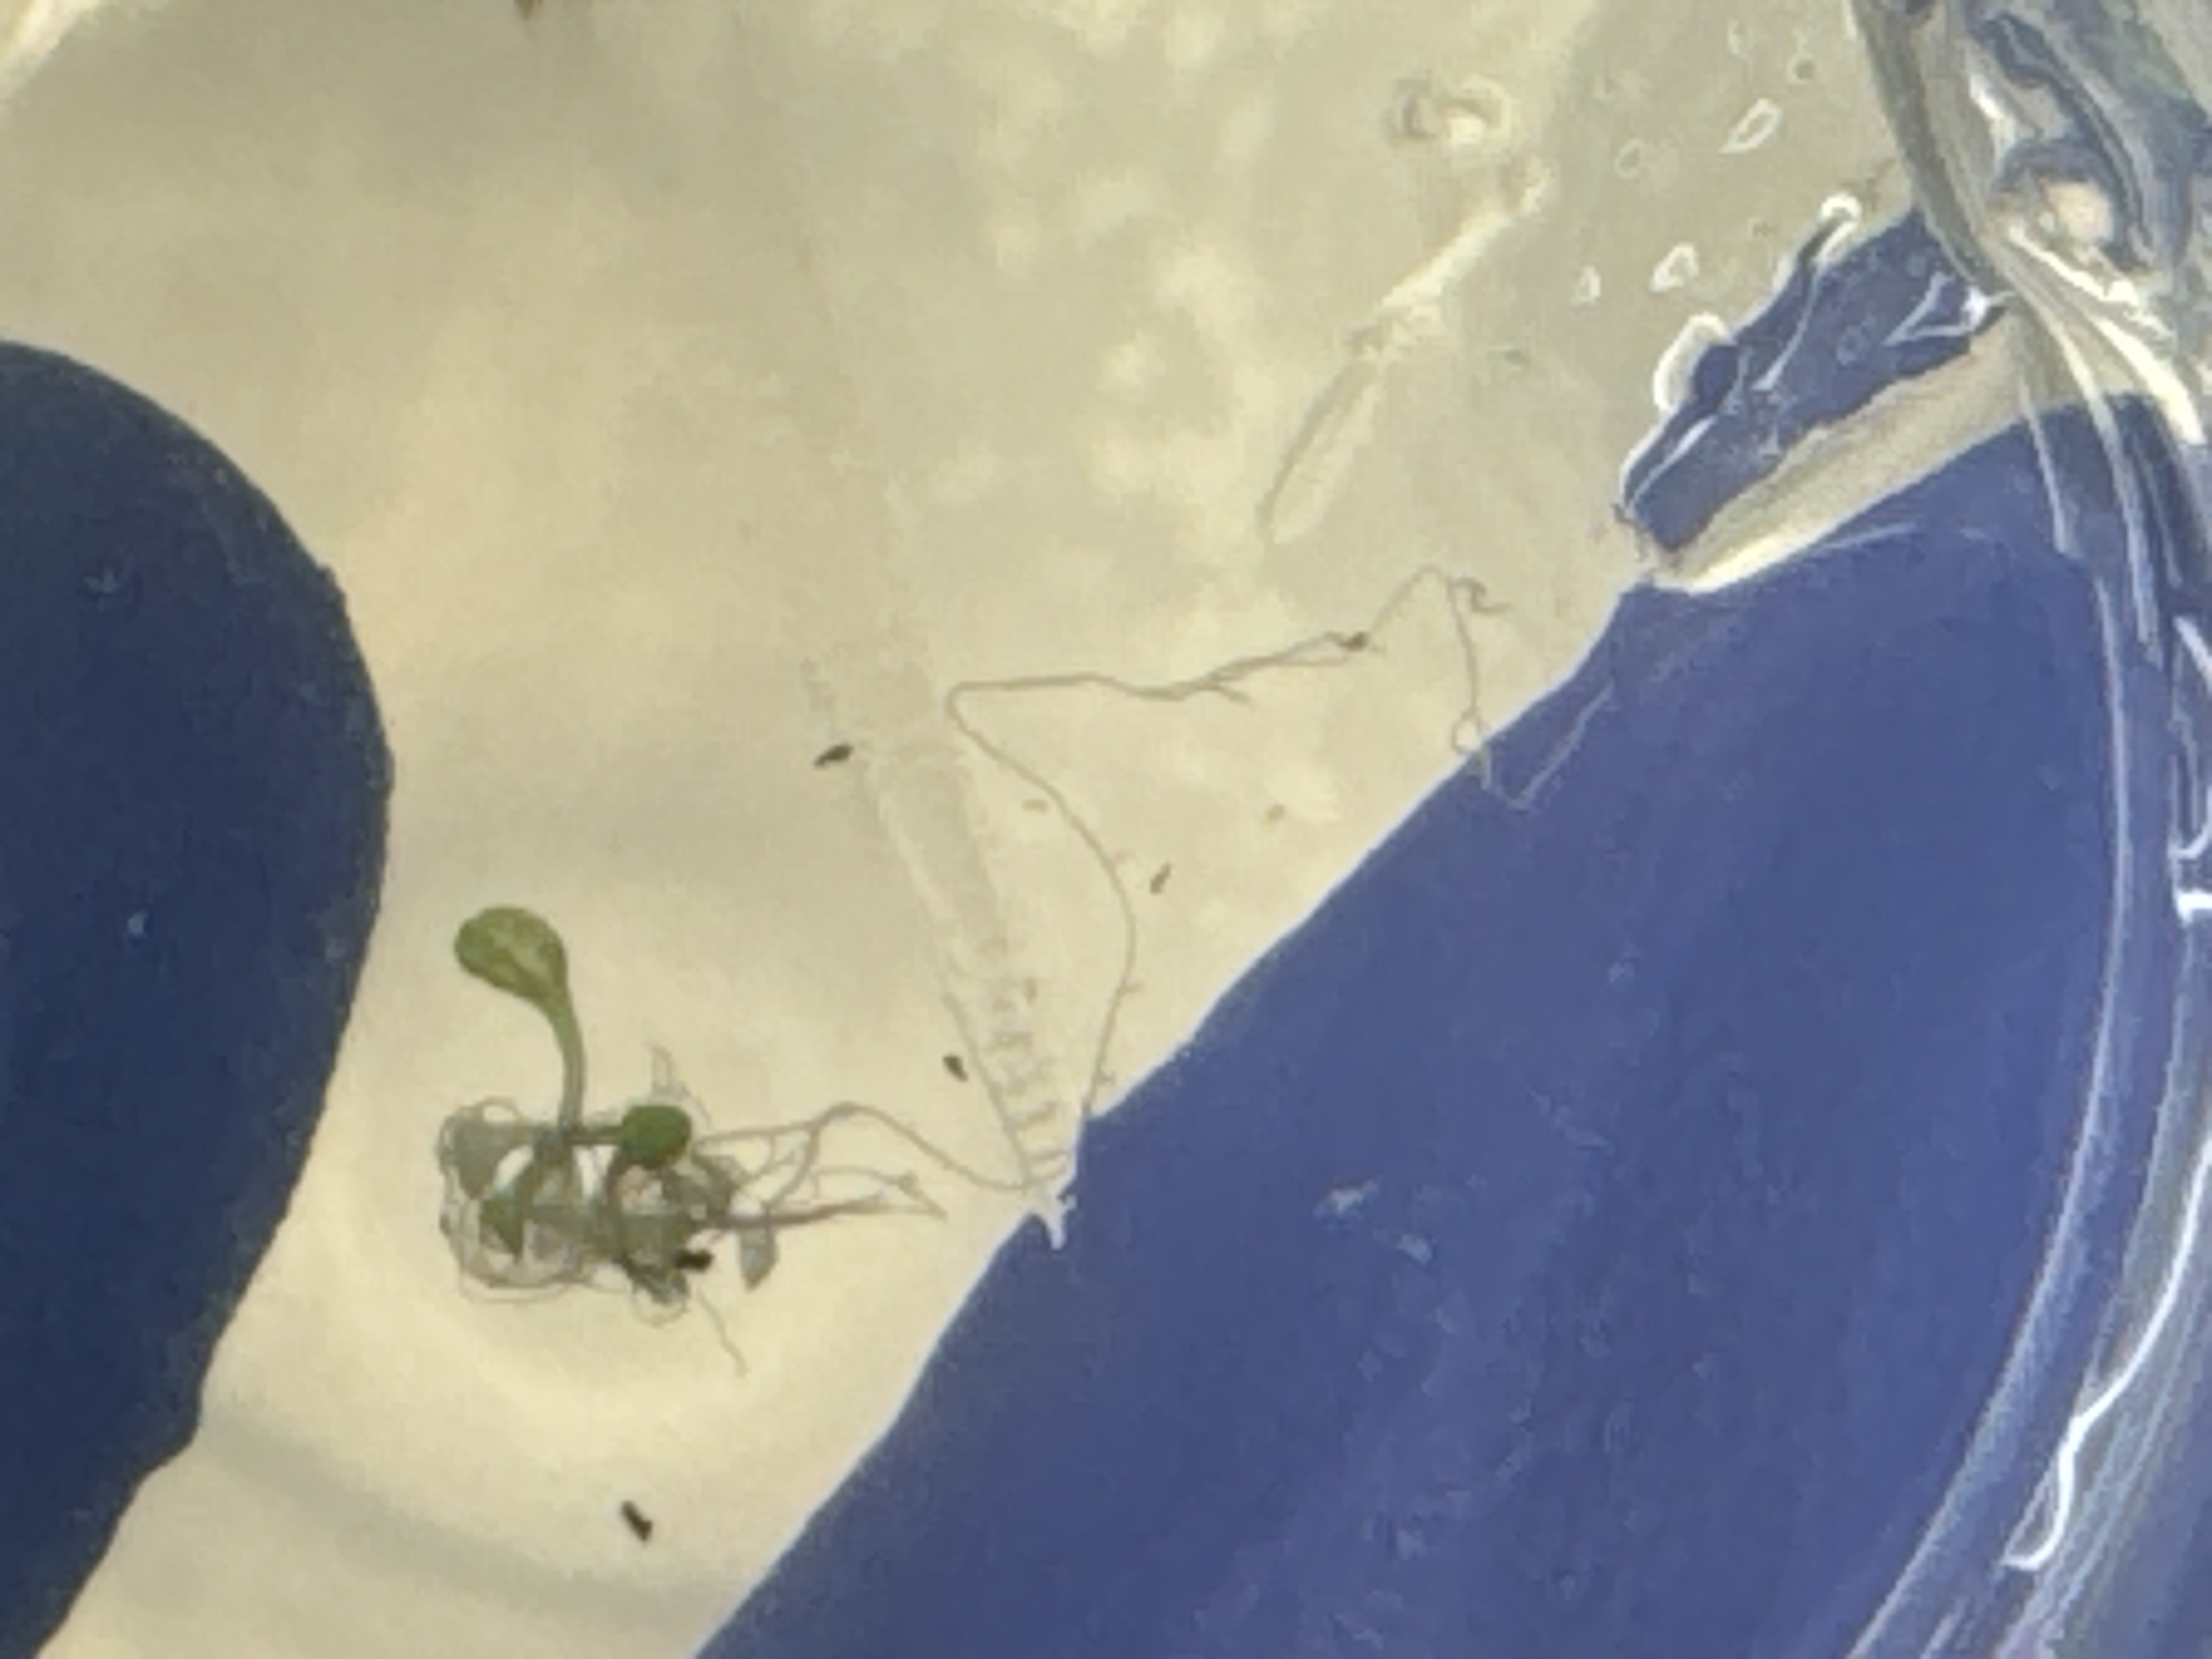
After the BSC was moved, I poured some new plates to use in Arabidopsis imaging. I am doing this because I am just about out, and during the prep for my next time-lapse here in a bit, I will use the last of my supply.
Once the new plates were ready to go, I went ahead and prepped one of the plants for imaging. This is a fairly simple process (that frankly I should have gotten more pictures of) where we take one of the small individuals that has been growing, clean all the dirt off of its roots, place it in a small petri dish, add a vitamin mixture, and then sandwich a cut-out of fresh agar from one of the aforementioned plates onto the roots to hold it in place and keep it hydrated. This is how we have been preparing our samples thus far, but I think next time we are going to make a small modification and cut the agar around the leaves to provide them with more oxygen.
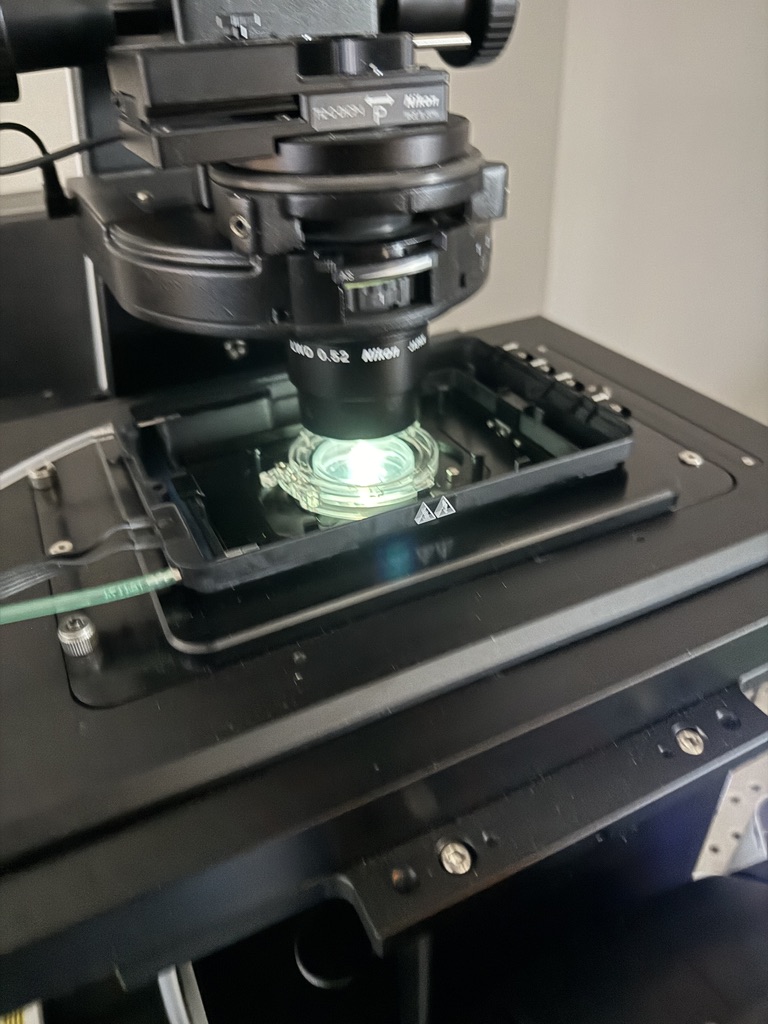
After prepping, I loaded it up onto the scope and started the image:
In these last few pre-experiment trials, I am trying to push our time-lapses longer and longer, and start to lock in on final laser settings.
04-10 - Friday
Housekeeping, made some updates to the Sputter Coater Repair Log, did some minor code work and tweaks to this site, and am working on doing some expenses and other random admin work. We have to wait to move the BSC until Monday because the lift isn’t quite ready for us to borrow yet.
04-09 - Thursday
Today I was helping out down in amp lab, so I don’t have too many updates on the regular projects. I probably wouldn’t have even posted today, but I got the freezer fixed and wanted to show it off
Freezer update
The new plug came in today, so I took a little bit to get it swapped in and get things re-assembled!
Random
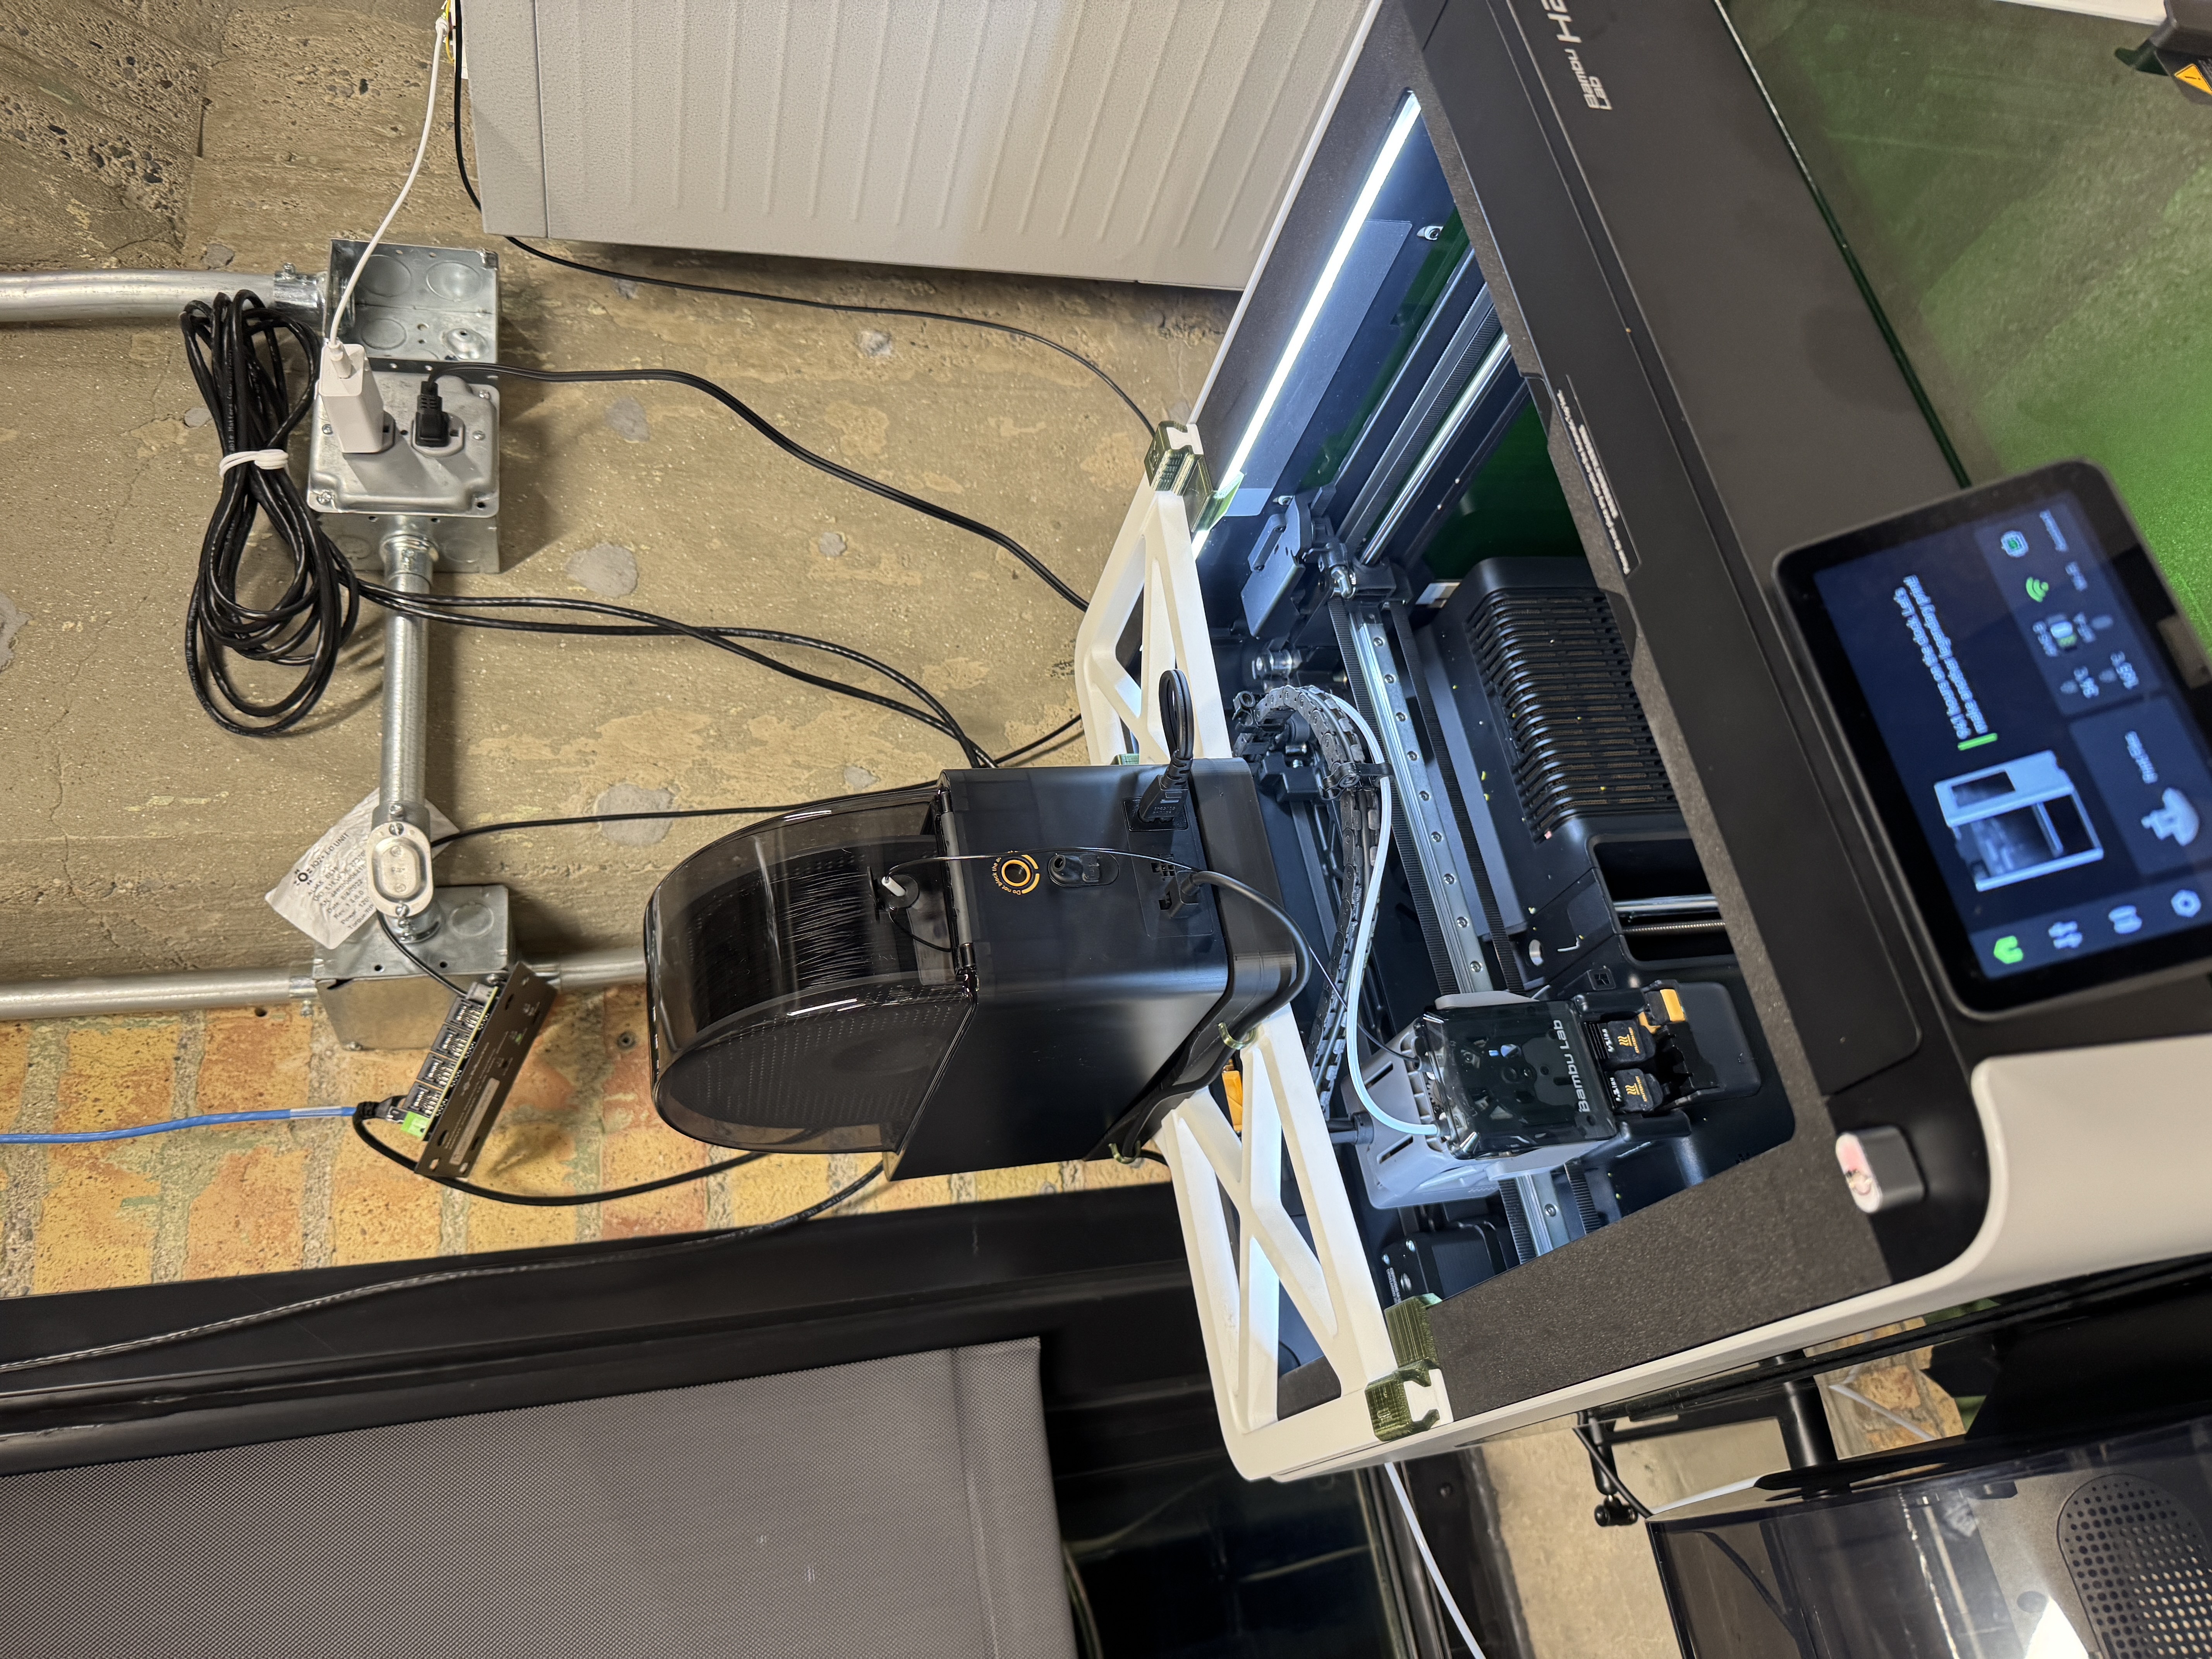
I also ran a test print with our new top loading filament extruder setup, and it worked very well. This should allow us to print most weird filaments. I did a test benchy and it came out great.

04-08 - Wednesday
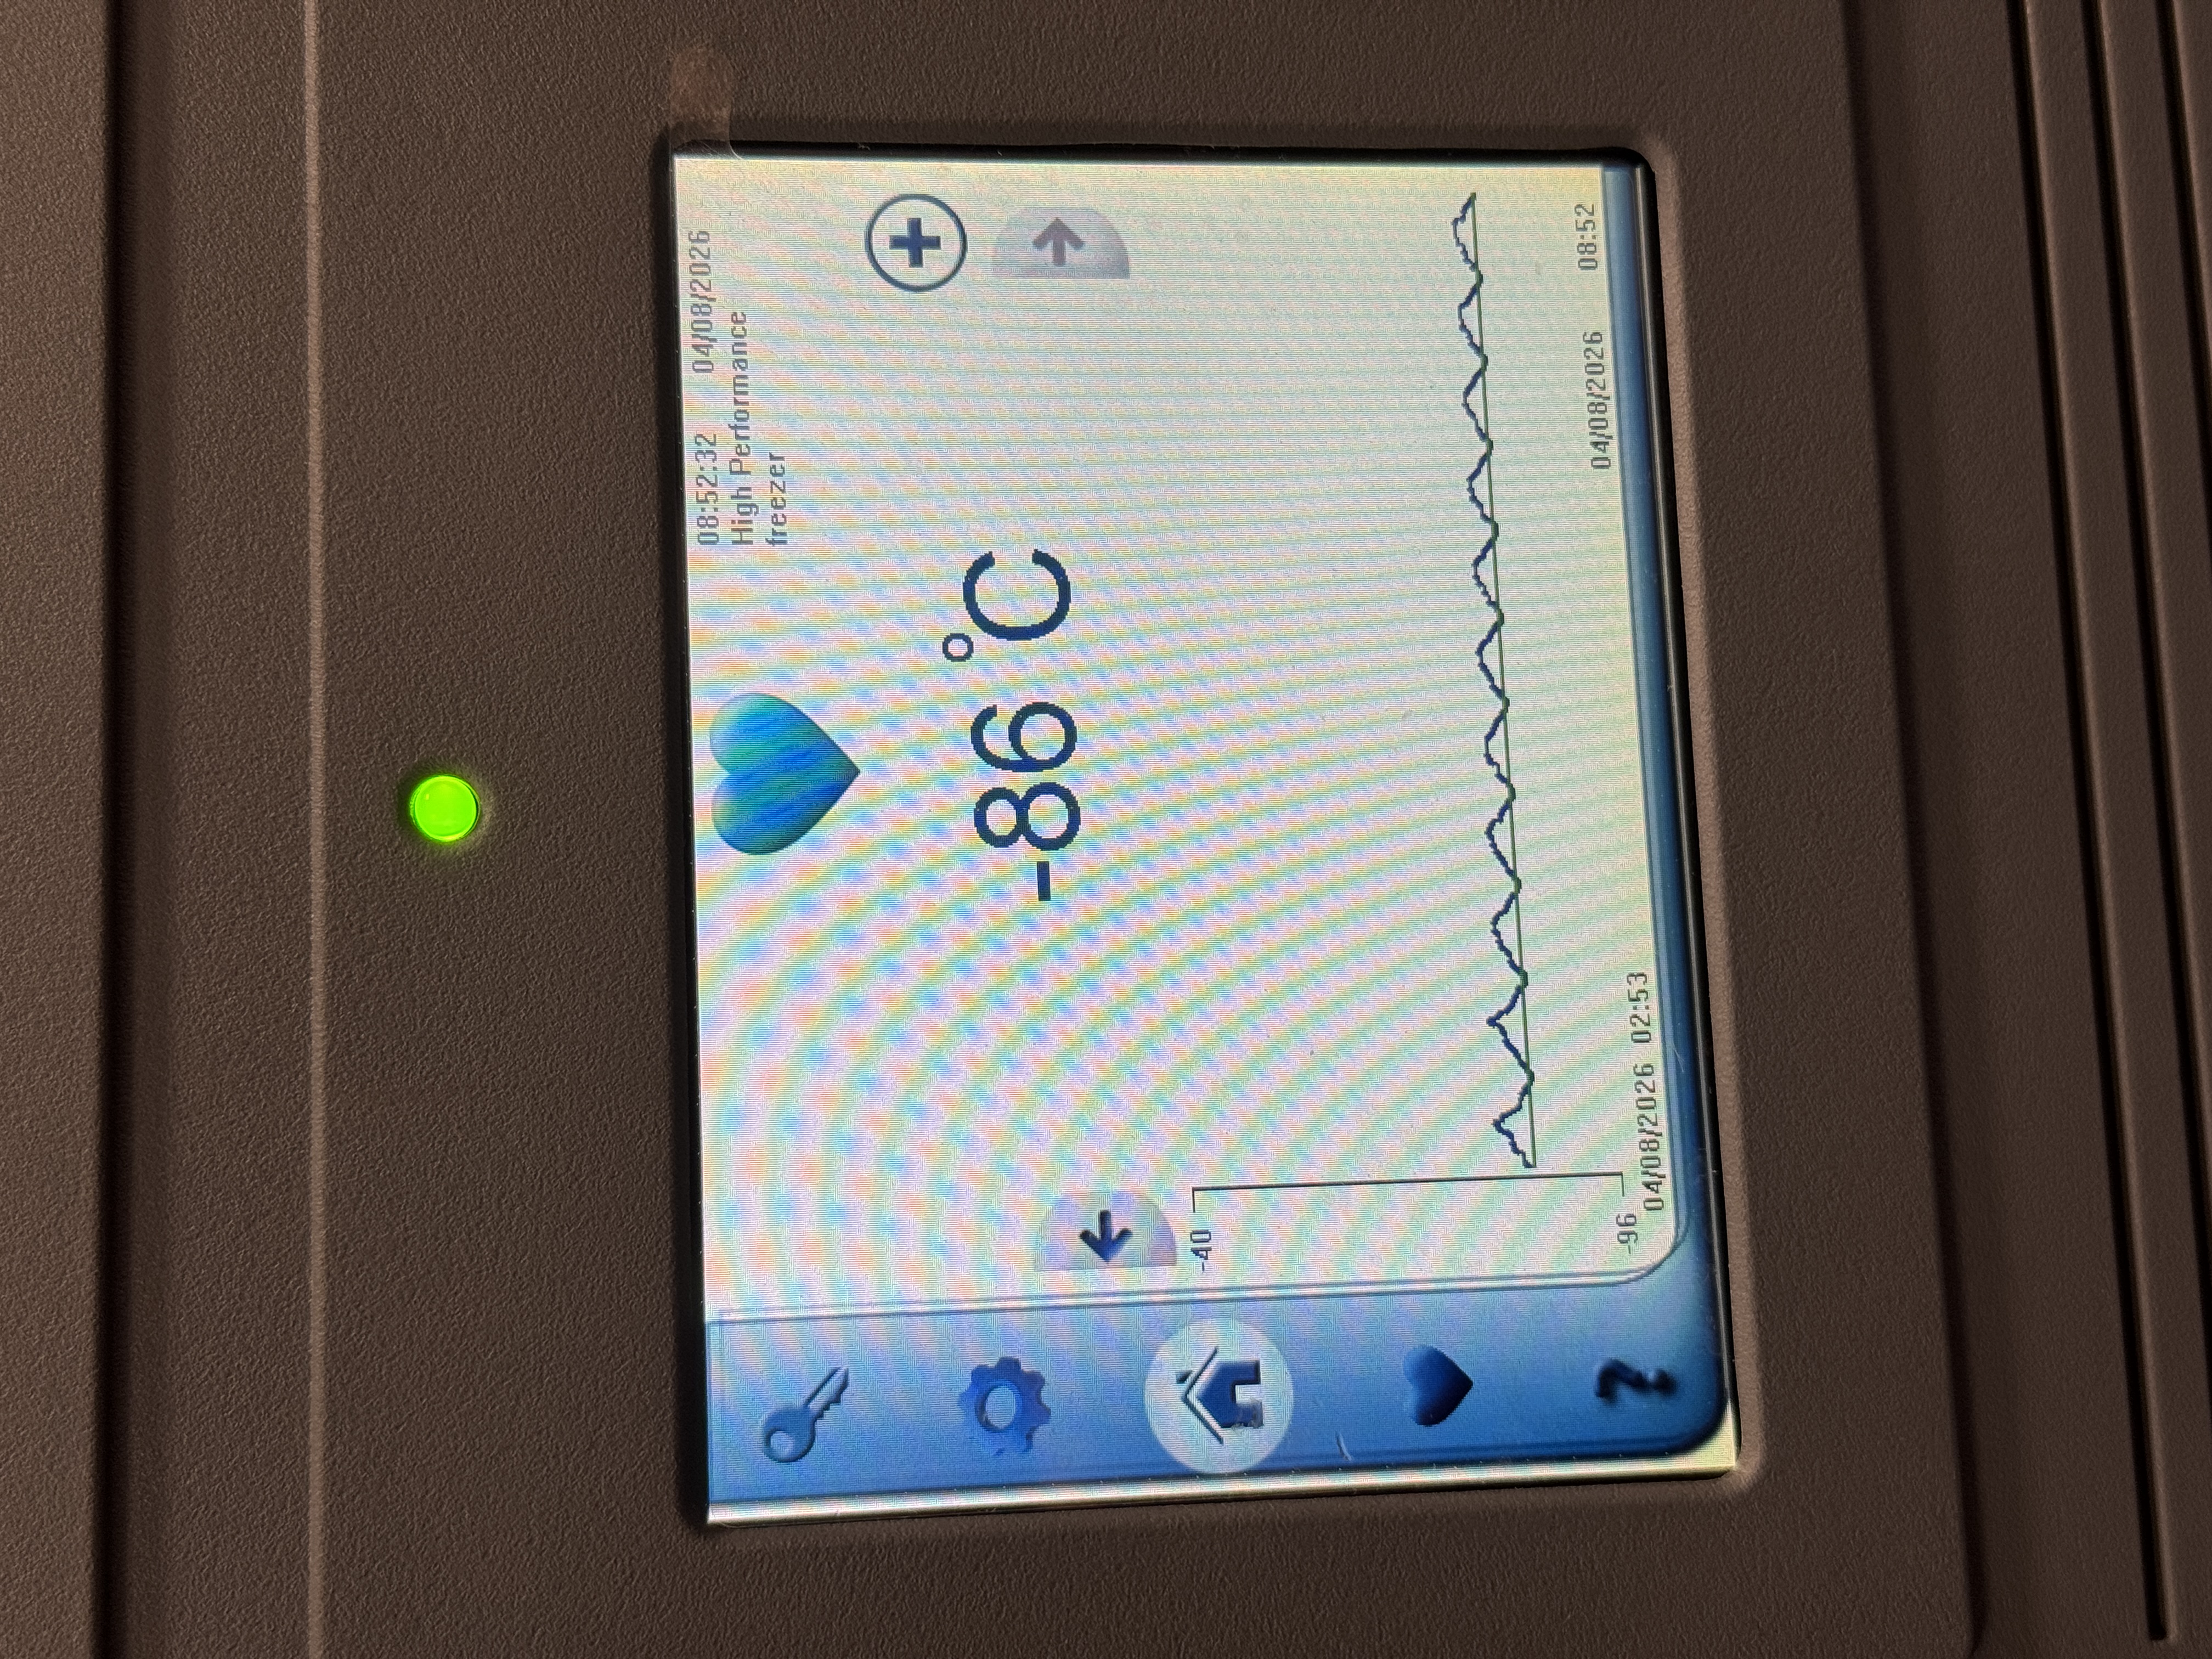
More freezer stuff
Last night I left the new freezer running to see if it would get to its set point, this morning I was pleasantly surprised to see that it was there. Now that I know it works, I need to get it moved to a more convenient spot so its not getting in the way for people that actually need to use the lab today. I am going to unplug it and wheel it over into the imaging lab for now, Bri and I should hopefully be attempting to fix the BSC (BioSafety Cabinet) positioning today, which should free up enough space to let this freezer have a proper home.

Code stuff
I spent a couple hours this morning making some improvements to this blog codebase for our other editors here at BNX. I got Cameron set up with the new tooling, I’m sure you’ll see a post by him here shortly. I also made some optimizations surrounding image loading and sizing. I think the new setup will be a much better experience for content creators and readers alike.
Other
I spent a while today working with one of our interns to try to figure out how to get our Elveflow microfluidics system talking to our Nikon Ti2. It seems like we could basically get it working in a few minutes if we had the TTL/Analog IO module for the Ti2, which we do not. We are reaching out to Nikon to get a price on this module. Hopefully its reasonable and we are able to make it work, because we will need TTL capabilities for a lot of our experiments in the future.
Bri and I got confirmation that DoItBest is going to let us borrow their lift tomorrow so we can fix the BSC positioning, so tomorrow should be fun 😛
04-07 - Tuesday
Today I am working on checking the state of all of the new equipment we got yesterday.
Freezer work
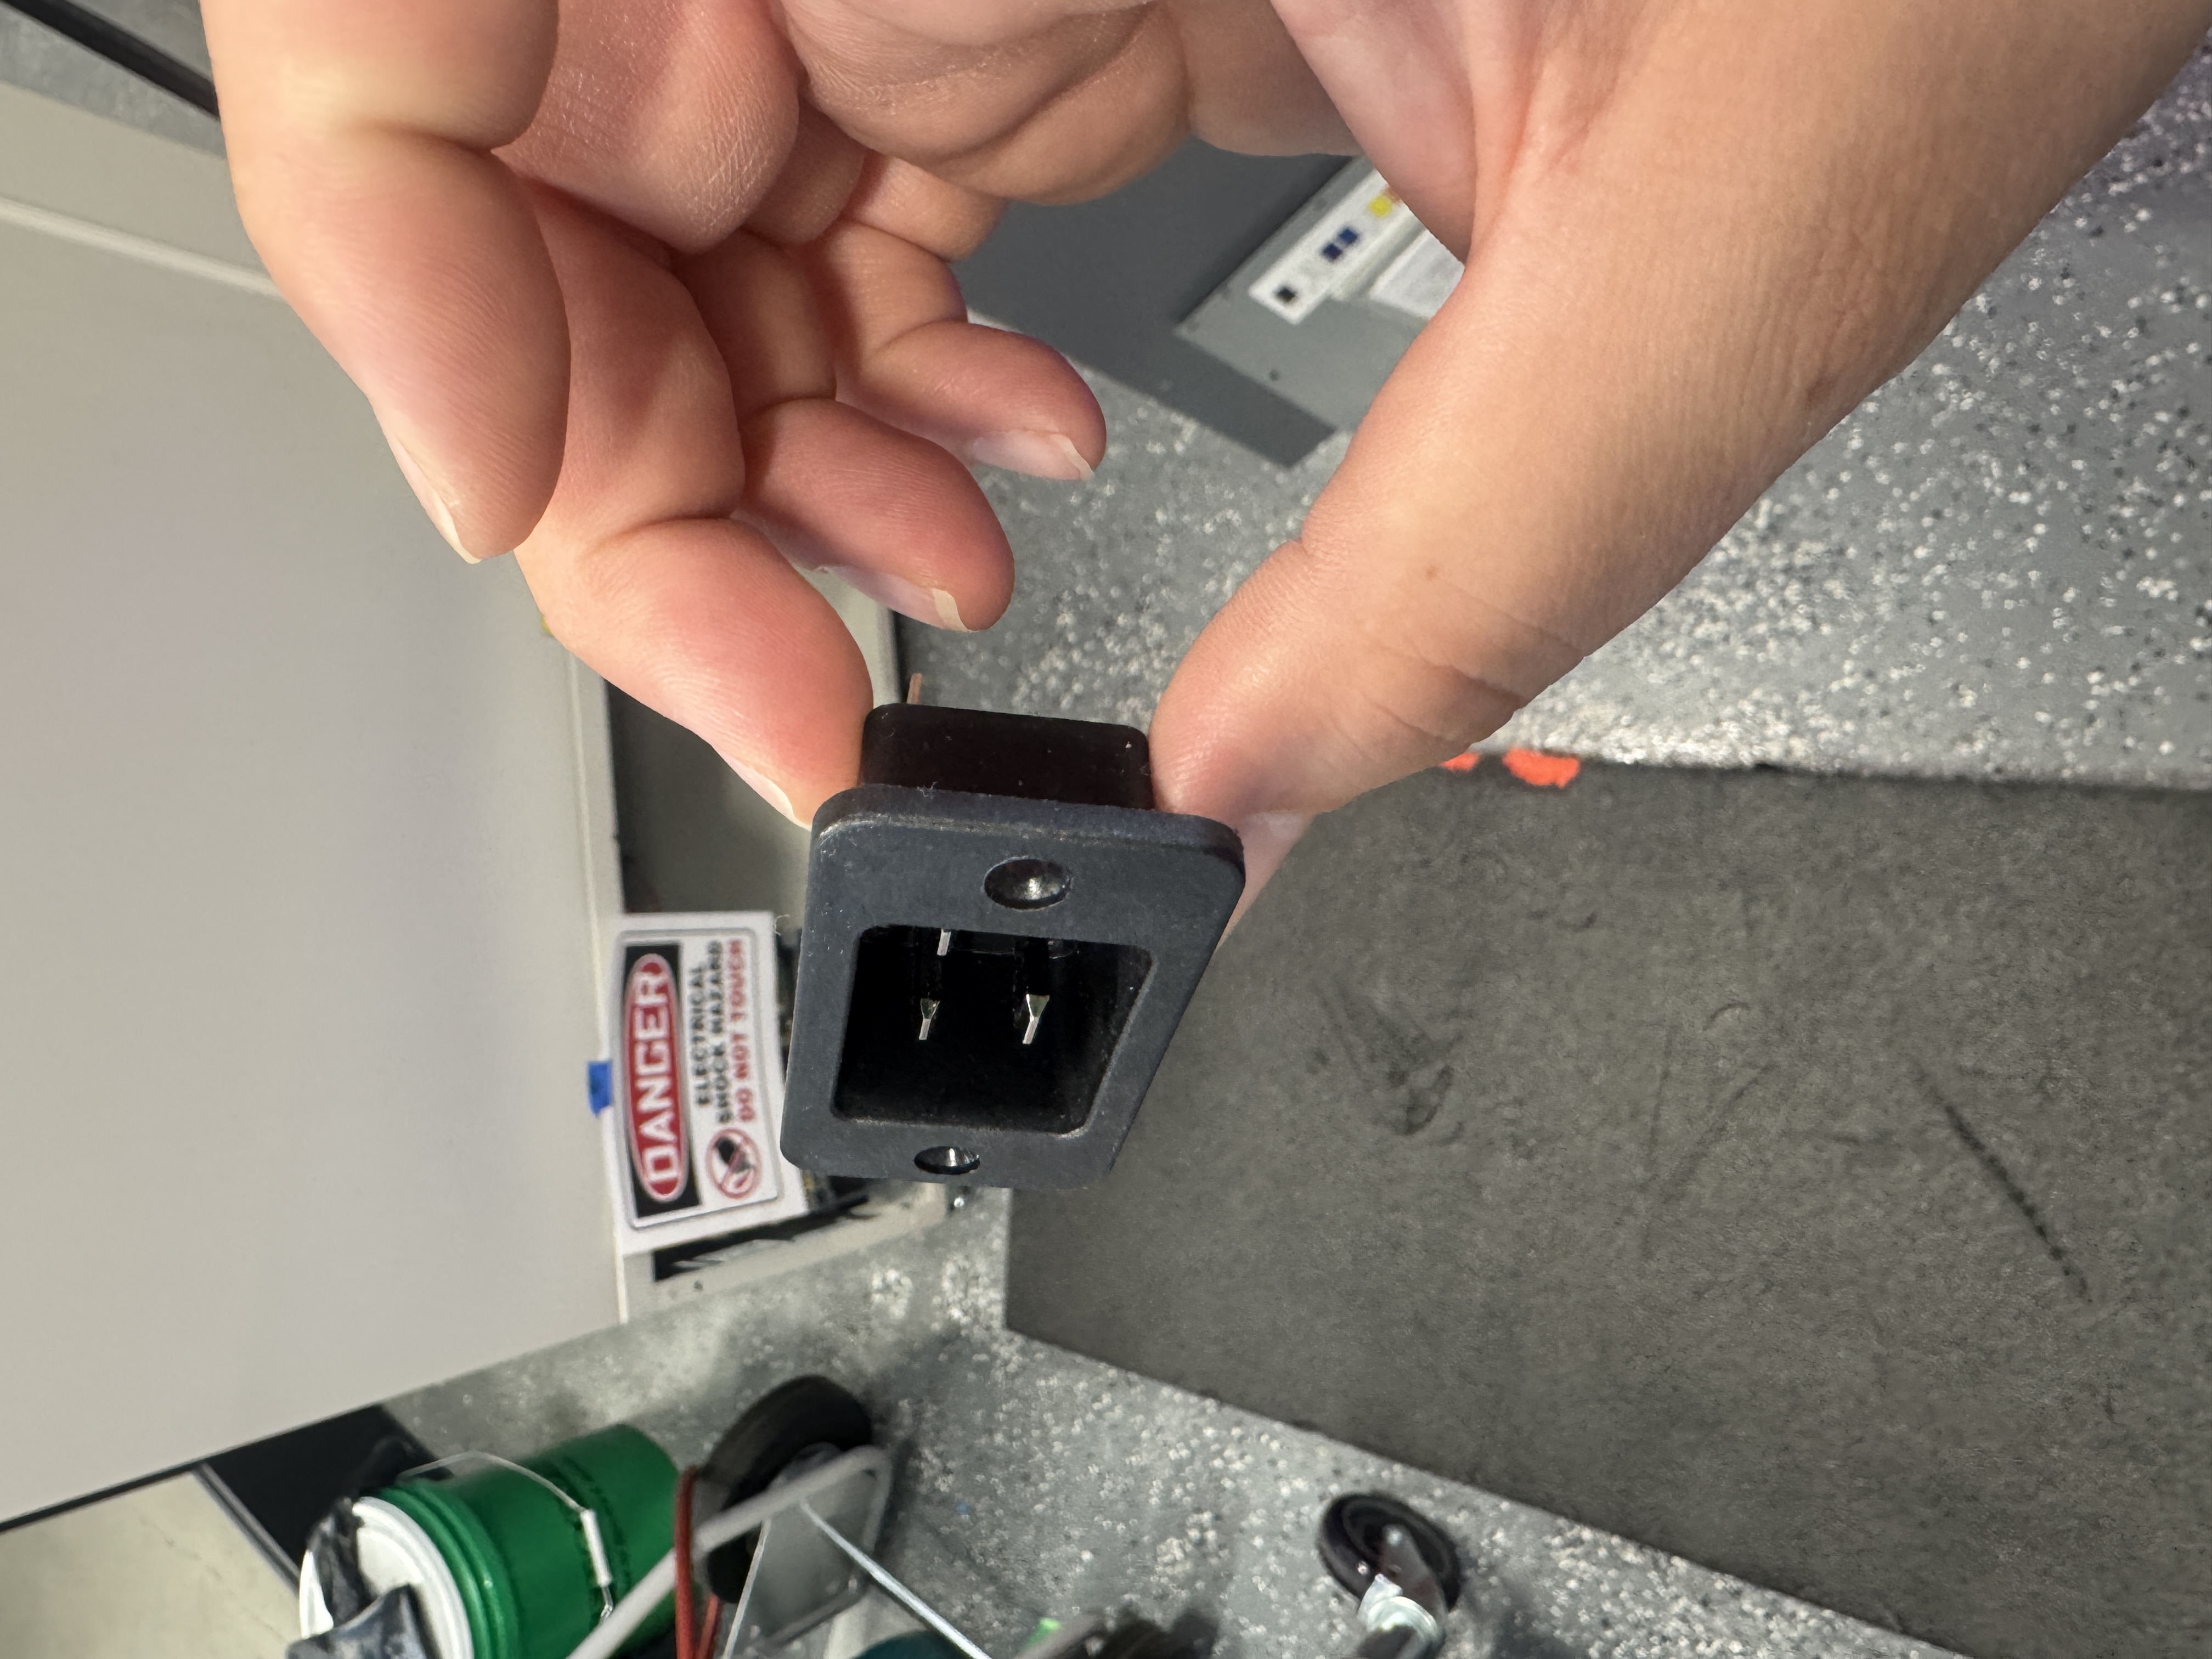
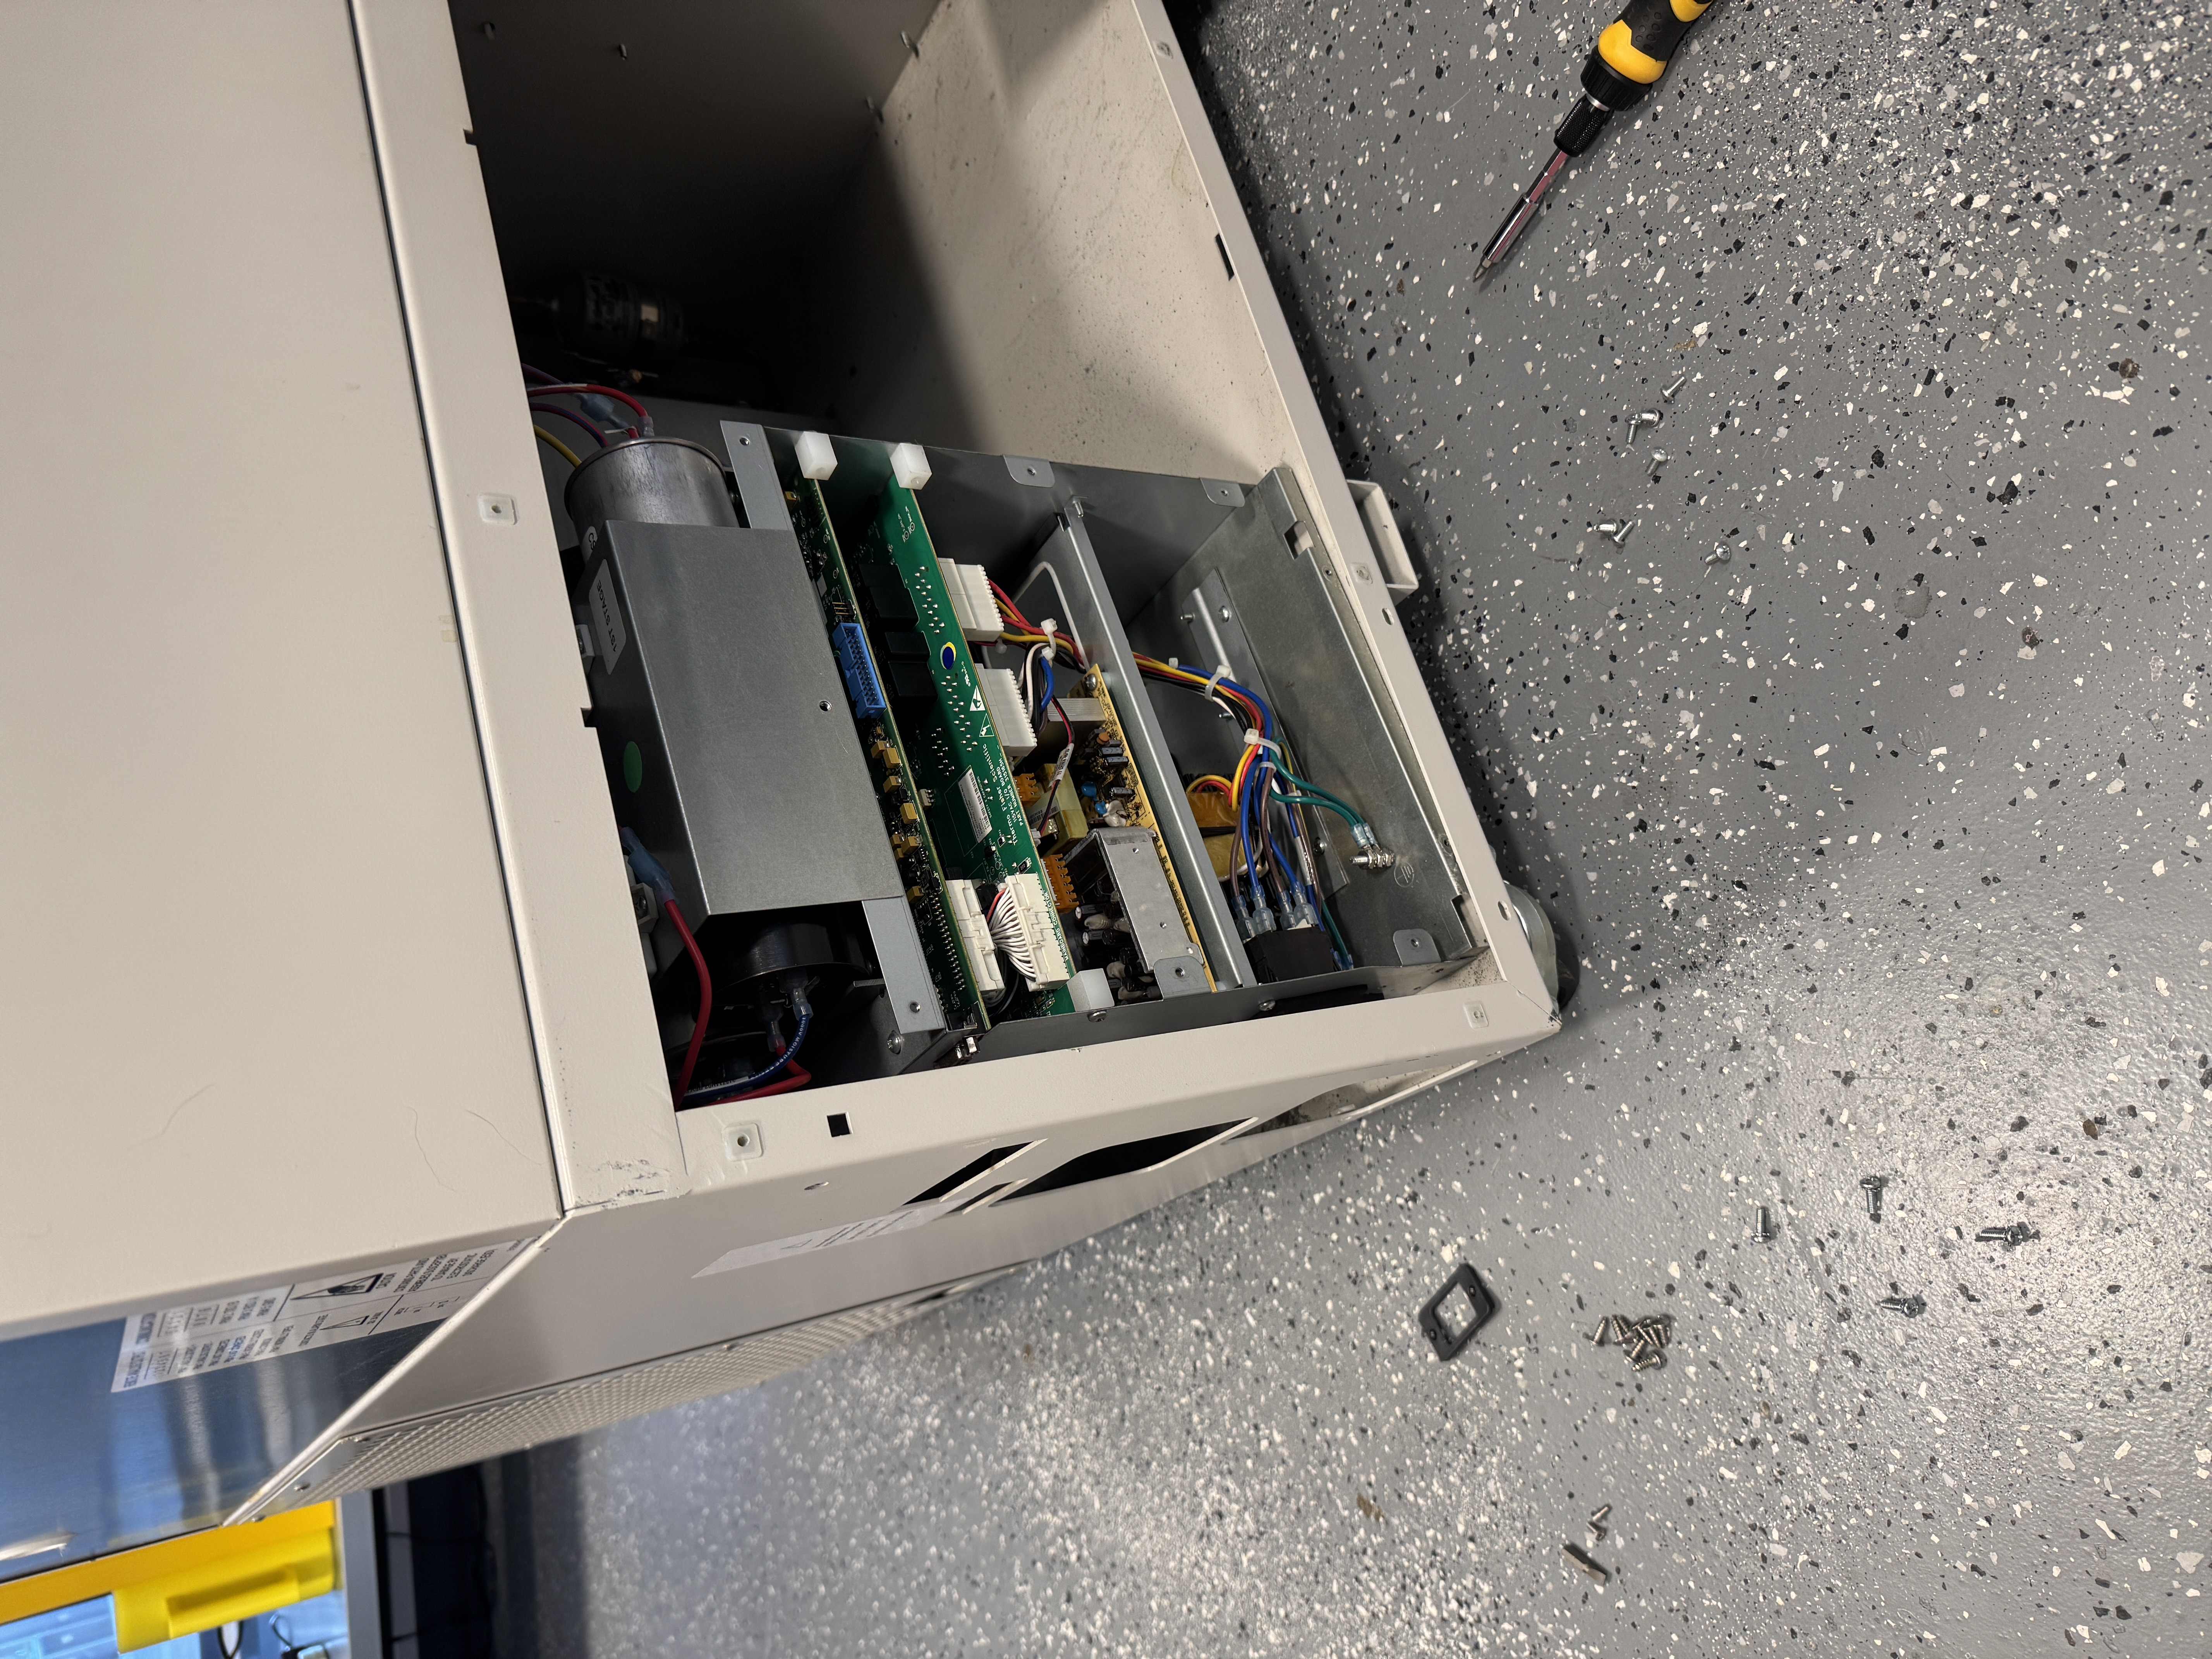
I started by pulling the freezer into the wet lab so I could power it and test it. As soon as I went to plug it in, I noticed that the plug didn’t go in at all. After some investigating, I found that it arrived to us with a broken plug. No bueno.
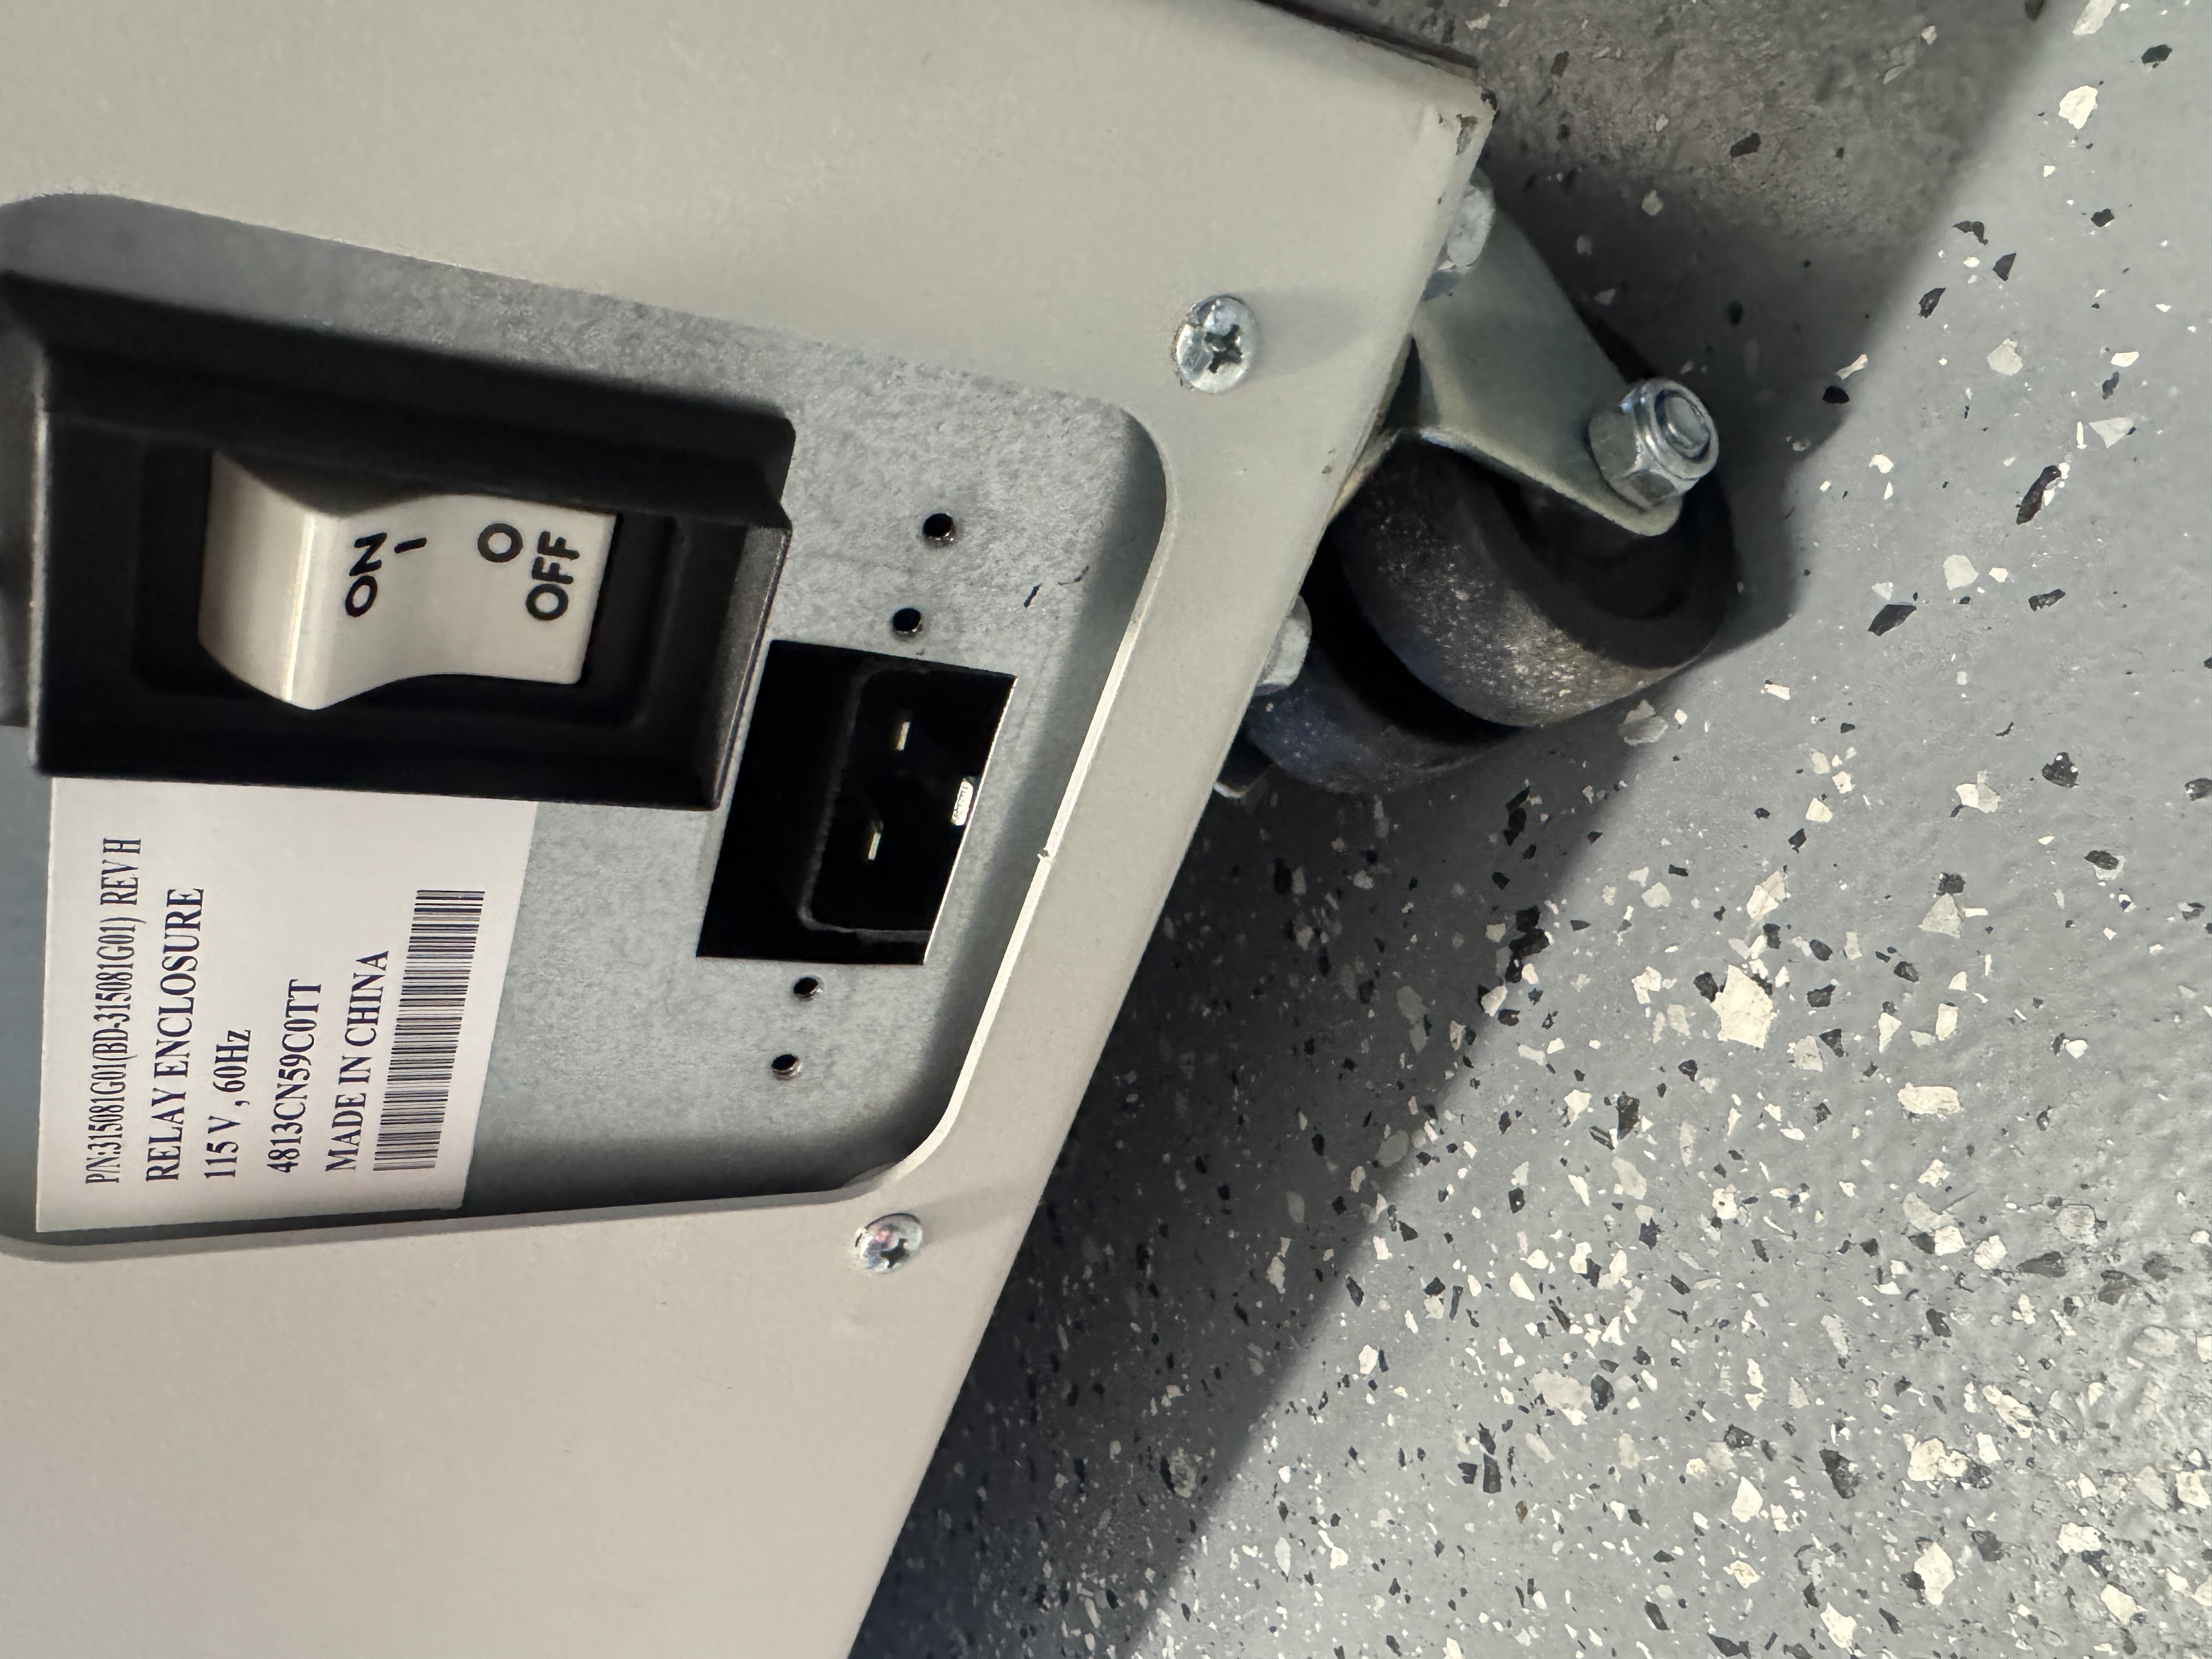
I stripped the side panels off and made my way into the power supply, and was able to pull the plug out from the back so I could easily read its model number:
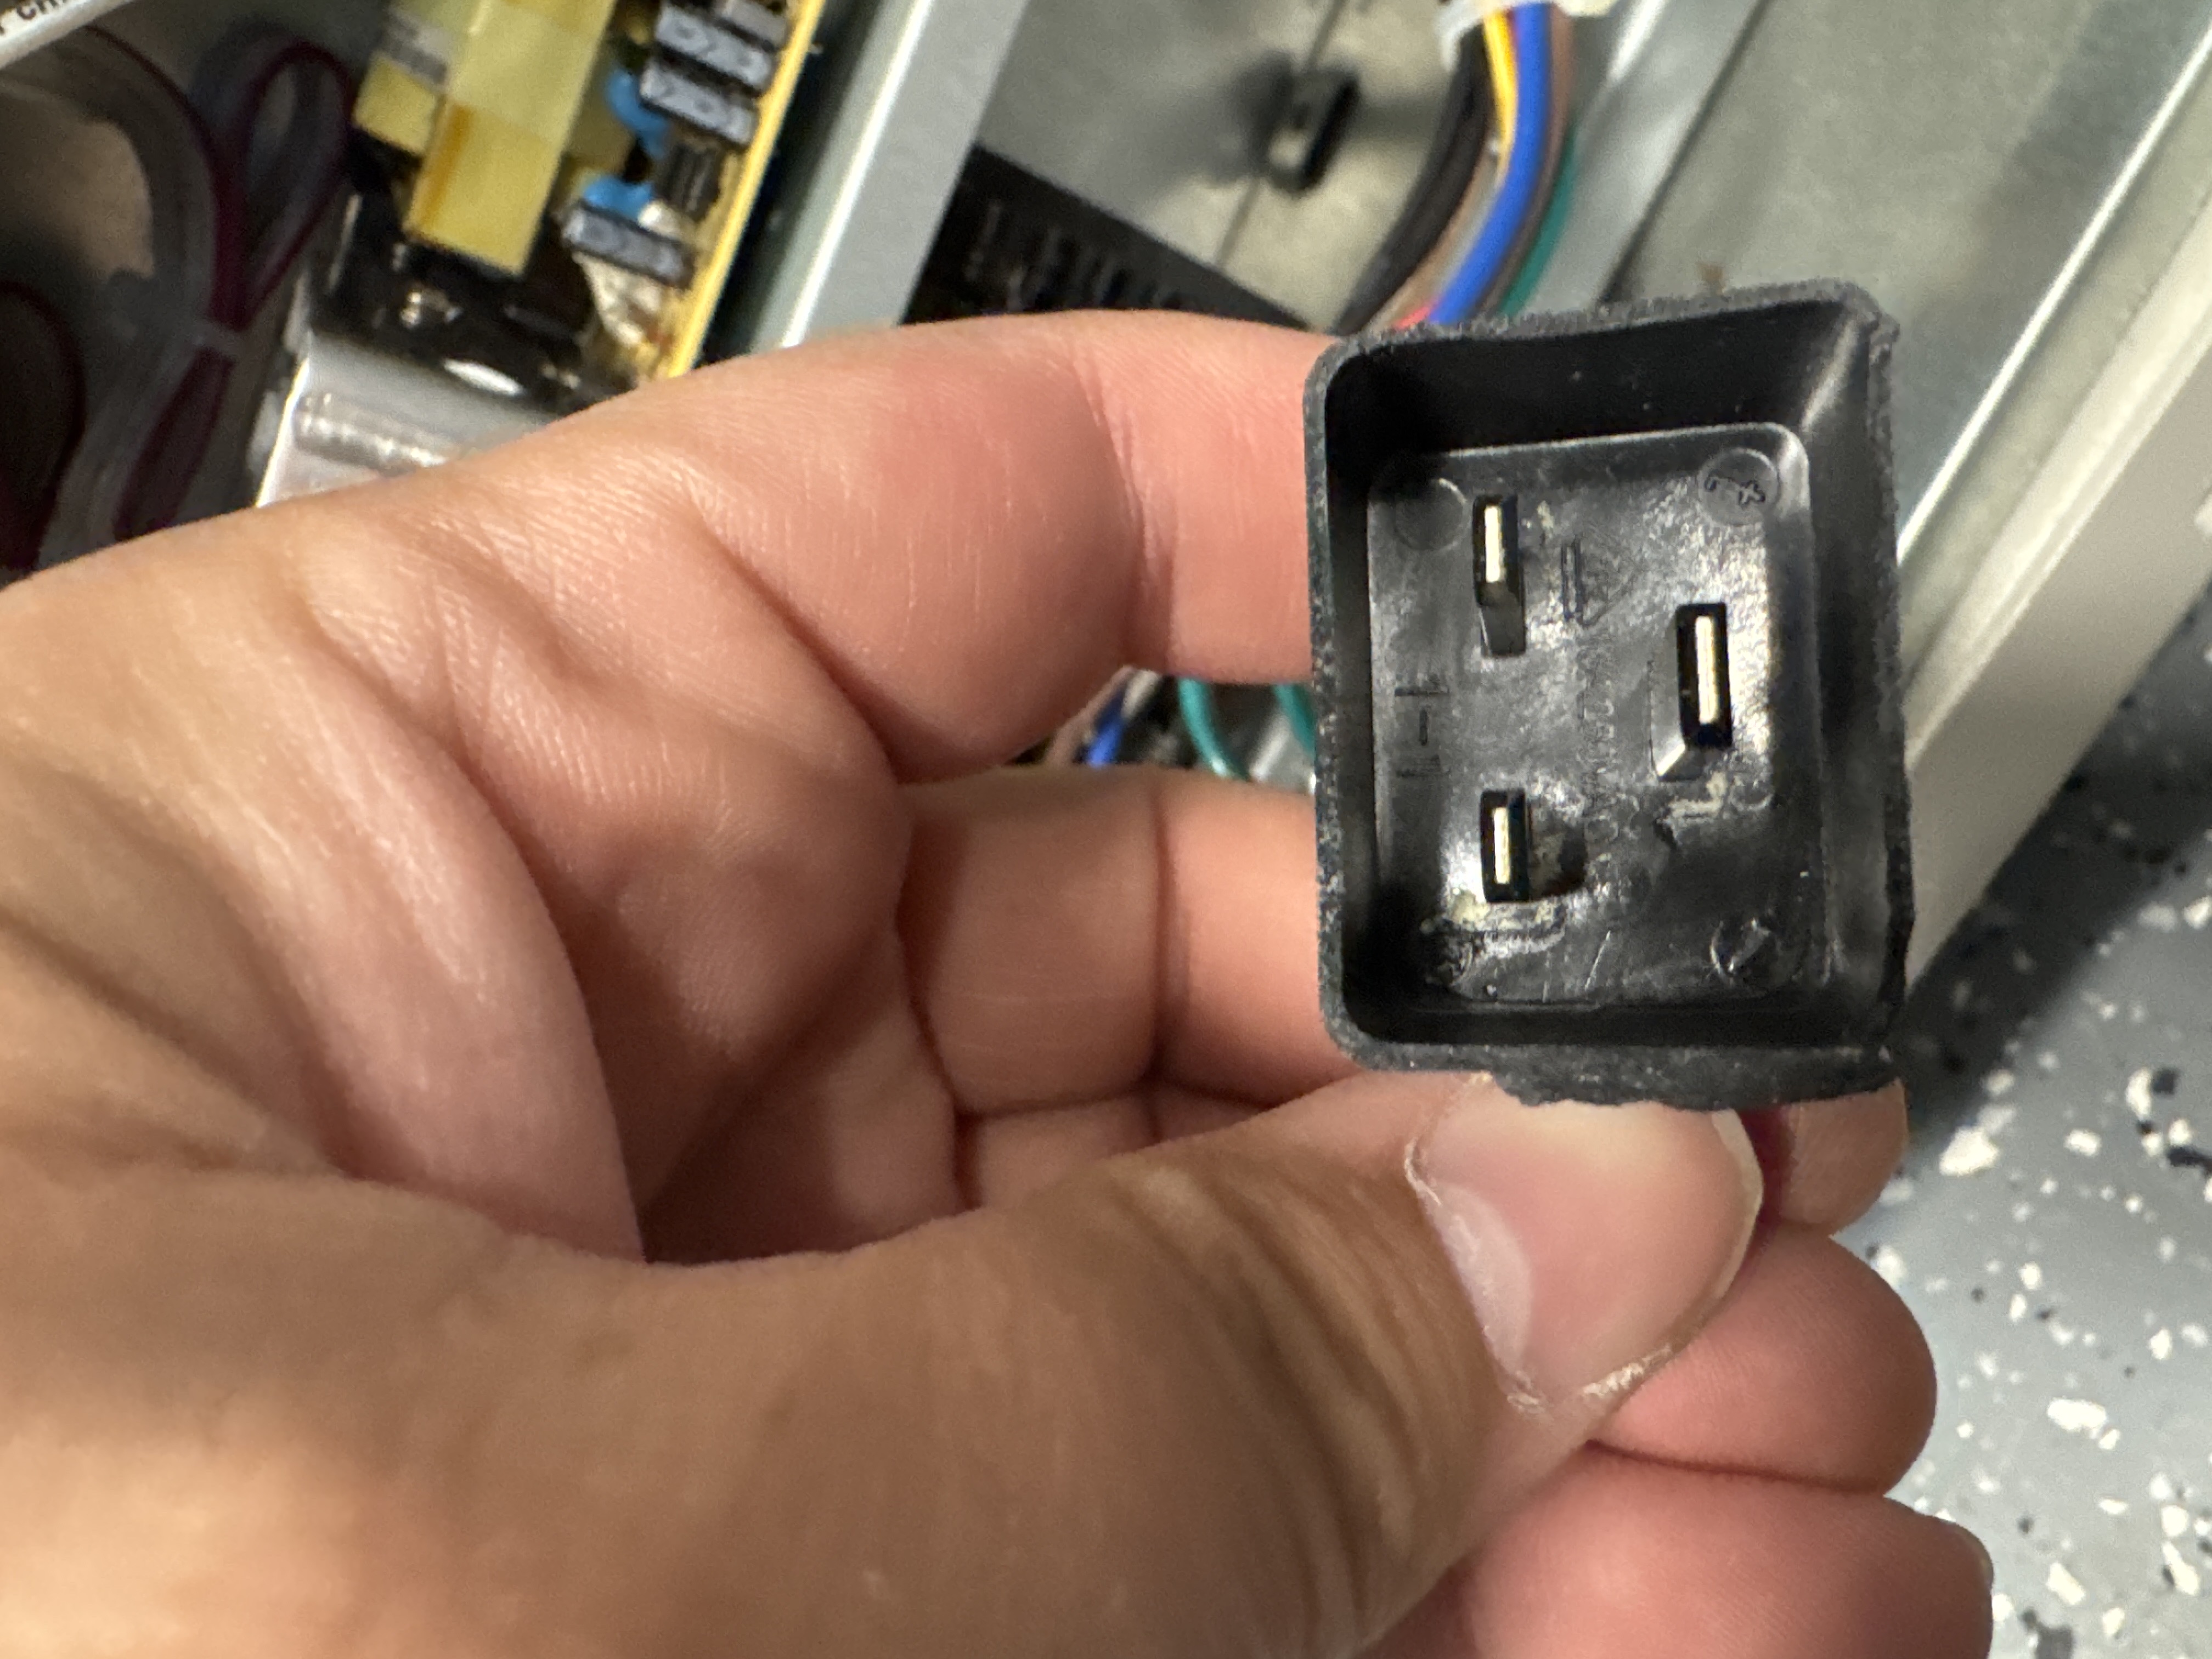
After some digging I found it to be a Qualtek 744W-00/04:
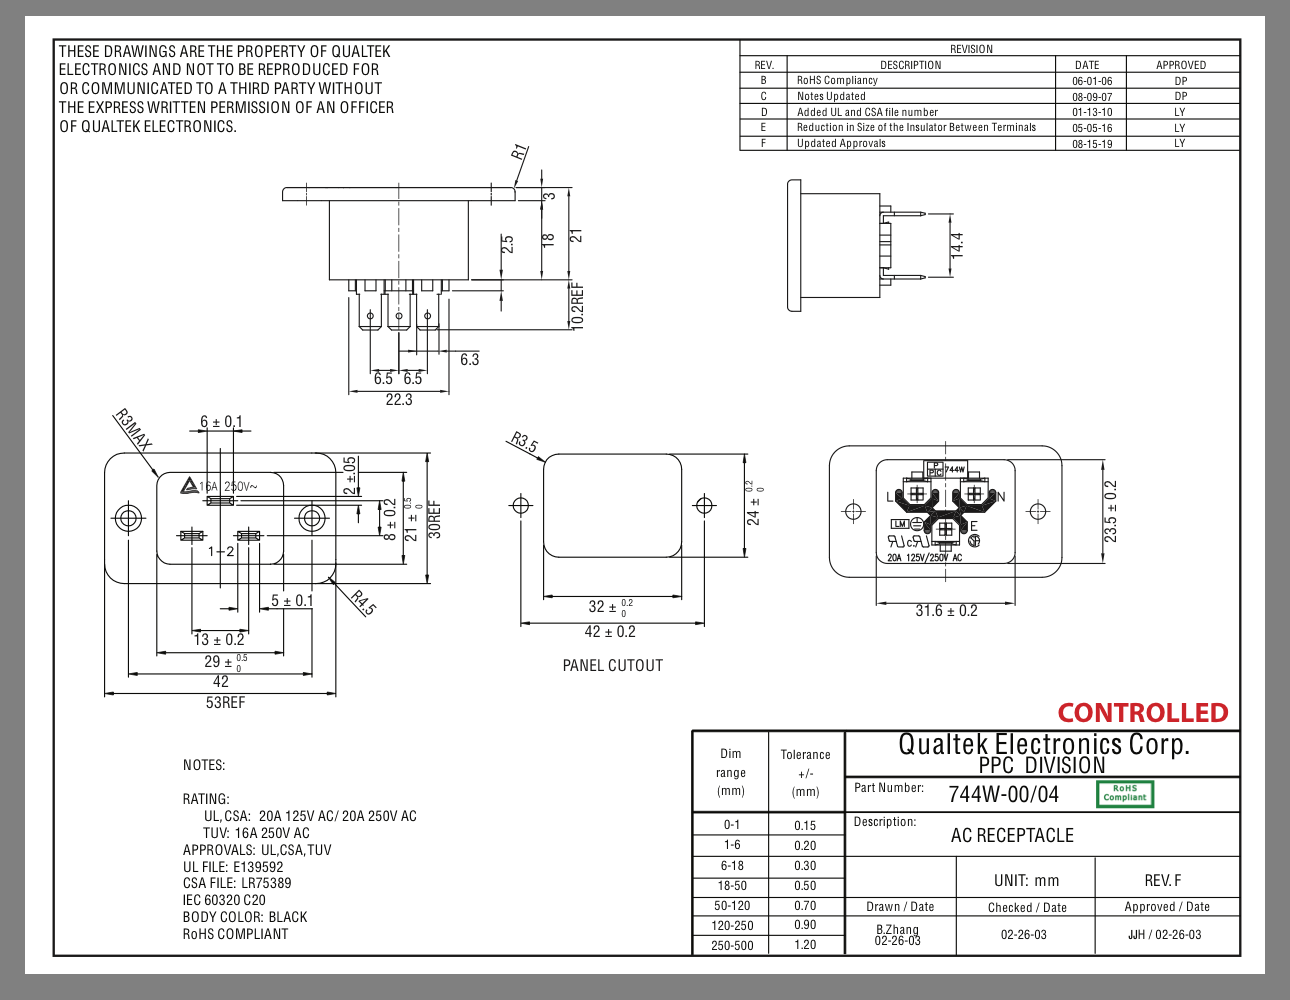
I got a replacement unit ordered which should be here this week. In the interim I will likely just wire it up for a quick test.
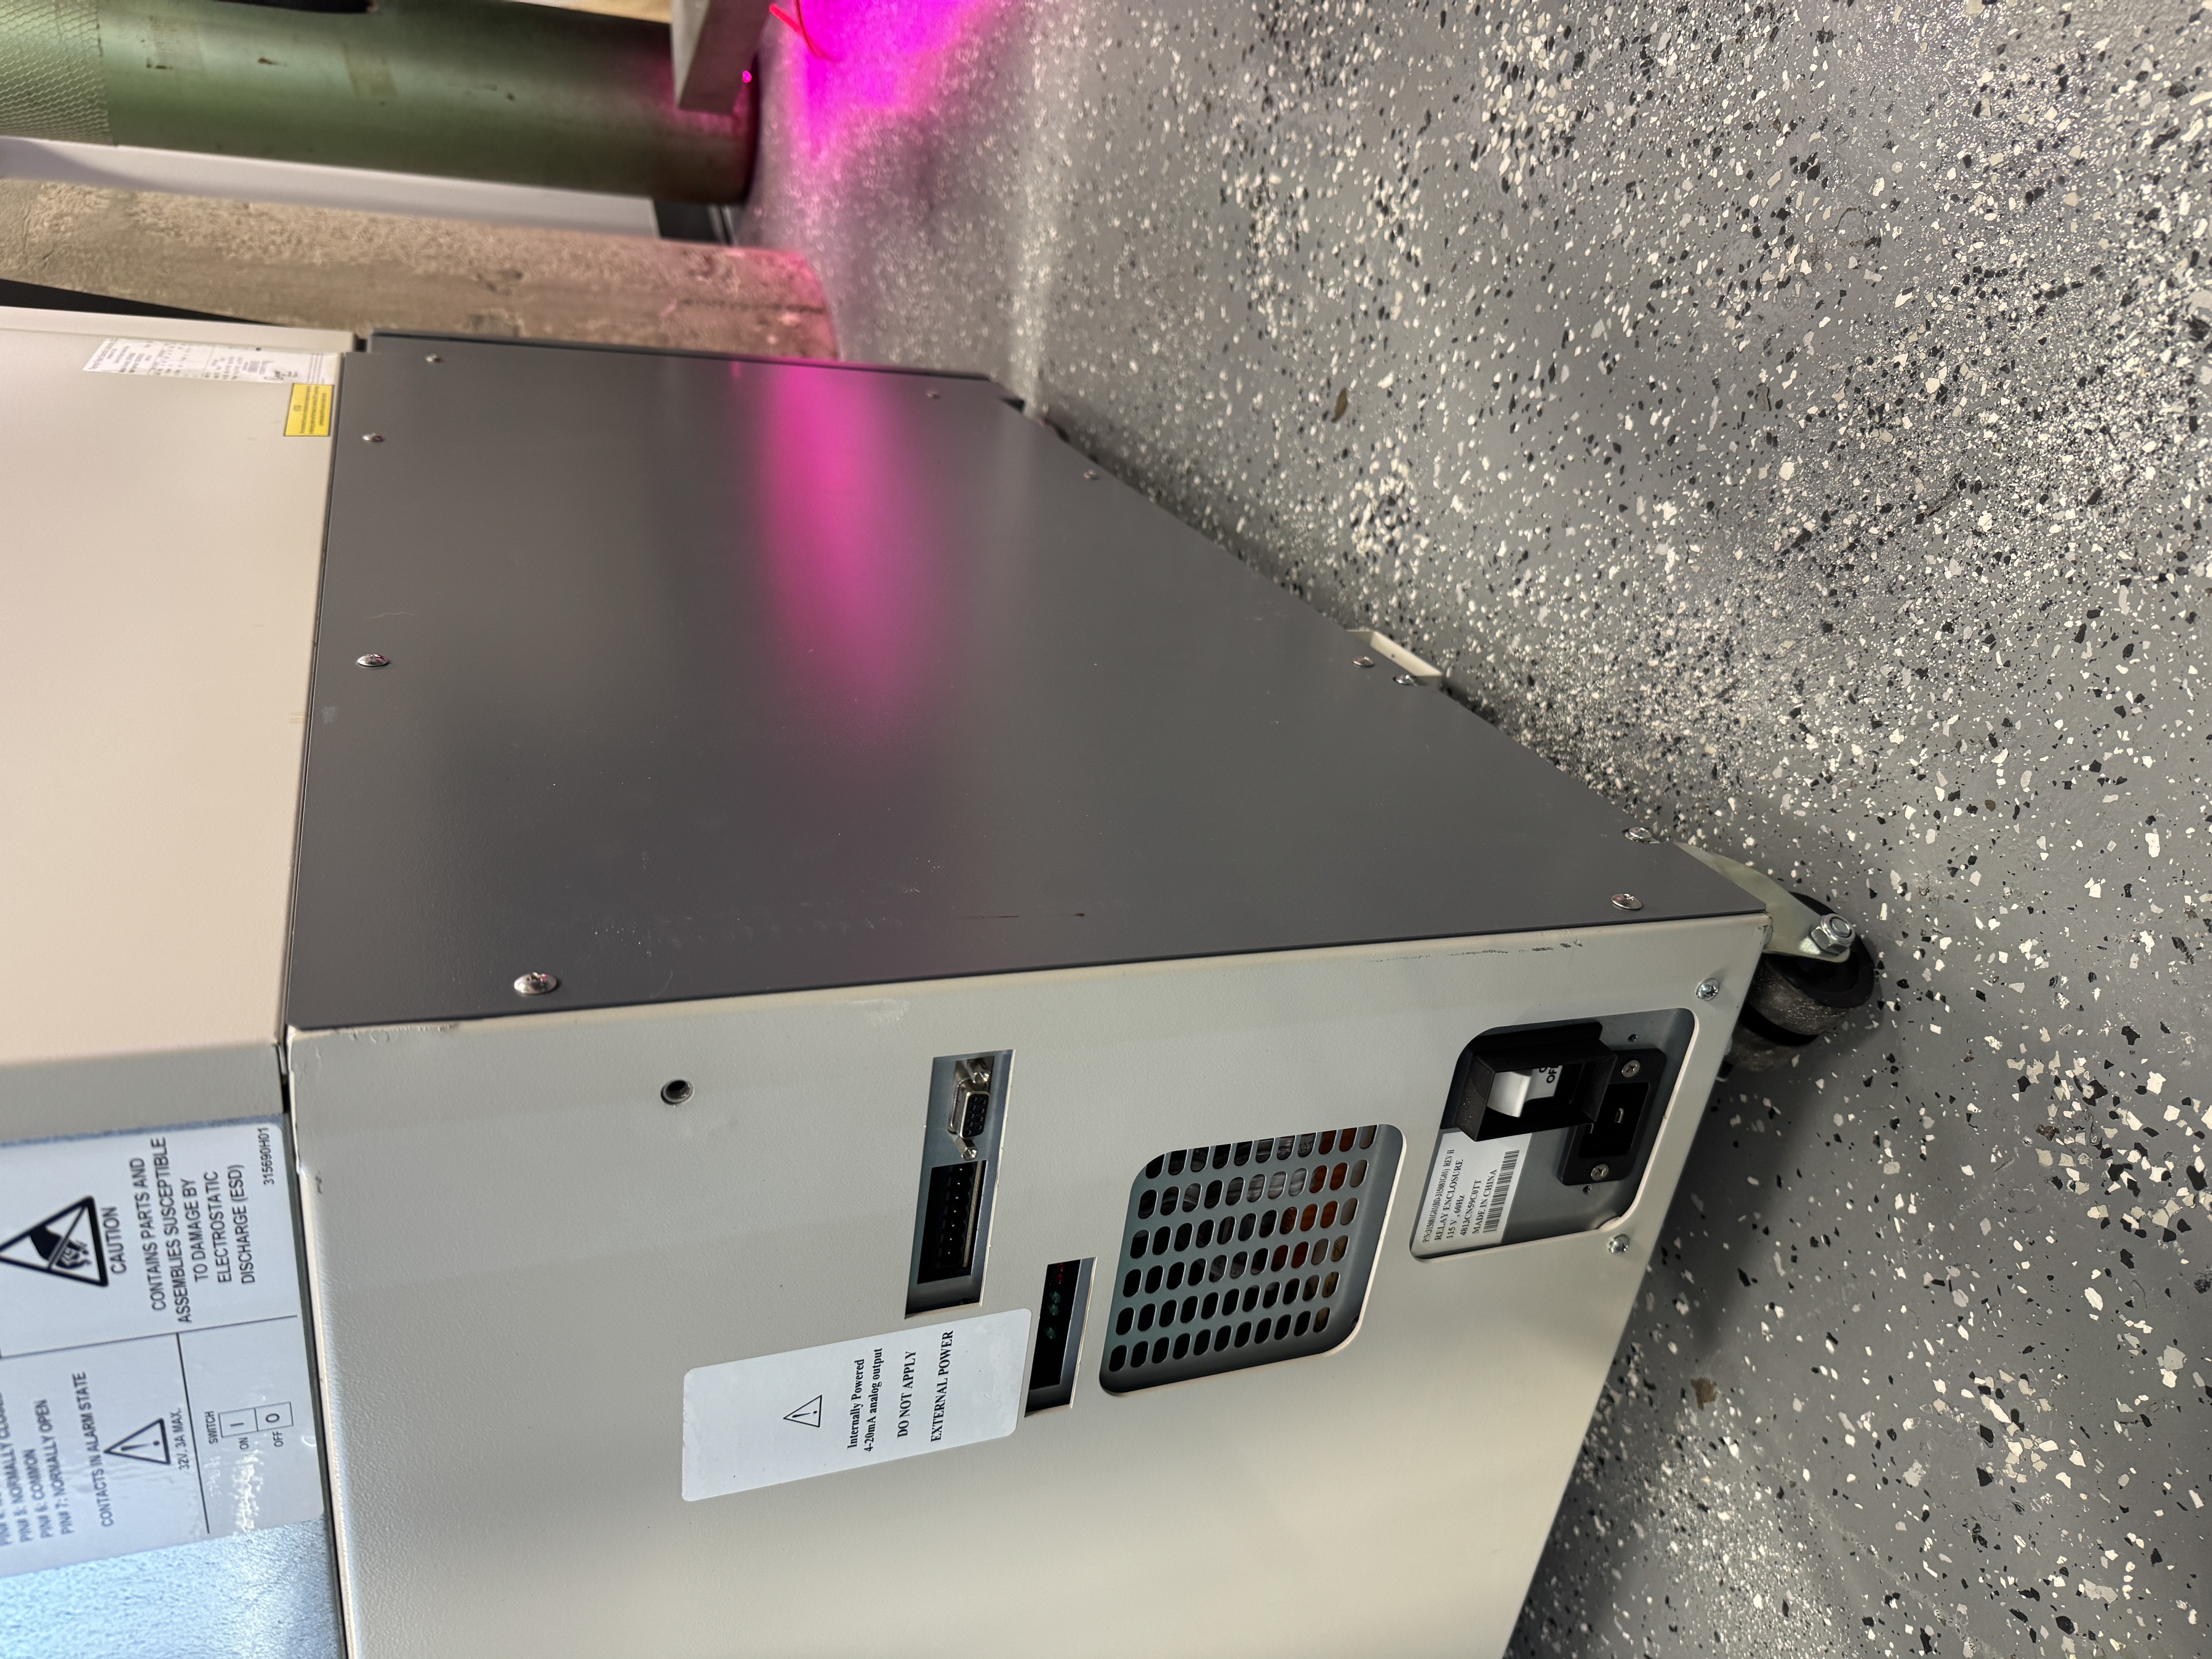
I got the freezer plugged in a totally-safe-and-not-jank way for testing:
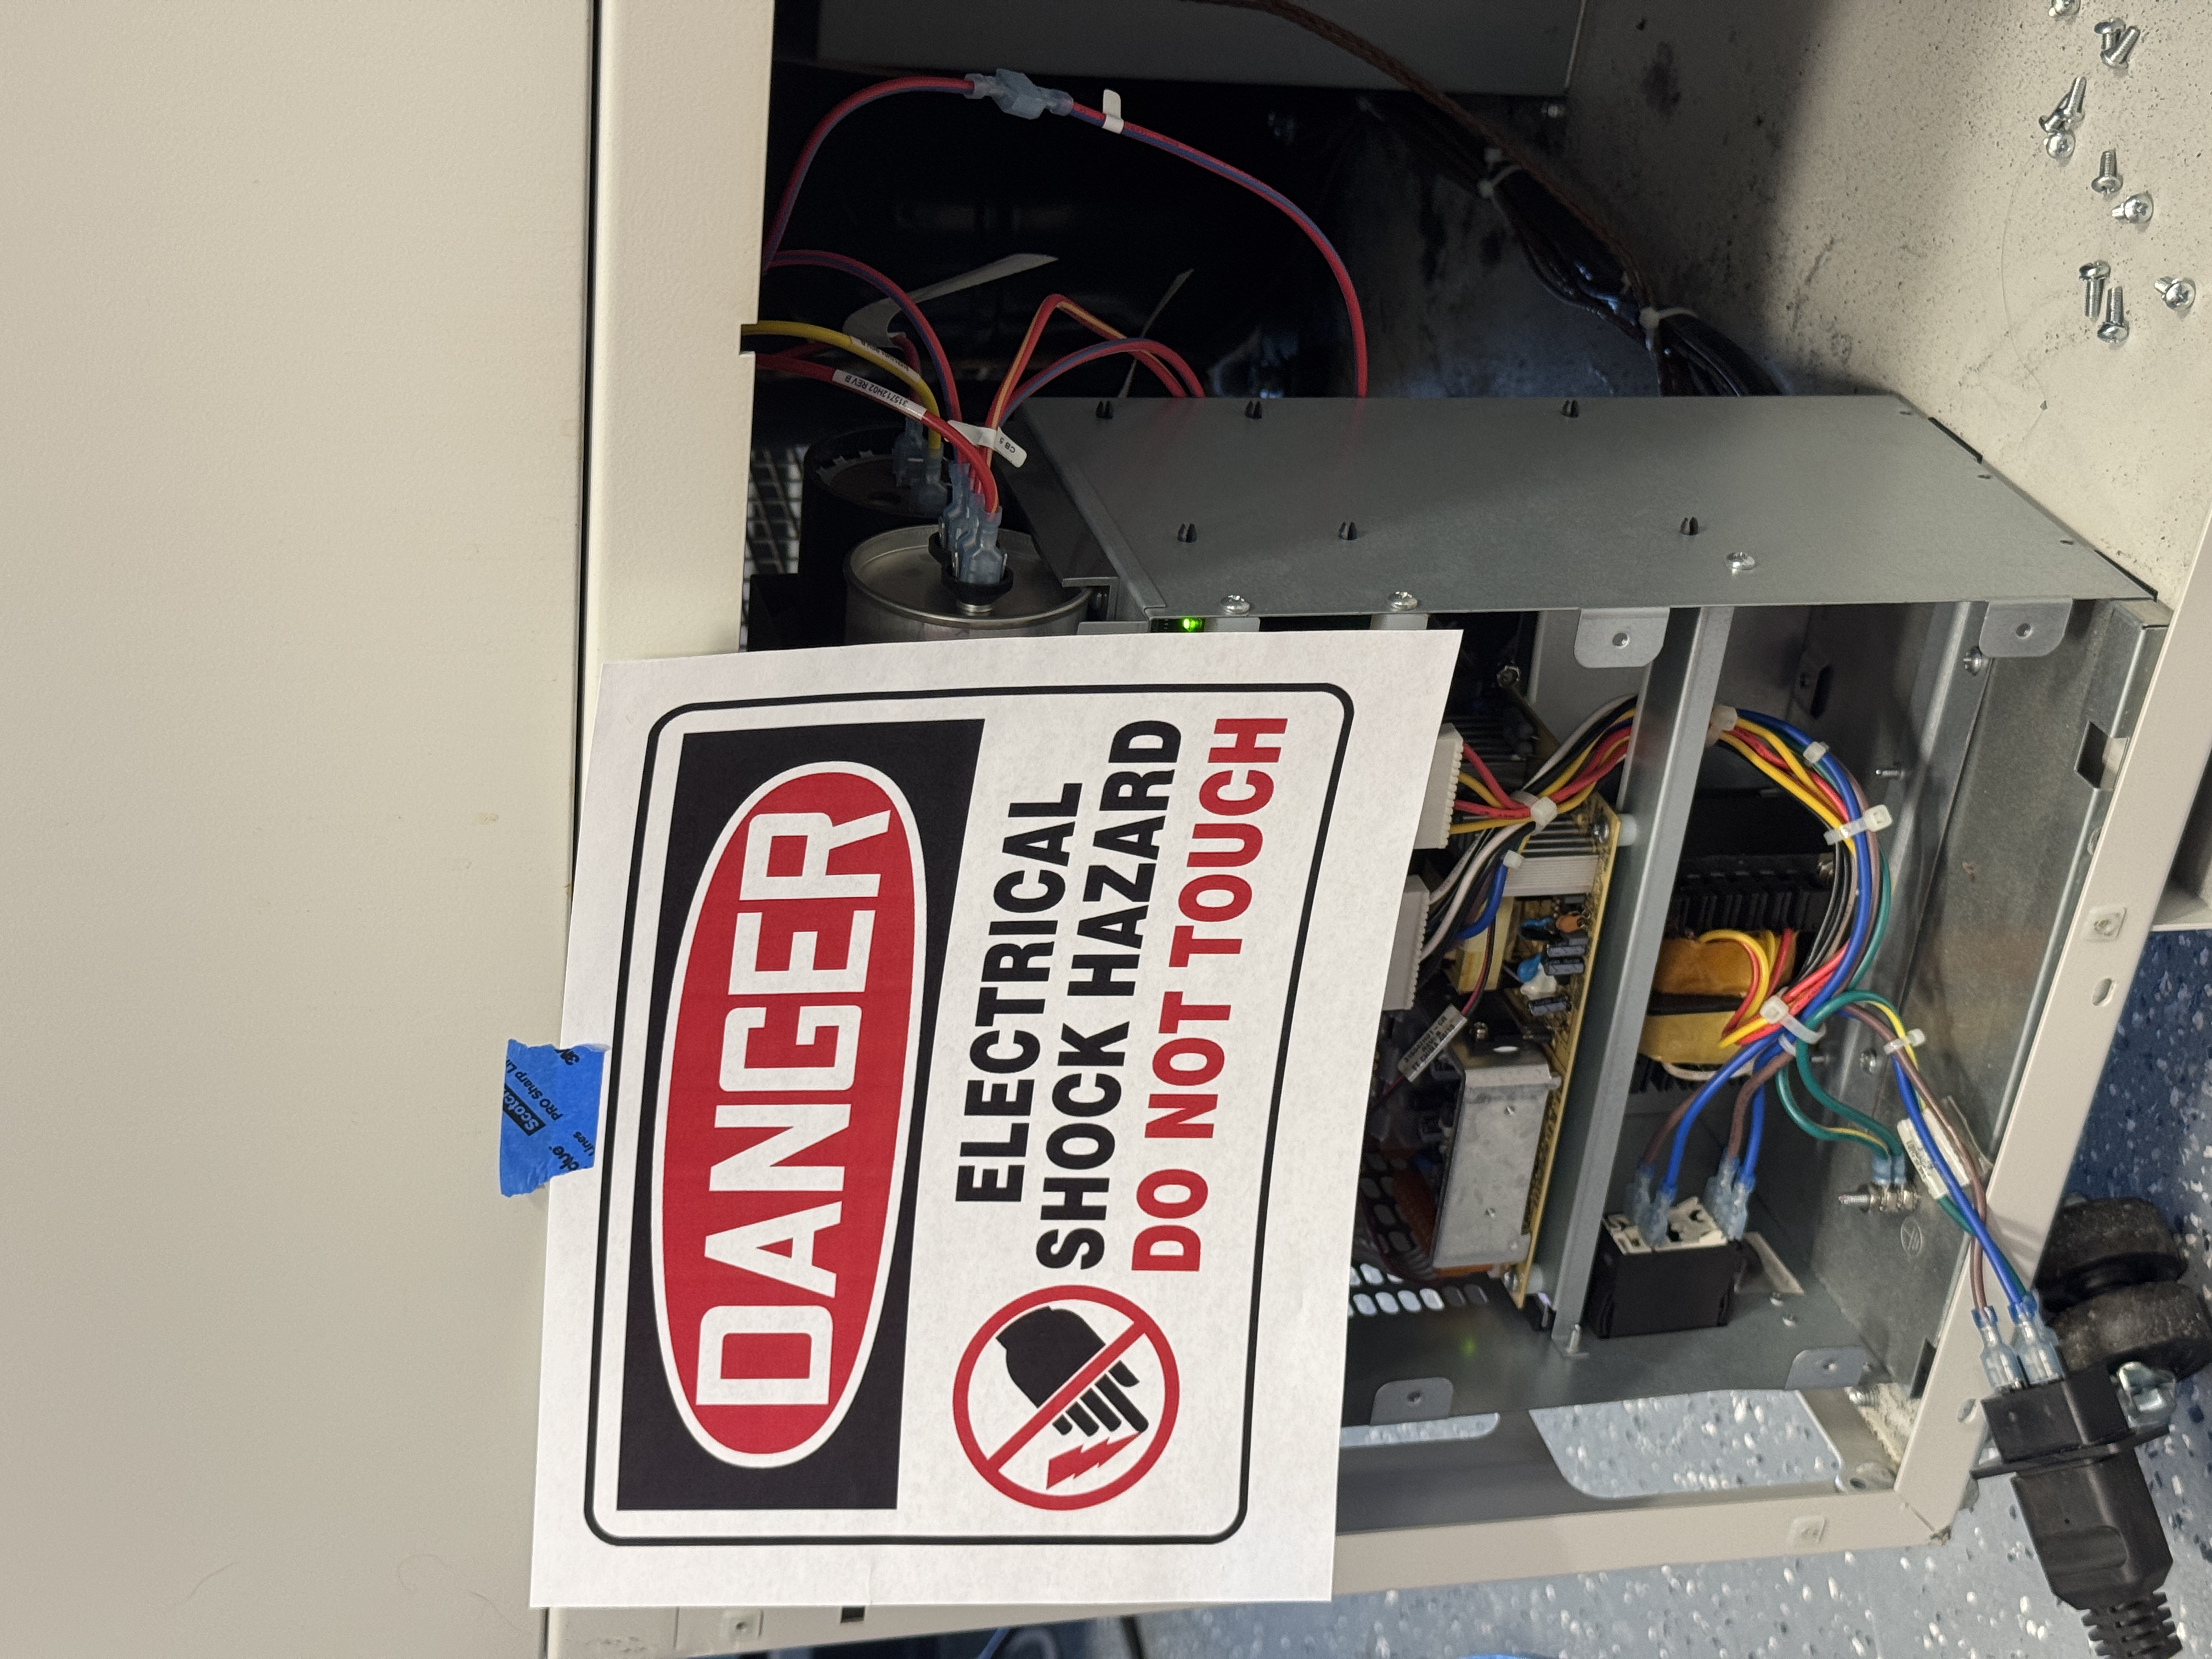
Luckily, it booted right up. We ended up having a proper dedicated (at least we are fairly sure its dedicated & are checking with our electrical contractors) outlet in the lab already for this, and its compressors booted right up without tripping anything, so assuming its good for now.

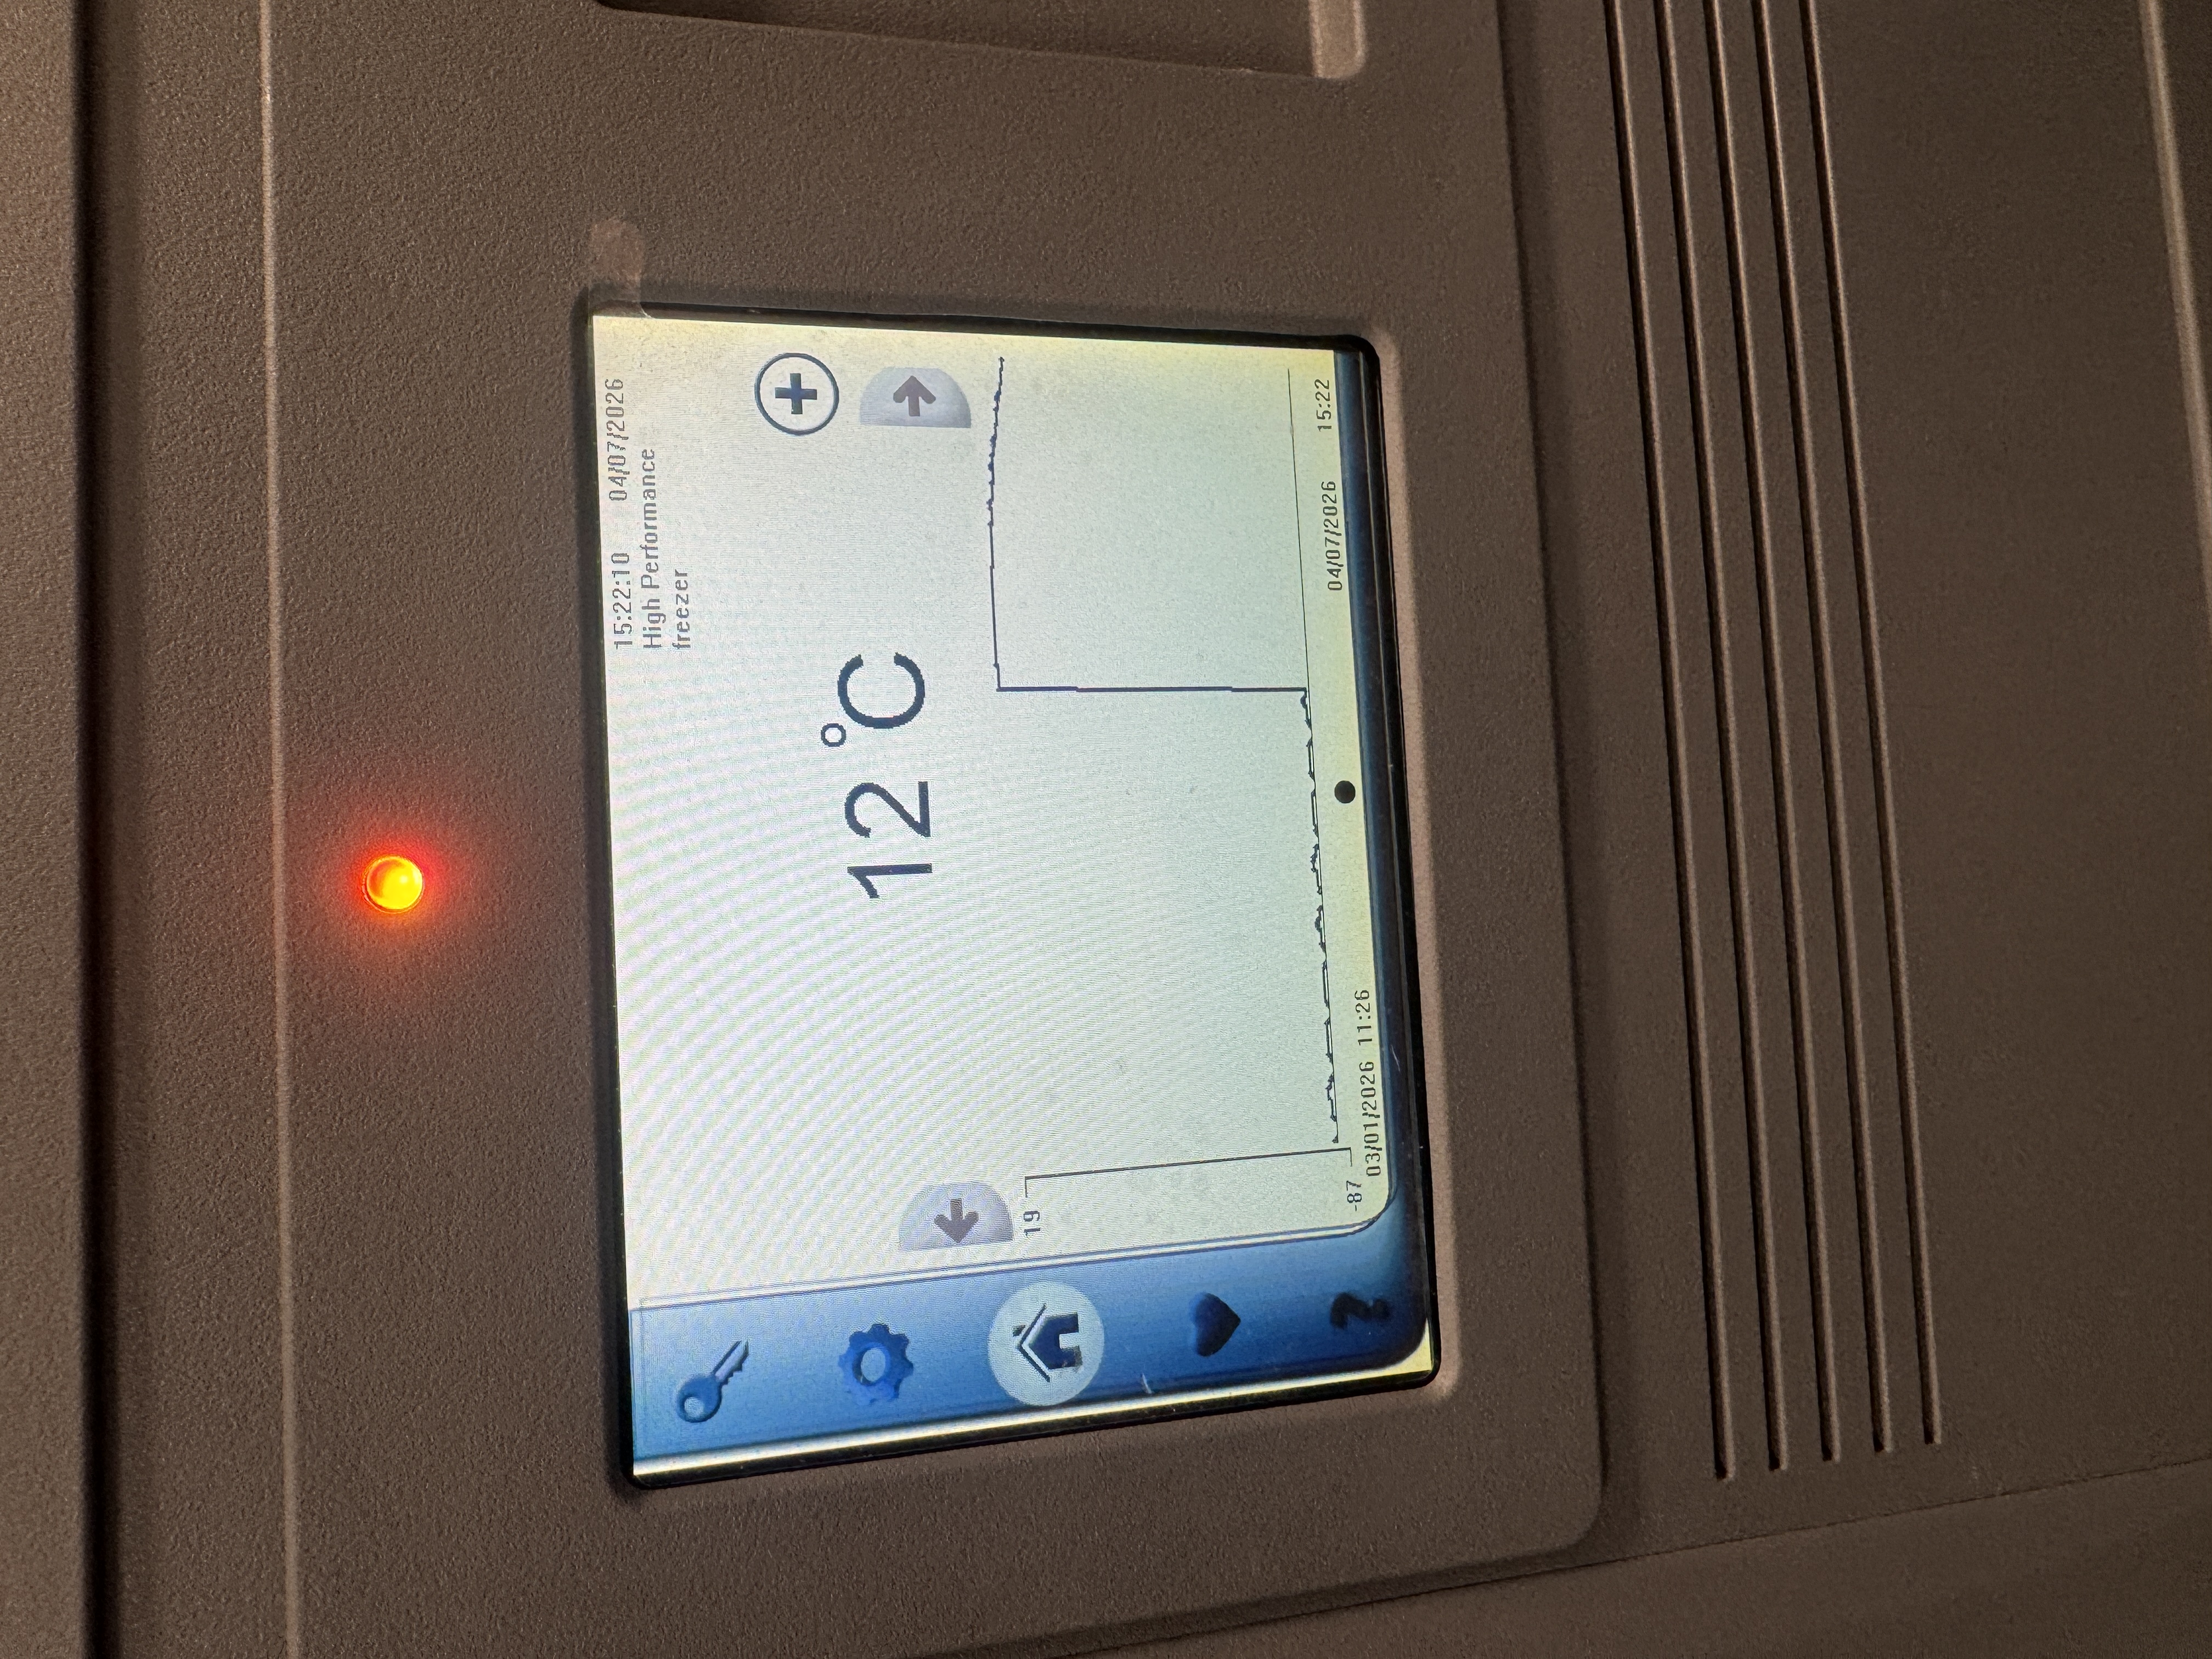
I am going to leave it running overnight, and see if we are down to near the -86 C range by the morning
Housekeeping
Now that we have this new freezer, we need to re-organize the lab to actually fit it. Right now, this is very difficult due to our friend “The BioSafety Cabinet”. Due to an unfortunate situation with its casters, its incredibly hard to move right now.
This is a big problem because now the only way we can properly fit all of our equipment into this lab where it needs to go is by moving this BSC. Bri and I have been brainstorming ways to lift it by its frame all afternoon, and I think we have some ideas. You will probably see another update on that soon, just… not today.
Random
I am also setting up Parallels today because I was recommended Solid Edge for a few of my projects and I want to try it out. I’ve also been printing some things to finish our printers top feeing AMS HT setup.
04-06 - Monday
Today Bri and I went to Indy to pick up our 3 new vacuum pumps and new -86 C freezer. There isn’t much to say about today other than that it went off totally without a hitch. One of the easiest equipment moves we have done since we started moving heavy equipment into this lab. I think we are getting the hang of it 😎
Here is a photodump from today:


04-03 - Friday
Housekeeping
Spent this morning finalizing our GovDeals order & Tax Free status, got a truck rented for Monday so we can go pick up our new goodies. Printed more adapters for the 3D printer and new AMS mounts.
This morning I’ve been doing a lot more research on ways we can schedule scope time. I am considering building it into our existing lab software, nucleus.
I spent most of the day doing random admin work and testing out a few ideas / concepts in code. I am leaning towards quickly building our own scheduling suite for our lab tools into our site.
04-02 - Thursday
Printer Upgrades
Started the day off with finishing some organization of our 3D printer station. This print finally finished so I spent some time getting the station all organized and looking nice.
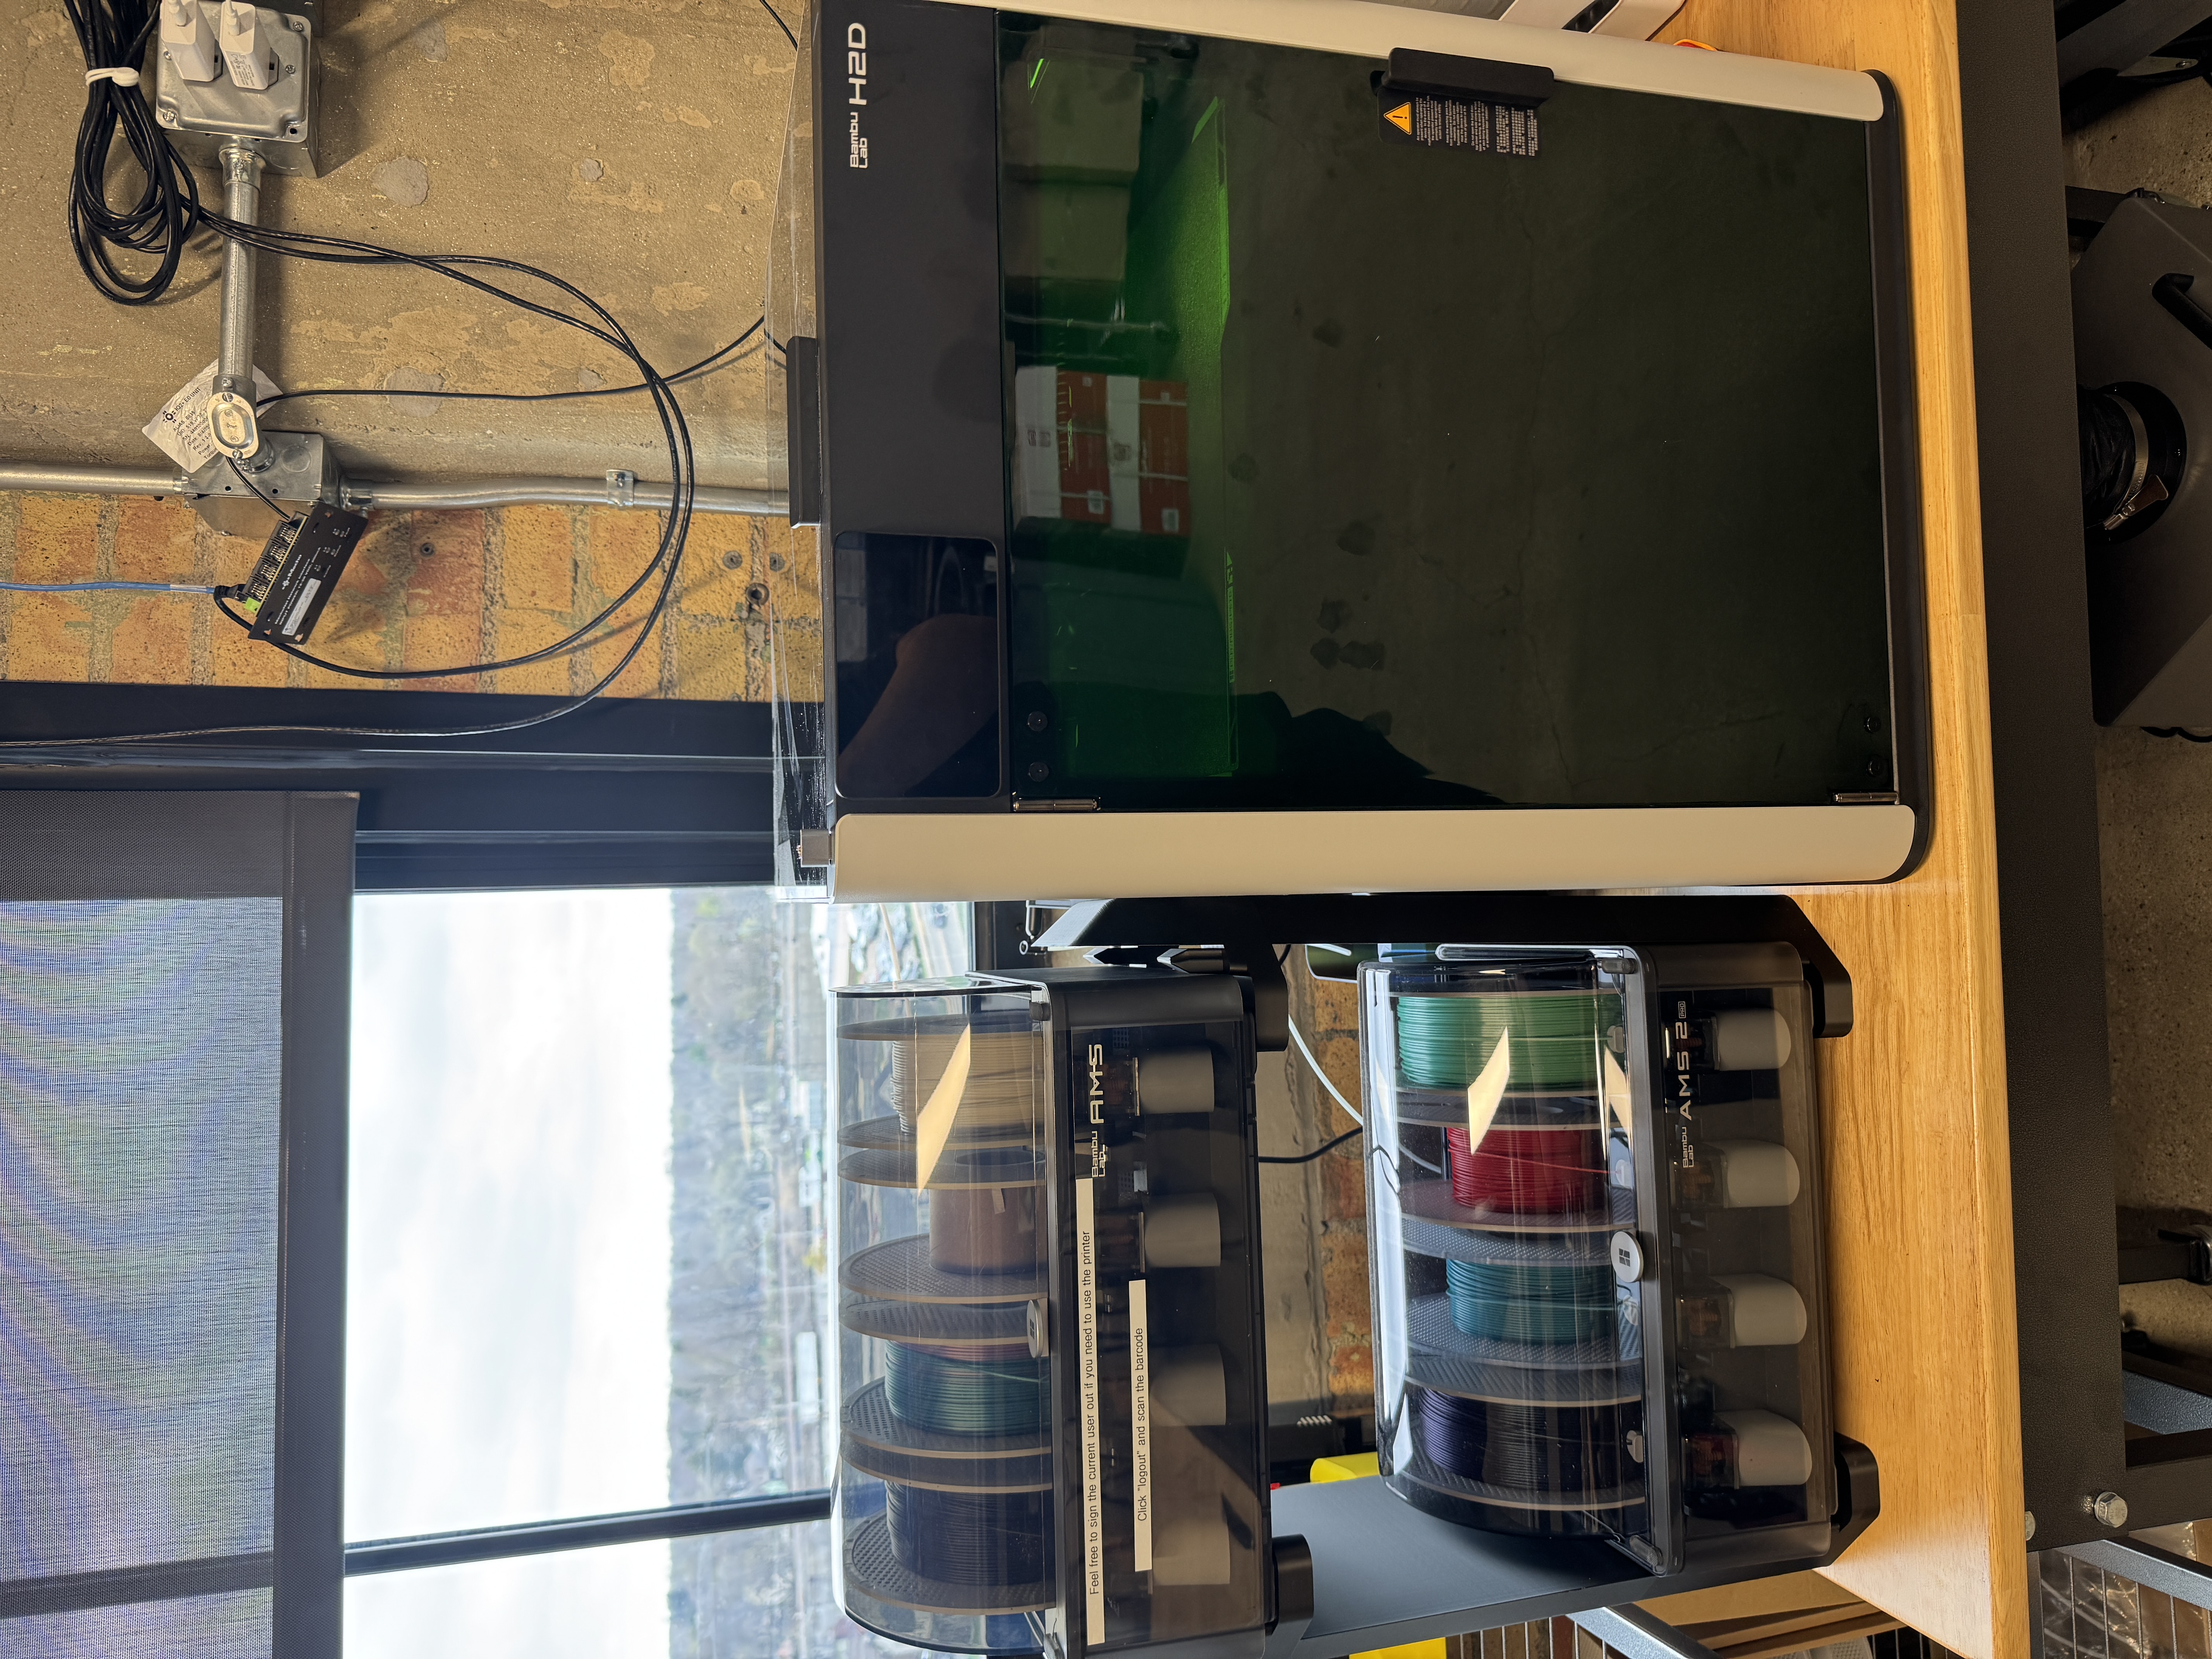
Before we had a rack that held both of the AMS units on top of the printer. This worked fine, but made using the laser and a top-loading extruder configuration very difficult. This will solve those problems and give us a lot more flexibility with how we use this machine.
We also swapped nozzles to fresh ones, and fixed the nozzle blocker which had broken.
General
I fixed some tax exemption stuff for GovDeals, hopefully they get back in the next day and we can finish paying for our lots.
Arabidopsis
Decided to spend some time today starting to get another time-lapse prepared on the confocal scope. I got a new plate poured with some fresh Agar, spent a while getting the sample prepped, and then realized that the BioFilm Group was already using our scope 😭. I fridged the samples, hopefully they will still be ready to image in 46 hours when the group’s z-stack is done. If not I’ll re-prep Monday.
04-01 - Wednesday
Today I spent the first part of my morning babysitting some auctions for new equipment as well as figuring out tax exempt status for the auction house. I am happy to report we won 3 very nice vacuum pumps at a nice price, as well as a -86 C freezer which will come in handy with our DNA work. We will likely go pick those up on Monday.
I also got the rotator re-built yet again (for the last time, if it breaks again we are officially buying a new one). It seems to be real nice an quiet after applying the proper grease (shocker 😲)
Sounding real nice good.
03-31 - Tuesday
The oil got delayed another day somehow, so I guess I will not be fixing the auto-rotator today. It will have to wait until tomorrow. This morning so far has just been the repeated process of beginning to start work on a project before realizing shortly after that I don’t have the tools, and thus switching to another project and repeating.
I spent a while troubleshooting issues with our 3D printer, and decided to print a new rack for our dual AMS setup so that we can more easily access the top of the printer.
The water hose I ordered for the sputter coater also came in today, a test fit around the barbs worked quite nicely, and I have no doubts it will fit correctly.
03-30 - Monday
Ok so the grease I had on hand was also not the move, the gearbox was audible from the hallway this morning which is not amazing. Luckily the grease I ordered Friday is going to be here today and should be more or less exactly what we need. I got this rotator for incredibly cheap, but if this grease replacement fails on me one more time I am going to just be ordering a new one and scrapping this one for its internals.
I have a few projects I really want to get done by the end of April:
- Adam McCombs is coming to visit on the 12th of April for a whole week, we are going to be doing an intense SEM tune up. I need to make sure the lab is clean and we have all the tools we need to work on it that week.
- I want to get the sputter coater fixed
- I want to image every spine from the Echinocereus project
Most of what I am working on these next few weeks will be related to these projects. Getting the SEM lab fully operational by end of April will help not only my but many of our research associates research.
I ordered some new hoses today for the argon and water lines on the sputter coater system and updated my log accordingly. Took a while to source and confirm the available hoses and find decent deals on all of the diameters I needed, but they are ordered now.
I also got on govdeals and bid on a new vacuum pump for that machine, as well as a new -86 C freezer. Both bids end Wednesday and I hope to secure both of them.
I spent a while running the SEM and just double checking some things anticipating the arrival of Adam in a couple weeks.
Its now 3:37pm and the oil for the gearbox still isn’t here so its likely our Autorotator is down for the count until tomorrow. If it gets here before 4pm I probably have time to get it fixed today, but I am not optimistic.
03-27 - Friday
While I was away
It’s my first day back in a couple weeks (aside from coming in to do some quick maintenance between trips last week). I saw and did a lot of really cool things while I was out and about, including potentially getting an international partnership started with some OpenIDI stuff, and also filmed a documentary about some ecological threats facing the Big Bend region that I hope to finish and release soon. The way I look at it if im traveling to a new place and not trying to build ecological relationships, I am not doing it right 😅
Back to the lab
I was greeted walking in this morning by the sound of our variable auto-rotator grinding its own gearbox into a fine metallic paste. It needs new oil very badly. We re-oiled it a month ago, but the red-n-tacky grease we stole from the robotics lab is probably not the right call for something that needs to rotate for hundreds of hours a week. So I need to fix that, I also need to get some plans finalized for some SEM maintenance we have coming up. Start ordering o-rings for the sputter coater, and generally just try to get the SEM lab to a great place by the end of next month. The lines are still pink on the SEM, indicating that the PH is still a little too low, I may swap to a different coolant soon.
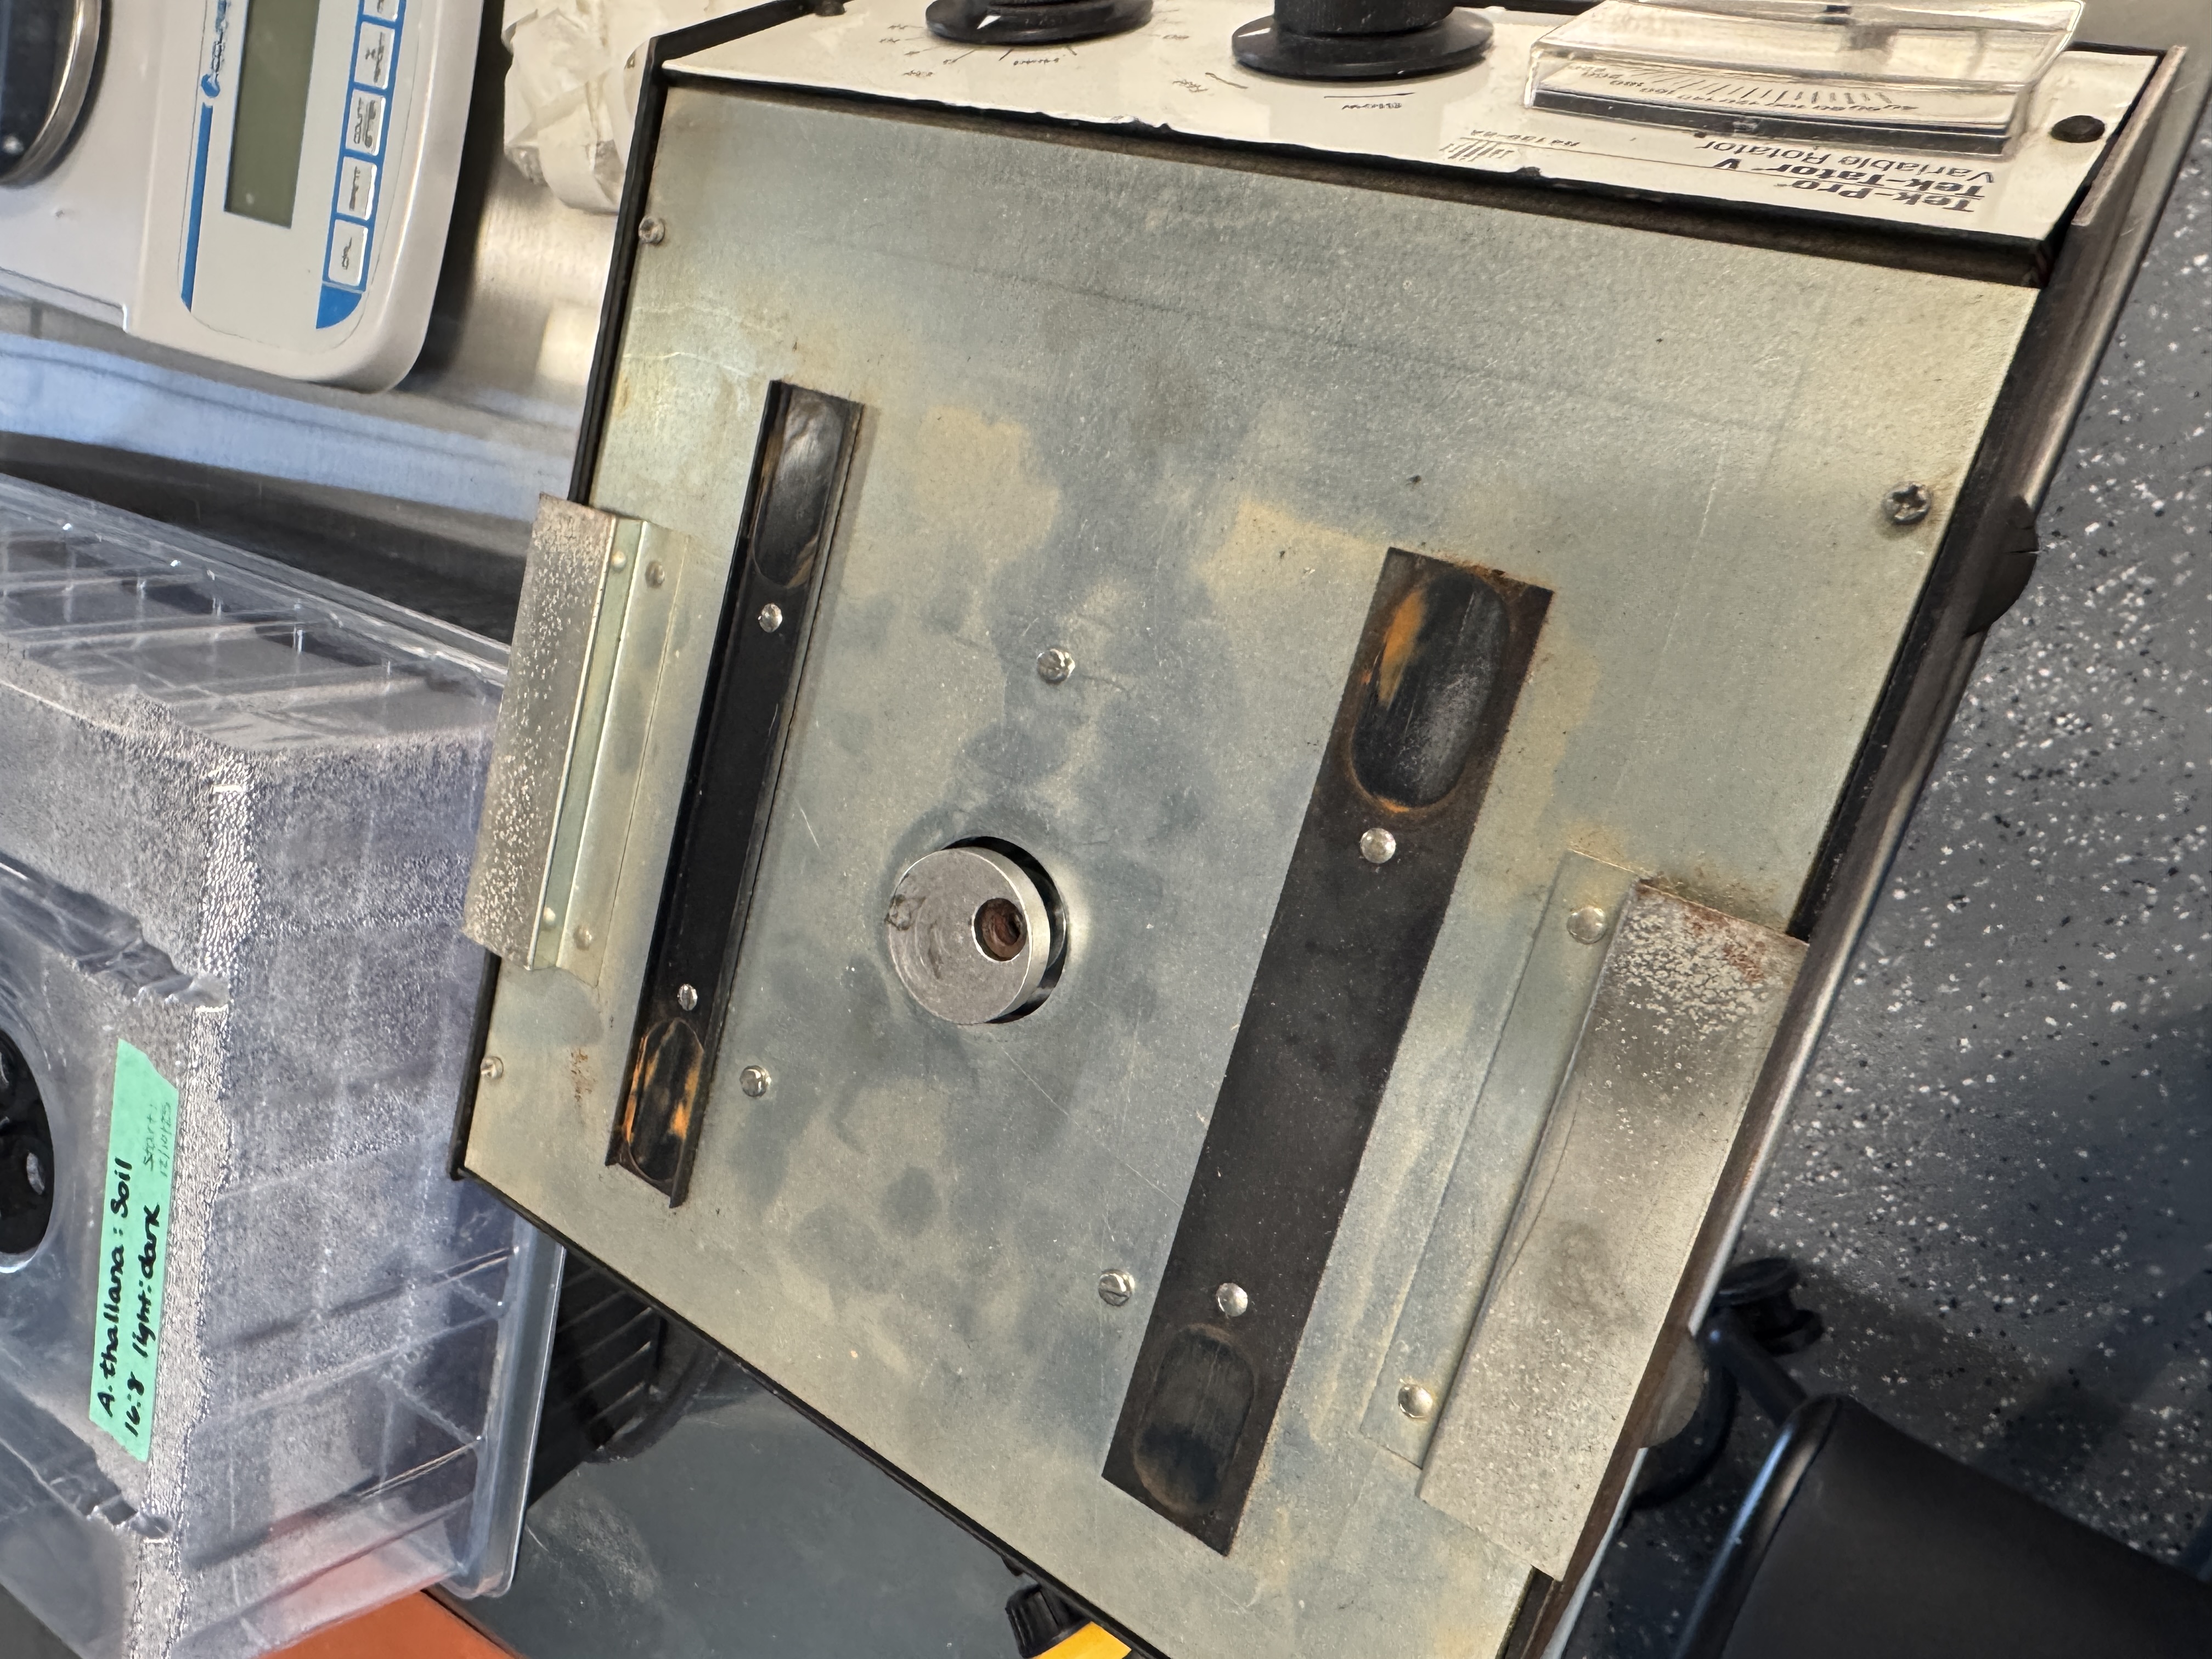
Fixing the auto-rotator
For reference, the reason I need to strip this down again is to fix this sound: Click play to subject yourself to a horrible noise
This thing is a little annoying to get apart due to using like 4 different screw standards, but it comes apart quick. I first stripped off the top rotator plate.
I yoinked the top assembly from the machine and threw it in the fridge to cool down. It was a little too hot from being on for about 2 weeks.
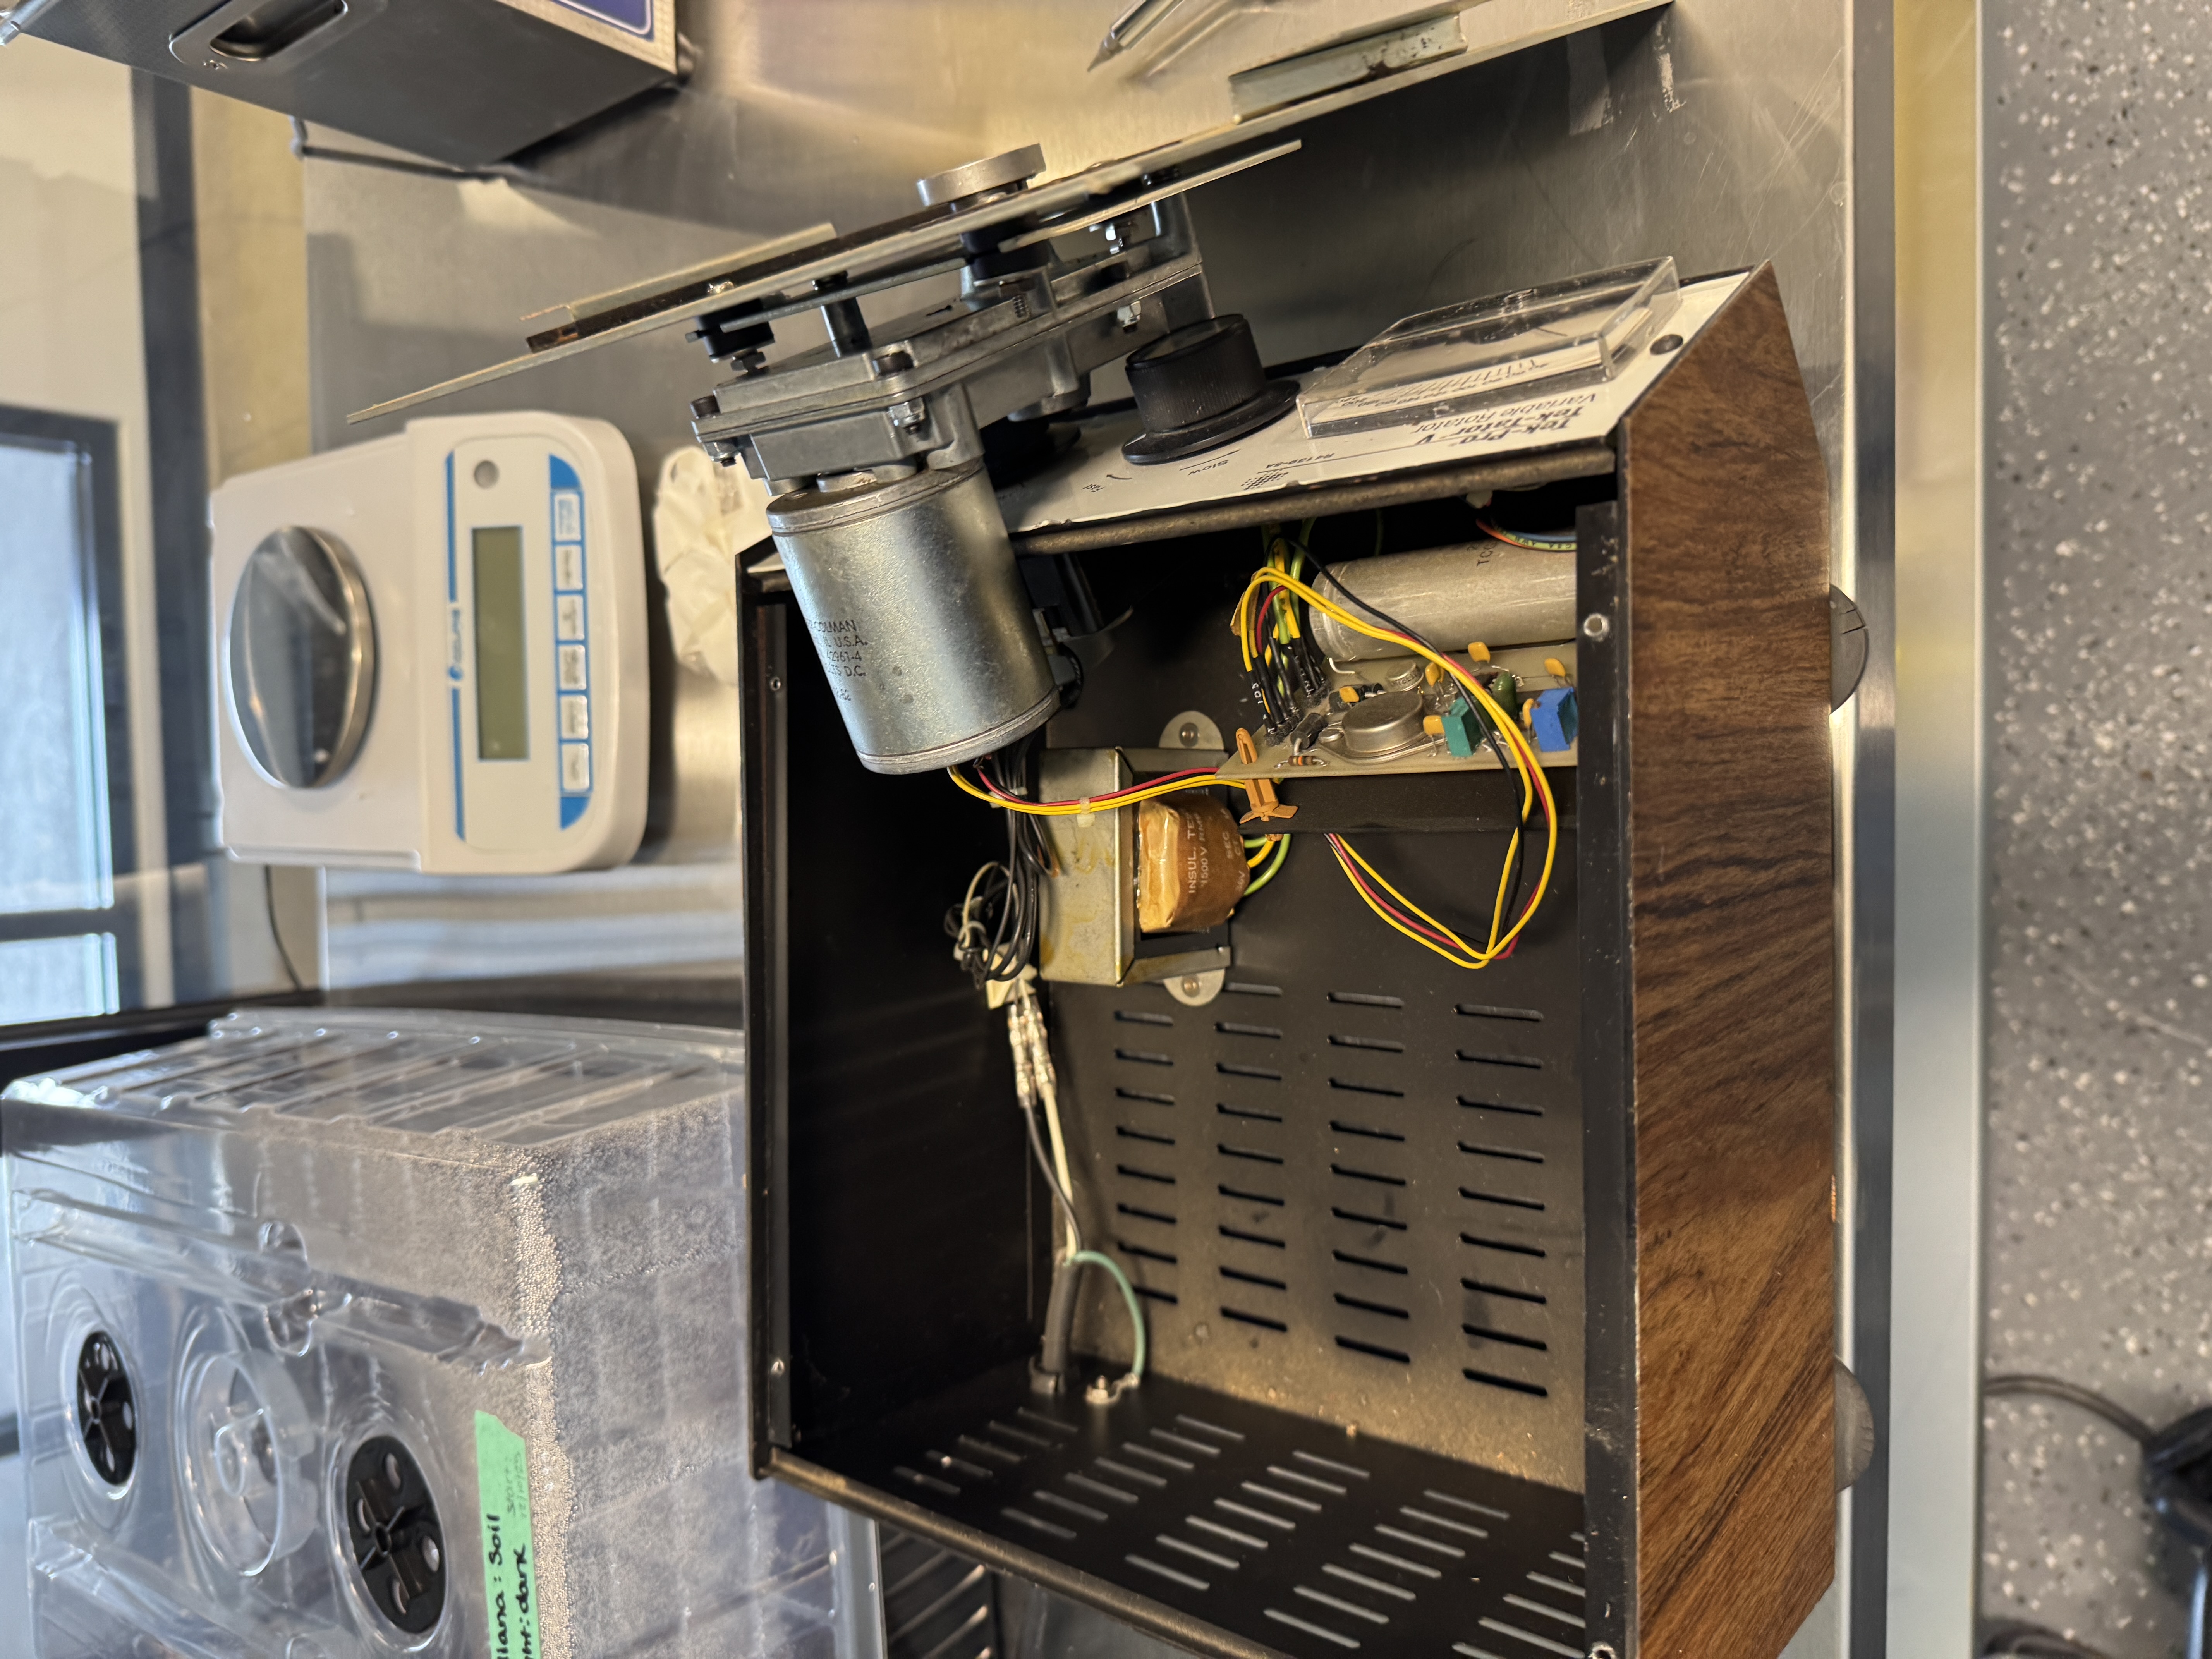
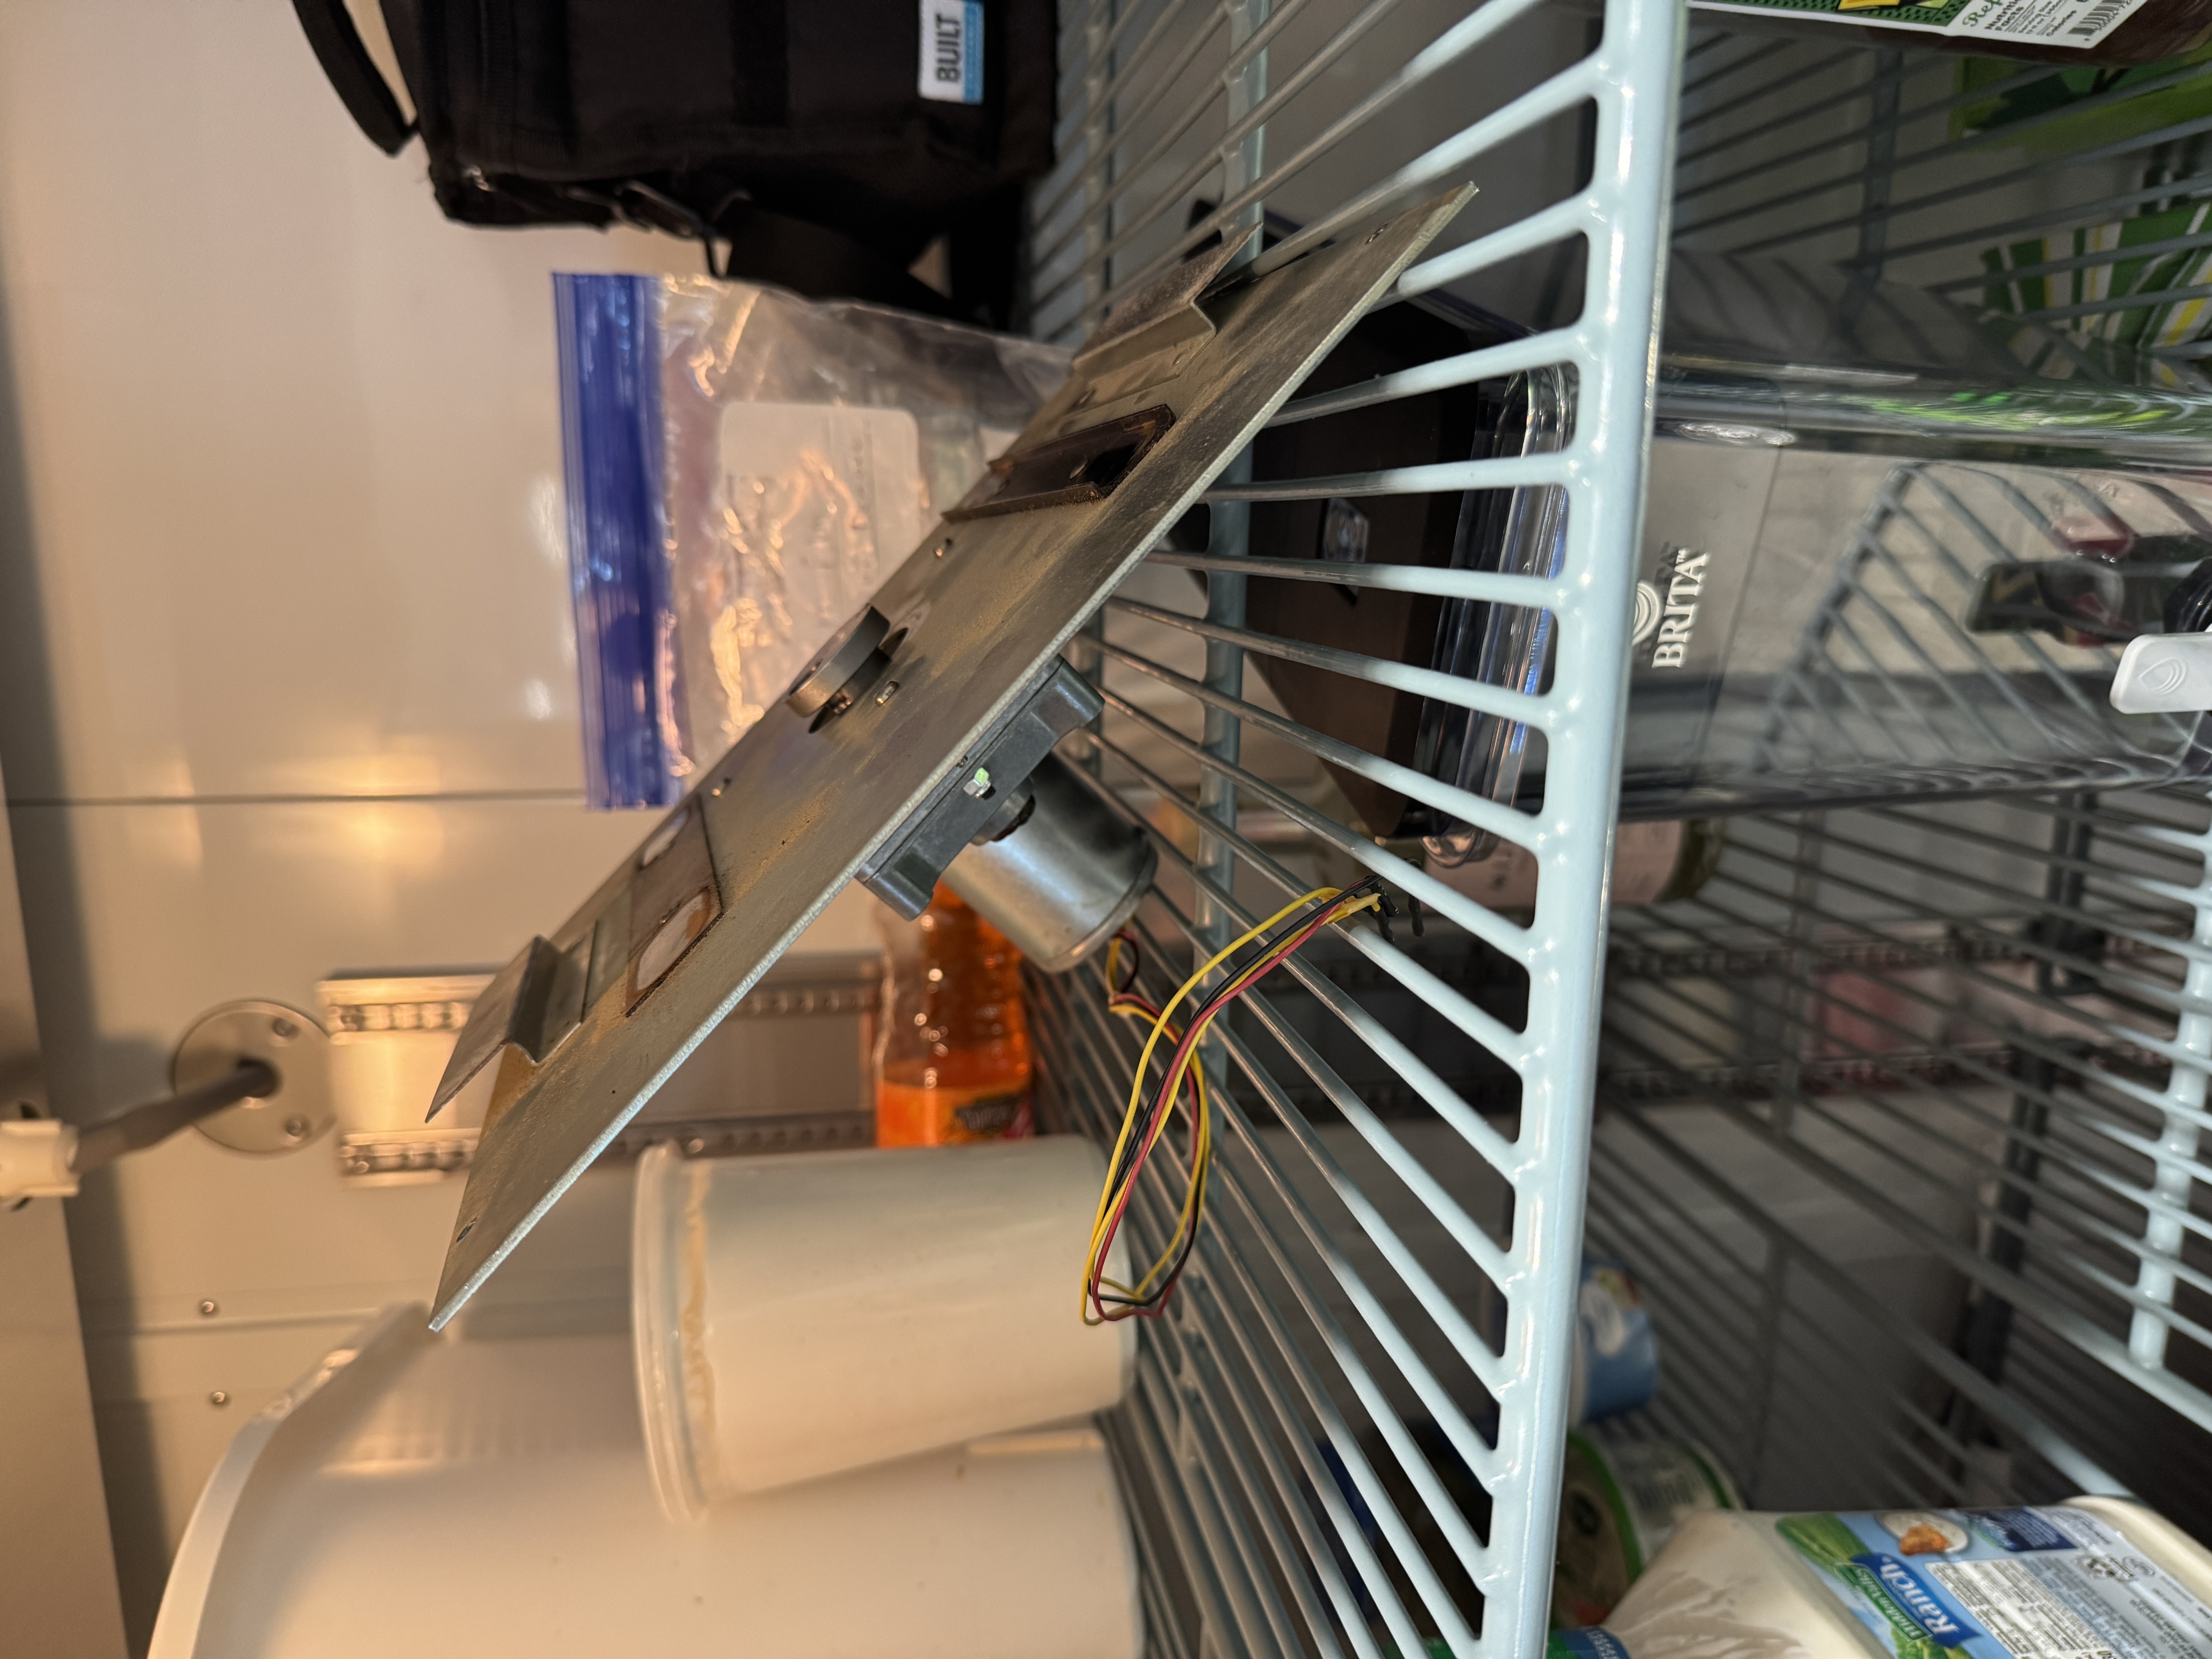
After 20 min in the fridge, I pulled the gearbox off the mounting plates and pulled it apart.
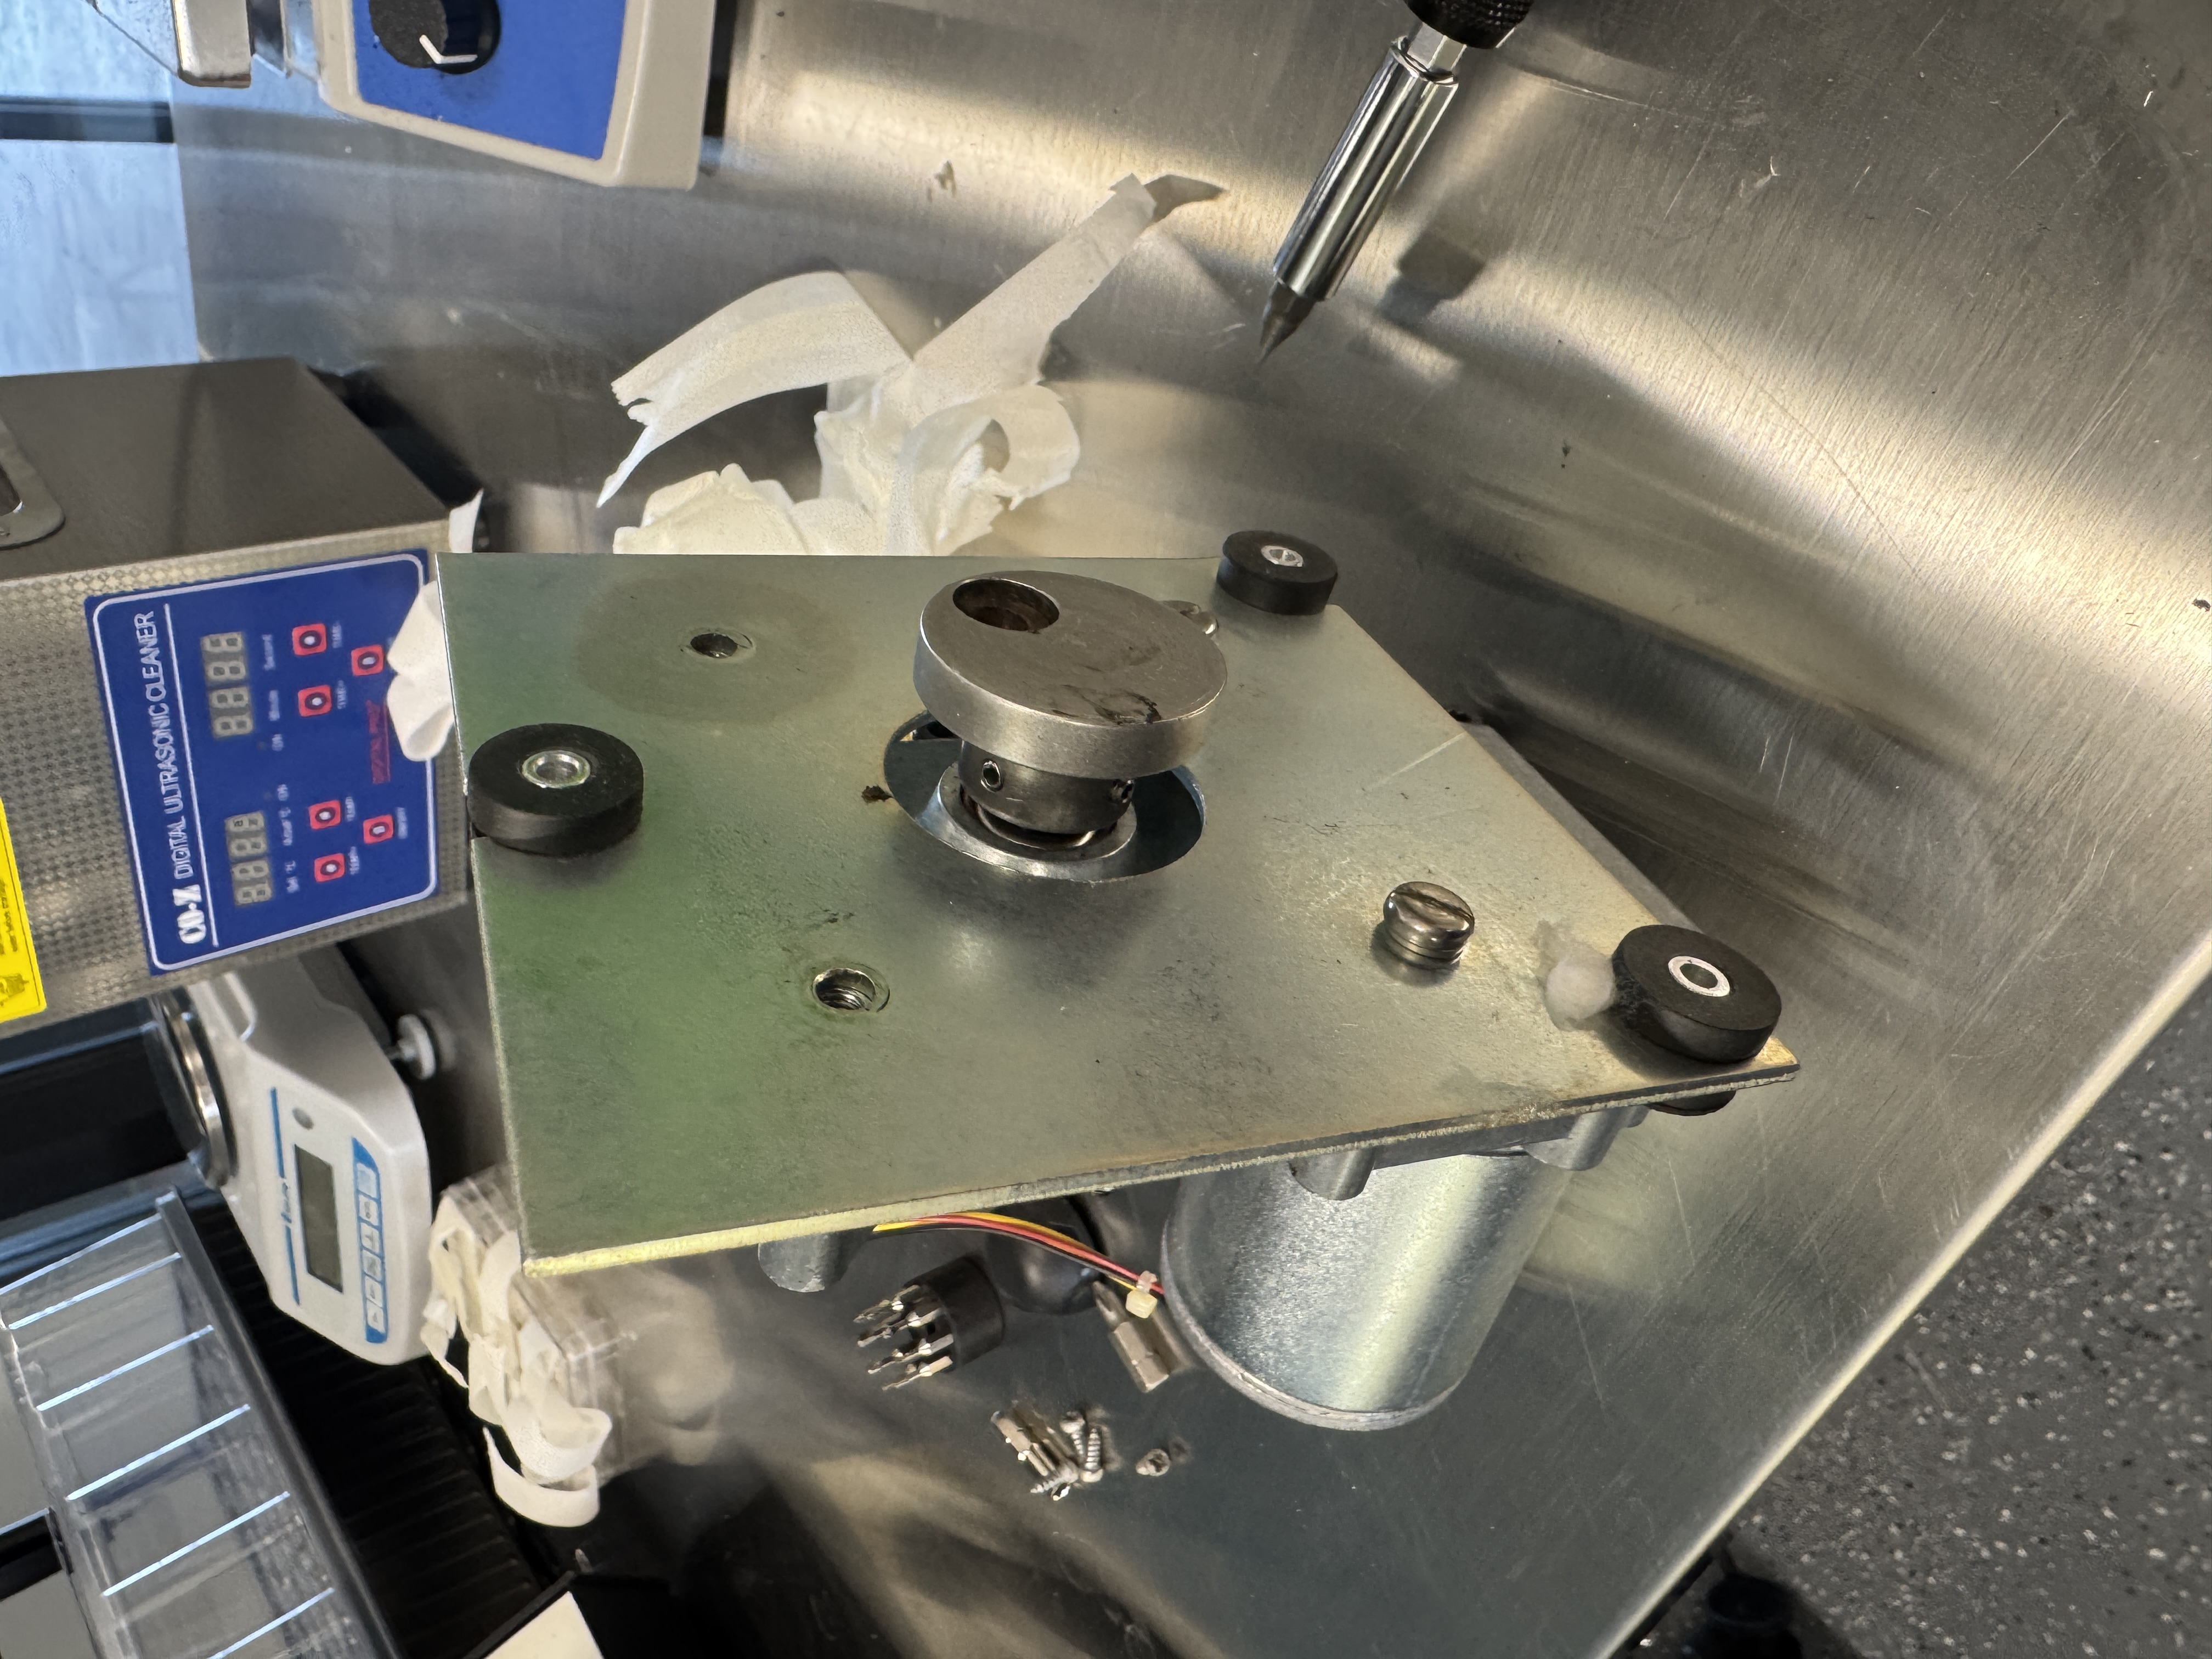
Let me tell you, red-n-tacky grease was not the move, look at this horror show:

Sounds much more like a machine running and much less like a gearbox eating itself
With that back together, its sounding OK now.
Other stuff
The most of the rest of my day here I am just catching up on everything from being out and planning out my next few days.
03-05 / 03-06 - Thursday / Friday
Mostly worked on getting the lab cleaned up and organized for my departure, and worked a bit on the SBRI site a bit and got that to a decent starting point.(Summit Biofilm Research Institute, one of our research partners). Nothing really worth adding to a tempo doc, but I will link that site here once it is finally live.
The next couple weeks I am going to be traveling around Jamaica and West Texas, and I hope to come back from these trips with some new leads for OpenIDI. If I research anything interesting during my travels, you can be sure I will add it here.
03-04 - Wednesday
Pink is the new translucent
Today I got into the lab, and I noticed that the coolant I had installed yesterday was pink?
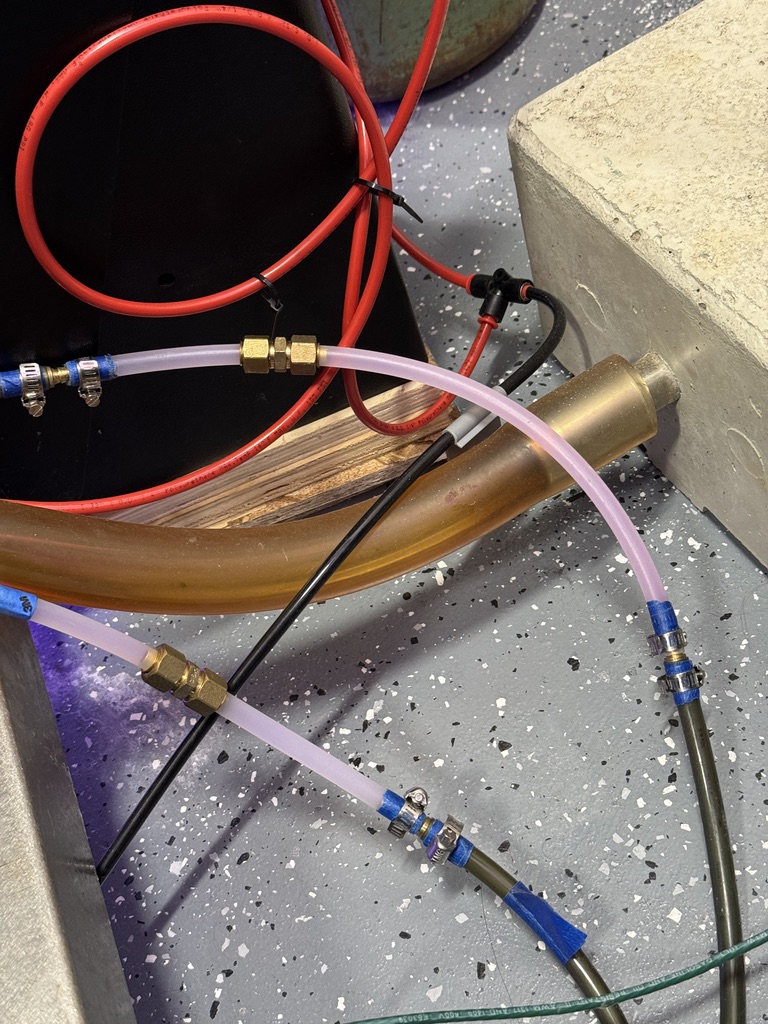
This actually happened last year, I posted in the SEM discord at the time and our general consensus was that it was probably just dye from the old coolant that had run in this system (a pink antifreeze) that had been baked into the lines and coaxed back out by the new coolant. Last year this went away within a few weeks and my lines were back to clear. Now with this happening again a year later, I am not so sure I was correct, but we will see.
I decided to check the pH of the coolant to see if it was maybe super acidic or something and actively corroding the lines. I used a pH strip I had lying around and it was definitely extremely basic, this checks out, as SDS specifies a pH of roughly 11.5.
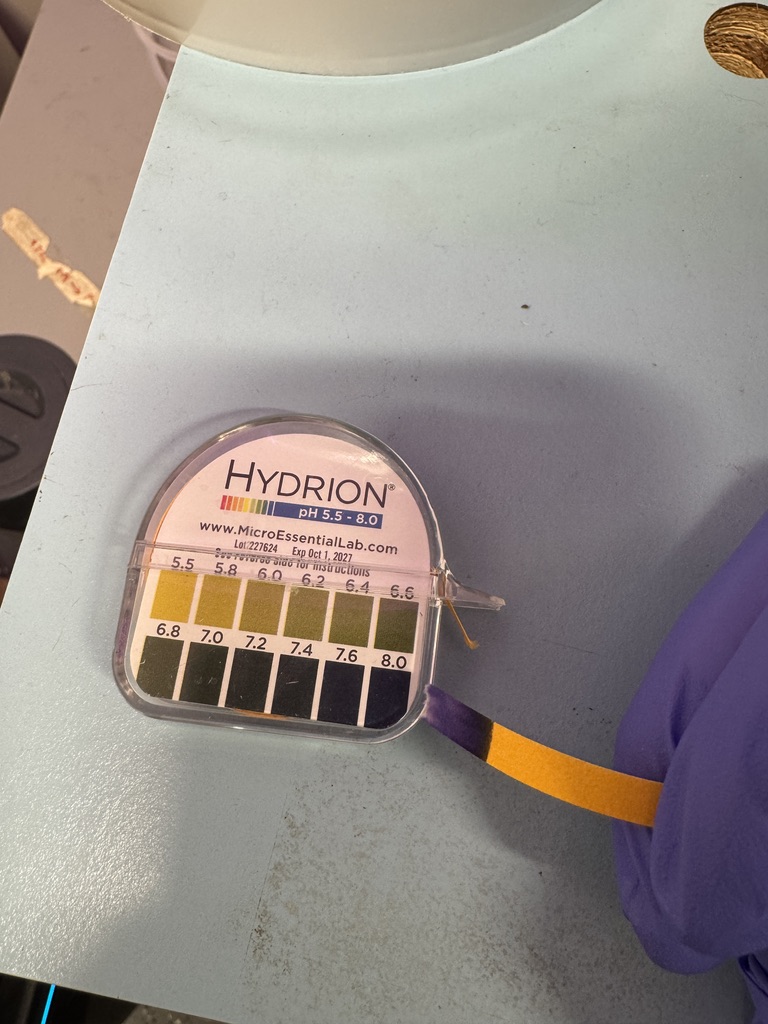
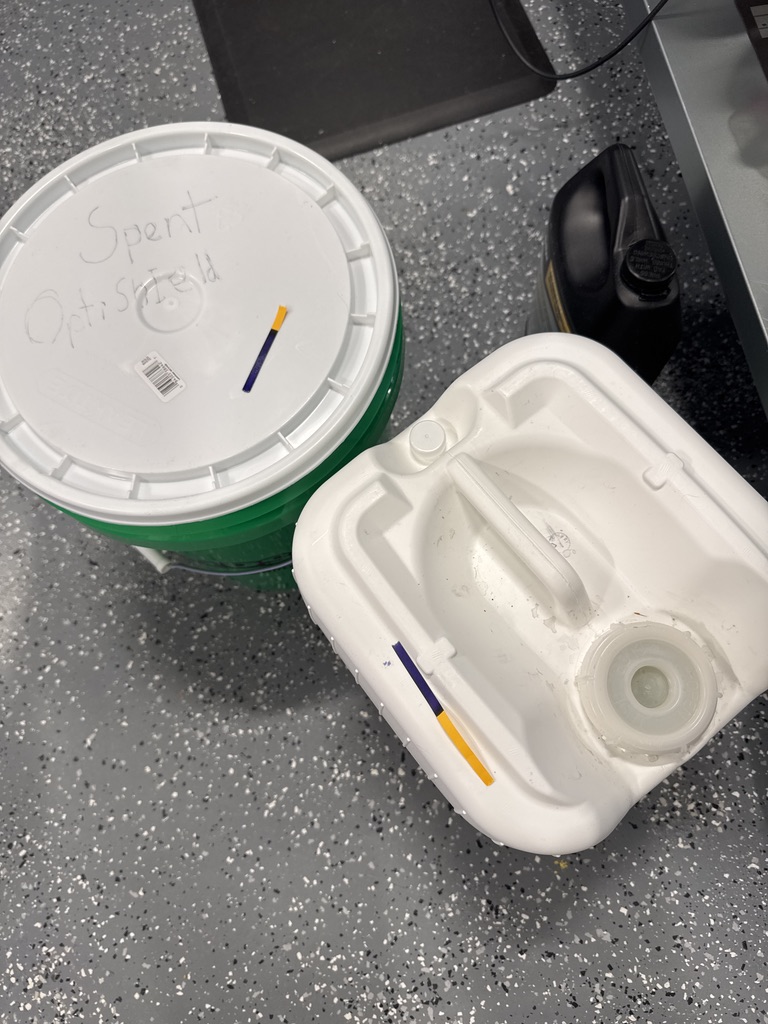
I checked the both the fresh OptiShield that is unused, and the spent OptiShield, which both at least above 8 (the high end of my test).
I have been conversing with some members of the SEM Discord about these problems today, and a couple users suggested it might be an indicator dye indicating that the PH has dropped into the 8 range. This would make sense, especially when I think back to how last time it slowly changed back to clear over a few weeks. That could have been the indicator dye slowly dissipating as the PH rose back into the 11 range. I am going to pull a cup out and check to see if hitting it with a stronger acid pulls the dye into its <8.3 range color, which should be translucent (if it is a fluorescent dye). A user by the name of TheServer201 shared this graphic:
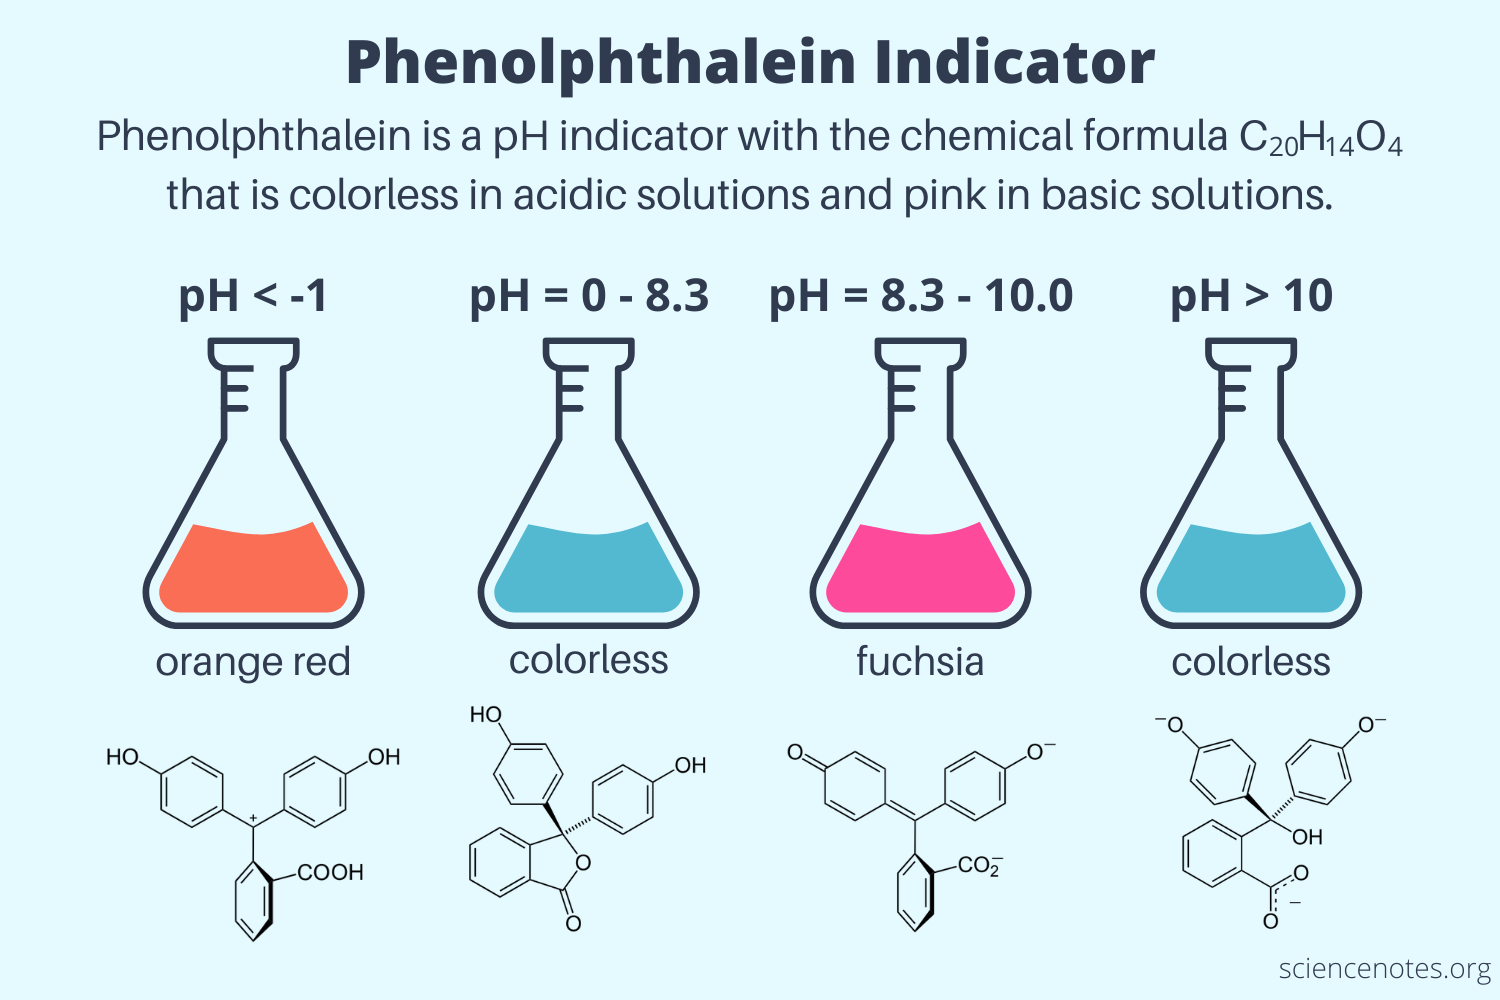
If this were a Phenolphtalein Indicator, its likely that when we add the coolant to the SEM initially, the metals in the system briefly (for a period of a week or two) bring the pH of the solution closer to the 9-10 range than the 11.5 that the fresh stuff is mixed at. This pulls the indicator dye into its fuchsia range, which exists between 8.3 and 10. When we add pure acetic acid to the solution, if it was indicator dye, it would immediately drop into the 0-8.3 range, which should be colorless again.
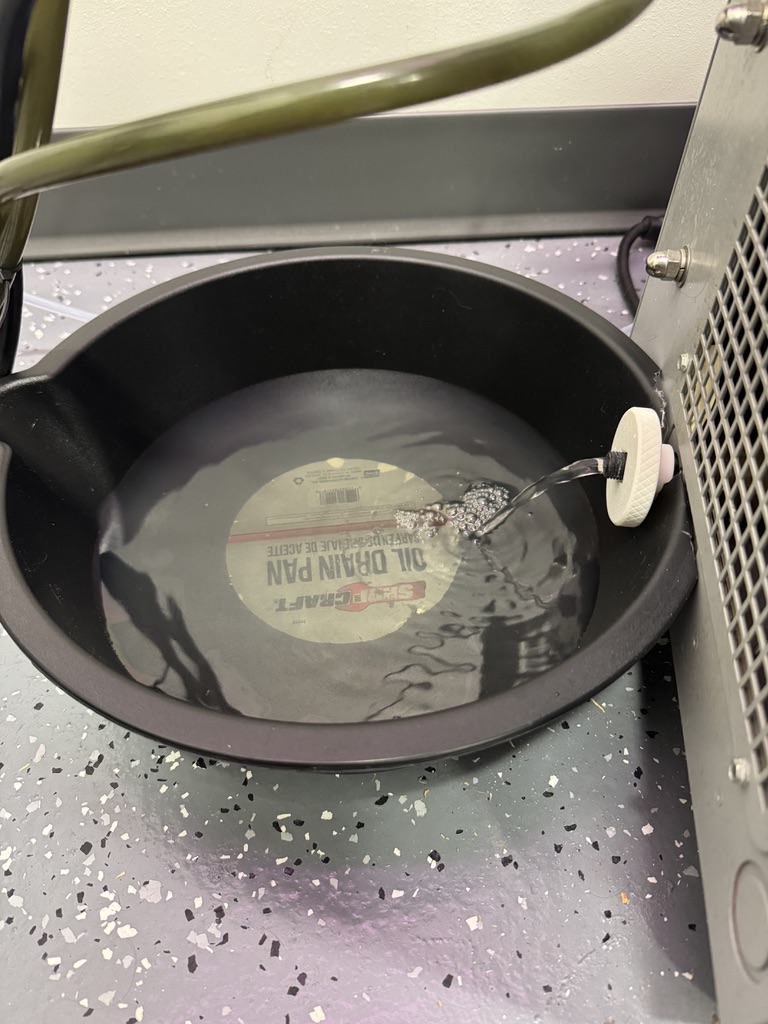
Lets pour some acetic acid into the coolant and see what happens:
Upon dumping some acetic acid into the coolant we pulled out it cleared up immediately.
It immediately cleared up upon the addition of the smallest drop of acetic acid. To me this proves that this is some sort of indicator dye. I am for now going to file this under “slightly weird but probably not concerning” for now, future opinion subject to change 😛
The rest of the day I just have some code work planned, and I am also preparing to leave for a trip soon, so I may not have an update on this project for a bit.
03-03 - Tuesday
Coolant Swap for the SEM (finally)
I was a couple days behind where I wanted to be with this today because I was feeling sick yesterday. Back at it today, and getting the SEM back up and running.

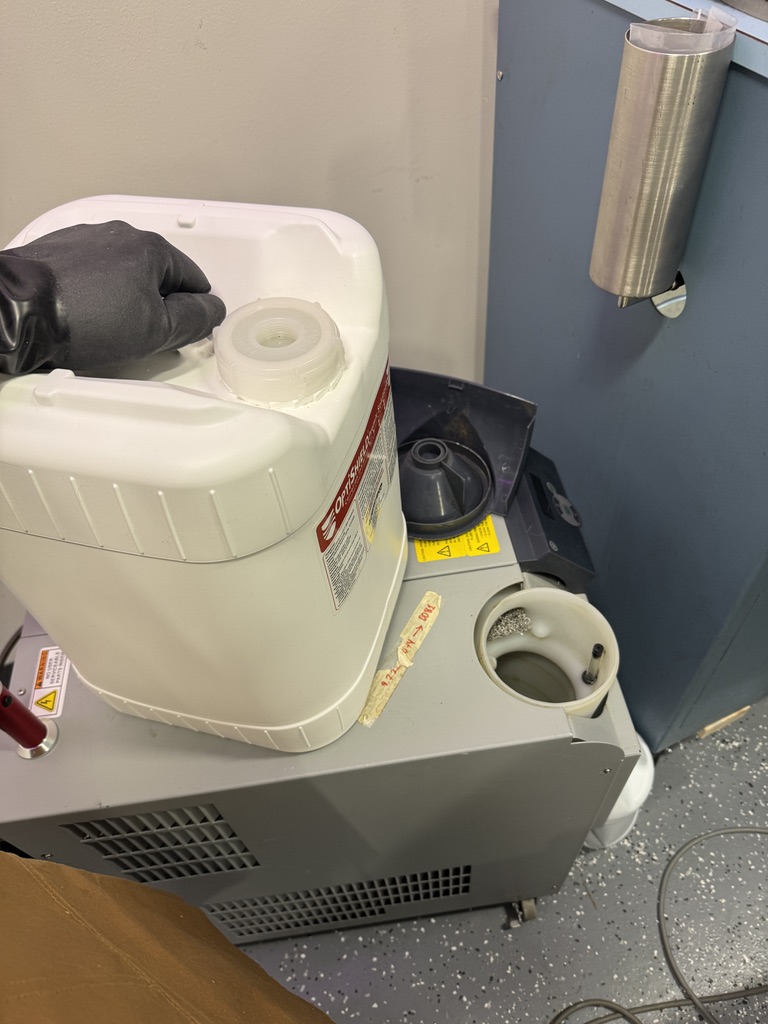
When I first used my fancy new handle to crack the drain valve, I was immediately met with the sheen of a thin layer of oil which must have been sitting at the bottom of the pump’s drain line for a very long time.
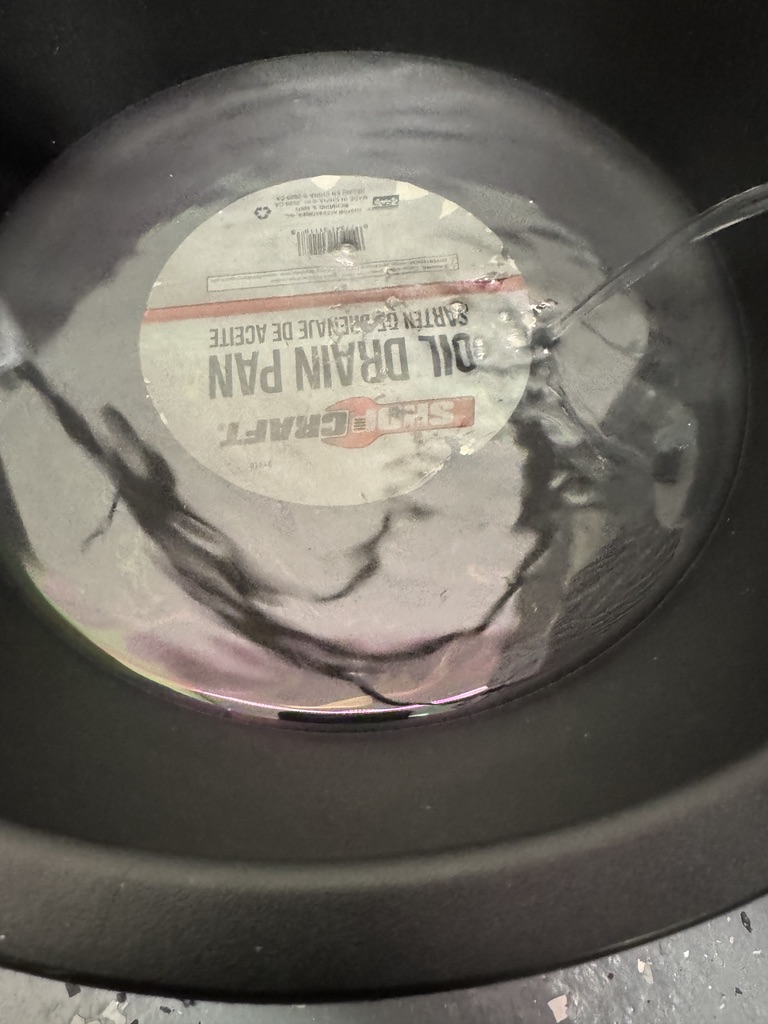
I don’t feel so great about this, but I am inclined to leave it be for now. There aren’t a lot of ways oil possibly could have even gotten into this system. The only way I can think would be some seal failing in the water pump itself, but there are no pathways inside of the SEM or DV-502 which are both hooked to this that would allow oil to migrate into the lines. So it has to be something with the water pump. Its likely I will perform another coolant swap soon to see if we are still pooling oil.
Regardless, I decided to carry on with the change. I pulled a few pans of this mostly coolant with some interspersed oil into a waste bucket:
After pulling a few of those pans out to the point where the reservoir was mostly empty, I took a heavily gloved hand in there with some paper towels and cleaned residue off of the edges and sides of the plastic container that acts as the main reservoir.
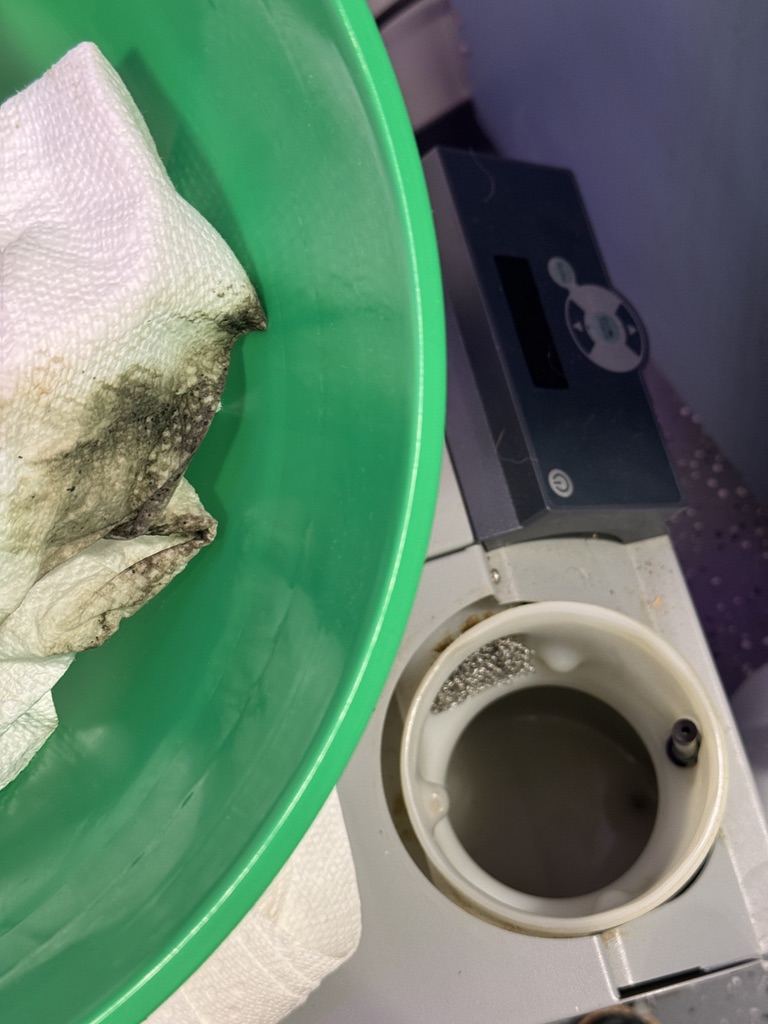
I then refilled that reservoir with a flushing dose of our coolant, maybe a gallon and a half, let it run for a bit, drained it again, washed the internal filter down in hot water, and then topped the pump up to its final dose and put it all back together.
After it was all topped off to its final level, I put the equipment corner back together and ran the SEM for a few hours to circulate the coolant.
This was all I had time for today, but it was nice getting it all back up and running.
03-02 - Monday
Got the buckets
I started my morning by running out to menards and grabbing a couple 5 gallon buckets with lids so that I am well-stocked up for coolant swaps in the future. The coolant swap is ready to do, but I am not going to get to it until this afternoon because I have a project this morning that I need to get rolling on first.
OpenIDI Work
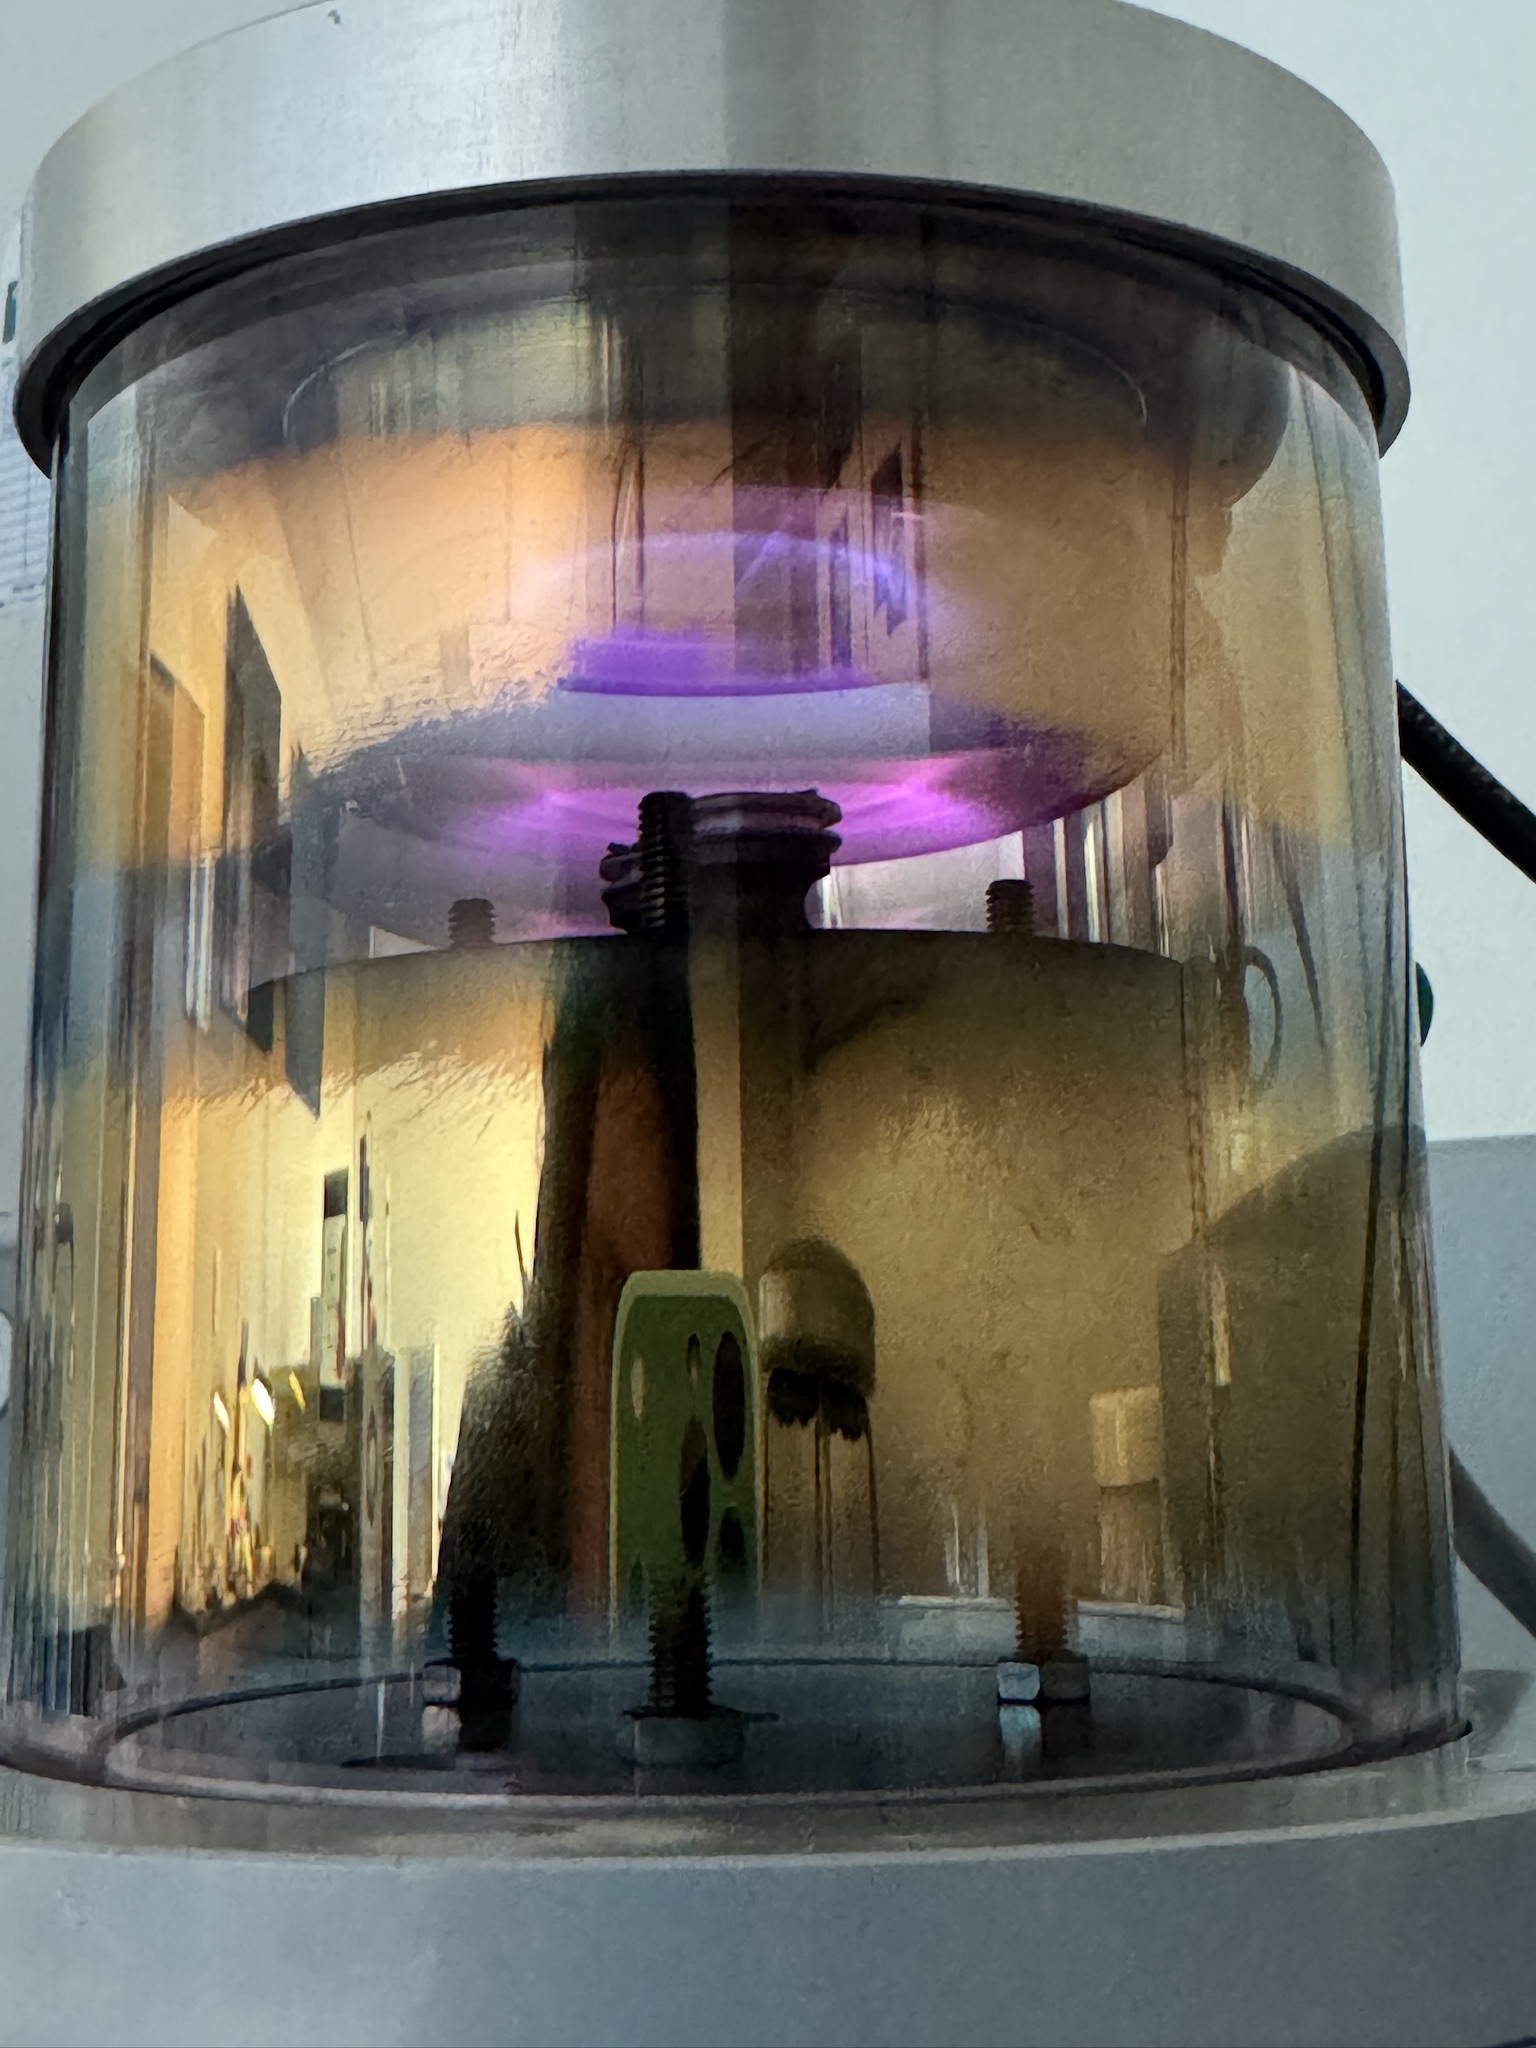
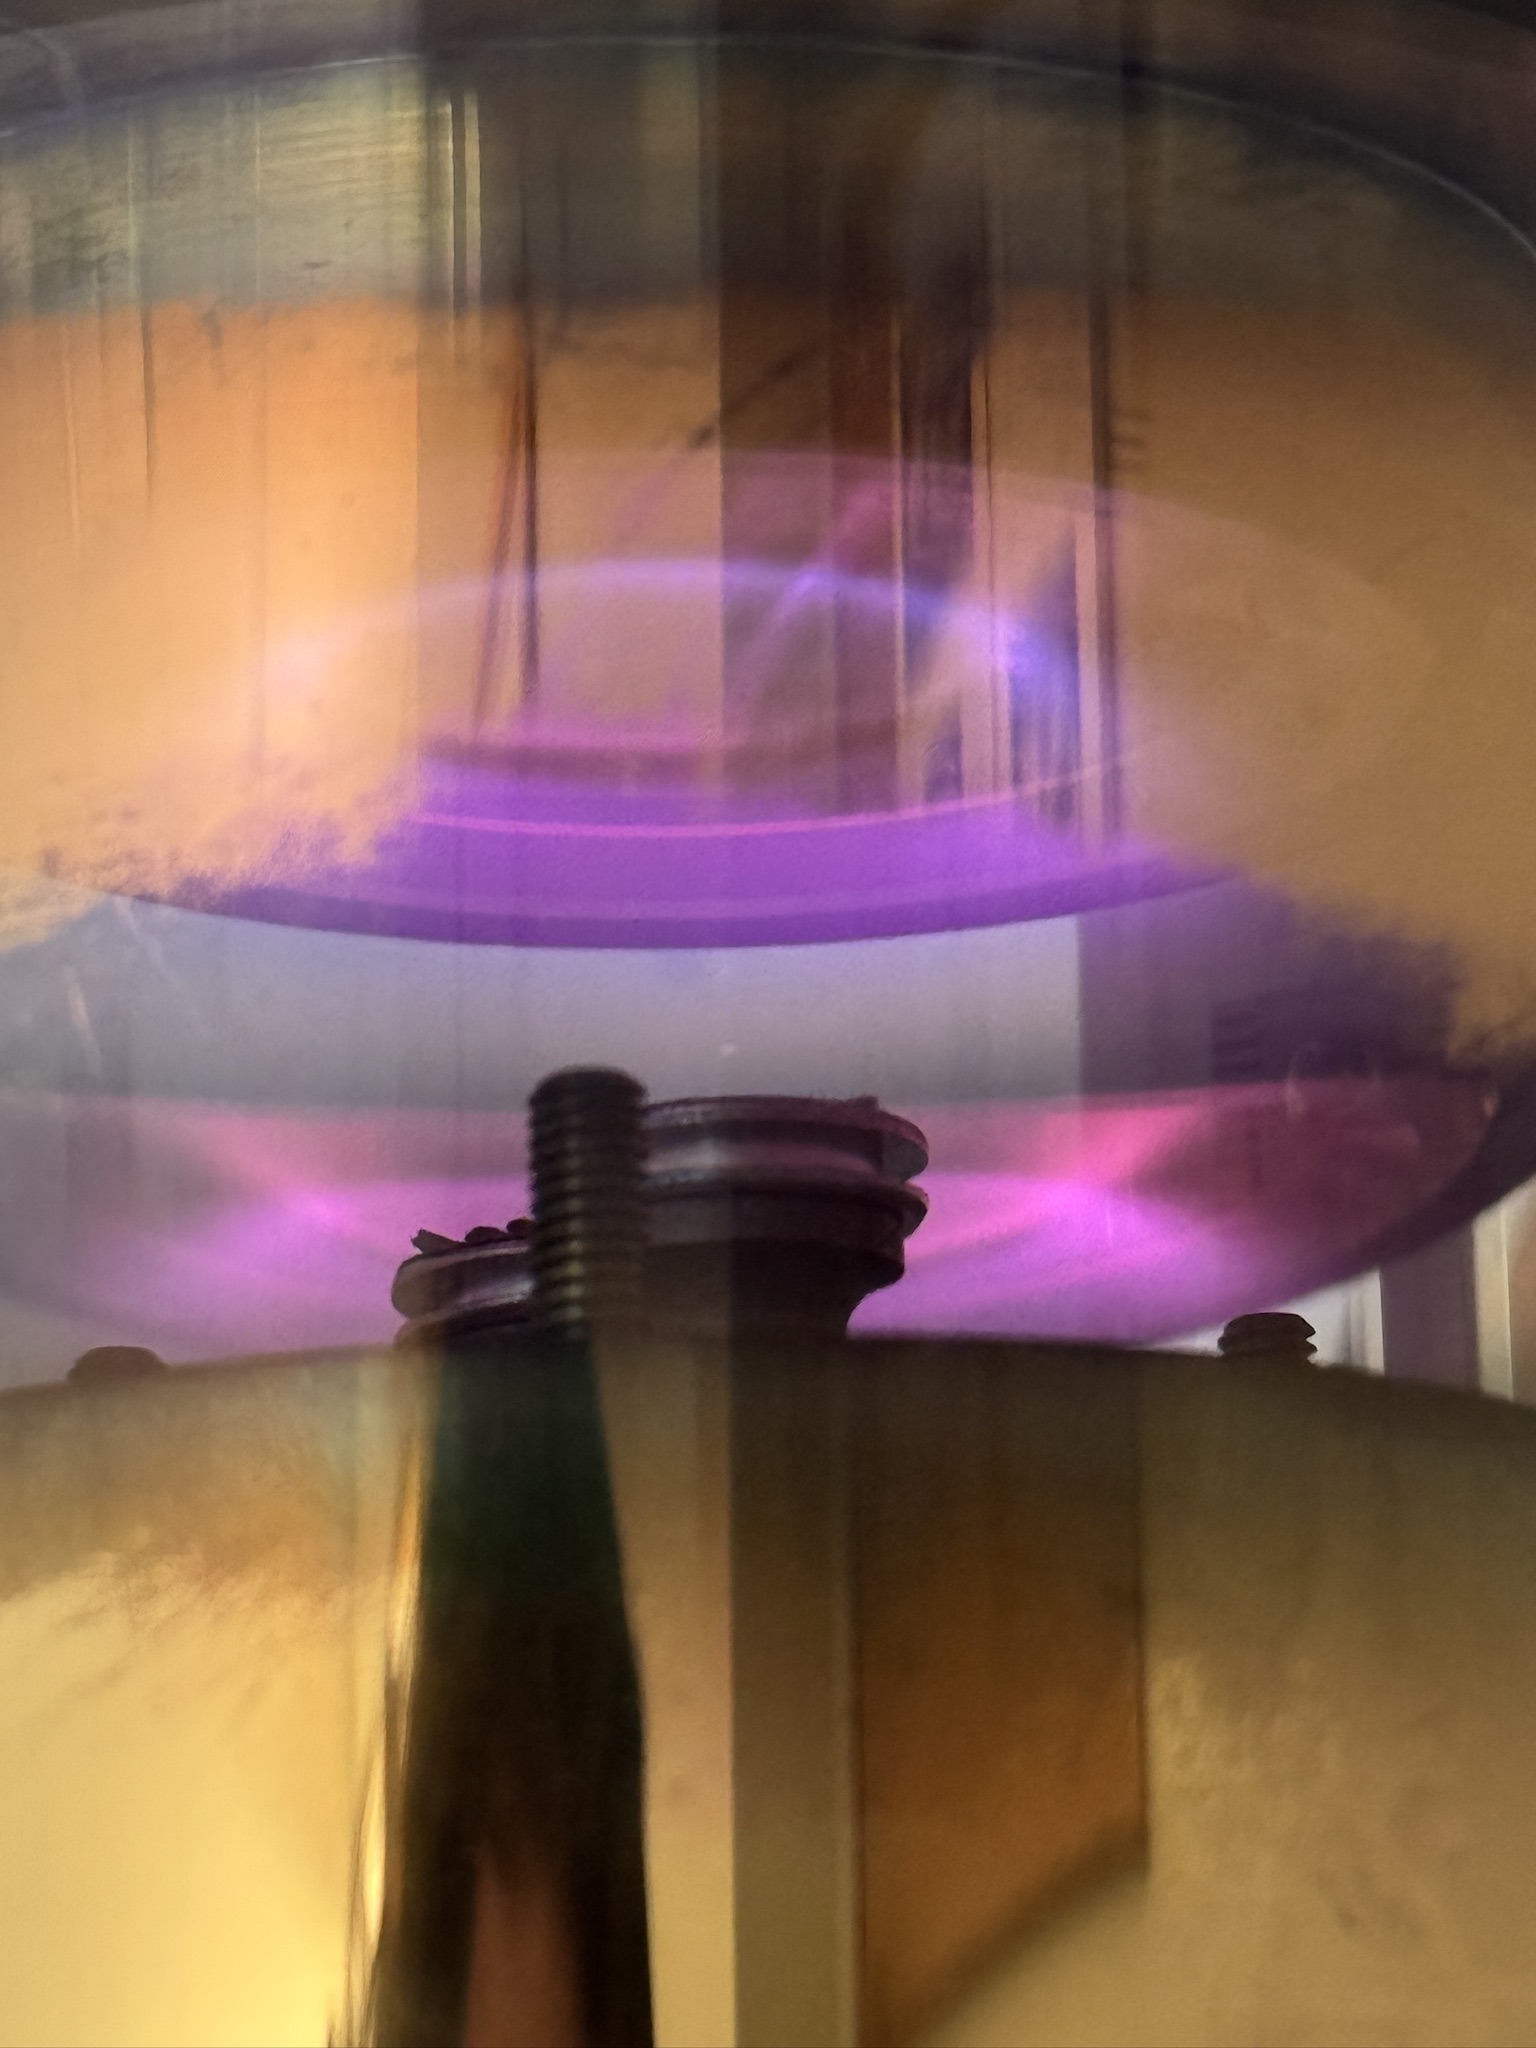
One of the projects we are working on right now in the OpenIDI realm is examining the micro-structures of a few Echinocereus sp. under SEM to determine if there are microscopic morphological features that might help us tell certain species apart, that right now, are too hard to tell apart without DNA work. Since our SEM lab is under maintenance, Professor Warreny Pryor at St. Francis University here in town has graciously offered me the use of their SEM and sputter coater. My goal this morning is to get as many of these specimens as I can gold coated.
At the imaging lab
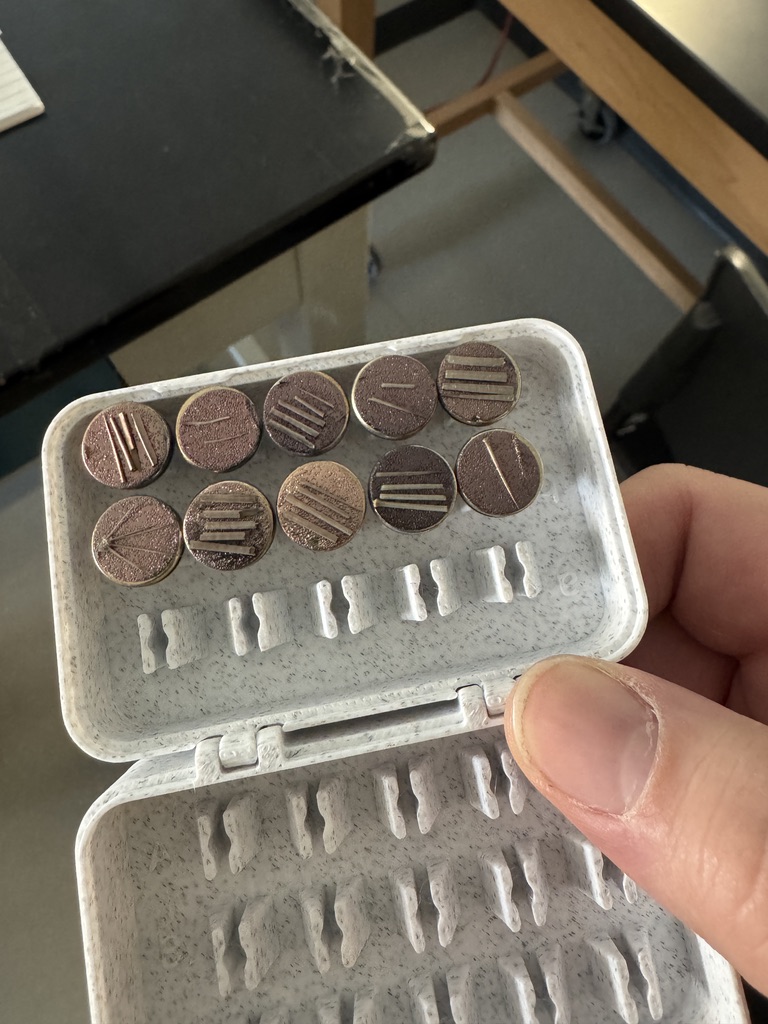
I spent the entire first part of my day over in St. Francis’ imaging lab. We didn’t end up getting any time in on their JEOL NeoScope but I did spend an hour or so prepping and coating 10 sets of echinocereus spines for imaging.
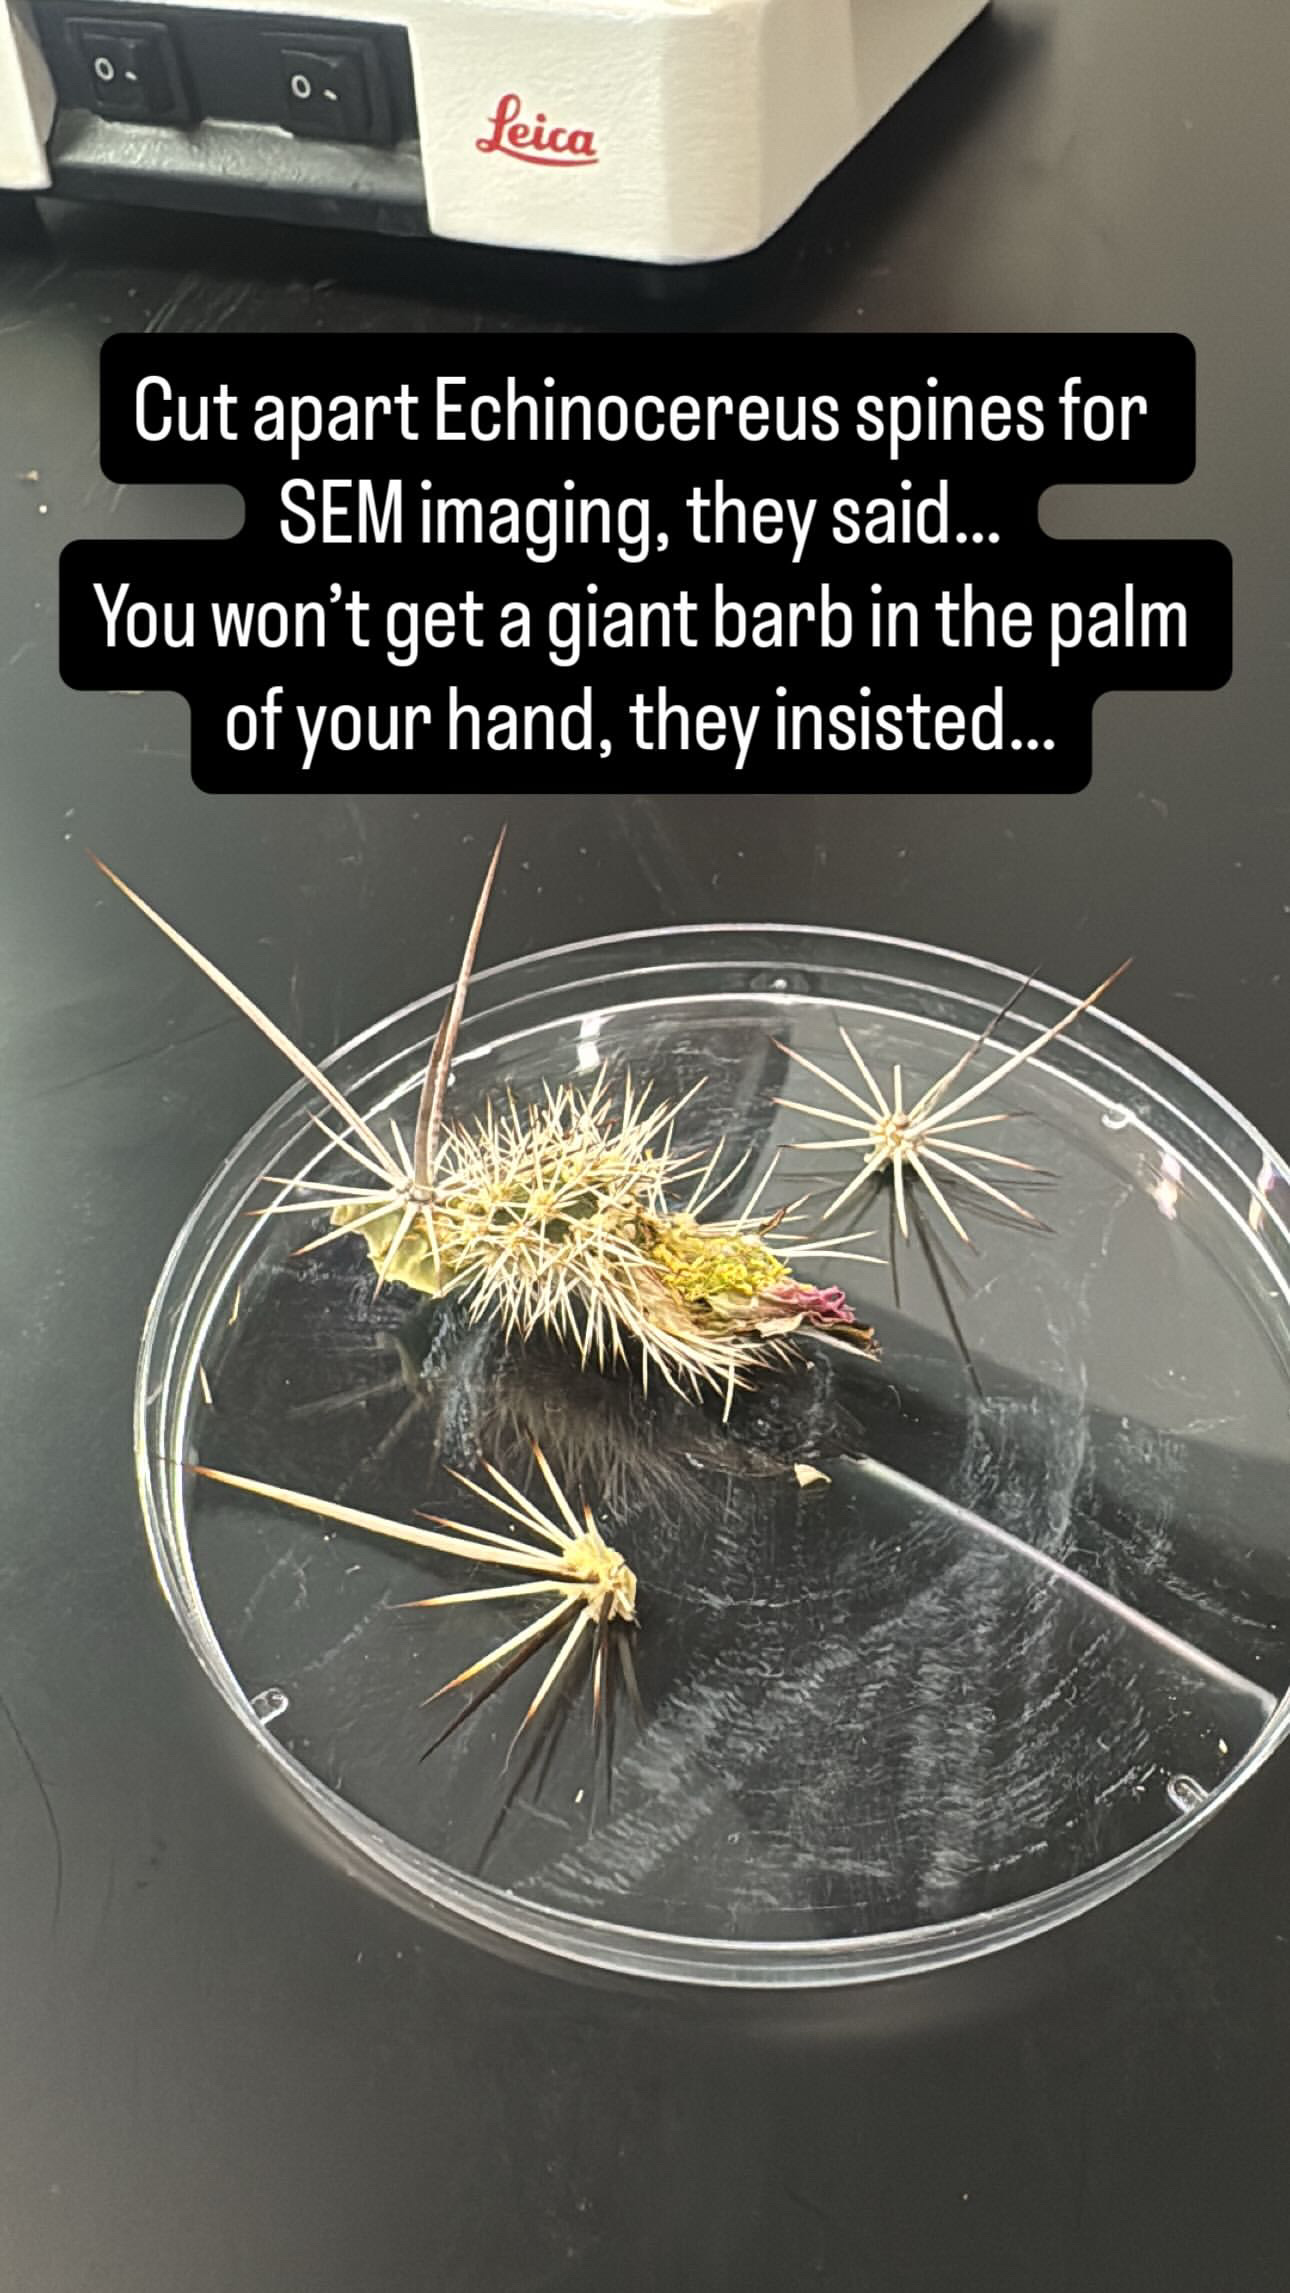
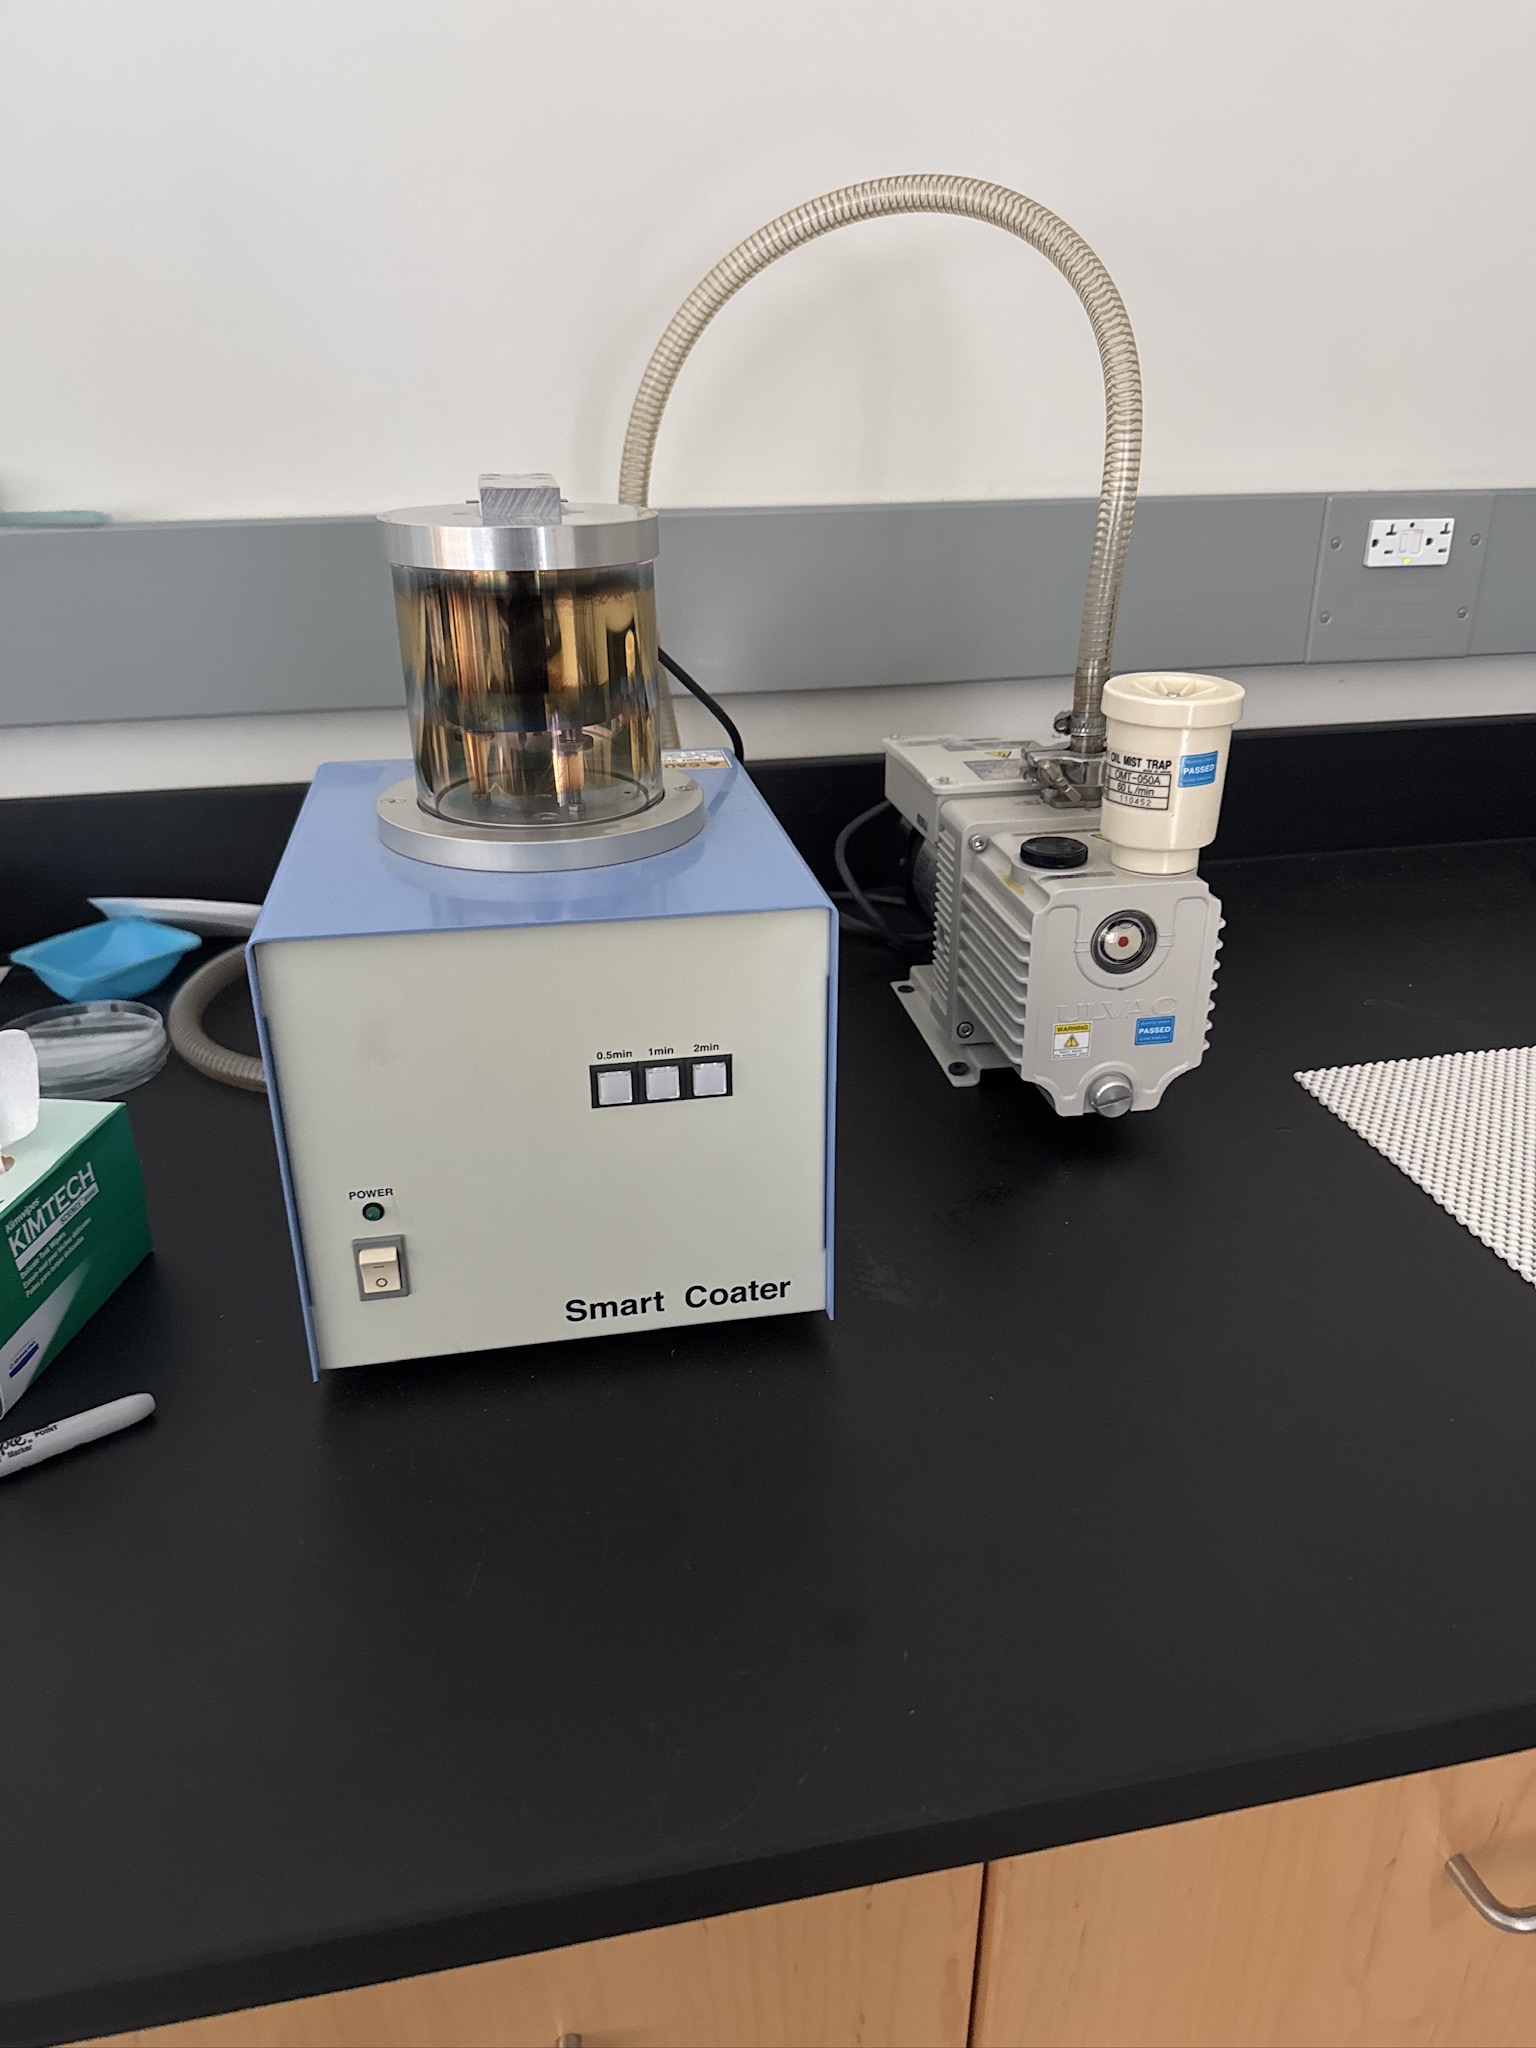
Their coater surprised me actually, its similar to our BioRad Coater that we are currently repairing (read more about that here), but instead of using Argon gas, it just uses whatever was left in the atmosphere after roughing to make its plasma. An interesting and mechanically simple design, but one that does leave your samples more oxidized than they would be had they received this same coating with an atmosphere of inert gas.
After about an hour of prepping and coating samples, I finally had 10 that were ready to image for this project. I coated them for durations ranging from 1-4 mintues. These 10 I have quite a lot of extra material from, so I don’t mind doing some testing on this material. I’ve notated which samples were coated for how much time, so that when I get to imaging I can start to nail down the best coating time for the rest of this experiment.
After my brief stint at St. Francis, I ended up developing a pretty bad migraine and ended my day a bit early today, coolant swap to come tomorrow.
02-27 - Friday
Coolant Swaps and Electrical Work
Today is mostly a maintenance day in the lab. I got in early today to let our electricians at Votaw in for the 4th day in a row. Votaw has been re-working our electrical system to offer more surge protection for our sensitive devices at the breaker-level, and adding more outlets and amperage in the lab so I don’t keep taking out the entire circuit with our High Vacuum Evaporator. They have been overall very pleasant to work with, and I would recommend their services.
Time for a coolant swap
I got started today by preparing to do a coolant swap on the SEM. It needs its coolant swapped because that coolant is about to experience its first birthday, which our fancy sticker here very explicitly warns against:
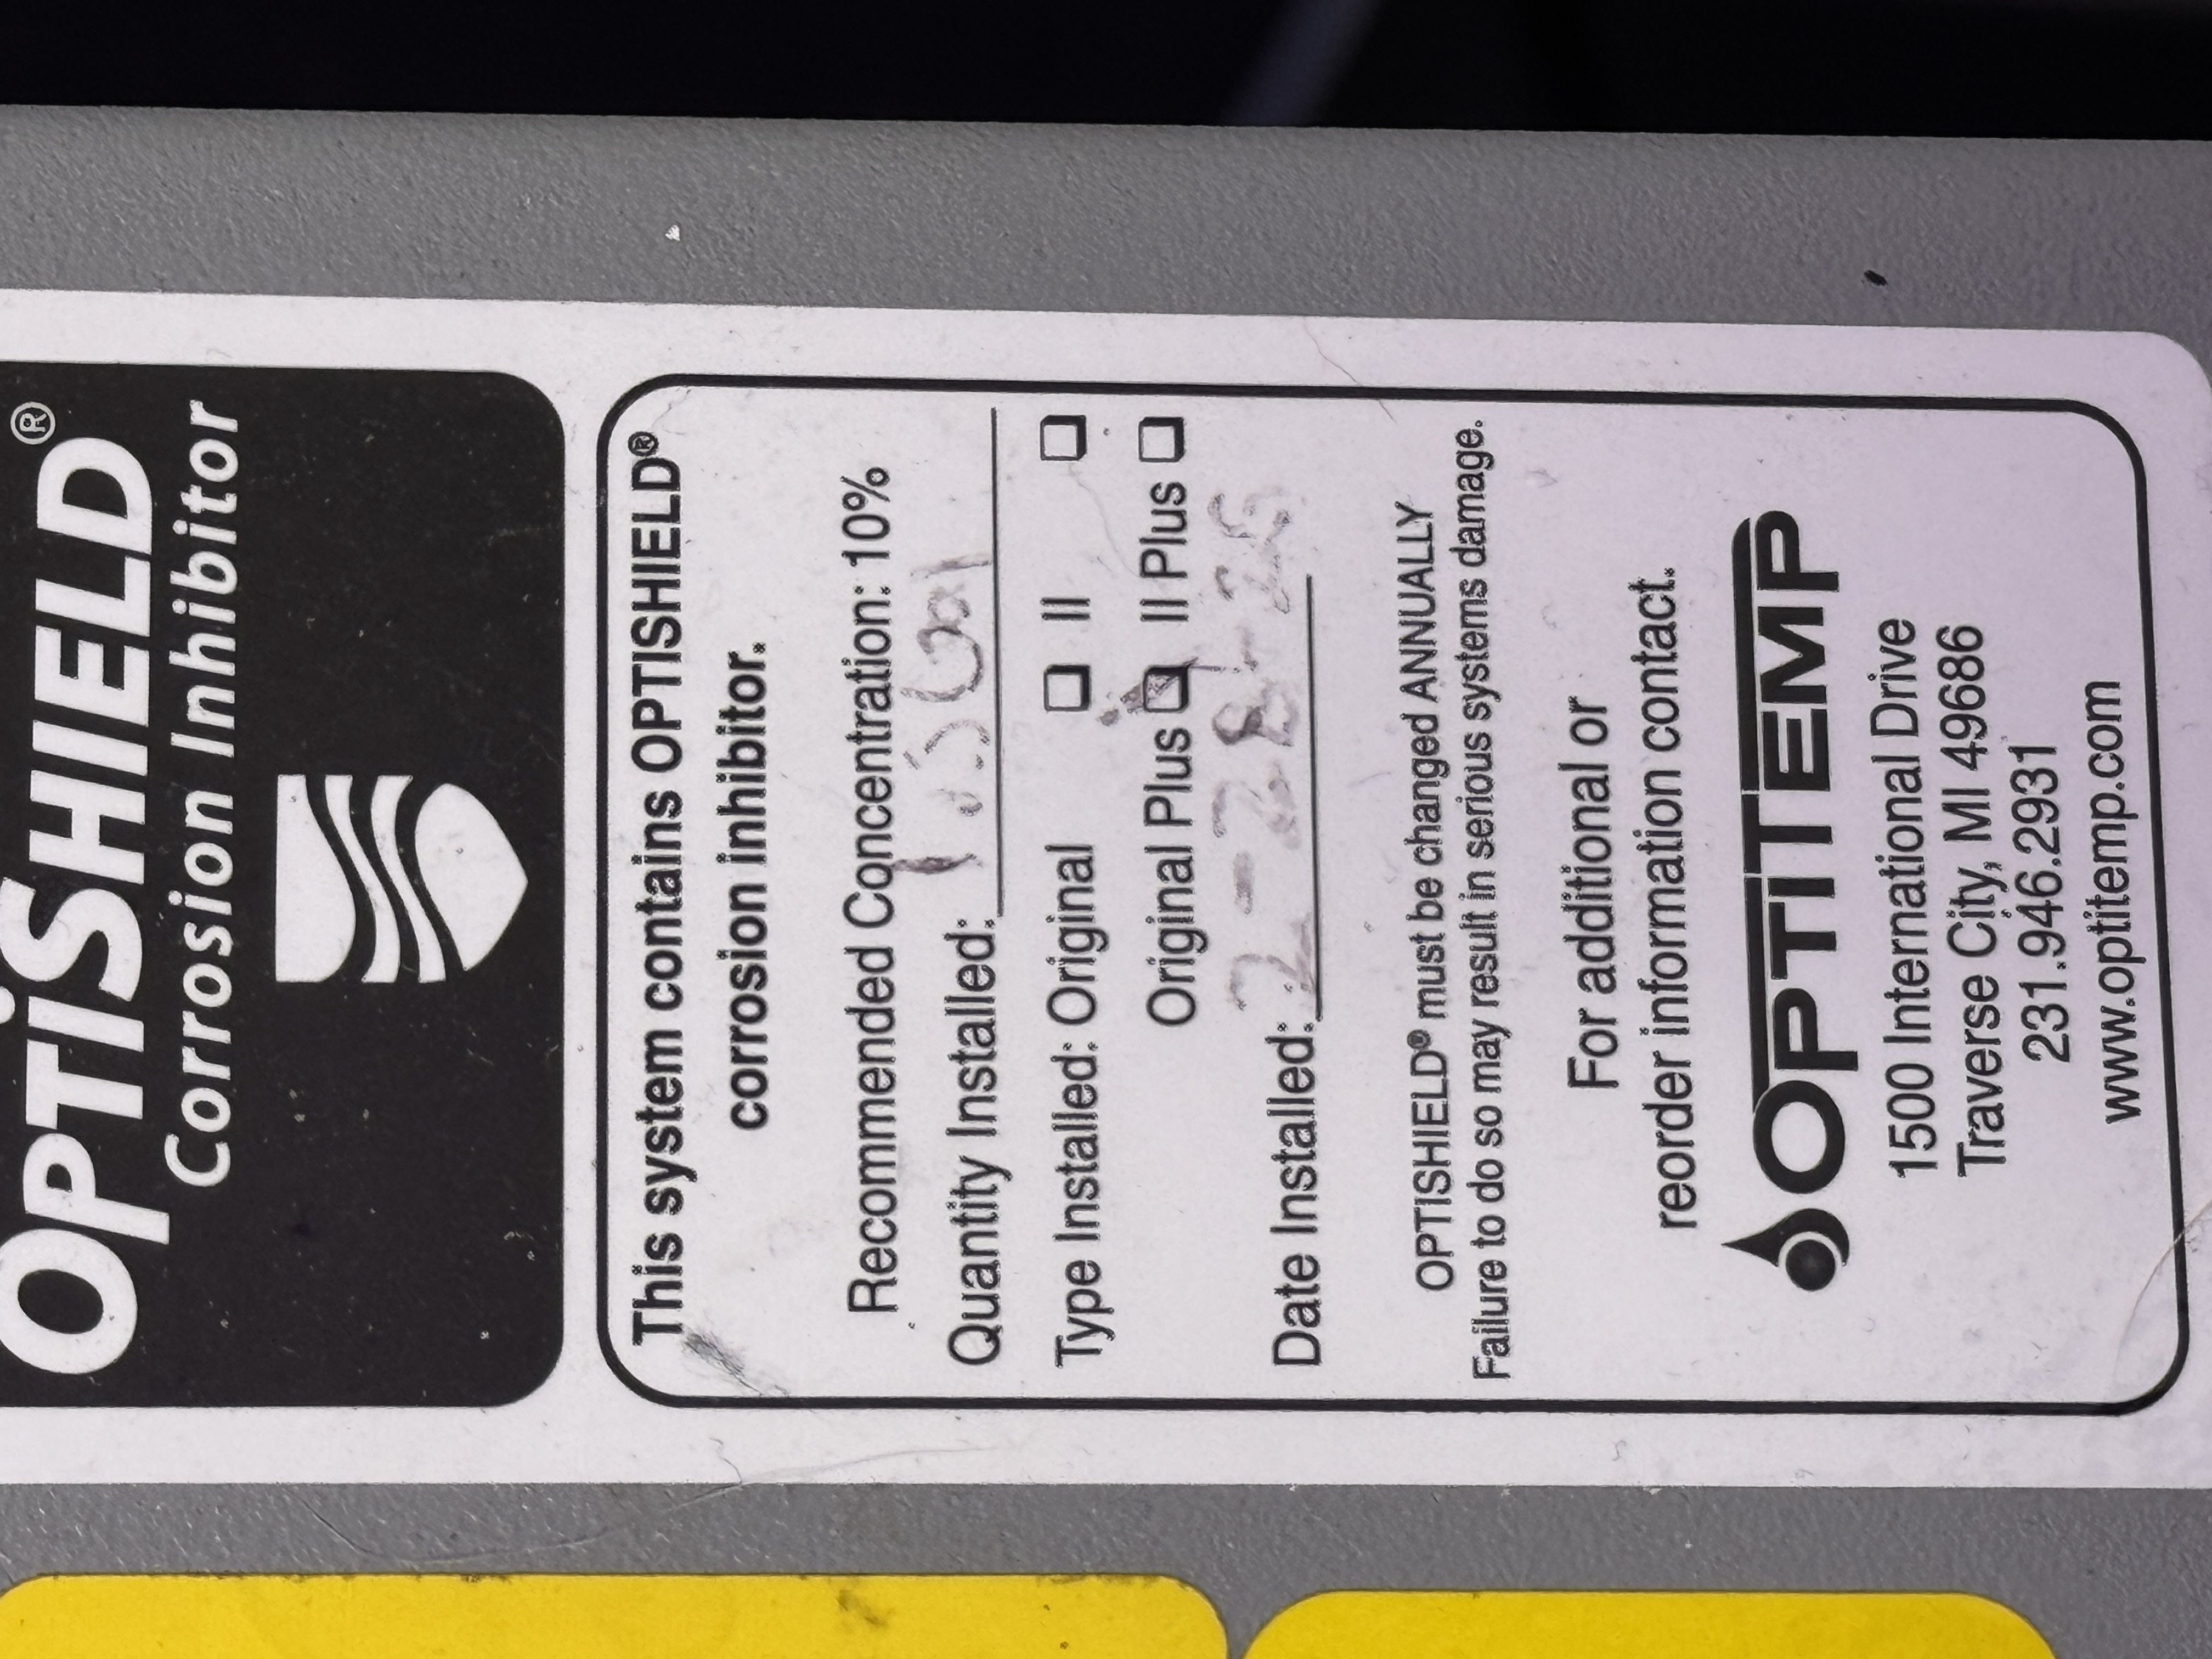
Honestly, I’m glad for the sticker, because I forgot I only need to flush ~1.5 gallons, I somehow had it in my head that there were 5 gallons of coolant in here. I already have a 5 gallon jug of pre-diluted OptiShield sitting in the lab right now, so I am all set probably for next year’s swap as well.
Learning from mistakes
Last time I emptied this thing, it was mostly distilled water I was running in the loop, which is a lot less nasty to get on your hands than the OptiShield that is in there now. I spilled so. much. water. on the floor. I spilled so much last time for 2 reasons:
- Our oil pan was not perfectly flush against the back of the chiller, I cut a hole in it for the chiller drain spout to fit through almost a year ago, but the ridge still caused the pan to sit out from the drain plug a bit.
- Last time, I had to open this drain valve with a pair of pliers, which slipped a lot, mangled the plastic a bit, and overall was very difficult to quickly open and shut.
I fixed the first issue by trimming the back rim of the oil pan down so that it is now flush with the back of the chiller.
For the valve issue, I quickly whipped up a new design in fusion 360 that acts as a turn handle for that valve.
After 1 quick revision to make the length that grabs the valve stem a bit longer, and the knurls just a touch deeper, this tool is ready to help us open and shut this valve with record ease and speed.
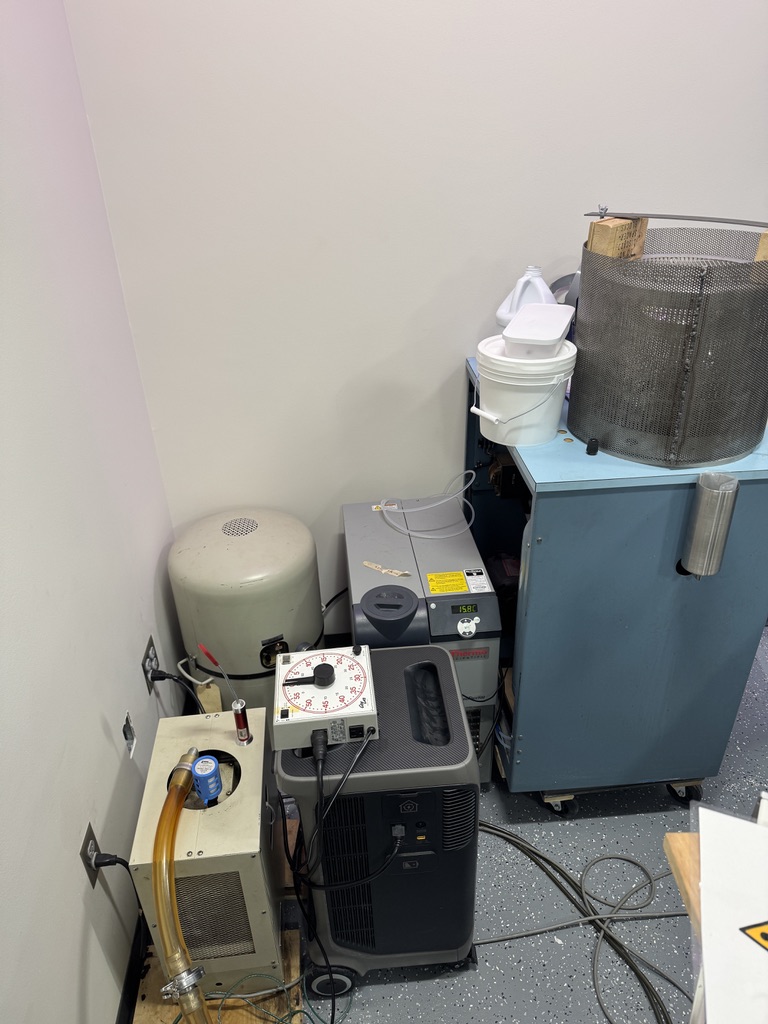
Luckily, I had to disconnect and move all our pumps for the electricians to do work in our space earlier this week anyways, which would normally also be part of this process, so perfect timing on that. I took some extra time to re-position some equipment and give myself a comfortable and ideal work area for this coolant swap.

As always happens when I reach this phase in a project, I realized I don’t have the last thing I need to actually start it, a 5 gallon bucket. So I need to go run to Menards to get one. Its questionable at this point in the day if I will be back in time to do a full coolant swap and re-assembly of the equipment corner this evening, so likely the next update in this doc will be on Monday or if I get some time this weekend, we will see. I am not worried that leaving coolant un-circulating for 2 days past its expiry will damage anything, we just definitely need to get it swapped out before the next time we power it all on.
Code work
On another note, I’ve done a lot of code work today both on this blog and the site at large, cleaning things up and getting Bri set up with an editor so she can start adding some content to this site as well.